ATV tire pressure affects traction, steering, ride comfort, and the risk of tire or wheel damage. However, there is no single PSI chart that is safe for every ATV or every terrain. Start with the cold pressure printed on your vehicle’s warning label or listed in its owner’s manual. Treat terrain adjustments as small, carefully tested changes that must remain within the limits approved for your ATV, tires, and wheels.
Quick Answer
Use the cold tire pressure printed on your ATV’s warning label or owner’s manual as the safe baseline. Do not rely on a universal terrain chart. ATV specifications commonly fall within a low 2–10 PSI range, but the correct figure depends on the model, tire, load, and wheel setup. Make only small, permitted adjustments.
Key Takeaways
- The pressure on your ATV’s label or in its owner’s manual is the starting point and overrides general terrain advice.
- Lower pressure can enlarge the contact patch on soft ground, but going too low increases sidewall roll, rim strikes, air loss, and de-beading risk.
- Use a low-pressure ATV gauge and check all tires cold before every ride.
- Do not add a fixed 1 or 2 PSI for cargo, use a fixed altitude formula, or assume beadlocks make extremely low pressure safe.
- ATVs are intended for off-highway use. Raising tire pressure does not make normal paved-road riding safe.
At a Glance
| Time Required | 5–10 minutes |
| Difficulty | Easy, provided the correct factory specification is available |
| Tools Needed | Low-pressure ATV gauge, portable compressor or hand pump, and a valve-core tool if appropriate |
| Cost | No recurring cost if you already own the gauge and pump |
Warning: Never use a terrain PSI chart to override your ATV’s warning label, owner’s manual, tire limits, or wheel instructions. Incorrect or uneven pressure can cause poor handling, loss of control, tire damage, or wheel damage.
What ATV Tire Pressure Means and Why Lower PSI Changes Traction
ATV tire pressure is normally measured when the tire is cold, before riding has heated the air inside it. Because ATV tires operate at much lower pressure than most road-vehicle tires, even a small adjustment can represent a large percentage change.
A 1 PSI adjustment from 5 PSI is a 20% pressure change, so small adjustments can noticeably alter steering, sidewall movement, traction, and rim protection.
Reducing pressure generally allows the tread and sidewall to conform more closely to loose or uneven ground. This can enlarge the contact patch, improve flotation, soften the ride, and help the tire wrap around small obstacles.
The tradeoff is reduced support. If pressure falls too far, the tire can roll sideways during a turn, strike the rim against a rock, lose air at the bead, spin on the wheel, or come off the bead. The correct balance depends on the ATV’s weight, tire construction, wheel design, speed, load, and terrain.
Find the Correct Baseline Before Adjusting for Terrain
Locate the cold-pressure specification on the ATV’s tire-pressure and load label. It may be attached to a fender, frame area, or another visible location. The same information should appear in the owner’s manual under specifications, tires, or safety labels.
Can-Am states that there is no one-size-fits-all pressure because the correct setting changes with the model, tire, and riding conditions. Current manufacturer examples also demonstrate how widely factory specifications can differ:
| Official example | Front cold pressure | Rear cold pressure |
|---|---|---|
| 2025 Polaris Sportsman 110 | 3 PSI | 3 PSI |
| 2025 Polaris Sportsman 450/570 | 7 PSI | 7 PSI |
| 2025 Polaris Sportsman XP 1000 S | 10 PSI | 10 PSI |
These figures are examples, not recommendations for another ATV. Some machines also specify different pressures for the front and rear tires. Never equalize all four tires unless the manufacturer calls for equal pressure.
Note: The maximum pressure molded into a tire’s sidewall is not automatically the correct operating pressure for your ATV. Use the vehicle manufacturer’s cold-pressure specification unless an approved tire or wheel document provides different instructions for your exact setup.
Quick Decision: How to Approach ATV Pressure by Terrain
Use the following table as a decision guide rather than a universal PSI chart. Begin at the factory cold-pressure setting and make a change only when the ATV, tire, and wheel manufacturers permit it.
| Terrain | Safe pressure approach | Main risks to watch |
|---|---|---|
| Dry sand or loose snow | Start at the factory setting. If lowering is permitted, use very small steps and test at low speed to improve flotation. | De-beading, sidewall roll, wheel spin inside the tire, and overheating at speed |
| Mud | Use the factory setting first. A small approved reduction may help the tread conform, but traction also depends heavily on tread design and throttle control. | Bead contamination, hidden objects, sidewall cuts, and excessive wheelspin |
| Rocks | Keep enough pressure to prevent the tire from collapsing onto the rim. Lower only within approved limits and only if extra conformity is needed. | Rim strikes, sidewall pinching, cuts, bead loss, and steering instability |
| Hard-packed trail | The factory cold-pressure setting is normally the safest starting point. Restore the baseline after leaving soft terrain. | Sidewall roll and sluggish steering if pressure remains too low |
| Turf or grass | Use the specified pressure and reduce speed and wheelspin. Pressure alone cannot prevent surface damage. | Torn turf, loss of traction on wet grass, and rollover risk on slopes |
| Pavement | Do not create a pavement PSI setting. Avoid paved-road operation except a safe, legal crossing. | Abrupt handling, tire scrub, rollover, traffic collision, and legal restrictions |
Start with the ATV manufacturer’s cold-pressure specification. Adjust only within approved limits, in small steps, for a specific handling or traction problem.
ATV Tire Pressure for Sand, Mud, Rocks, Snow, Turf, and Trails
Sand and Loose Snow
A larger footprint can help an ATV float over dry sand or loose snow rather than digging in. If your manual, tire manufacturer, and wheel manufacturer allow pressure reduction, lower the pressure gradually and test at walking speed first.
Stop lowering pressure when steering becomes vague, the sidewall folds heavily, the tire shifts on the rim, or the rim approaches the ground over small bumps. Deep snow may also hide rocks, stumps, holes, or ice that can damage an underinflated tire.
Mud
Lower pressure does not always produce more forward movement in mud. The tread pattern, mud depth, wheel speed, vehicle weight, and the surface below the mud all matter. Begin with the specified pressure and avoid large throttle inputs that spin the tires and dig holes.
After leaving mud, inspect the bead area. Mud or grit trapped between the tire bead and wheel can cause a slow leak.
Rocks
Rocky terrain requires a balance between conformity and rim protection. A small approved reduction may help a tire wrap around uneven surfaces, but excessive reduction makes rim strikes and sidewall pinching more likely.
If you feel or hear the rim contact an obstacle, stop and inspect the tire and wheel. Add air before continuing rather than repeatedly striking the rim.
Hard-Packed Trails
Use the manufacturer’s cold specification as the default on firm trails. A pressure left unusually low after sand or mud can make steering slow, allow the tire to roll under the wheel in turns, and increase heat as speed rises.
Carry a compact pump so you can restore the baseline before riding faster or moving onto firmer ground.
Turf and Grass
Correct pressure helps the ATV handle as intended, but careful operation matters more than chasing a particular turf PSI. Use low speed, smooth throttle, broad turns, and minimal wheelspin. Follow Tread Lightly guidance by remaining on designated routes and avoiding sensitive areas.
Paved Surfaces
Do not raise the pressure and treat the ATV as a road vehicle. The ATV Safety Institute advises riders to stay off paved roads except when crossing safely and where permitted by law. ATV tires, steering geometry, and handling are designed primarily for off-highway surfaces.
The Role of Beadlock Wheels
A conventional wheel relies on inflation pressure and the wheel’s bead-seat shape to retain the tire. A true beadlock wheel uses a bolted ring to clamp one tire bead mechanically. This can improve bead retention when a permitted low-pressure setup is used off-road.
However, a beadlock does not make any chosen PSI safe. Many ATV and UTV beadlocks secure only the outer bead. The inner bead, tire sidewall, rim, load, speed, and terrain can still limit how low the pressure may go.
Warning: Do not assume that beadlock wheels automatically permit 2 or 3 PSI. Follow the wheel and tire manufacturer’s minimum-pressure, installation, bolt-torque, inspection, and operating instructions for the exact components.
ITP’s beadlock instructions warn that tire mounting can be dangerous and should be performed using proper equipment and procedures. KMC also advises checking beadlock pressure before each use and tightening the hardware to the specified torque pattern.
Inspect the ring, bolts, bead, and air pressure regularly. Stop riding if bolts are loose, the ring is distorted, the tire is leaking, or the bead appears incorrectly seated.
How to Measure and Adjust ATV Tire Pressure Correctly
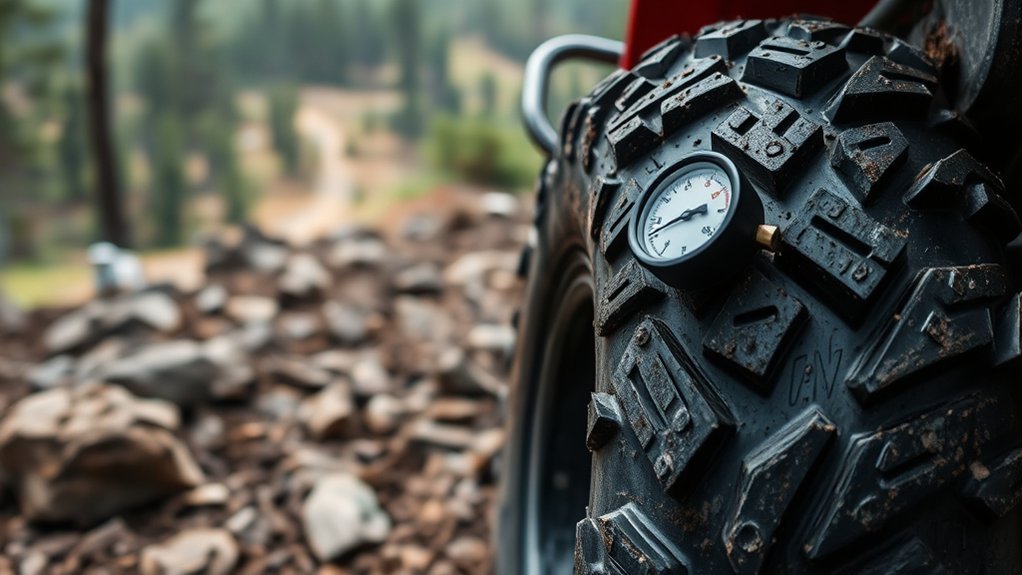
The ATV Safety Institute recommends a pre-ride tire inspection and notes that ordinary automotive gauges may not read low ATV pressures accurately. Use a gauge intended for the range shown in your owner’s manual.
- Park safely: Place the ATV on level ground, turn off the engine, set the parking brake, and let the tires cool.
- Find the specification: Read the vehicle’s pressure and load label or owner’s manual. Note whether the front and rear values differ.
- Inspect each tire: Look for cuts, bulges, punctures, exposed cords, damaged valves, loose wheel hardware, or a bead that is not seated evenly.
- Measure the cold pressure: Press the low-pressure gauge squarely onto the valve stem and repeat the reading to confirm it.
- Adjust gradually: Add or release air in small amounts. At very low pressure, increments of about 0.5 PSI can noticeably change handling.
- Recheck: Measure again after each adjustment and replace the valve cap.
- Compare all tires: Match the specified front and rear values rather than assuming all four should be equal.
- Test carefully: Ride slowly in a designated off-highway area. Stop immediately if the ATV pulls, wallows, bounces, feels unstable, or contacts a rim.
Pro Tip: Keep a simple log of the cold pressure, tire model, rider and cargo load, temperature, terrain, and handling result. This is safer and more useful than relying on a universal online chart.
How Weight, Temperature, and Altitude Affect ATV Pressure
Rider, Passenger, and Cargo Weight
Do not automatically add 1 or 2 PSI for a passenger or cargo. First confirm that the ATV is designed to carry a passenger and that the combined rider, passenger, accessories, and cargo weight remains below the vehicle’s maximum capacity.
Follow any load-specific pressure instructions in the owner’s manual or warning label. Extra pressure cannot make an overloaded ATV safe, and a single-rider ATV should never carry a passenger.
Temperature
Cold weather can reduce measured pressure, while warmer conditions can increase it. The U.S. Tire Manufacturers Association notes a broad change of about 1–2 PSI for each 10°F temperature change in road tires.
Do not use that estimate to calculate an ATV setting. Because many ATVs run at single-digit pressure, direct measurement with a low-pressure gauge is more reliable. Check the pressure cold after a major weather change.
Altitude
Do not subtract 1 PSI for every 1,000 feet of elevation. Michelin notes that altitude itself has only a minimal direct effect compared with temperature changes that often occur during a climb.
Check the tires cold at your destination and adjust them to the ATV manufacturer’s specification. Do not rely on an altitude formula.
Common Mistakes and Troubleshooting
Check pressure before every ride and whenever the weather, load, tires, wheels, or terrain changes. Incorrect or uneven pressure can affect steering quickly because ATV tires operate at low pressure.
| Symptom | Possible pressure-related cause | What to do |
|---|---|---|
| ATV pulls to one side | Unequal left-to-right pressure, tire damage, or another steering problem | Stop, compare cold readings, inspect the tires, and do not continue if the cause is unclear |
| Steering feels slow or the ATV wallows | Pressure may be too low, allowing excessive sidewall roll | Return to the specified baseline and inspect for bead or sidewall damage |
| Ride feels harsh or the tires bounce over obstacles | Pressure may be above the vehicle specification | Check cold pressure and reduce it only to the approved setting |
| Rim contacts rocks or roots | Insufficient pressure for the load, speed, tire, or terrain | Stop, inspect for damage, and restore an approved pressure before continuing |
| Pressure drops repeatedly | Puncture, leaking valve core, damaged stem, dirty bead, cracked wheel, or beadlock issue | Find and repair the leak rather than repeatedly adding air |
| Tire slips on the wheel | Pressure is too low for the wheel, tire, torque, load, or throttle input | Stop riding and have the tire, bead, valve, and wheel inspected |
Also avoid these common mistakes:
- Using a high-range automotive gauge that cannot resolve small ATV pressure changes.
- Setting pressure immediately after a long ride and treating the warm reading as the cold specification.
- Assuming the front and rear pressures must match.
- Using the tire-sidewall maximum instead of the ATV’s pressure label.
- Lowering pressure without considering aftermarket tires, different wheel widths, or beadlock instructions.
- Ignoring cuts, bulges, exposed cords, a bent rim, or a damaged valve because the tire still holds air.
- Continuing to ride after repeated rim strikes or bead leakage.
If a tire has a bulge, exposed cord, deep cut, damaged bead, or repeated unexplained air loss, stop using it until it has been inspected or replaced. Tire pressure cannot correct structural damage.
Frequently Asked Questions
Does lower PSI always mean more traction?
No. Lower pressure can enlarge the footprint and help on some loose or uneven surfaces, but traction also depends on tread design, tire construction, load, wheel speed, and the material beneath the tire. Going too low can cause sidewall roll, rim strikes, bead loss, and unstable steering.
Why do ATVs use low-pressure tires?
Low-pressure tires provide compliance, flotation, shock absorption, and traction on off-highway surfaces. Their flexible construction also means that relatively small pressure errors can noticeably affect handling.
What is the ATV 4 PSI rule?
There is no universal 4 PSI rule. Four PSI may be correct for a particular ATV, tire, or low-speed setup, but it should never replace the vehicle label or owner’s manual. For more background, see this explanation of what PSI means in tire-pressure measurements.
What PSI should ATV tires be set at?
Set them to the cold pressure specified on the ATV’s warning label or in the owner’s manual. The ATV Safety Institute notes that ATV pressures are usually low, often within approximately 2–10 PSI, but the exact setting is vehicle-specific.
Should all four ATV tires have the same pressure?
Only when the manufacturer specifies equal front and rear pressure. Some ATVs require different front and rear settings. Left and right tires on the same axle should normally match unless the manufacturer provides another instruction.
Can I use the maximum PSI printed on the tire?
Do not use the tire-sidewall maximum as the operating target unless the ATV, tire, and wheel instructions specifically require it. The vehicle manufacturer’s cold-pressure label is the normal starting point.
Can I raise the pressure and ride an ATV on pavement?
No pressure adjustment makes an ATV behave like a road vehicle. ATVs are designed for off-highway use. Avoid paved roads except for a safe, legal crossing performed according to local law and the owner’s manual.
Conclusion
Correct ATV tire pressure starts with the vehicle’s cold-pressure specification, not a universal number for sand, mud, rocks, snow, grass, or trails. Lower pressure may improve conformity and flotation in some conditions, but excessive reduction increases the risk of sidewall roll, rim strikes, air loss, and de-beading.
Check every tire cold with a low-pressure gauge before each ride. Respect the front and rear specifications, payload limit, tire and wheel instructions, and beadlock maintenance requirements. Make only small approved adjustments, test at low speed, and restore the normal baseline before returning to firmer terrain or higher speeds.
Sources
- Can-Am Off-Road: Choosing ATV or SxS Tire Size and Pressure — supports model-, tire-, and condition-specific pressure guidance.
- Polaris 2025 Sportsman 450/570 Owner’s Manual — provides an example of manufacturer-specified cold pressure and load limits.
- ATV Safety Institute: Before You Ride — supports pre-ride inspections and the use of a low-pressure ATV gauge.
- ATV Safety Institute Golden Rules — supports off-highway operation and paved-road restrictions.
- ITP Technical Information and Beadlock Instructions — supports safe beadlock mounting and inspection practices.
- U.S. Tire Manufacturers Association: Tire Care Essentials — supports cold-pressure checks and temperature-related pressure changes.
