
An air compressor for tires is a compact pump that pressurizes air and delivers it through a hose and chuck to restore your tire’s recommended PSI. You’ll plug it into your vehicle’s 12V outlet or mains, set the regulator to the target pressure, secure the chuck to the valve stem, and watch the gauge until it clicks or the auto shutoff stops. It saves trips to stations, prevents under- or overinflation, and if you keep going you’ll learn how to choose, hook up, and maintain one.
Quick: Inflate a Tire With a Portable Tire Compressor
One portable compressor lets you inflate a tire at home without a trip to the gas station: check the recommended PSI on the driver‑side door sticker, measure current pressure with a tire gauge, then connect the compressor hose and tire chuck securely to prevent leaks. You’ll set the compressor output above 40 PSI to guarantee adequate flow; monitor inflation because most units add roughly 1 PSI every 1–2 seconds. Stay present — secure fittings and steady pressure prevent waste and let you control tire pressure precisely. When you reach target pressure, stop the compressor and verify with your gauge; if you’ve overinflated, depress the valve core to release air in controlled bursts. This routine gives you autonomy: you’re not dependent on station hours or queues. Use a compact compressor, keep it accessible, and practice the sequence once so it becomes second nature. Accurate, timely tire pressure maintenance protects handling, fuel efficiency, and your freedom to move on your terms.
[Products Worth Considering]

【METAL INFLATABLE STRUCTURE】: It’s composed of metal cylinder and metal gear, it could continuously work for 20 minutes, the maximum air pressure could reach 160psi, meet the needs of 4 tires at a time, more efficient and faster to use.

High-pressure inflation mode with automatic shutoff

QUICK & ACCURATE: Built with the highest quality materials, Airmoto is a portable tire inflator for car, trucks, SUVs, motorcycles, and bicycles. Quickly inflate your vehicle's tires in just minutes with precision accuracy up to 120 PSI. Small and compact car air pump that fits in your glove box or trunk.
Find the Right PSI (Where to Look & Why It Matters)
Check the sticker inside the driver-side door to find the manufacturer-recommended PSI for your tires. Use a basic tire gauge and your compressor to match that pressure, since the wrong PSI increases rolling resistance, reduces fuel economy, and accelerates tire wear. Check pressures monthly and before long trips to maintain safety and efficiency.
Location Of PSI Sticker
Inside the driver-side door jamb you’ll usually find a sticker that lists the recommended PSI for your tires; follow that number for correct inflation. The location of psi sticker is your primary reference—it’s precise, vehicle-specific, and beats guessing or relying on tire sidewall numbers. Use it to set your air compressor and check pressures cold.
- Driver-side door jamb: main sticker location most manufacturers use.
- Owner’s manual: backup source if sticker is missing or unreadable.
- Fuel filler door: some models list PSI here for quick access.
- Tire sidewall: shows max PSI, not recommended operating pressure.
Check and maintain the listed PSI regularly to protect tread life, fuel efficiency, and control—freedom on the road needs accurate pressure.
Manufacturer Recommended Pressure
Now that you know where to find the PSI sticker, use that manufacturer-recommended pressure as your target when filling tires. You’ll rely on that value for safety, fuel efficiency, and tire longevity. Use a basic tire gauge, compare its reading to the manufacturer recommended pressure, and add air until the target is met. Check pressure cold for accuracy and repeat regularly.
| Why it matters | What to check | Action |
|---|---|---|
| Safety baseline | Sticker on driver door | Set to recommended PSI |
| Efficiency | Gauge reading | Inflate or release air |
| Longevity | Regular intervals | Inspect and adjust |
Following the manufacturer’s specifications frees you from guesswork and keeps vehicle performance optimized.
Effects Of Incorrect PSI
If your tires aren’t at the manufacturer-recommended PSI, you’ll notice measurable effects on fuel economy, handling, and tire wear; even a 1 PSI drop can cut fuel efficiency by about 3%. You’ll want to check the sticker inside the driver’s door and adjust pressure monthly and before long trips.
- Under-inflation: raises rolling resistance, lowers fuel economy, and accelerates edge wear — reducing tire life.
- Over-inflation: concentrates contact patch, causes center wear, harsher ride, and higher blowout risk.
- Temperature effects: colder weather drops PSI; unchecked variance undermines handling and safety.
- Maintenance habit: regular checks with an air compressor restore ideal PSI, improving efficiency, comfort, and control so you stay liberated on the road.
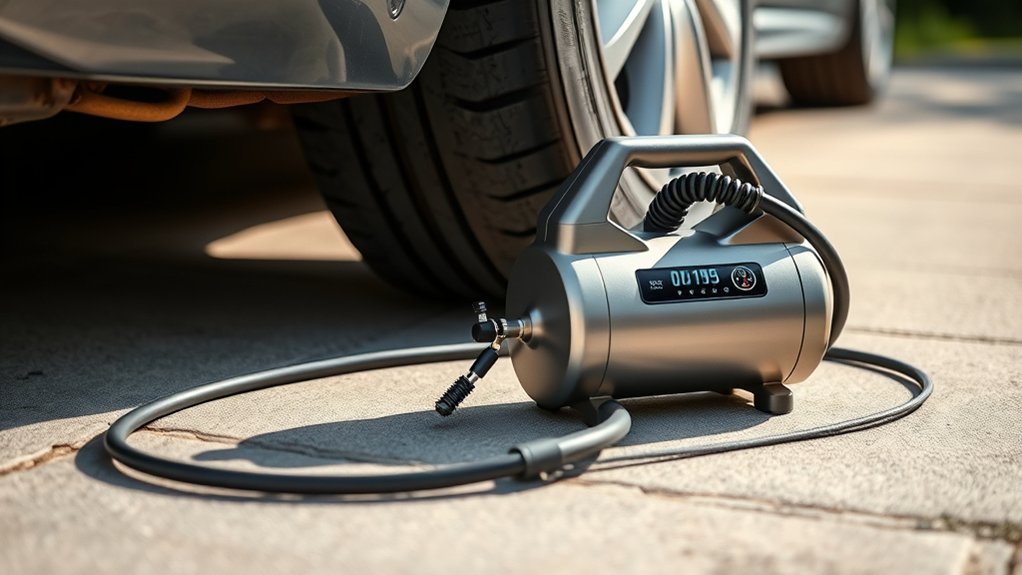
Best Portable Tire Compressors for Cars, Bikes, and SUVs
When choosing a portable tire compressor, you’ll want to balance portability and size so it fits your vehicle without adding bulk. Check power and inflation speed to make sure it can top a car, bike, or SUV tire in a reasonable time (typically 5–10 minutes for a standard car tire). Look for practical features and accessories — built-in gauges, auto shut-off, and versatile hose/adapters — that make operation safer and more useful on the road.
[Products Worth Considering]

【50s Fast Inflation】: Equipped with Industrial-Leading chip, sensor and Zinc-Alloy motor, Inzeetor Tire Inflator takes only 50 seconds to inflate a tire (195/65R15) from 30 to 36 PSI.

Please Note: This product must be powered by a 12V DC Cigarette Lighter to function properly, and ensure the vehicle is in a running state. And it equipped with a 9.8-foot cord, which can meet the usage needs of most regular-sized vehicles.

Fast Inflation & Easy Operation: The air pump’s high-quality cylinder delivers 25L/Min inflation, filling a tire from 29 PSI to 36 PSI in just one minute. Easy operation, quick inflation. Please note that you should allow the air compressor to cool off for a while after 15 minutes of continuous operation. (NOTE: This tire inflator can only be used if connected to a 12 V DC, 15 A cigarette lighter). NO AC!
Portability And Size
Because you’ll need a compressor that fits your vehicle and workflow, portability and size are the first specs to check: most high-quality portable tire compressors weigh under 5 pounds, are compact enough for trunk or under-seat storage, and often plug into a 12V outlet so you can inflate on the go without an external power source. You want a unit that’s easy to grab, stow, and deploy so you stay mobile and independent.
- Weight — sub‑5 lb units keep your kit carryable and won’t clutter storage.
- Footprint — compact housings fit trunks, cargo wells, under seats.
- Power interface — 12V plug compatibility guarantees on‑road usability.
- Versatility — built‑in gauges and nozzle sets let you serve cars, bikes, and gear.
Choose portable tire compressors that maximize freedom through minimal size.
Power And Inflation Speed
A compact compressor that delivers steady power and fast PSI rise will save you time and get you back on the road; look for units that pump roughly 1 PSI every 1–2 seconds and can reach output settings above 40 PSI so you can handle cars, bikes, and most SUVs. You’ll appreciate a unit like the McGraw 20 that balances power and inflation speed for quick, reliable fills. That power range preserves mobility and fuel economy by keeping tires correct.
| Tire Type | Typical PSI Need | Recommended Power |
|---|---|---|
| Bike | 40–120 | Low–Medium |
| Car | 30–35 | Medium |
| SUV | 35–45+ | Medium–High |
Use inflation speed as your liberation metric: faster fills free you to move.
Features And Accessories
If you want a compressor that’s ready for roadside emergencies and regular maintenance, prioritize compact, well-built units with useful accessories and clear controls. You’ll want a built-in pressure gauge, rechargeable power, and automatic shut-off so you hit the recommended PSI without babysitting the unit. Multiple nozzles expand use to sports gear and inflatables, freeing you from extra pumps.
- Compact chassis — easy storage, grab-and-go liberation.
- Built-in digital gauge — accurate readings for correct inflation.
- Automatic shut-off — stops at your set recommended PSI to prevent overfill.
- Multiple nozzle kit and rechargeable battery — broad utility and true portability.
Choose models with solid controls and durable fittings so you stay independent on the road.
Hose & Fittings: Create a Leak‑Free Connection

Leaks waste time and pressure, so seal every quarter‑inch thread and tighten fittings for a snug, leak‑free system. You’ll wrap PTFE tape on the quarter‑inch threads, fit the male quick‑connect plug on one hose end and the female coupler on the other, then use a wrench to secure hose-to-compressor connections. This prevents leaks that sap the air compressor’s efficiency and your freedom to finish the task fast.
| Component | Action | Check |
|---|---|---|
| Quarter‑inch thread | Apply PTFE tape | No visible gaps |
| Male plug | Crimp/secure to hose | Pull test |
| Female coupler | Attach to hose end | Smooth connect |
| Hose to compressor | Wrench-tighten | Listen for hiss |
Attach the tire chuck to the valve stem and listen for airflow to confirm a seal. Monitor fittings during inflation for escaping air; any hiss means re‑seal and retighten. A disciplined, leak-free rig gives you control and movement, not tethering, when you inflate tires.
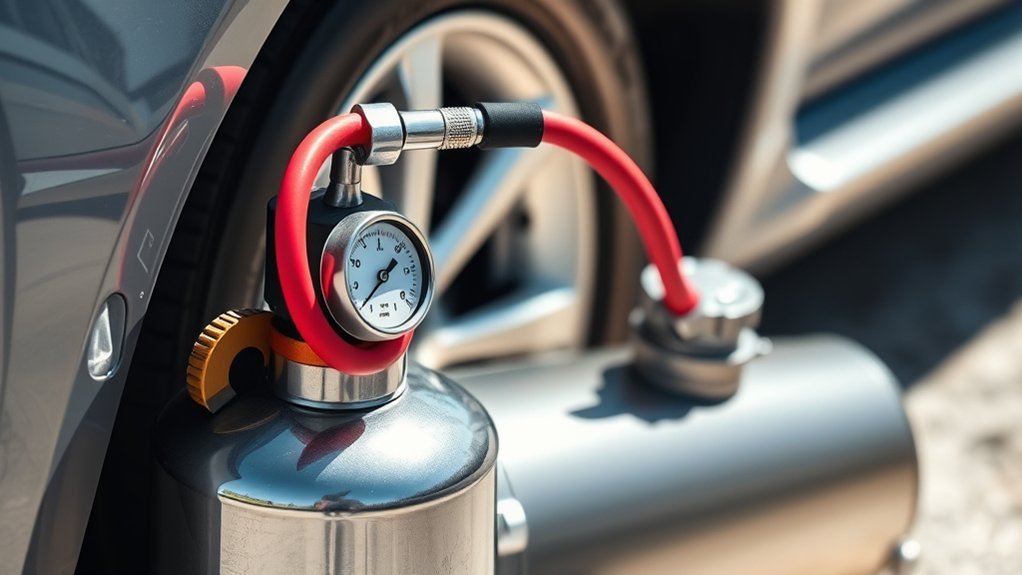
Prep the Compressor: Tank, Regulator, and PSI Settings
Start by confirming the tank drain valve is fully closed, then plug in and power the compressor so it builds to its preset shut‑off PSI; you’ll want the regulator set above 40 PSI to guarantee adequate flow for tire inflation. You’re preparing a reliable source of air; this step prevents pressure loss and readies the regulator to deliver consistent output. Monitor the gauge as it fills and note the shut‑off point.
- Verify drain valve closed and inspect for visible leaks.
- Energize compressor; allow it to reach auto shut‑off PSI.
- Adjust the regulator to a value above 40 PSI; confirm with the output gauge.
- Watch regulated pressure during use; if tires don’t fill, recheck regulator and hoses.
Stay deliberate and in control: setpoints matter for safety and efficiency. By prepping the tank and regulator correctly, you liberate yourself from guesswork and ascertain the compressor supplies steady, usable air for the inflation steps that follow.
Fill the Tire: Step‑by‑Step Inflation and Rechecking
With the tank pressurized and regulator set, attach the tire chuck firmly to the valve stem so you get an airtight seal and steady airflow. Hold it in place and monitor the inflation rate — expect roughly 1 PSI every 1–2 seconds — so you won’t overshoot the target. Add air in short bursts, then pause to read the gauge; this lets you approach the vehicle manufacturer’s recommended PSI on the driver-side door sticker with control. Use the compressor regulator to slow flow if you need finer increments. When the gauge shows the recommended proper tire pressure, stop adding air and remove the chuck quickly to avoid bleed-off. If you see you’ve exceeded the target, depress the valve core briefly to release small amounts until the gauge reads correctly. Recheck pressure after a minute to confirm stability. This method keeps you efficient and independent, so you control inflation precisely and maintain safe, liberated mobility.
Troubleshooting Common Inflation Problems
If your compressor or tire won’t cooperate, troubleshoot methodically to isolate the fault and get back to safe pressures quickly. You want control, so proceed stepwise: confirm power, verify settings, and physically inspect interfaces. check the tire valve and chuck contact before repeating inflation.
- If the unit won’t start, confirm it’s plugged in, the power switch is on, and the drain valve is closed so the tank can build pressure.
- For slow inflation, ascertain the output PSI is set correctly and that the tire chuck is secured to the valve stem; loose contact reduces flow.
- If the tire still won’t inflate after attempts, verify the compressor has reached operating PSI and check the hose and connections for leaks.
- If you overfill, release excess air by pressing the valve core gently with a tool; if no air flows with chuck attached, inspect the tire valve for damage or blockage.
Work deliberately, reclaiming mobility by fixing one variable at a time.
Safety Tips and Routine Compressor Maintenance
After you’ve ruled out mechanical and connection issues, shift attention to safety and routine upkeep so the compressor stays reliable and safe to use. Follow safety tips: always confirm the drain valve at the tank bottom is closed before pressurizing to prevent sudden air loss or moisture ejection. Inspect hoses and fittings routinely; replace any with cuts, bulges, or damaged threads to eliminate leaks that compromise performance and safety.
Keep the unit clean and free of dust, which degrades cooling and seals. Check oil levels on oil-lubricated models and change oil per the manufacturer’s schedule to preserve pump life and prevent seizure. Store the compressor in a dry, cool place to avoid rust and electrical or structural damage from humidity or heat.
You should establish a simple maintenance log: date, inspections, parts replaced, oil changes. That record liberates you from surprises and keeps the compressor ready for safe, efficient tire inflation when you need it.
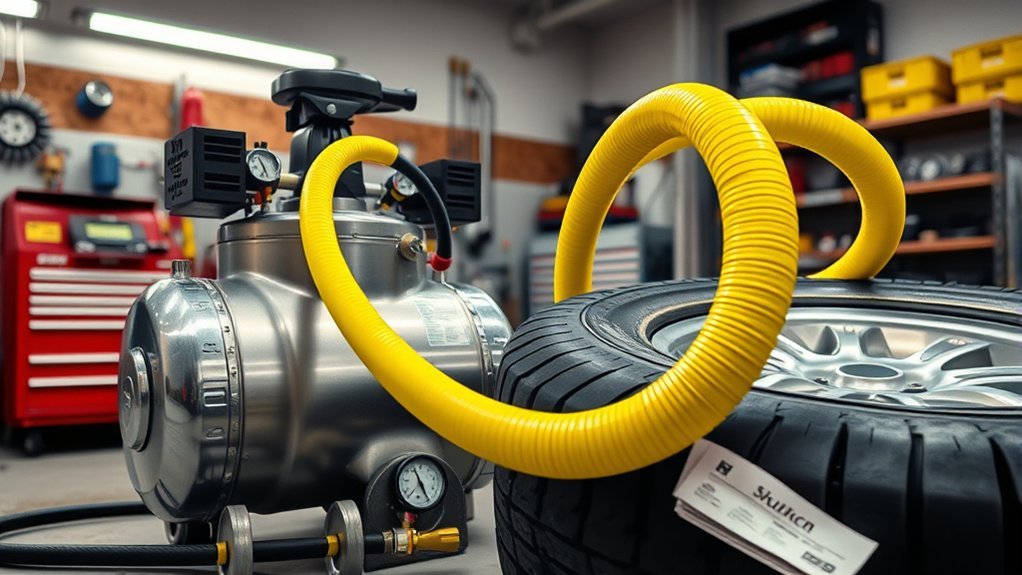
Choose a Tire Compressor: Size, CFM, Power, and Accessories
Because your needs determine the right unit, start by matching compressor size, CFM, power source, and essential accessories to the tires and operating conditions you’ll service. You’re choosing based on task: portable size units suit home use and quick fixes; larger tanks handle repeated or heavy-duty inflation. Prioritize CFM for speed — higher CFM inflates large tires faster and reduces pump cycles. Match power source to freedom: electric for convenience at home, gas for remote work or sustained output. Insist on adjustable PSI control to avoid overfilling and to tune pressure precisely.
Match compressor size, CFM, power source, and accessories to your tires and usage for fast, precise inflation.
- Size: pick portable for occasional auto use, larger tank for trucks/RVs.
- CFM: select a rating that supports your largest tire without long recovery times.
- Power: choose electric for garages, gas for off-grid or multi-tire jobs.
- Accessories: get a quality tire chuck, durable hose, accurate pressure gauge, and regulator for reliable, liberated operation.
[Products Worth Considering]

ADVANCED TRUEGAUGE SCREEN: This battery tire inflator includes updated sensor technology, capable of collecting pressure data from tire inflators at a frequency of 200 times per second. Its valid data rate is higher than 80%, which is 60% better than the market average. Wherever you go, accurate readings help you drive safely.

[Fast & Efficient Inflation] The OlarHike tire inflator features a high-performance motor that delivers rapid airflow—inflate a standard car tire (195/65 R15) from 30 to 35 PSI(+5 PSI) in just 55 seconds, or a larger SUV tire (235/65 R17) from 30 to 35 PSI(+5 PSI) in only 2.2 minutes. Ideal for cars, SUVs, light Pickup(Within 51 PSI), motorcycles, bicycles, and sports balls. Important Note: The unit can only inflate car/pickup truck tires up to 51 PSI

2X Faster Tire Inflation: This is really an innovative product. The compact car tire inflator portable air compressor with high performance motor can pump up a standard car tire from 0psi to 36psi within 6 minutes, top off tesla tire from 29psi-41psi (255/40/r20) within 1 minute, pump up the whole tire within 10 minutes (255/40/r20), keeping you on the road without the embarrassment of calling a tow truck.
Frequently Asked Questions
How Does a Tire Air Compressor Work?
A tire air compressor works by Compressor Mechanics: you convert electrical power into mechanical motion, compress air into a tank, the motor cycles off at set pressure, and you connect the hose to inflate tires quickly and reliably.
How to Use an Air Compressor on a Tire?
Check tire maintenance PSI on the door sticker, attach hose and chuck securely, start the compressor, set output above 40 PSI, press chuck firmly, monitor rise (~1 PSI/sec), stop, recheck pressure, and release excess if needed.
What Is the Difference Between a Tire Inflator and an Air Compressor?
A tire inflator’s portable, 12V design gives convenient Inflation Accuracy with automatic shutoff for quick roadside use, while an air compressor delivers higher PSI, larger tank capacity and versatility for heavy-duty tasks, letting you reclaim control and freedom.
What Are the Disadvantages of Tire Inflators?
Limited longevity, limited luster: you’ll get slower fills, smaller supply, weaker wattage, wobbling wear, and whining noise. You’ll need vigilant Tire Maintenance and backup plans, so you’re free to maintain mobility without being limited.
Conclusion
You’ll grab a compact compressor — small and quiet — and turn it into something powerful and precise. One minute it’s a gadget in your trunk, the next it’s the difference between a smooth commute and a damaged tire. Follow PSI specs, secure fittings, and monitor the gauge; simple steps prevent big problems. Routine checks keep the unit ready, so practicality meets preparedness every time you need to restore safe, efficient pressure.


Leave a Reply