If your tire inflator is not working, identify the exact symptom before replacing it. A unit that will not turn on has different likely causes than one that runs but produces little or no air. Start with the power source, then check the hose, air chuck, valve stem, pressure settings, and tire condition in that order.
Quick Answer
A tire inflator that will not work usually has a power, connection, airflow, setting, or tire problem. Verify the outlet or battery, inspect the fuse and cord, seal the chuck firmly on the valve, check for hose leaks, confirm the target PSI, and test the inflator on another tire.
Key Takeaways
- Use the pressure listed on the vehicle’s door-jamb label or in the owner’s manual, not the maximum pressure molded into the tire sidewall.
- If the inflator will not turn on, test the power source, fuse, battery, cord, plug, and connectors before opening the unit.
- If the motor runs but the tire does not fill, check the chuck seal, hose, valve core, adapter, and tire for escaping air.
- Follow the inflator’s stated duty cycle. Run time and cool-down requirements vary by model.
- Stop inflating a tire with a bulge, exposed cord, major sidewall cut, damaged valve stem, or unseated bead.
At a Glance
| Time Required | About 10 to 30 minutes for basic checks |
| Difficulty | Easy for external checks; professional service may be needed for internal faults |
| Tools Needed | Trusted tire-pressure gauge, soapy-water spray, flashlight, valve-core tool, and the inflator manual |
| Cost | Usually no cost for inspection; replacement fuses, valve cores, hoses, batteries, or inflators vary by model |
Warning: Do not inflate a tire that has exposed cords, a bulge, a major cut, severe sidewall damage, or a bead that has separated from the rim. Move away from traffic before roadside work, keep clear of a hot compressor head, and never run a vehicle inside a garage or other enclosed space to power a 12V inflator.
Quick Diagnostic Checklist for a Non-Inflating Tire Inflator
Use the symptom to choose your first test. This prevents you from replacing a working inflator when the real problem is the socket, valve, pressure setting, or tire.
| Symptom | Likely Causes | First Check |
|---|---|---|
| No lights, sound, or display | Dead battery, faulty outlet, blown fuse, loose plug, damaged cord, or open breaker | Test the power source with another suitable device and inspect the fuse |
| Motor runs but no air reaches the tire | Loose chuck, wrong adapter, blocked head, kinked hose, or internal pump fault | Reseat the chuck and listen for air escaping at each connection |
| Pressure rises very slowly | Weak power supply, hose leak, clogged intake, hot compressor, large tire, or tire puncture | Check the hose and valve with soapy water and confirm the power source is suitable |
| Inflator stops during use | Target pressure reached, thermal protection, weak battery, loose plug, or overloaded circuit | Check the target PSI, display message, manual duty cycle, and power connection |
| Gauge changes but the tire stays flat | Chuck is not opening the valve, valve is blocked, hose is pinched, or the reading is trapped hose pressure | Remove and reconnect the chuck squarely, then compare with a separate gauge |
| Tire fills and quickly loses pressure | Puncture, leaking valve core, damaged stem, failed repair, bead leak, or sidewall damage | Spray soapy water over the tread, valve and rim edge |
Follow This Testing Order
- Read the pressure target. Use the vehicle’s tire-information label or owner’s manual. Check and adjust pressure when the tires are cold whenever practical.
- Confirm the power source. Charge the battery, test the outlet, inspect the fuse, or verify the vehicle socket can supply the required current.
- Check the controls. Confirm the unit is set to PSI, bar, or kPa as intended and that the auto-stop target is above the tire’s current pressure.
- Attach the chuck again. Place it squarely on the valve stem and lock or thread it according to the inflator design.
- Listen and feel for leaks. Check the chuck, hose, fittings and valve stem while the unit runs.
- Test another tire. Use another serviceable tire or another suitable inflatable within the unit’s stated limits.
- Verify the reading. Compare the inflator with a trusted separate tire-pressure gauge.
Pro Tip: A successful test on another tire is one of the fastest ways to separate an inflator fault from a puncture, bad valve, bead leak, or other problem with the original tire.
Check Seals, Valve Stems, and Valve Cores
If the motor runs but air escapes around the valve, inspect the chuck seal, valve stem, valve core, and adapter. The connection should sit straight on the stem without strong sideways pressure.
Inspect a Schrader Valve Core
A loose or damaged Schrader valve core can release air while the inflator is connected or immediately after it is removed. Apply soapy water to the valve opening and watch for growing bubbles.
Use a valve-core tool to turn a loose core only until it is properly seated. Do not force it. A preset tool such as a 4 inch-pound valve-core tool can help prevent over-tightening on compatible applications, but that value should not replace a vehicle, valve-stem, or TPMS manufacturer’s specification.
- Replace a core that is bent, corroded, contaminated, or still leaking after it is seated.
- Install a valve cap after testing. The cap provides a secondary barrier against dirt and moisture.
- Do not twist or bend a metal TPMS valve stem while attaching the chuck.
- Have a tire professional replace a cracked, loose, bent, or heavily corroded stem.
Inspect the Chuck and Valve Seals
A worn rubber seal inside the air chuck can leak before air reaches the tire. Examine the chuck for a split gasket, damaged locking lever, stripped thread, dirt, dried sealant, or a missing internal pin.
- Listen for hissing where the chuck meets the valve.
- Make sure a locking chuck is pushed on fully before moving its lever.
- Thread a screw-on chuck straight to avoid cross-threading.
- Replace a damaged chuck seal or hose assembly with a part approved for the inflator.
- Do not hold a badly leaking chuck in place with excessive sideways force.
Adjust a Presta Valve or Adapter
For a bicycle tire with a Presta valve, remove the cap and loosen the small locknut at the valve tip before inflation. Briefly press the tip to make sure it is not stuck, then attach the Presta-compatible head or adapter squarely.
If the inflator uses a Schrader-style chuck, thread the Presta adapter on gently and reconnect the chuck. After inflation, remove the adapter and tighten the small Presta locknut by hand. Not every Presta valve has a removable core, so inspect the valve before using a core tool.
Note: A gauge may show pressure in the hose even when the chuck is not opening the tire valve. If the reading jumps immediately but the tire remains soft, remove the chuck, reopen the Presta valve if applicable, and reconnect it fully.
Power, Fuse, and Connector Checks
Use the checks that match your inflator’s power system. Do not take the housing apart while it is connected to electricity or a battery.
12V Vehicle-Socket Inflators
- Push the plug fully into a known-working 12V outlet.
- Check whether the vehicle requires the ignition to be in accessory or run mode.
- Read the inflator label for its amperage or wattage requirement.
- Confirm the vehicle outlet is rated to supply that load.
- Try another compatible vehicle outlet if one is available.
- Inspect the metal contacts in the plug and socket for dirt, looseness, heat damage, or corrosion.
- Check the fuse in the inflator’s plug tip and the vehicle fuse for that outlet.
Replace a blown fuse only with the same type and amperage specified by the inflator manufacturer. If the replacement fuse blows again, stop using the unit. A short circuit, seized motor, damaged cord, or overloaded outlet may be present.
Direct Battery-Clamp Inflators
Connect battery clamps only in the sequence and polarity stated in the inflator manual. In a common setup, the red clamp connects to the positive terminal and the black clamp connects to the designated negative terminal or grounding point, but the manufacturer’s instructions control.
- Keep the power switch off while making connections.
- Make sure both clamps grip clean metal securely.
- Keep cables away from belts, fans, exhaust parts, and other moving or hot components.
- Do not let the clamps touch each other.
- Disconnect the unit if a cable, plug, clamp, or fuse holder becomes unusually hot.
Cordless Inflators
- Charge the battery with the approved charger.
- Remove and reseat the battery until it locks in place.
- Inspect the battery contacts for dirt, corrosion, or damage.
- Allow an overheated or very cold battery to return to its permitted operating range.
- Try another compatible battery if one is available.
- Check the battery indicator for a fault code rather than assuming it is simply discharged.
Household-Current Inflators
- Test the wall outlet with another suitable appliance.
- Reset a tripped ground-fault circuit interrupter or circuit breaker only after checking for an obvious fault.
- Avoid an undersized or damaged extension cord.
- Inspect the plug and cord for cuts, exposed conductors, crushed areas, or heat damage.
- Do not use the unit in standing water or rain unless it is specifically rated for those conditions.
Power-Cycle or Reset the Unit
If the display freezes or the controls stop responding, switch the inflator off and disconnect its power source. Reconnect it after the display and motor have fully stopped. This is a basic power-cycle test, not a universal reset procedure.
If the unit has a reset button, breaker, error code, or required button sequence, follow the model’s manual. Do not assume that disconnecting it for a fixed number of seconds will clear every fault.
Why the Inflator Shows Low or Inconsistent Pressure
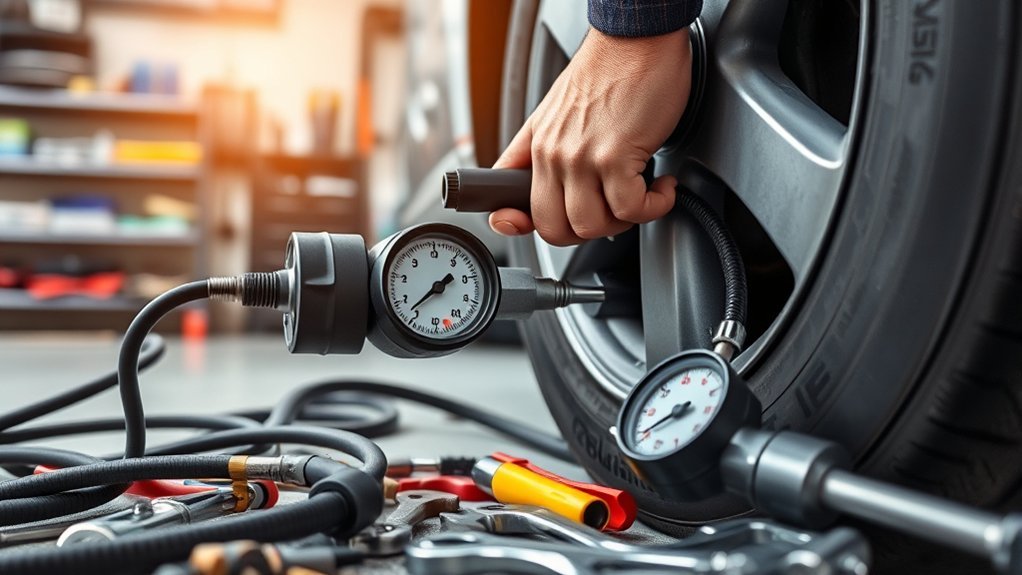
Low output and unstable gauge readings can come from a leaking hose, loose chuck, weak electrical supply, clogged intake, hot compressor, incorrect unit setting, or inaccurate gauge. Large tires also take longer to fill than bicycle or passenger-car tires.
Confirm the Pressure Unit and Auto-Stop Target
Check whether the display is set to PSI, bar, or kPa. A mistaken unit can make the target appear far too high or low. Also confirm that the programmed auto-stop target is above the tire’s current pressure. Some units will not restart if they believe the selected target has already been reached.
Compare the Gauge With a Trusted Reference
Inflate the tire in short intervals, disconnect the inflator, and check the tire with a reliable separate gauge. You can also review this guide to checking a pressure gauge for accuracy.
A small steady difference may be manageable if you understand the offset, but a reading that jumps, drifts, or differs greatly from a trusted gauge may indicate a damaged sensor, blocked chuck, leaking hose, or faulty display.
Check the Power Supply Under Load
An outlet may appear to work with a low-power accessory but still fail when an inflator draws more current. A loose socket, weak vehicle battery, undersized extension cord, or corroded clamp can reduce motor speed and air output.
Stop the test if a cord, plug, socket, clamp, fuse holder, or battery becomes unusually hot.
Clean the Inflator Head, Hose, and Air Intake
Dirt, dried sealant, a kinked hose, or a clogged intake can reduce airflow. Disconnect the inflator from its power source before cleaning or inspecting it.
Clean only the parts the manufacturer identifies as serviceable. Do not pour water into an electric inflator, motor housing, gauge, battery compartment, or permanently attached hose.
- Wipe dirt from the outside of the chuck and threads with a clean, slightly damp cloth.
- Remove visible debris without pushing it deeper into the air passage.
- Inspect the hose for cracks, burns, flattened sections, cuts, kinks, and loose fittings.
- Keep the ventilation slots and intake openings free of dust.
- Clean or replace a serviceable air filter according to the manual.
- Replace a damaged pressure hose rather than covering a high-pressure leak with ordinary tape.
If the model has a removable, serviceable chuck, follow its instructions for disassembly and cleaning. Some removable pneumatic heads can be cleaned with warm soapy water, but that procedure should not be applied to an integrated electric unit without manufacturer approval.
For additional filter guidance, see how to clean the inflator’s air filter.
Prevent Inflator Overheating and Maintain Tank Compressors
Every inflator has a duty cycle or permitted run-time pattern. Some compact units require frequent cooling breaks, while some heavy-duty models can run much longer under specified conditions. Read the label or manual instead of assuming a universal 10-minute, 15-minute, or 30-minute limit.
- Place the inflator on a stable surface with clear ventilation openings.
- Do not cover the unit while it runs.
- Keep the hose away from the compressor head, which may become hot enough to damage it.
- Stop if you smell burning insulation, see smoke, hear grinding, or notice melting plastic.
- If thermal protection activates, switch the unit off and follow its specified cool-down procedure.
- Do not repeatedly restart an inflator that shuts down immediately.
Some models include thermal-overload protection, while others rely mainly on the operator following the duty cycle. A thermal shutdown is a protective event, not permission to exceed the rated run time repeatedly.
Tank-Compressor Moisture Maintenance
A portable tankless inflator has no air-storage tank to drain. A garage compressor with a tank is different. Moisture can collect inside the tank, so use the drain valve according to the compressor manual.
Turn the compressor off, disconnect power, and reduce pressure as directed before opening the drain. Never drill, weld, patch, or attempt an improvised repair on a rusted or leaking pressure tank.
Use Tire Sealant Safely With a Portable Inflator
Some emergency kits inject sealant through the valve while the inflator adds air. Others use a separate bottle, hose, or removable valve core. Follow the exact kit instructions because the connection method, sealant quantity, speed limit, driving distance, pressure-check interval, and service deadline vary by product.
- Park away from traffic on a stable surface and switch on the hazard lights.
- Inspect the tire. Do not use sealant on a major sidewall cut, exposed cord, damaged rim, or tire that has separated from the rim.
- Read the sealant label and confirm that the formula is intended for the tire and compatible with the vehicle’s TPMS.
- Connect the bottle, hose, valve-core tool, or inflator exactly as directed.
- Add sealant and air without exceeding the vehicle’s recommended pressure.
- Drive only the distance and speed stated by the sealant manufacturer.
- Stop, recheck the pressure, and arrange professional inspection within the product’s stated limit.
Warning: Emergency sealant does not make a damaged tire permanently safe. A tire professional must remove the tire from the wheel to determine whether the puncture qualifies for a proper repair.
Sealant can clog a chuck, adapter, valve core, or hose. Clean only the removable parts identified in the kit instructions. Do not flush water through the inflator motor, electronic gauge, or permanently attached electrical assembly.
When the Tire, Not the Inflator, Is the Problem
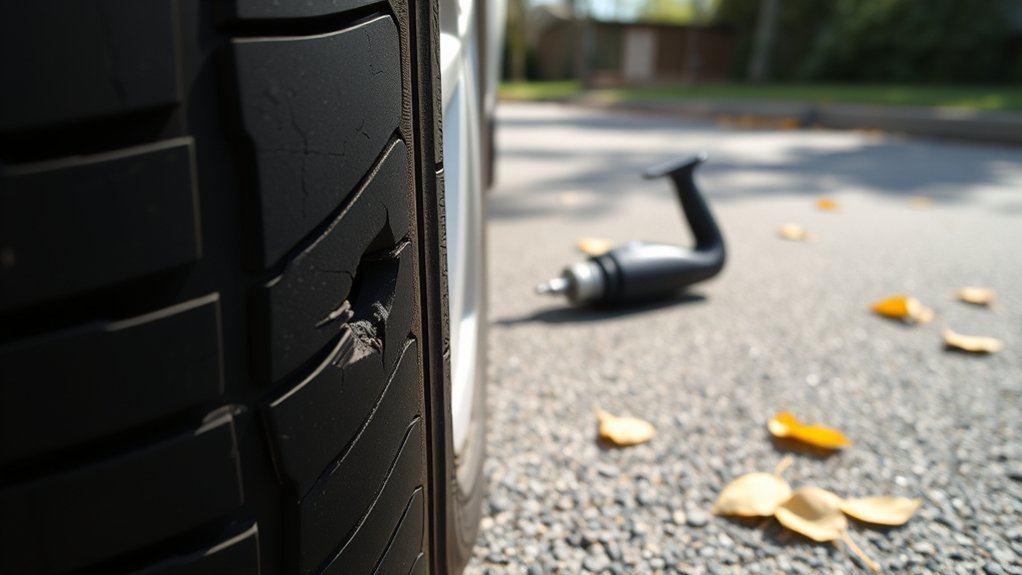
If the inflator works on another tire but the original tire will not hold pressure, inspect the tire, valve, wheel, and previous repairs. Mix a small amount of dish soap with water and spray it over the suspected areas. Growing bubbles indicate escaping air.
Before blaming the pump, test the tire’s tread, valve core, valve-stem base, bead area, and any previous repair for leaks.
- Look for a nail, screw, or other object in the tread.
- Check for bubbles at the valve opening and around the valve-stem base.
- Spray the bead area where the tire meets the wheel.
- Inspect the sidewall for cuts, bulges, cracking, exposed cords, or severe deformation.
- Check a previous plug or temporary repair for renewed leakage.
- Inspect the wheel for visible bending, cracking, or heavy corrosion.
Industry puncture-repair guidance limits repairs to qualifying injuries in the tread area. A tire should be removed from the wheel for internal inspection and a proper combination patch-and-plug repair. Do not use an outside-only plug as a permanent repair.
Shoulder damage, sidewall damage, an unseated bead, exposed cords, a large puncture, or evidence that the tire was driven while flat requires professional inspection and often replacement.
Preventive Maintenance and When to Stop Troubleshooting
Inspect the inflator before a trip and according to its manual rather than following one universal monthly service schedule.
- Charge the battery and test the unit periodically.
- Store the hose and power cord without sharp bends.
- Keep the chuck capped or protected from dirt.
- Carry the correct fuse, adapter, and valve-core tool when appropriate.
- Keep the manual or a digital copy available.
- Store the unit within its permitted temperature range.
- Replace cracked hoses, damaged plugs, and worn seals promptly.
Stop Using the Inflator When
- A correctly rated replacement fuse blows again.
- The cord, plug, clamp, socket, battery, or fuse holder overheats.
- The motor grinds, rattles heavily, smokes, stalls, or smells burned.
- The housing is cracked or exposes electrical parts.
- The hose develops a bulge, split, or high-pressure leak.
- The gauge is dangerously inaccurate or changes unpredictably.
- The unit repeatedly shuts down despite correct power and duty-cycle use.
- The manufacturer has issued a safety recall or stop-use notice for the model.
Internal piston seals, valves, switches, circuit boards, motors, and pressure sensors may require manufacturer service. For a small sealed consumer inflator, replacement may be safer and more economical than an unauthorized internal repair.
Frequently Asked Questions
What is the most common reason a tire inflator stops working?
Common causes include a dead battery, unsuitable outlet, blown fuse, loose electrical connection, leaking chuck, damaged hose, incorrect auto-stop setting, overheating, or a problem with the tire. The exact symptom should determine which cause you test first.
How do I reset a portable tire inflator?
Switch it off and disconnect the plug or removable battery, then reconnect it after the motor and display have stopped. This power-cycles the unit. A true reset procedure, breaker, or button sequence is model-specific, so check the owner’s manual if the fault returns.
Why does my portable tire inflator keep shutting off?
It may have reached the programmed target pressure, activated thermal protection, exceeded its duty cycle, lost power through a loose plug, or detected a battery or electrical fault. Check the display, pressure target, power connection, and model-specific run-time instructions.
How can I diagnose a faulty tire inflator?
Test the power source, inspect the fuse and cord, reconnect the chuck, listen for hose leaks, verify the pressure setting, and try the unit on another serviceable tire. Compare its reading with a trusted gauge. Grinding, smoke, repeated fuse failure, severe overheating, or no airflow after external checks points to an internal fault.
Can a tire inflator damage TPMS sensors?
Normal inflation with the correct chuck should not damage a properly installed TPMS sensor. Damage can occur if the valve stem is bent, twisted, cross-threaded, or subjected to strong sideways force. If the TPMS warning light stays on, recheck every tire and follow the vehicle’s normal relearn procedure before assuming the sensor has failed.
Why does the inflator fuse keep blowing?
The inflator may be drawing too much current because of a short circuit, damaged cord, seized motor, incorrect fuse, unsuitable outlet, or internal electrical fault. Replace the fuse only once with the specified type and rating. If it blows again, stop using the inflator.
Why does the inflator gauge disagree with my tire gauge?
A small difference can result from gauge tolerance, hose pressure, temperature, or checking the tire at different times. A large or changing difference may mean the chuck is not opening the valve correctly, the hose is leaking, or one gauge is faulty. Compare both gauges on the same cold tire within a short period.
Conclusion
A tire inflator that will not inflate a tire does not always need replacement. Begin with the power source, fuse, pressure setting, and chuck connection. Then inspect the hose, valve core, intake, and tire for leaks or damage. Test another tire and compare the reading with a separate gauge before blaming the pump.
Follow the model’s duty cycle, cleaning instructions, fuse rating, and reset procedure. Stop using the unit if it repeatedly blows a fuse, overheats electrical connections, smokes, grinds, or develops a damaged high-pressure hose. If the inflator works but the tire still loses air, arrange a professional tire inspection.
Sources
- National Highway Traffic Safety Administration: Tire Safety — correct inflation pressure, cold-pressure checks, tire inspection, and TPMS guidance.
- U.S. Tire Manufacturers Association: Puncture Repair Procedures — repairable tread area, puncture limits, internal inspection, and proper repair method.
- VIAIR Compressor FAQ — electrical requirements, duty-cycle meaning, and thermal-overload guidance.
- Park Tool: Tire and Tube Service — Schrader and Presta valve operation and valve-core checks.
- Slime Tire Sealant Instructions — product-specific sealant installation, inflation, distribution, and pressure recheck steps.
- Craftsman Tank Compressor Information — moisture-removal drain-valve purpose for tank-equipped compressors.
