If your tire inflator battery will not charge, start with the safest and simplest causes: the wall outlet, power adapter, cable, charging port, battery temperature, and removable-battery connection. Do not open a sealed battery pack or try to force-charge lithium cells. The correct test depends on whether your inflator uses USB charging, a barrel adapter, a removable tool battery, or a dedicated 12-volt input.
Quick Answer
Try a known-good outlet, then use the original cable and charger or an approved replacement with matching specifications. Let the inflator reach room temperature, inspect and clean the charging port, and watch the charge indicator. Stop immediately if the battery is swollen, leaking, unusually hot, odorous, discolored, smoking, or making odd noises.
Key Takeaways
- Use the supplied charger or a manufacturer-approved replacement with the correct voltage, current, connector, polarity, and charging protocol.
- A cable that fits is not automatically safe or compatible.
- Let a very hot or cold inflator return to the charging temperature listed in its manual.
- Do not trickle-charge, jump-start, open, rebuild, or apply power directly to a sealed lithium-ion battery pack.
- Replace or professionally service a pack that is damaged, swollen, overheating, leaking, or unable to hold useful charge.
At a Glance
| Time Required | 10–30 minutes for basic checks, plus normal charging time |
| Difficulty | Easy for external checks; professional service for internal faults |
| Tools Needed | Flashlight, dry soft brush, known-good compatible cable and adapter, and optionally a multimeter for a simple barrel adapter |
| Cost | Usually free for inspection; replacement cables, chargers, batteries, or service vary by model |
Warning: Unplug the inflator and stop using it if the battery or housing is swollen, leaking, cracked, smoking, unusually hot, discolored, producing a chemical odor, or making hissing, popping, or crackling sounds. Move away from the device and call emergency services if it begins smoking or burning. Do not handle a burning or venting battery.
Why a Tire Inflator Battery Will Not Charge
A no-charge symptom does not always mean the battery cells are dead. The fault may be anywhere between the wall outlet and the battery pack.
- No power from the outlet: The outlet, vehicle socket, power strip, or USB source may be switched off or faulty.
- Wrong power adapter: The adapter may not provide the voltage, current, polarity, or charging protocol required by the inflator.
- Damaged cable: Internal wire breaks can stop charging even when the cable jacket looks normal.
- Dirty or damaged port: Lint, dirt, corrosion, moisture, or a bent contact can prevent a stable connection.
- Temperature protection: A lithium-ion battery may refuse to charge when it is too hot or too cold.
- Poor battery connection: A removable pack may not be fully seated, or its contacts may be dirty.
- Deep discharge or battery wear: The protection circuit may have shut the pack down, or one or more cells may have deteriorated.
- Charging-board failure: A damaged port, fuse, protection component, sensor, or control board may prevent charging.
Identify the Charging System Before Testing
Look at the label on the inflator, charger, battery pack, and owner’s manual before connecting a substitute power source. Record the required input voltage and current.
USB-C, Micro-USB, or USB-A Charging
USB-powered inflators often require a specific input such as 5V DC at 2A. Some USB-C products support only basic 5-volt charging, while others use USB Power Delivery or another negotiated charging mode. Do not assume that every USB-C adapter will produce the same result.
Use the supplied cable first. When trying a replacement, use a good-quality cable and adapter that meet the inflator manufacturer’s stated requirements. Do not probe tiny USB-C contacts with multimeter leads.
Note: Charging specifications vary by model. For example, Xiaomi lists a 5V/2A charging input and a 5°C to 40°C charging range for one of its portable air compressors. Always use the specifications printed on your own inflator or listed in its manual.
Low-Voltage Barrel-Plug Adapter
A barrel adapter has a round metal plug, usually with a center contact and an outer sleeve. Its label should list the DC output and polarity symbol. A replacement must match the required voltage and polarity and provide at least the required current.
A multimeter can check the unloaded voltage of a simple barrel adapter, but only when you understand the connector and can avoid shorting it. This test does not prove that the adapter can supply full current under load.
Removable Power-Tool Battery
If the inflator uses a removable tool battery, charge the pack only in the manufacturer-approved charger. Remove the pack, inspect the case and contacts, then reinstall it until it locks securely. A known-good compatible pack can help determine whether the problem is in the battery or the inflator.
Dedicated 12-Volt Vehicle Input
Some inflators include a 12-volt vehicle cable for operating the compressor, charging a pack, or both. These functions are not interchangeable. Check the tire inflator manual and the product instructions before connecting the cable.
Do not connect a vehicle socket directly to battery terminals or internal wiring. Use only the inflator’s factory-designed 12-volt input and supplied or approved cable.
Check the Outlet, Adapter, Cable, and Port
- Test the power source. Plug a different low-power device into the same wall outlet or USB source. Check the vehicle’s accessory-socket fuse if a 12-volt socket has no power.
- Inspect the adapter. Stop using it if the case is cracked, melted, discolored, unusually hot, buzzing, or giving off an odor.
- Inspect the cable. Look for crushed areas, cuts, loose plugs, exposed conductors, sharp bends, or heat damage.
- Check the connection. Insert the cable fully without forcing it. A plug that feels loose or charges only when held at an angle may indicate a worn cable or damaged port.
- Inspect the port with a light. Look for compacted lint, dirt, moisture, corrosion, or bent contacts.
- Clean only when unplugged. Use a dry soft brush or gentle air. Do not insert a needle, screwdriver, paper clip, or other metal object into the port.
- Try one known-good compatible cable and adapter. Match the manufacturer’s input specification rather than choosing a charger only because the connector fits.
Pro Tip: Change only one item at a time. Testing a different cable, adapter, and outlet all at once may restore charging, but it will not tell you which part failed.
Let the Battery Reach a Safe Charging Temperature
A tire inflator stored in a freezing garage, direct sun, or a hot vehicle may temporarily refuse to charge. Move it to a dry, room-temperature location away from combustible materials and let it rest before reconnecting the charger.
The U.S. Fire Administration advises against charging lithium-ion batteries below 0°C or above 40°C. Your manufacturer may specify a narrower range, so follow the product manual.
If the inflator became hot during a long inflation session, switch it off and allow the motor, hose, electronics, and battery to cool. Do not place it in a refrigerator or freezer to speed cooling.
Check the Charging Indicator
Observe the display or indicator light for the normal charging time stated by the manufacturer.
- No light or display: Check the outlet, adapter, cable, connector fit, and charging temperature.
- Light appears only when the plug is moved: Suspect a damaged cable, loose port, cracked solder joint, or worn connector.
- Indicator flashes an error pattern: Check the manual for a temperature, battery, or charger fault code.
- Indicator says full immediately but runtime is very short: The battery may have lost capacity, or the charge measurement may be inaccurate.
- Indicator never reaches full: The adapter may be underpowered, the cable may have excessive resistance, or the battery or charging circuit may be failing.
- Charging stops when the unit becomes hot: Unplug it and allow it to cool. Repeated overheating requires service or replacement.
Test a Simple Barrel Adapter Safely
This optional test applies only to a conventional low-voltage DC barrel adapter. Skip it for USB-C, magnetic, multi-pin, mains-voltage, or unfamiliar connectors.
- Read the adapter label and note the DC output voltage and polarity.
- Set the multimeter to a DC voltage range above the adapter’s rated output.
- Keep the probe tips from touching each other while connected to the adapter.
- Place the probes on the contacts indicated by the polarity diagram.
- Compare the reading with the label.
A zero, unstable, or substantially incorrect reading suggests an adapter, cable, connection, or test-method problem. A correct no-load voltage does not guarantee that the adapter can deliver its rated current. Replace questionable adapters with approved parts rather than opening them.
Warning: Do not open a wall charger, probe mains-voltage wiring, short the connector, or test exposed lithium cells. Stop if you cannot identify the connector, polarity, voltage, or safe probe points.
Check a Removable Battery Pack
Remove the pack only as described in the manual. Inspect the housing for cracks, swelling, impact damage, leakage, corrosion, melted plastic, or burned contacts.
Wipe accessible contacts with a clean, dry cloth. Do not scrape plated contacts aggressively or apply liquid cleaner unless the manufacturer permits it. Reinstall the pack firmly and try the approved charger.
If available, test with another undamaged and fully charged battery that the manufacturer lists as compatible. The result can narrow the fault:
- Inflator works with the second battery: The original pack or its internal protection circuit is likely faulty.
- Neither battery works in the inflator: The inflator’s battery contacts, switch, motor controller, or internal wiring may be faulty.
- Original battery works in another approved tool: The inflator is more likely to be the problem.
- Charger rejects the pack: Follow the charger’s error-code instructions and arrange approved service or replacement.
Reset the Inflator Without Forcing the Battery
A safe reset is a normal power cycle, not a forced battery recovery.
- Disconnect the charging cable and any 12-volt power cable.
- Switch the inflator off.
- Remove the battery only if it is designed to be user-removable.
- Wait 5–10 minutes.
- Reinstall the approved battery or reconnect the correct charger.
- Use a dedicated reset button or button sequence only when it appears in the manual.
Do not intentionally run a lithium-ion pack completely flat to “reset” it. Do not trickle-charge it, jump-start it from another battery, connect a bench supply to its terminals, or bypass the protection board.
Use an Approved External Power Mode Only
If the inflator includes a factory 12-volt or AC input, you may use it exactly as described in the manual. This can help identify the failed section without altering the wiring.
- Inflator operates normally on approved external power: The motor and compressor are functional. The battery, battery contacts, or charging circuit may be faulty.
- Inflator does not operate on either battery or approved external power: The switch, fuse, motor controller, motor, or internal wiring may require service.
- External-power cable becomes hot or repeatedly blows the vehicle fuse: Stop using it. Check the required fuse rating and arrange service.
Do not improvise an external-power connection on an inflator that lacks a dedicated input.
Tire Inflator Charging Troubleshooting Table
| Symptom | Likely Causes | Safe Next Step |
| No charge light | Dead outlet, bad cable, wrong adapter, dirty port, temperature lockout | Test the outlet, confirm specifications, inspect the port, and let the unit reach room temperature |
| Charges only at an angle | Worn plug, broken cable, loose port, cracked internal connection | Stop wiggling the connector, try an approved cable, and service a loose port |
| Shows full but dies quickly | Lost battery capacity, weak cell group, inaccurate state-of-charge reading | Perform one normal charge and runtime test, then replace or service the approved pack |
| Adapter or inflator becomes very hot | Wrong charger, short circuit, damaged pack, failing charging board | Unplug immediately and stop using the affected component |
| Works on 12V but not on battery | Battery, battery contacts, or charging circuit fault | Check warranty and obtain an approved pack or professional diagnosis |
| Swelling, odor, smoke, leakage, or odd noise | Damaged or failing lithium-ion battery | Stop use immediately, move away, and follow manufacturer and local emergency guidance |
When to Replace the Battery or Repair the Inflator
Replace or professionally service the battery when it is physically damaged, repeatedly overheats, will not charge with approved equipment, or provides too little runtime for practical use.
Do not use calendar age alone as the deciding factor. A battery’s condition depends on charging cycles, storage temperature, time spent fully discharged, build quality, and workload.
Replace the Battery When
- The removable pack is damaged, swollen, leaking, cracked, or heat-discolored.
- An approved charger consistently rejects it.
- A known-good compatible battery operates the inflator normally.
- The pack charges but runtime has dropped severely.
- The manufacturer has issued a recall or replacement notice.
Repair or Replace the Whole Unit When
- The battery is sealed and not listed as user-serviceable.
- The charging port is loose, burned, corroded, or pushed into the housing.
- The inflator fails on both battery and approved external power.
- Repair requires opening or rebuilding a lithium-ion pack.
- The cost of an approved battery and labor approaches the cost of a reliable replacement inflator.
Check the warranty, manufacturer support page, and the U.S. Consumer Product Safety Commission recall database before paying for a repair.
Where to Get Replacement Batteries, Parts, or Professional Repair
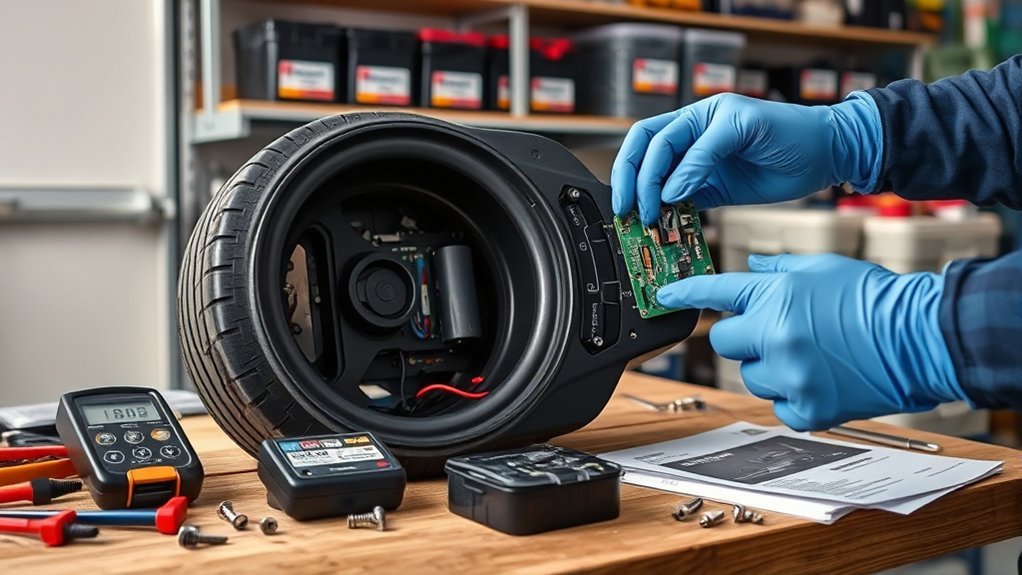
Start with the inflator manufacturer or an authorized service center. Search using the complete model number printed on the inflator and battery label.
A replacement pack must match all relevant requirements:
- Exact model compatibility
- Battery chemistry
- Nominal voltage
- Connector shape and pin arrangement
- Polarity
- Protection circuitry
- Temperature-sensor connection
- Physical dimensions and mounting system
Capacity may differ only when the manufacturer confirms compatibility. A higher advertised milliamp-hour rating does not make an unknown pack safe.
Avoid loose or rewrapped 18650 cells sold as direct replacements for a protected battery pack. The U.S. Consumer Product Safety Commission warns that loose industrial cells may lack the protective features needed for safe consumer use.
How to Store the Inflator and Prevent Charging Problems
- Store the inflator in a cool, dry place away from direct sunlight and vehicle heat.
- Do not leave it connected to a charger indefinitely unless the manual specifically permits this.
- Recharge it at the storage interval listed by the manufacturer. Some models recommend charging at least once every three months.
- Keep the charging port covered or protected from dirt and moisture.
- Do not store a loose removable battery with keys, tools, coins, or other metal objects.
- Inspect the battery, adapter, and cable before long trips.
- Carry the correct charging cable or approved 12-volt power cable with the inflator.
How to Recycle a Failed Battery
Do not put a lithium-ion battery or battery-powered inflator in household trash or curbside recycling. Use a participating battery retailer, electronics recycler, or local household hazardous-waste collection program.
For an undamaged removable battery, cover exposed terminals with non-conductive tape or place the battery in a separate plastic bag before taking it to an approved collection point. Contact the manufacturer or local hazardous-waste authority before transporting a swollen, leaking, recalled, or otherwise damaged pack.
Frequently Asked Questions
Why is my tire inflator not charging?
Common causes include a powerless outlet, damaged cable, incompatible adapter, dirty or loose charging port, battery-temperature protection, poor removable-pack contact, a worn battery, or a failed charging board. Start with the outlet and approved charging accessories before assuming the battery is dead.
How do I reset a portable tire inflator?
Disconnect all power, switch the inflator off, remove a user-removable battery if applicable, and wait 5–10 minutes. Reconnect the approved battery or charger. Use a reset button or button sequence only when it is documented in the model’s manual.
Can I charge my tire inflator with a phone charger?
Only when the inflator manufacturer permits USB charging and the adapter and cable meet the required voltage, current, connector, and charging protocol. A connector that fits does not prove compatibility. Use the supplied charger or an approved equivalent whenever possible.
Should I fully discharge the battery to reset it?
No. Intentionally deep-discharging a lithium-ion battery is not a reliable reset and may worsen an already weak or deeply discharged pack. Use a normal power cycle and the manufacturer’s documented reset procedure instead.
How do I get a lithium battery out of protection mode?
Connect the pack only to the supplied or approved charger at a permitted temperature and allow the normal charge cycle to begin. Do not jump-start, trickle-charge, bypass, or apply direct power to the cells. If the approved charger continues to reject the pack, arrange service or replacement.
Can I replace the internal tire inflator battery?
Replace it yourself only when the manufacturer identifies the pack as user-removable and supplies an approved replacement procedure. Sealed packs should be handled by an authorized or qualified repair service because opening them can damage cells, insulation, sensors, or protection circuitry.
Why does the charging light turn on but the battery still dies quickly?
The battery may have lost capacity, developed a weak cell group, or reached full voltage without storing much usable energy. Perform one normal charge and runtime test. Replace or professionally service the battery if the runtime remains severely reduced.
Conclusion
When a tire inflator battery will not charge, begin with the outlet, approved adapter, cable, port, battery connection, and temperature. These checks resolve many external charging problems without opening the device. A normal power cycle is safe, but forced discharge, improvised trickle charging, direct cell charging, and battery-board bypasses are not.
Stop using any battery that swells, leaks, overheats, smells unusual, changes color, smokes, or makes odd sounds. Use an approved replacement pack or qualified repair service, and take failed lithium-ion batteries to a dedicated recycling or household hazardous-waste collection point.
Sources
- U.S. Fire Administration: Battery Fire Safety — charging-temperature guidance, warning signs, storage, and fire prevention.
- U.S. Environmental Protection Agency: Used Lithium-Ion Batteries — safe handling, terminal protection, and recycling guidance.
- U.S. Consumer Product Safety Commission: Universal Charger Warning — risks of chargers that fit but are not electrically compatible.
- U.S. Consumer Product Safety Commission: Loose 18650 Cell Warning — hazards of separated, rewrapped, or unprotected lithium-ion cells.
- Xiaomi Portable Electric Air Compressor 2 FAQ — manufacturer example of model-specific charging input, temperature, storage, and battery-service requirements.
- Xiaomi Portable Electric Air Compressor 2 Specifications — manufacturer-listed USB-C input, charging voltage, charging temperature, and battery type.
