A low tire can interrupt a trip quickly, especially when electrical power is unavailable. A manual tire inflator gives you a compact, non-electric way to add air with a hand pump, foot pump, or bellows-style pump. This guide explains how to inspect the tire, find the correct pressure, connect the pump, avoid leaks, and decide when an electric compressor or roadside service is the safer choice.
Quick Answer
To use a manual tire inflator, inspect the tire, find the recommended cold pressure, attach the correct pump head firmly, and pump with steady strokes. Pause often to check the gauge. Manual pumps suit small top-ups and backup use; choose an electric compressor or roadside help for large, badly underinflated, damaged, or unsafe-to-reach tires.
Key Takeaways
- For cars, SUVs, and light trucks, use the pressure on the vehicle placard or in the owner’s manual, not the maximum pressure molded on the tire.
- Check pressure when the tires are cold, ideally after the vehicle has been parked for at least three hours.
- Inspect the tread, sidewall, valve, and wheel before adding air. Inflation does not repair a puncture or structural damage.
- Choose a pump that matches the valve type, required pressure, tire volume, and your ability to operate it safely.
- Do not attempt roadside inflation when traffic, weather, lighting, tire damage, or your location makes the task unsafe.
At a Glance
| Time Required | Varies by pump and tire. A small top-up may take several minutes; a large or nearly flat tire can take much longer. |
| Difficulty | Easy for a small top-up; physically demanding for large or very low tires. |
| Tools Needed | Manual inflator, reliable pressure gauge, correct valve head or adapter, and roadside visibility gear when needed. |
| Cost | No added cost if you already own a suitable pump and gauge; otherwise the cost depends on the tool. |
What’s in This Article
- Manual Tire Inflator Basics
- Before You Begin
- Find the Correct Pressure and Valve Type
- Inflate a Tire With a Hand Pump
- Inflate a Tire With a Foot Pump or Bellows
- Hand Pump vs. Foot Pump vs. Bellows
- How Manual Inflators Work
- Choose the Right Manual Inflator
- Inflation Time and Pressure Rating
- Common Problems and Fast Fixes
- Roadside Safety
- When to Switch to Electric
- Pump Care and Storage
- Frequently Asked Questions
- Conclusion
- Sources
Manual Tire Inflator Basics: What It Is and When to Use It
A manual tire inflator is a compact pump that uses hand or foot power instead of electricity. Each stroke compresses air and sends it through a hose or pump head into the tire valve.
Manual inflators work best for bicycle tires, small pressure corrections, routine garage checks, camping equipment, and emergency backup. A suitable model can add air to a car tire, but the job may require many strokes because a car tire holds far more air than a bicycle tire.
A manual pump adds air only. It does not seal a puncture, repair a leaking valve, fix a bent wheel, reseat a separated automotive tire bead, or make a structurally damaged tire safe.
Note: A tire that becomes low again soon after inflation probably has a leak. Treat added air as a temporary pressure correction and arrange an inspection.
Before You Begin: Inspect the Tire and Gather Your Tools
Before connecting a pump, park in a safe place and inspect the tire, valve stem, and visible wheel area. Look for cuts, punctures, bulges, cracks, exposed cords, a bent or cracked wheel, or a tire bead that is no longer seated evenly against the rim.
Warning: Do not continue inflating a tire with visible structural damage, exposed cords, a large sidewall bulge, a cracked wheel, or a bead that has come off the rim. A damaged assembly can fail during inflation. If the tire was driven while flat, have it inspected before returning to normal driving.
Gather these items before you start:
- Manual tire inflator: Use a hand pump, foot pump, floor pump, or bellows-style pump rated for the pressure you need.
- Reliable tire pressure gauge: Use a separate gauge when the pump has no gauge or its built-in gauge is hard to read or unverified.
- Correct valve head or adapter: Most cars use Schrader valves. Many bicycles use Presta valves, and some use Schrader or Dunlop/Woods valves.
- Gloves and a light: These help you inspect the valve area and keep your hands away from dirt and sharp debris.
- Visibility equipment: Carry reflective clothing, hazard markers, or other equipment suitable for your location and local rules.
Find the Correct Pressure and Identify the Valve Type
For a car, SUV, van, or light truck, use the recommended cold tire pressure on the Tire and Loading Information label, usually found on the driver’s doorjamb, or in the owner’s manual. The pressure molded on the tire sidewall is a tire limit, not the normal pressure recommendation for the vehicle. The front and rear recommendations may be different.
The National Highway Traffic Safety Administration defines a cold tire as one that has not been driven for at least three hours. Check all road tires and the spare when applicable.
Pro Tip: Do not release air from a warm tire simply because its reading is above the cold placard pressure. Pressure rises as the tire warms. If a warm tire is clearly low, add enough air to reach the placard value, then check and adjust it again when cold.
For a bicycle, follow the permitted pressure range marked by the tire manufacturer and any lower limit set by the rim or wheel manufacturer. The best pressure within that range depends on tire width, rider and cargo weight, road or trail conditions, and whether the system uses tubes or tubeless construction. Never exceed the lowest maximum limit among the tire, rim, and other components.
Schrader Valve
A Schrader valve is the wider, car-style valve with a spring-loaded pin in the center. Remove the cap, press the pump head straight onto the valve, and lock the lever or threaded fitting if the pump uses one.
Presta Valve
A Presta valve is narrower and has a small threaded tip. Remove the cap, unscrew the small tip counterclockwise until it stops, briefly press it to make sure it moves, and attach a Presta-compatible pump head or adapter. Keep the pump head straight so you do not bend the valve.
Dunlop or Woods Valve
Dunlop or Woods valves appear on some city and utility bicycles. Use a pump head or adapter specifically listed as compatible with that valve type.
Quick Steps to Inflate a Tire With a Hand Pump
Use these steps for a hand pump or bicycle-style floor pump. Keep the pump stable, use smooth strokes, and stop often to verify pressure.
1. Check the Starting Pressure
Remove the valve cap and check the current pressure with a gauge. Compare it with the correct cold pressure for the vehicle or the approved range for the bicycle tire and rim.
2. Attach the Pump Head Firmly
Push or thread the pump head onto the valve according to the pump design. Lock the lever if fitted. A brief hiss during attachment can be normal, but continuous hissing means the head is not seated correctly.
3. Pump With Steady Strokes
Keep the hose and pump head aligned with the valve. Use full, controlled strokes rather than fast, short movements. If the pump or hose becomes unusually hot, difficult to operate, or unstable, stop and let it cool or inspect it.
4. Check the Pressure Often
Pause after several strokes and read the gauge. A pump gauge may show pressure only while you stop pumping, and some small gauges are less precise at the low end of their scale.
5. Finish and Recheck
- Stop when the gauge reaches the recommended pressure.
- Unlock and remove the pump head quickly and straight.
- Check the pressure again with the same reliable gauge.
- If the tire is overinflated, release a small amount of air, then measure again.
- Replace the valve cap and listen for any continuing leak.
Quick Steps to Inflate a Tire With a Foot Pump or Bellows
Place the foot pump or bellows-style pump on firm, level ground. Make sure its feet or base cannot slide before you apply pressure.
- Check the tire: Inspect for damage and measure the starting pressure.
- Remove the valve cap: Keep it in a pocket or another safe place.
- Attach the nozzle: Seat it firmly and correct any continuous hissing.
- Use controlled full strokes: Press the foot lever or bellows through its intended range without twisting the hose.
- Read the gauge often: Pause regularly so you do not overshoot the target.
- Finish cleanly: Remove the nozzle, verify the final pressure, and replace the cap.
Many users find a foot pump easier on the arms because body weight supplies much of the force. However, stability, air volume, and effort vary by pump design. Small bellows-style pumps save space but usually suit modest top-ups better than restoring a large tire from very low pressure.
Hand Pump vs. Foot Pump vs. Mini Bellows: Pros and Cons
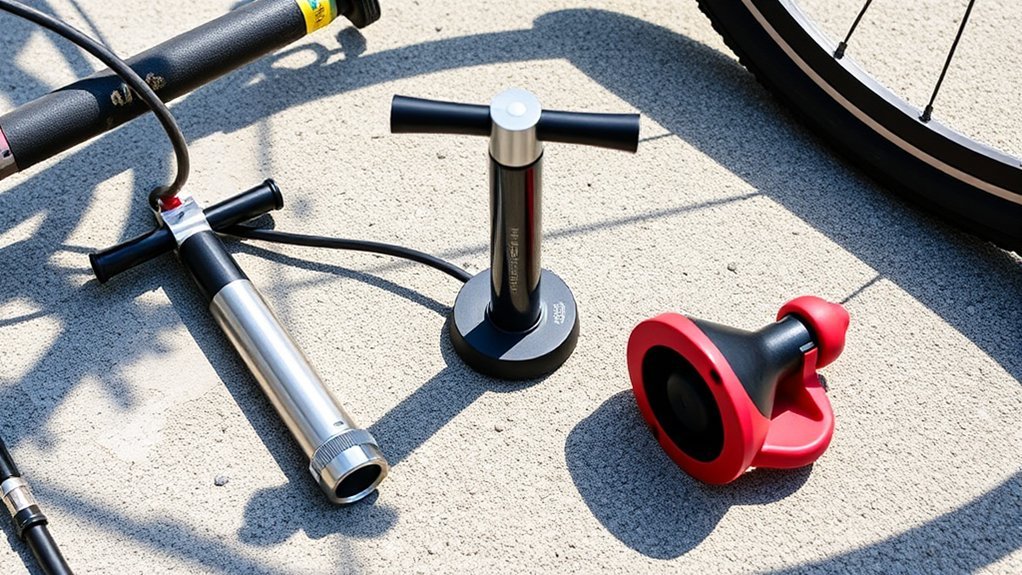
Compare pumping effort, air volume, pressure capability, stability, and storage size before choosing a manual inflator. Maximum PSI alone does not tell you how quickly a pump will fill a large tire.
| Pump type | Best use | Main advantage | Main limitation |
|---|---|---|---|
| Hand or frame pump | Bicycles and compact emergency kits | Easy to store and carry | Can be tiring on high-volume tires |
| Floor pump | Home use, bicycles, and car top-ups when compatible | Stable base and efficient full strokes | Too bulky for some vehicles or packs |
| Foot pump | Vehicle top-ups and trunk storage | Uses leg force and body weight | Quality and stability vary widely |
| Mini bellows pump | Light backup and small pressure corrections | Very compact | Usually slow on car, SUV, or truck tires |
Pumping Effort
Hand pumps use repeated upper-body movement. Floor pumps let you brace the base with your feet and use both arms. Foot pumps shift the effort to your legs. Choose a design you can operate without losing balance, straining, or kneeling close to traffic.
Inflation Speed
Inflation speed depends on the pump’s air displacement per stroke, tire volume, starting pressure, hose restriction, seal quality, and your pace. High-pressure bicycle pumps may reach a high PSI but move less air per stroke, while high-volume pumps can fill larger tires more efficiently.
Portability and Storage
A compact pump is useful only if it can actually reach the required pressure and connect to the valve. Store it where you can access it without unloading the entire trunk, and protect the hose and gauge from crushing, moisture, and dirt.
How Manual Inflators Work
A manual tire inflator uses a piston, diaphragm, or bellows to draw air into a chamber and compress it. A one-way valve directs that compressed air toward the tire instead of allowing it to return through the pump.
The pump must create slightly more pressure than the tire already contains before air can flow into it. That is why pumping usually becomes harder as tire pressure rises.
A tight connection matters because a leaking pump head wastes air and effort. Some pumps include a built-in gauge, while others require a separate gauge. Even with a built-in gauge, an occasional comparison with a trusted reference gauge can reveal a steady reading offset.
Pick the Right Manual Inflator for a Car, SUV, Truck, or Bike
Choose a pump based on the tire’s valve, required pressure, air volume, and the conditions in which you will use it. Do not choose by the largest advertised PSI number alone.
Pressure Rating
The pump’s listed maximum pressure must exceed the target pressure with a reasonable margin. Never operate the pump above its rating. A 150 PSI or 300 PSI label describes a pressure ceiling, not necessarily gauge accuracy, durability, or filling speed.
Air Volume per Stroke
Large car, SUV, truck, mountain-bike, and fat-bike tires benefit from a higher-volume pump. Narrow road-bike tires often need higher pressure but less total air, so a high-pressure pump may work better.
Valve Compatibility
Confirm that the pump head fits Schrader, Presta, Dunlop/Woods, or another valve used on your tire. The Park Tool valve guide explains the operating differences between common Schrader and Presta bicycle valves.
Gauge, Hose, and Base
Look for a readable gauge in the pressure range you use most, a hose long enough to reach without pulling sideways on the valve, a secure chuck, and a base that remains stable under load. Replace a pump with a cracked hose, damaged fitting, sticking mechanism, or gauge that changes unpredictably.
| Tire use | Useful pump features |
|---|---|
| Road bicycle | High-pressure capability, precise gauge, Presta-compatible head |
| Mountain or fat bike | High-volume barrel, low-pressure gauge readability, correct valve head |
| Car or SUV | Stable base, larger air volume, Schrader chuck, durable hose, readable gauge |
| Light truck | Adequate pressure rating, high air volume, strong fittings, manageable operating effort |
What to Expect: Inflation Time and Maximum Pressure
Manual inflation time varies too much for one reliable estimate. A small pressure correction may take only several minutes, while a nearly flat high-volume tire can require a long period of pumping and may exceed what a compact pump or user can manage safely.
Stop if the pump becomes unstable, the hose swells, a fitting leaks badly, the gauge behaves erratically, or the required pressure is outside the pump’s rating. A tool that can technically reach the target may still be too slow or strenuous for practical roadside use.
Check tire pressure at least once a month and before long trips. A tire-pressure monitoring system is a warning system, not a replacement for checking with a gauge.
The U.S. Tire Manufacturers Association recommends checking pressure monthly, before long trips, and before carrying heavy loads or towing. It also notes that many TPMS warnings do not appear until a tire is already significantly underinflated.
Common Problems and Fast Fixes
Most manual inflation problems come from an incorrect valve head, a poor seal, a damaged gasket, a blocked or kinked hose, a loose valve core, a faulty gauge, or a tire leak.
Air Hisses at the Connection
Remove the pump head, confirm that you are using the correct valve setting, and reconnect it straight. Check the rubber seal inside the chuck for dirt, wear, or cracking. A brief hiss during attachment or removal is normal; steady hissing is not.
The Pump Is Extremely Hard to Operate
Pressure naturally increases resistance, but sudden or excessive resistance may mean the hose is kinked, the pump head is blocking the valve, a Presta tip is still closed, or an internal pump part is sticking. Stop and inspect the setup instead of forcing it.
The Gauge Reading Jumps or Looks Wrong
Stop pumping and compare the reading with a separate gauge. Make sure the gauge range suits the tire; a gauge designed for very high pressure may be difficult to read accurately at low bicycle pressures.
Pressure Drops After Inflation
Apply soapy water to the valve, pump connection, tread, and accessible bead area, then watch for growing bubbles. A continuing leak may come from a puncture, loose valve core, damaged valve stem, wheel corrosion, or bead problem. Do not rely on repeated inflation instead of repair.
The Tire Will Not Take Air
Check that the valve is open, the pump head is compatible, and the tire bead is seated. Some tubeless bicycle setups need a rapid burst of high-volume air to seat the bead, which a small manual pump may not provide. An automotive tire bead that is off the rim should be handled by a tire professional.
Roadside Safety and Best Practices
Move to a parking area, service area, side road, or another place separated from traffic whenever possible. Turn on hazard lights, secure the vehicle against movement, and keep people away from moving traffic.
Roadside procedures and warning-device rules differ by country and road type. Do not walk into a live lane or stand between the vehicle and approaching traffic to place equipment. On a high-speed road, a manual top-up is rarely worth prolonged exposure.
Warning: If you cannot reach a place of relative safety, cannot exit away from traffic, or would need to work beside a live lane, keep yourself and passengers protected according to local emergency guidance and call the appropriate emergency or roadside service.
The U.S. Army Combat Readiness Center advises drivers to pull as far from traffic as possible, use hazard lights and visibility equipment, exit on the side away from traffic when safe, and call for professional help when the work would expose them to traffic.
After inflation, check the final pressure, replace the valve cap, inspect the tire again, and drive cautiously. If the tire was severely low, suffered impact damage, or loses pressure again, have it inspected before continuing a long trip or high-speed driving.
When to Use a Manual Inflator and When to Switch to Electric
Use a manual pump for small pressure corrections, bicycle tires, routine checks, camping use, and power-free backup. It is especially useful when compact storage and long shelf life matter more than speed.
Choose a portable electric inflator or compressor when the tire is large, very low, or needs frequent adjustment; when several tires need air; when physical effort is a concern; or when reducing time beside the road improves safety.
- Manual pump: Best for small corrections and backup.
- Portable electric inflator: Best for routine vehicle use and faster top-ups.
- Workshop compressor: Best for repeated high-volume service and some bead-seating tasks when used by trained operators.
- Roadside or tire professional: Best when the tire is damaged, repeatedly leaking, off the rim, or unsafe to reach.
How to Maintain and Store a Manual Tire Inflator
After use, wipe dirt and moisture from the pump, hose, and valve head. Coil the hose loosely so it does not kink, and protect the gauge face from impacts.
- Inspect rubber seals, threads, clamps, and hose ends for wear.
- Test the pump periodically on a known-good tire instead of waiting for an emergency.
- Compare the built-in gauge with a trusted gauge from time to time.
- Lubricate moving parts only when the pump manufacturer recommends a specific method and lubricant.
- Store adapters, valve caps, and the gauge together in a dry pouch or case.
Frequently Asked Questions
What are the different types of tire inflators?
Common options include hand pumps, floor pumps, foot pumps, bellows-style pumps, portable electric inflators, workshop compressors, and single-use or refillable CO2 inflators. They differ in speed, effort, air volume, pressure capability, power needs, and portability.
How do you use a manual tire inflator?
Inspect the tire, find the correct pressure, remove the valve cap, attach the correct pump head firmly, and pump with controlled strokes. Stop often to read the gauge, remove the head at the target pressure, recheck, and replace the cap.
Can a hand pump inflate a car tire?
Yes, a compatible hand or floor pump can add air to a car tire if it fits the Schrader valve and reaches the required pressure. It works best for small top-ups. Restoring a large or nearly flat tire may take too much time and effort.
Can you use a bicycle pump on a car tire?
You can if the pump fits a Schrader valve, has enough pressure capacity, and is sturdy enough for the job. A high-pressure, low-volume bicycle pump may be slow because a car tire needs much more air per PSI increase.
How do you choose the right manual inflator?
Match the pump to the valve type, required pressure, tire volume, storage space, and your physical ability. Favor a stable base, durable hose, secure chuck, readable gauge, and readily available replacement seals or parts.
Is a 150 PSI or 300 PSI inflator better?
Neither is automatically better. The pump only needs a rating safely above your target pressure. Air volume per stroke, gauge readability, hose quality, stability, and durability often matter more than an unusually high maximum-PSI claim.
How long does a manual tire inflator take?
There is no universal time. It depends on tire volume, starting pressure, pump displacement, seal quality, temperature, and user effort. Small top-ups may take several minutes, while a very low vehicle tire may take much longer or be impractical with a compact pump.
Why does the tire lose pressure again after pumping?
The tire may have a puncture, leaking valve core, damaged valve stem, wheel or bead leak, or structural damage. Use soapy water to look for bubbles where accessible, then arrange a proper inspection and repair instead of repeatedly adding air.
Safety Disclaimer: This article provides general information and does not replace the vehicle owner’s manual, tire and wheel manufacturer instructions, pump manual, local roadside rules, or professional service. Stop and seek qualified help when tire damage, traffic, weather, lighting, or tool limits make inflation unsafe.
Conclusion
A manual tire inflator is a useful backup for bicycles and small vehicle-tire top-ups when power is unavailable. Inspect the tire first, use the correct cold pressure, connect the pump head securely, and check the gauge often.
Choose a hand or floor pump for portability and control, a foot pump when leg-powered operation is more comfortable, and a compact bellows pump for light backup use. Switch to an electric compressor or professional service when the tire is large, very low, damaged, repeatedly leaking, or unsafe to reach.
Store the pump, gauge, adapters, valve caps, and visibility gear together, and test them before you need them. A simple equipment check can turn a stressful low-tire warning into a safer, more manageable problem.
Sources
- National Highway Traffic Safety Administration: TireWise — vehicle placard pressure, cold-tire checks, TPMS limits, and tire-damage inspection.
- U.S. Tire Manufacturers Association: Tire Care Essentials — monthly checks, long-trip checks, cold pressure, loads, towing, and TPMS guidance.
- Tire Industry Association: Tire Inflation Pressure — pressure-checking procedure and vehicle placard guidance.
- U.S. Army Combat Readiness Center: Roadside Assistance Safety — visibility, traffic exposure, safe exit, and professional-help guidance.
- Schwalbe: Bicycle Tire Inflation Pressure — bicycle pressure ranges, load factors, and gauge use.
- Park Tool: Tire and Tube Valve Guide — Schrader and Presta valve operation and compatibility.

1 thought on “Manual Tire Inflators: Types, How They Work, and When to Use Them”