
Clean the valve stem, check for cracks or a loose core, and identify Schrader or Presta. Align the inflator chuck straight with the stem, push firmly and twist to lock the connector, and confirm O‑rings are intact. Hold the chuck steady, then perform a 15‑second pressure check and use a soap solution at the connection to spot bubbles. If you see leakage, reseat the chuck or replace worn seals; keep a right‑angle chuck and spare O‑rings handy to learn more techniques.
Prepare the Valve: Clean, Inspect, Identify Schrader/Presta/TPMS

Before you attach the inflator, wipe the valve stem with a dry cloth, inspect it for cracks, bent threads, or loose cores, and confirm whether it’s a Schrader or Presta (and compatible with TPMS on vehicles); then press the chuck or proper adapter firmly so it seats squarely and forms an airtight seal. Start by cleaning the valve stem to remove dirt that can block a seal. Next, inspect the valve for corrosion, split rubber, or loose cores—any defect risks a leak or TPMS fault. Identify whether you have Presta valves or a Schrader valve: Presta valves require a different adapter and careful handling; Schrader valve bodies are stouter and match automotive fittings. For vehicles with TPMS, verify stem compatibility to prevent sensor damage. If you find damage, replace the valve core or stem before inflating. These steps free you from repeated leaks, keep pressure accurate, and protect sensors—so you control the road, not recurring flats.
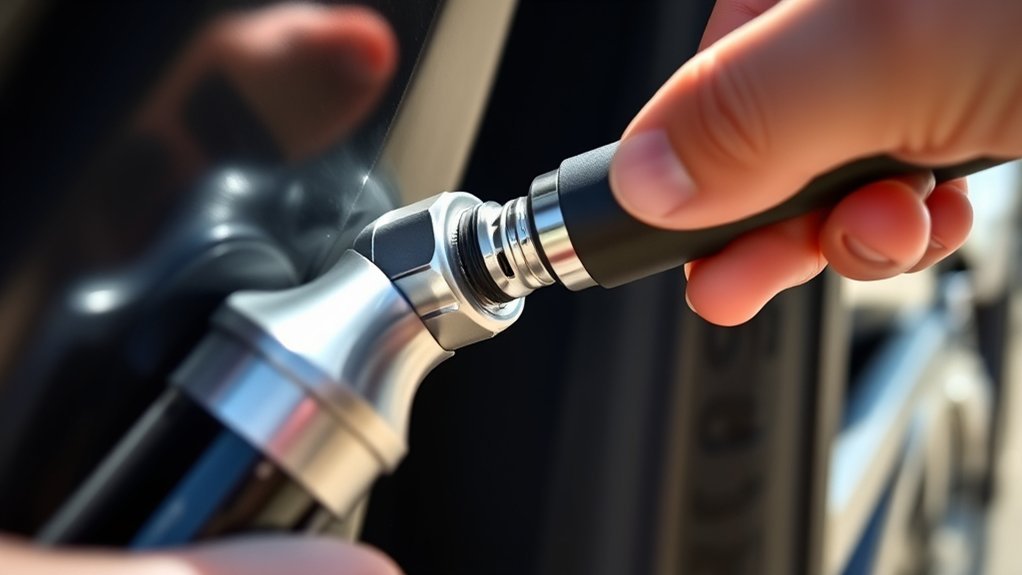
Attach the Inflator: Angle, Push, Twist, Lock for a Leak‑Free Seal
Place the chuck straight onto the valve stem so it’s fully aligned with the axis of the stem. Push firmly while giving a slight twist to engage the locking mechanism and create a tight seal. Use a locking chuck or right-angle head and check O-rings for wear if you can’t get a leak‑free connection.
Align Chuck With Stem
Start by lining the inflator’s chuck squarely with the valve stem so it seats evenly; push firmly while giving a slight twist to help the rubber seal conform, then engage the lock (if present) to secure the connection and prevent air escape. You’ll hold the air chuck aligned to avoid angled contact that causes leaks or damage. Press until you feel resistance and the seal compress around the stem; a confident, steady push beats wavering force. The slight twist helps the rubber sit flush, improving tire pressure retention while you monitor the gauge. Inspect the chuck and valve stem for cuts, debris, or hardening before use; replace worn parts. Secure alignment and a clean seal let you control inflation and reclaim mobility without compromise.
Twist And Lock Tight
With the chuck aligned and seated, angle it square to the valve stem, push firmly until it fully engages, then twist clockwise to lock the fitting onto the stem. You’ll feel the mechanism seat; don’t stop halfway. Maintain that angle, apply steady pressure, and complete the twist until the chuck won’t rotate further. Gently pull the inflator to confirm it’s secure — if it shifts, repeat the push-and-twist. Listen and feel for air; a sealed connection will be silent and stable. Inspect the rubber seals on the chuck regularly and replace them if they’re cracked or flattened, because worn seals betray freedom with slow leaks. Practice this disciplined motion until connecting becomes fast, confident, and reliably leak-free.
Confirm the Seal: 15‑Second Pressure Test and Soap Bubble Check
Although a tight connection usually seals immediately, you should still perform a 15-second pressure test to confirm there’s no major leak before inflating fully; if the gauge shows no pressure build, you likely have a significant leak at the connection. Start with the inflator securely attached to the valve stem and observe the pressure gauge for 15 seconds without adding air. If pressure rises, proceed. If not, stop and recheck the connection.
Next, pressurize briefly and apply a soap solution to the connection point and surrounding valve stem base. Watch for bubbles: large bubbles mean a major leak, small steady bubbles indicate a slow leak. Mark any leak sites and release pressure before adjustments.
Remember: over 80% of leaks happen at connections. Troubleshoot external fittings first, and keep rubber parts maintained so seals stay elastic. Confirming the seal fast preserves your freedom to move—don’t skip it.
Fix Common Failures: Chuck Fit, Worn O‑Rings, Tight or Inward Dually Stems
Make sure the chuck is seated squarely and aligned with the valve stem before you open the air — a crooked or loose chuck is the most common cause of leaks on inward‑pointing dually stems. Inspect and replace any cracked or flattened O‑rings and grommets at the chuck and hose fittings, since worn seals cause roughly 80% of connection failures. If alignment is difficult, use a right‑angle or locking‑head chuck and recheck with a soap‑bubble test.
[Products Worth Considering]

QUICK-CONNECT: Patented 90 degree self-locking nozzle instantly locks on to the tire valve stem with a simple push, providing a secure, air-tight seal every time (for standard vehicle Schrader valves)

AIR-TIGHT SEAL: Patented, self-locking quick-connect nozzle ensure a rapid & secure seal – no more air leaks or fighting with your tire valve stem.

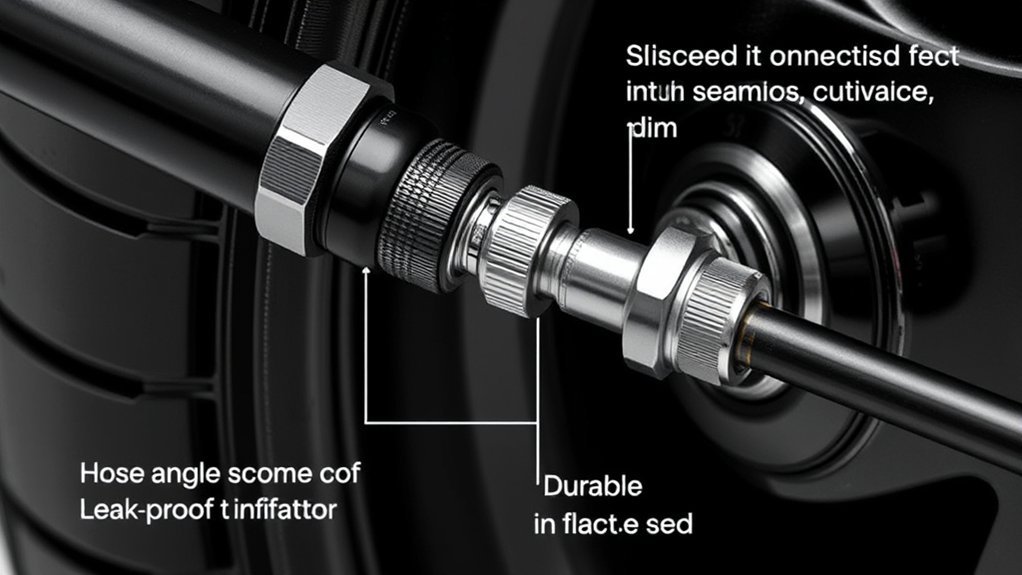
High Quality Material: The car tire valve inflation hose connector is crafted from high-quality copper and zinc alloy materials. Copper offers great durability, maintaining great performance even with prolonged use; zinc alloy enhances overall structural strength, withstanding daily impacts and friction while resisting deformation or damage under complex conditions.
Chuck Seating And Alignment
If the chuck isn’t seated and aligned correctly, you’ll lose air and waste time—so inspect the fit, check O‑rings, and adapt for awkward stems before inflating. Position the air hose straight behind the valve stem; don’t approach at an angle that forces the chuck off-center. Firmly press the chuck onto the valve without twisting; hear or feel the click that indicates seating. For inward or dually stems, switch to a right‑angle or extended chuck to maintain straight alignment. Tighten the valve stem nut if it’s loose to secure the interface. After seating, apply a soap bubble solution around the connection to detect sealing failures immediately. If you find leaks, reseat the chuck, reposition the hose, or change chucks until the seal holds.
Replace Worn O‑Rings
Once you’ve confirmed the chuck seats properly, inspect the O‑ring at the chuck’s base and on any quick‑connect fittings—rubber degrades and will let air escape. Remove the chuck, wipe fittings, and visually check for cracks, flattening, or glazing on O-rings; these defects cause air loss and compromise sealing. Replace O-rings every 12–18 months or immediately if damaged. Use correctly sized replacements and lubricate lightly with silicone grease for a smooth seal. Reattach the chuck, test on the valve stem, and engage any locking mechanism air chuck for stubborn or inward dually stems to improve sealing. Tighten valve stem nuts and retest with a soap bubble test. If bubbles appear, reseat or replace components until you achieve a clean, leak-free connection.
Use Adapters and Extensions Safely (When To : and When Not To)
When you need better access or a more secure connection, use screw-on Schrader (.305-32) valve stem adapters and flexible extensions to reduce air loss and fatigue during multiple inflations. Fit the adapter to the valve stem, hand-tighten the nut, then attach the inflator hose to the adapter. Check for an immediate pressure drop; if you see one, re-seat threads and retest. Use flexible valve extensions when the stem is recessed or obstructed so you can work freely without forcing the hose.
Do not leave valve extensions fitted while driving — they can alter wheel dynamics and balance and threaten safety. Only use adapters and extensions that match Schrader .305-32 threads; mismatched parts invite leaks and false readings. Inspect nuts, connections, and the hose before each session; replace worn adapters or corroded fittings. By choosing compatible components and routine checks, you keep inflation efficient, minimize air loss, and maintain control over your tires and movement toward freedom.
[Products Worth Considering]
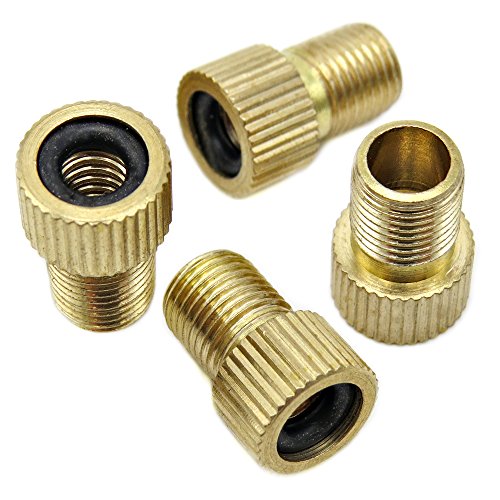
Effortless Conversion: Easily convert Presta valves to Schrader valves for universal compatibility with standard pumps and air compressors.
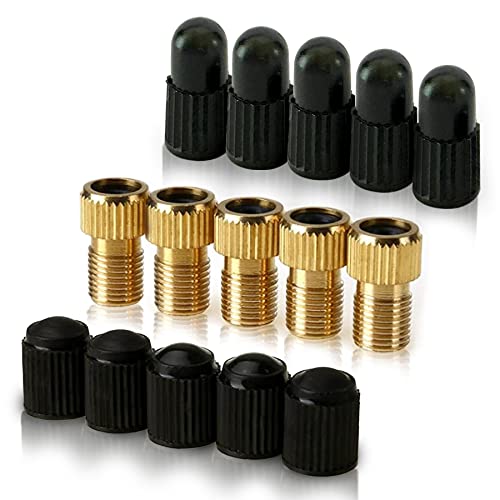
UNIVERSAL FITMENT: This Shrader valve tool conveniently converts your bicycles or e-scooter Presta valve to Schrader, allowing you to inflate tires using a standard pump or air compressor. Be prepared! This five-set offers peace of mind whilst cycling long and short distances. Universal fitment for all bike tires with Presta valves including kids and adult mountain bike, drift trike, electric bicycles, electric moped, and electric motorbike.

This is a simple bicycle tool that converts any Presta valve to a Schrader valve.
Pack a Fast‑Fix Tire Kit: Spare O‑Rings, Right‑Angle Chuck, Short Hose
Having the right spare parts and fittings on hand speeds up repairs and keeps you from fighting a stubborn connection at the roadside. Pack spare O-rings in several sizes and check them every 12–18 months; swap brittle rings immediately to stop leaks at the valve stem and between fittings. Carry a right-angle chuck to reach tight valve stem positions without straining the inflator or bending the hose. Add a short hose to reduce connection points and lower leak risk during inflation.
- spare O-rings: assorted sizes, inspect and replace annually
- right-angle chuck: improves access, reduces stress on connections
- short hose: minimizes joints, lowers chance of air loss
When you inspect your kit, test the chuck and short hose for wear, replace cracked rubber, and practice quick swaps so roadside repairs are fast and decisive. This setup gives you freedom from roadside delays and control over a reliable seal every time.
[Products Worth Considering]

8V1 AIR ADAPTER: Patented lock-on tire inflator attachment instantly converts screw-on, clip-on, snap-on, thumb lock, and 1/4 inch NPT air compressor nozzles to a quick-connect air chuck.

【360° ROTATING TIRE CHUCK】LUMITECO tire inflation hose with swivel tire chuck features more flexibility for a hassle-free inflation process, ensuring you can inflate with ease from any angle. No more struggling to position your portable air compressor, just adjust the air chuck and inflate.

QUICK-CONNECT: Patented 90 degree self-locking nozzle instantly locks on to the tire valve stem with a simple push, providing a secure, air-tight seal every time (for standard vehicle Schrader valves)
Frequently Asked Questions
How to Stop Air Leak Around Valve Stem?
Tighten the valve stem nut, clean the stem, and replace worn O-rings to stop air leak around valve stem; use proper sealing methods, perform regular valve stem maintenance, and do air pressure checks as tire inflation tips.
How to Fix Air Leaking Around Valve Stem Tubeless?
Clean the valve stem, deflate, replace worn seals or core, apply sealing techniques (soapy test, sealant), reinstall and inflate to proper air pressure, tighten cap or use locking chuck, and keep tire maintenance regular.
Why Did My Valve Stem Start Leaking?
Oh great — your valve stem started leaking because aging valve stem materials failed; inspect for worn rubber, corrosion, loose nuts, or debris. Follow tire maintenance tips, use pressure monitoring solutions, and replace faulty parts promptly.
Can a Tire Hold Air Without a Valve Stem?
No — a tire can’t hold air without a valve stem. You’ll need valve stem replacement, follow tire maintenance tips, use tire sealing solutions as needed, and practice regular air pressure monitoring to reclaim safe, liberated mobility.
Conclusion
You’re about to heroically wrestle air into a tire without turning the valve stem into a sprinkler. Clean and check the stem — Schrader, Presta or TPMS — then angle, push, twist and lock the chuck like snapping a stubborn jar lid. Hold for 15 seconds, watch for bubbles, swap O‑rings or use the right adapter if it hisses. Pack spares and a short hose; your inflator shouldn’t stage a mid‑ride betrayal.


Leave a Reply