

You can use your inflator’s LED to create a focused work cone that lights the valve, stem, gauge, and immediate ground so you attach the hose quickly and accurately. The beam reduces guesswork, highlights trip hazards, and helps you maintain stable footing and posture. Conserve inflator battery by pairing it with vehicle power or a headlamp for longer jobs. Keep scanning for traffic cues and do a quick 360° check between cycles — more practical techniques follow.
How the Inflator LED Improves Nighttime Visibility
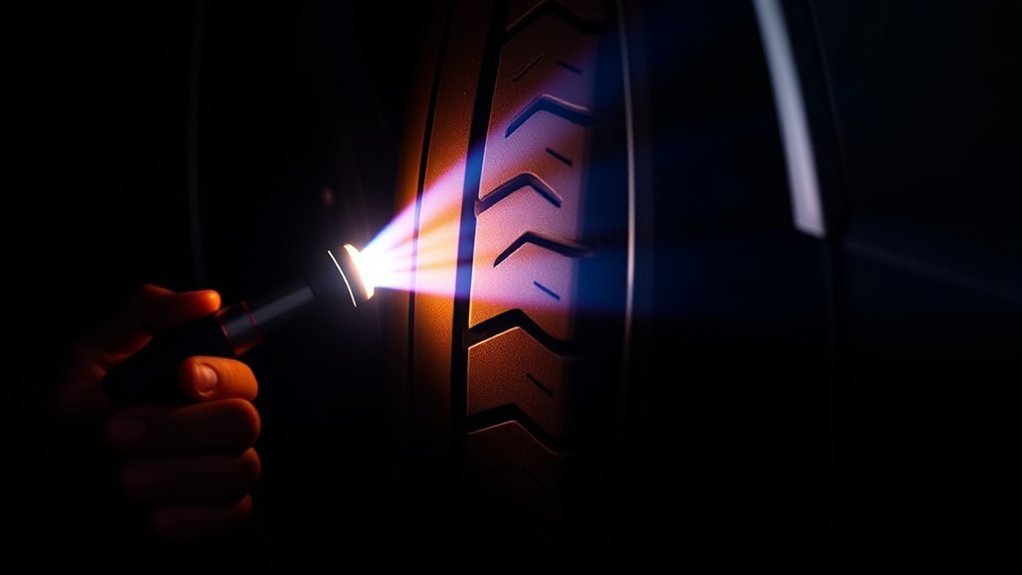
Because you need a clear, focused view when changing a tire at night, the inflator’s built-in LED delivers a concentrated beam that lights the valve, valve stem, and immediate work area so you can attach the hose and check fittings without fumbling. You’ll rely less on weak dome lights or a phone flashlight; the LED, tire inflator provides targeted illumination that removes guesswork. With a defined light source you’ll see the hose seating, clamp engagement, and any debris that could compromise a seal. That clarity reduces slips, misthreads, and repeated attempts that waste time and sap autonomy. The integrated work light also reveals ground conditions, helping you set the unit on stable footing and avoid equipment instability. Finally, regular “Look Up” checks every 10–15 seconds become effective because the beam maintains situational awareness around the wheel, letting you manage risks proactively and keep moving with control and confidence.
[Products Worth Considering]

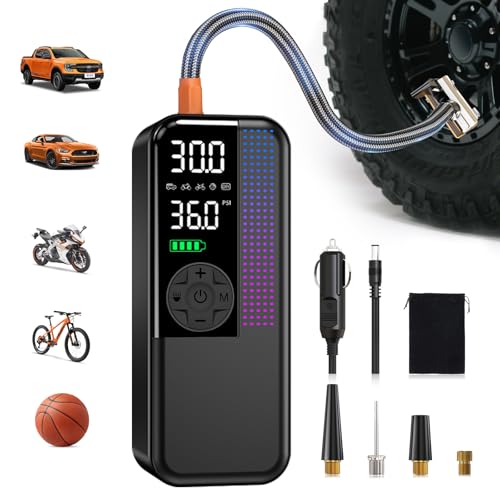
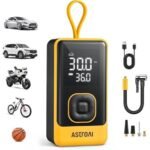
ADVANCED TRUEGAUGE SCREEN: This battery tire inflator includes updated sensor technology, capable of collecting pressure data from tire inflators at a frequency of 200 times per second. Its valid data rate is higher than 80%, which is 60% better than the market average. From routine maintenance to roadside emergencies, its accurate readings ensure confident pressure checks and a safer driving experience.Suitable as a Father's Day gift for your dad.

Please Note: This product must be powered by a 12V DC Cigarette Lighter to function properly, and ensure the vehicle is in a running state. And it equipped with a 9.8-foot cord, which can meet the usage needs of most regular-sized vehicles.

High-pressure inflation mode with automatic shutoff
Create a Cone of Visibility
With the inflator’s LED giving focused task lighting, you should now broaden your aim to create a cone of visibility that covers you, the vehicle, the tire, and the inflator. Establishing this cone during nighttime tire inflation prevents accidents and keeps you aware of approaching hazards. Turn on vehicle hazard lights to mark a broad perimeter; that external signal communicates your presence to traffic and secures space around your work area. Use a precision task light—headlamp or flashlight—directed at the valve so you can place the hose accurately without fumbling. Rely on the inflator’s built-in LED to illuminate the ground and immediate equipment, reducing trip risks and letting you inspect fittings and tools. Maintain alternating scans between the tire and surroundings to avoid tunnel vision and preserve situational awareness. This deliberate lighting geometry supports efficient, autonomous tire inflation while minimizing exposure to traffic and environmental danger.
Use the Inflator LED for Precise Connections
When you line up the inflator’s LED with the valve stem, you get a clear, shadow-free view that lets you attach the hose quickly and accurately even in low light. You’ll reduce fumbling and misalignment with a Portable Tire Inflator whose LED Light focuses on the valve and gauge. That precision cuts errors, speeds inflation, and keeps you in control.
| Benefit | Effect |
|---|---|
| Shadow-free view | Accurate hose seating |
| Gauge visibility | Correct pressure reading |
| Beacon function | Alerts passing traffic |
Use the LED to confirm the nozzle’s threads and hear the seal engage before you press start. Keep situational awareness—scan the tire perimeter for hazards while the light illuminates details. This habit protects you from cross-threading, air loss, and delayed departures. You’re asserting autonomy: reliable, efficient tire care that doesn’t wait for daylight. The LED-equipped Portable Tire Inflator is a compact tool that empowers safe, precise night-time maintenance.
[Products Worth Considering]

Advanced TrueGauge Display: This durable air pump is equipped with AstroAI's upgraded sensor technology, capable of collecting pressure data at a frequency of 200 times per second. The valid data is higher than 80%, 60% higher than the market average. This accurate display ensures safer driving no matter where you roam.

【EASY TO USE&AUTO SHUT OFF】:Plug Carsun portable air compressor power cable into the car's 12V power outlet, then press the inflation nozzle into the tire valve,set the pressure value required by the tire and press the switch to start inflating. The air compressor pump will automatically shut off when reaching desired tire pressure.

[Fast & Efficient Inflation] The OlarHike tire inflator features a high-performance motor that delivers rapid airflow—inflate a standard car tire (195/65 R15) from 30 to 35 PSI(+5 PSI) in just 55 seconds, or a larger SUV tire (235/65 R17) from 30 to 35 PSI(+5 PSI) in only 2.2 minutes. Ideal for cars, SUVs, light Pickup(Within 51 PSI), motorcycles, bicycles, and sports balls. Important Note: The unit can only inflate car/pickup truck tires up to 51 PSI
Light the Ground to Prevent Trips and Falls

Position the inflator’s LED to illuminate where you place your feet and the air hose to reduce missteps. Use the beam to highlight curbs, debris, or uneven ground so you can identify trip hazards before you move. Keeping your footing visible lets you perform a quick 360-degree scan and maintain stable posture while inflating tires.
[Products Worth Considering]

【Powerful Inflation】Delivers up to 150 PSI, inflating a 195/65 R15 tire from 30–36 PSI in under 1 minute—fast, reliable performance for roadside emergencies.

Please note that this product requires a 12V DC cigarette lighter to function properly, and the vehicle must be in a running state. (This product cannot be powered by battery.) It is equipped with a 9.8-foot cord, making it suitable for most regular-sized vehicles.AIRUN H features its cordless counterpart H2 Pro.
Tired of inflators that get too hot and shut down halfway? Ours won’t let you down. Thanks to a smart cooling design, this pump stays cool even during extended use. You can easily inflate 3 standard car tires (195/65 R15) on a full charge — no overheating, no stopping, just get the job done
Illuminate Ground Placement
Although night inflations often feel routine, you should always light the ground around the vehicle to prevent trips and falls; using the inflator’s built-in LED lets you inspect surface levelness, spot debris or uneven pavement, and confirm the hose path before you start. You rely on the LED light of your air pump to create a secure work zone, reducing the 42% risk tied to uneven surfaces. Scan for stability, mark hazards mentally, and position the hose to avoid tension. Good illumination preserves situational awareness and lets you read pressure gauges without fumbling.
- Verify ground level and firmness before connecting the hose.
- Clear loose debris within the lighted radius.
- Align the air pump to minimize hose crossing.
- Keep the LED facing the work area.
- Re-check lighting after any vehicle movement.
Highlight Trip Hazards
After lighting the ground around your vehicle to check level and hose routing, focus the inflator’s LED on likely trip zones so you can spot rocks, curbs, and stray tools before you move. You’ll reduce risk: 42% of equipment-related accidents stem from unstable ground, so targeted illumination directly lowers that exposure. Sweep the work area methodically, holding the LED to reveal uneven surfaces and debris that could catch your feet or snag the hose. With clear ground lighting you’ll set the inflator and route the hose confidently, avoiding last-minute adjustments that cause slips. This disciplined use of the LED light preserves mobility and autonomy—letting you complete inflation efficiently while staying alert to trip hazards and maintaining control.
Maintain Footing Visibility
When you light the ground around your vehicle with the inflator’s LED, you’ll spot uneven surfaces, loose debris, and hose obstructions that cause most equipment-related slips; use that focused illumination to confirm the area is level and stable before kneeling or setting the unit down. You’ll reduce the 42% risk tied to uneven footing by scanning the immediate perimeter and positioning the inflator on solid ground. LED visibility helps you align the hose, verify clear pathways, and detect small hazards you’d miss in low light. If temperatures dull display responsiveness, warm the screen area to maintain pressure-readout clarity. A deliberate, lit workspace frees you to act confidently and prevents avoidable trips.
- Scan perimeter for dips and loose objects
- Center inflator on solid ground
- Route hose along illuminated path
- Warm display for clear readings
- Re-scan after repositioning
Save Inflator Battery: When to Use LED, Headlamp, or Vehicle Power
If you’re working in low light, pick your lighting to protect the inflator’s battery and keep inflation efficient: rely on vehicle power for sustained inflation, use the inflator’s LED sparingly to conserve charge for multiple starts, and put on a headlamp when you need hands-free, targeted illumination. Check tire pressure goals, confirm the inflator battery level, then choose the power source that preserves mobility and control. Use vehicle power for long fills; switch to battery only for quick top-offs or when the vehicle outlet isn’t available. Wear a headlamp for focused, hands-free work and reserve the LED light for brief checks. Combine sources when safety demands redundancy, but prioritize the external power so the inflator stays ready.
| Choice | Emotional Aim |
|---|---|
| Vehicle power | Confidence |
| Headlamp | Autonomy |
| Inflator LED | Prudence |
| Combination | Security |
| Battery check | Liberation |
Check and Stabilize Your Workspace With the LED
Because poor footing causes nearly half of inflation accidents, use the inflator’s built-in LED to scan and level your workspace before you set anything down; the beam reveals dips, debris, and soft ground so you can reposition the vehicle, jack, or tools onto stable, even surfaces. You’ll confirm a stable workspace, reduce slips, and secure hose connections in low light. The LED light compensates when cold dulls LCD responsiveness, letting you check pressure and valve seating without guessing. Move until the beam shows a flat footprint for jacks and tool bags. Work deliberately: one reposition, one recheck.
- Illuminate the intended jack point and surrounding ground.
- Inspect for debris that could shift under load.
- Verify hose and valve alignment with the beam.
- Reassess after each vehicle adjustment.
- Prefer firm, level ground over marginal patches.
You’re reclaiming control of your environment: precise checks, clear vision, and deliberate placement cut risk and keep you mobile and free.
Stay Aware: The “Look Up” Drill and Traffic Cues
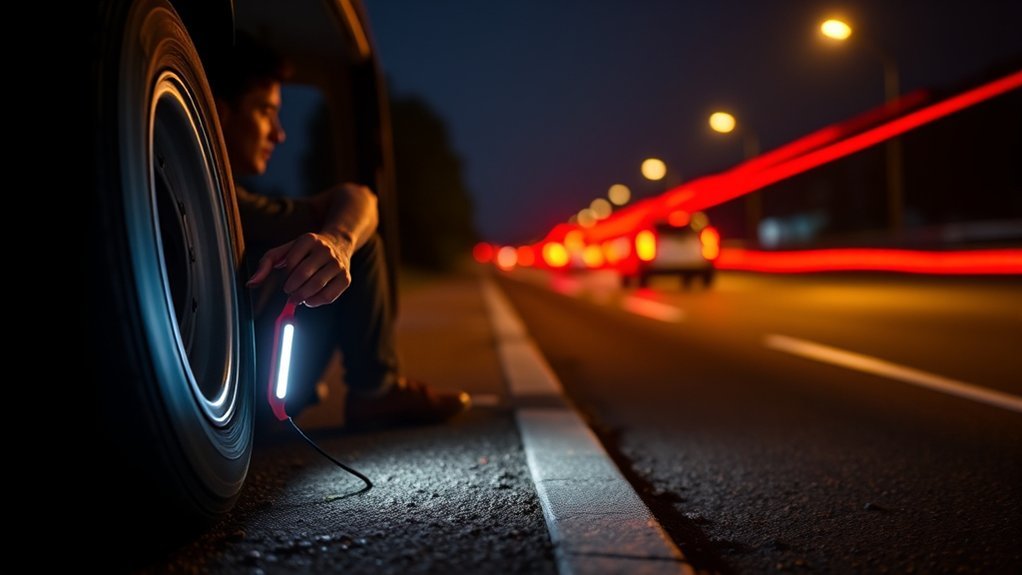
When you’re inflating a tire at night, look up every 10–15 seconds and perform a quick 360° scan to confirm your position relative to the roadway. Don’t rely on sound alone—your inflator can mask engine noise—so train yourself to recognize traffic cues like headlight patterns and rising engine pitch. Tell passengers to stay alert and report approaching vehicles so you can focus on the task without losing situational awareness.
Look Up Regularly
While you’re focused on the gauge and hose, make a point to look up every 10–15 seconds and scan a full 360 degrees; this simple rhythm keeps you aware of approaching traffic or other hazards that the inflator’s noise can hide. You’ll monitor tire pressure while staying liberated from tunnel vision: brief, regular scans let you detect vehicles, people, or obstacles before they become threats. The drill counters auditory masking from the inflator and enforces a habit that reduces reaction time. Make the scan methodical, note vectors of approach, and adjust your position or light to maximize visibility. Consistent practice increases confidence and preserves autonomy during nighttime roadside tasks.
- Start each cycle with a quick horizon sweep
- Check left and right vehicle lanes
- Verify rear and front approaches
- Note nearby reflective surfaces
- Reposition if sightlines are blocked
Traffic Sound Recognition
You’ve already established a steady rhythm of 10–15 second visual sweeps; now add focused listening to catch traffic cues the inflator can hide. While your Pump with LED lights the valve, air noise and motor whine mask engine approaches; you must parse sound layers. Briefly stop the pump to confirm directionality when you hear growth in volume, distinct engine tone, or tire-road rasp—these indicate an approaching vehicle or bike. Maintain 360-degree attention: rear, flank, and forward. If headlights puncture darkness or sound sharpens, pause inflation and relocate or signal for space. The Look Up drill plus disciplined auditory checks reduces risk for solo operators seeking freedom to travel safely at night. Trust hearing as a liberation tool.
Quick Safety Checklist: Gear, Positioning, Lighting, Post-Inflation Checks
Although night-time inflation adds risk, you can control most hazards by following a strict safety checklist: wear high-visibility reflective gear, park as far from the travel lane as possible with wheels turned away and hazards on, and set up a three-light hierarchy—vehicle hazards, a directed headlamp/flashlight at the valve, and the inflator’s built-in LED work lights—for clear, layered visibility. You’ll perform disciplined actions: position the vehicle to create a buffer, scan the scene every 10–15 seconds, and use lighting to preserve situational awareness while focusing on the tire.
Although night inflation increases risk, strict safety—reflective gear, off-road parking, and layered lighting—keeps you controlled and aware.
- Confirm reflective gear and secure footing; visibility equals agency.
- Position vehicle away from traffic, wheels turned outward, hazards engaged.
- Establish three-light hierarchy; illuminate valve, tread, and ground.
- Use the inflator’s digital pressure readout; verify target pressure twice.
- Complete a final 360° scan before remounting and driving.
This checklist reduces exposure, verifies accuracy, and restores control so you can move forward with confidence and freedom.
Frequently Asked Questions
What Are the Disadvantages of Tire Inflators?
You face battery unreliability, limited portability, high noise levels, frequent charging needs, poor nighttime visibility, and instability on uneven ground, which can elevate accident risk and hinder your freedom to handle emergencies confidently.
What Is the Most Reliable Tire Inflator?
“An ounce of prevention”: you’ll choose a high-capacity, portable options inflator with 10,000mAh battery, 12V input, automatic shut-off and digital gauges; you’ll trust rugged safety features for consistent, liberating roadside independence.
Does My Car Have to Be on to Use 12V for Tire Inflation?
You don’t have to keep the car on to use a 12v connection, but you should: prolonged use can drain the car battery, so start the engine to maintain power and avoid being stranded.
Does a Tyre Inflator Drain the Battery?
Yes — it can, but it depends: like a tide reclaiming sand, your battery capacity and inflator’s own battery determine drain; you’ll preserve freedom by using onboard charge or keeping the engine running during tire maintenance.
Conclusion
You’ve seen how a tiny inflator LED can turn a risky, dark task into a controlled one: its cone of light guides connections, lights the ground to stop trips, and helps you check gauges and traffic cues. Coincidentally, the same bulb that conserves battery also sharpens your awareness — so when you pause to tighten a chuck, you’re also pausing danger. Use the LED deliberately, position yourself, and finish with the quick safety checklist.


Leave a Reply