

A Presta valve is the slim, threaded valve found on high-pressure, lightweight bike wheels, especially road and performance rims. To use one, unscrew the small lock nut to let air in or out, attach a compatible pump head or adapter, and reseal it to hold pressure. Its narrow diameter preserves rim strength and allows precise inflation. Below, you’ll also find maintenance tips, differences from Schrader valves, and advice on extenders and removable cores for tubeless setups.
Quick Answer
- A Presta valve is a narrow (6 mm) threaded bicycle valve designed for high-pressure tires, commonly found on road and performance bikes.
- To inflate, remove the dust cap, unscrew the lock nut, tap the tip to break the seal, attach your pump, and inflate to the recommended pressure.
- You need a Presta-compatible pump or a Presta-to-Schrader adapter to add air.
- Some Presta valves have removable cores, which allow you to add sealant for tubeless tire setups.
- Compared to Schrader valves, Presta valves are lighter, thinner, and better suited for narrow, high-pressure rims.
What Is a Presta Valve, and Why Is It Used on Bikes?
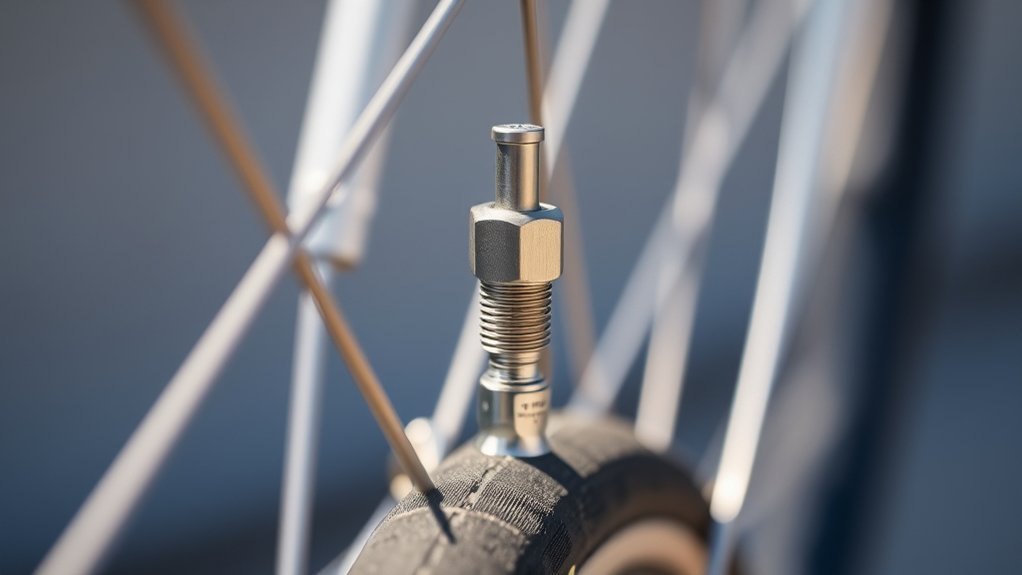
A Presta valve is a narrow, 6 mm-diameter valve invented by Frenchman Étienne Sclaverand. It was designed for high-pressure, lightweight bicycle wheels. You’ll find it on road bikes and high-end rigs because the slim valve body fits through smaller rim holes. That smaller hole preserves the strength of lightweight rims while supporting higher tire pressures, often up to around 8 bars.
The threaded stem and screw lock nut create a secure seal. Air pressure itself helps keep the valve closed. Some Presta valves have removable valve cores, which let you add sealant for tubeless setups or perform quick maintenance without swapping the entire tube.
Compared with Schrader valves, Presta valves are lighter and can speed up inflation. That matters when efficiency counts. Overall, the Presta valve optimizes rim integrity and tire pressure control, giving you a reliable, high-pressure solution built for performance riding.
Inflate and Deflate a Presta Valve (Tools & Quick Steps)
Inflating or deflating a Presta valve is quick once you know the steps. Remove the valve cap, unscrew the brass lock nut until it stops, and press the valve tip briefly to release any trapped air. Then attach the pump head. If your pump accepts both valve standards, you’re set. Otherwise, fit a Presta-to-Schrader adapter. Inflate to the recommended pressure, watching the gauge and feeling resistance. Detach the pump head, then screw the lock nut back down.
To deflate, fully unscrew the lock nut and press the tip gently to let air out slowly. Stop when you reach your target pressure. Reseal the lock nut and replace the valve cap.
For ongoing maintenance, keep the valve cap on when not in use. Check for leaks regularly, verify the lock nut turns smoothly, and replace the valve core or inner tube if air loss persists.
[Products Worth Considering]

Convert Presta to Schrader: Allows for a Schrader inflator, gauge or pump to be used with your bike's Presta valve tires
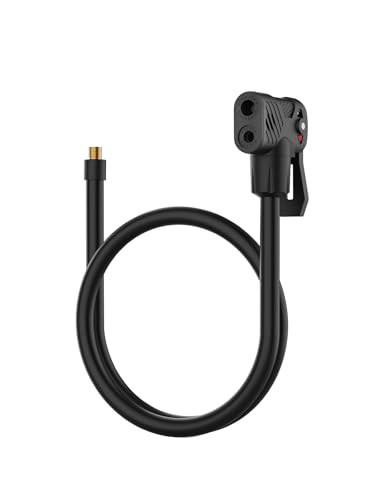
【UNIVERSAL VALVE COMPATIBILITY】Effortlessly switch between Presta and Schrader valves with dual independent nozzles. Perfect for cyclists using hybrid bikes or multiple tire types, this Presta Schrader valve adaptor ensures airtight seals without leaks. Its locking Presta/Schrader air chuck design guarantees stability during inflation, while the 20-inch hose offers flexibility for hard-to-reach valves. Works seamlessly with Presta valve pumps or Schrader-compatible inflators.

Material: This Presta valve adapter is crafted from high-quality solid brass for durability and strength. It features precision threads for a secure connection to the air pump and a rubber O-ring for a tight, leak-proof seal.
How Presta Valves Work (Parts, Sealing, Threaded Stem)
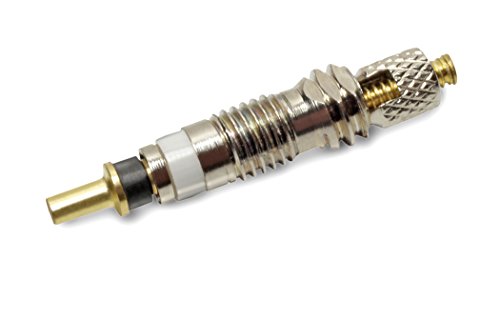
Look closely at a Presta valve and you’ll see a slim, threaded stem paired with a small brass lock nut. Together, they let air in and keep it sealed under pressure. Unscrewing that nut and pressing the valve tip opens the airflow.
The threaded stem and captive nut give you precise control over air flow. The valve’s 6 mm diameter lets it pass through narrow bicycle rims without weakening them. Presta valves rely on air pressure to keep the inner valve shut, so inflated tires stay sealed until you choose to deflate. Some cores are removable, which lets you add sealant for tubeless setups or perform quick repairs.
| Part | Function | Benefit |
|---|---|---|
| Threaded stem | Controls airflow | Precise inflation |
| Lock nut | Secures seal | Prevents leaks |
| Removable core | Serviceability | Tubeless-ready |
Unscrew the lock nut to inflate or deflate. Press the tip to release air gradually and safely.
Presta vs Schrader: When to Choose Each Valve Type

Both valves let you inflate a tire, but they suit different situations. Pick Presta for narrow, high-pressure road wheels and Schrader for wider, lower-pressure, or casual-use rims.
Lightweight bicycles and performance cycling benefit from the 6 mm Presta valve and its smaller rim hole. That design preserves rim strength and handles high-pressure tires (up to ~8 bars). Schrader valves, at 8 mm, suit mountain bikes, casual cycling, and budget bikes where ease of use and compatibility with standard pumps matter most. Schrader valves rely on a spring to seal.
Choose Presta for narrow, high-pressure road wheels; choose Schrader for wider, lower-pressure or casual-use rims and easy pumps.
- Performance cycling: Pick Presta valves for aerodynamic rims, high-pressure tires, and minimal rim hole weakening. Air pressure keeps the valve sealed.
- Mountain bikes and casual cycling: Choose Schrader valves for robustness, simple pumps, and lower typical pressures (2–3 bars).
- Mixed or commuter use: Convert or choose based on pump access and rim compatibility.
[Products Worth Considering]
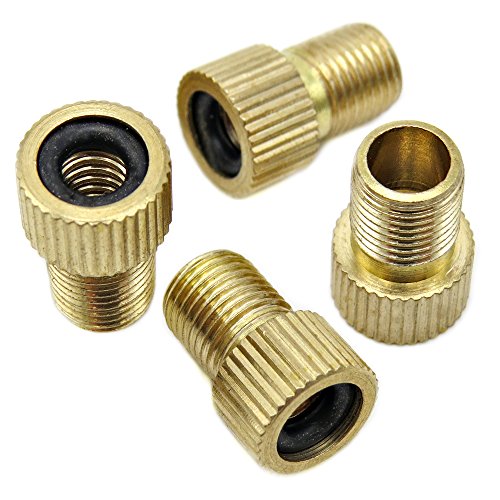
Effortless Conversion: Easily convert Presta valves to Schrader valves for universal compatibility with standard pumps and air compressors.

This is a simple bicycle tool that converts any Presta valve to a Schrader valve.
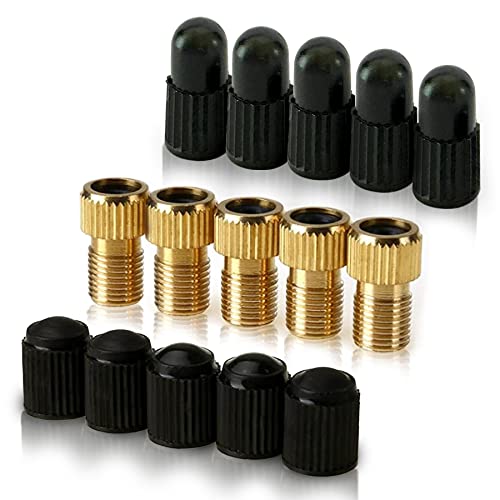
UNIVERSAL FITMENT: This Shrader valve tool conveniently converts your bicycles or e-scooter Presta valve to Schrader, allowing you to inflate tires using a standard pump or air compressor. Be prepared! This five-set offers peace of mind whilst cycling long and short distances. Universal fitment for all bike tires with Presta valves including kids and adult mountain bike, drift trike, electric bicycles, electric moped, and electric motorbike.
Maintaining and Troubleshooting Presta Valves (Cores, Extenders, Sealant)
Keep your Presta valves working by inspecting cores, extenders, and sealant regularly. Listen for hissing, check that the lock nut turns smoothly, and leave the dust cap on to keep grit out.
Removable cores let you add sealant into tubed or tubeless setups. Remove the core so sealant flows into the tire, then reinstall and tighten to prevent air loss. For deep rims, attach valve extenders to reach the pump easily. Verify threads and seating so you don’t strip the valve.
To troubleshoot leaks, isolate the valve first. Press the core briefly and listen for hissing. Swap in a known-good removable core or a new inner tube if needed. Keep the valve dust cap fitted whenever you’re not inflating, since debris can cause slow leaks. Use sealant to stop small punctures, but inspect after a ride and replace any components that show corrosion or persistent leaking.
[Products Worth Considering]

Included 2 Extensions, 2 Caps, 2 Presta Valve Cores, 2 Pcs heat-shrink tubings and a Core Removal Tool
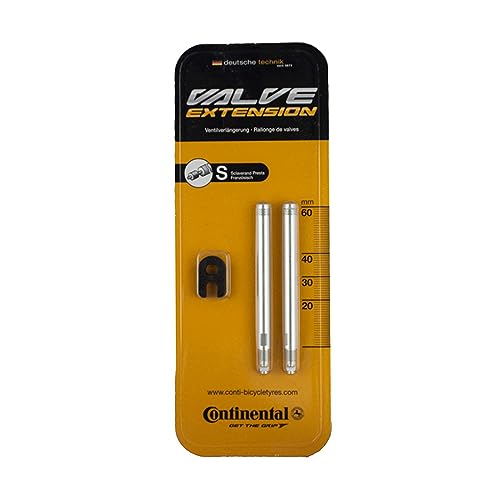
DURABLE AND STURDY: These valve cores are made of quality copper and nickel.
Choosing the Right Valve Stem Length
Presta valves come in different stem lengths, typically ranging from 32 mm to 80 mm. The right length depends on your rim depth. As a general rule, pick a valve stem that is at least 10–15 mm longer than your rim depth. This gives your pump head enough room to attach properly. If you ride deep-section aero wheels, you may need an 80 mm stem or a valve extender. Using a stem that’s too short will make inflation difficult or impossible.
Frequently Asked Questions
How Do You Put Air in a Presta Valve?
Remove the dust cap, unscrew the lock nut, and briefly press the tip to break the seal. Fit your pump (or use a Presta-to-Schrader adapter), pump to the recommended pressure, tighten the lock nut, and replace the cap. Check the valve periodically for leaks or stiffness.
What Is the Difference Between a Presta Valve and a Regular Valve?
Presta valves are slimmer (6 mm vs. 8 mm for Schrader) and handle higher pressures. They’re better for narrow rims because the smaller hole preserves rim strength. The trade-off is a slightly more fragile design that needs a compatible pump or adapter.
Do You Need a Special Pump for Presta Valves?
Yes. You need either a pump with a Presta-compatible head or a Presta-to-Schrader adapter. Many modern floor pumps include dual heads that work with both valve types. Check your pump’s compatibility before heading out.
How Does the Presta Valve Work?
The Presta valve uses a threaded lock nut instead of a spring. Unscrewing the nut and pressing the tip lets air flow in or out. When the nut is tightened, air pressure inside the tire keeps the valve sealed shut. This design gives precise control over inflation and holds pressure reliably.
Conclusion
Don’t ignore your Presta valve. Its slim, high-pressure design works well on road and gravel bikes, and the threaded stem provides a secure seal. Carry a small pump or adapter, know how to loosen the tiny lock nut, and inspect cores, extenders, and sealant periodically. Quick maintenance prevents flats and wasted rides. Learn basic troubleshooting, keep spare parts on hand, and you’ll stay rolling with minimal fuss.


Leave a Reply