

You should check cold tire pressures with a calibrated gauge, inflate each tire to the vehicle placard psi in short bursts, and reinstall valve caps to prevent leaks. Drive briefly to let the TPMS sensors and ECU update, then use the vehicle reset or menu command if the light stays on. If the warning persists, scan for sensor faults, low batteries, or wiring issues and address them. Continue for detailed reset, diagnostics, and seasonal tips.
Quick Fix: Inflate Tires and Clear the TPMS Light
If your TPMS light comes on, first inflate all tires to the manufacturer-recommended pressure (check the driver’s doorjamb or owner’s manual) — typically 35–36 psi — then drive a short distance so the system can relearn the updated pressures. You’ll check each tire, confirm uniform pressure, and use a calibrated gauge or inflator to reach 35–36 psi. Drive 5–10 minutes at moderate speed to allow the TPMS light to reset; the system needs motion and temperature stabilization to register new values. Remember temperature effects: expect roughly 1 psi loss per 10°F drop, so recheck when ambient conditions change. If the TPMS Light stays on after this procedure, inspect for a slow leak or a faulty sensor — don’t ignore it. Consult the owner’s manual for sensor reset steps specific to your vehicle. Act promptly and deliberately: this procedural routine preserves handling, safety, and your freedom to travel without unnecessary stops or risks.
How TPMS Works (And Why the Warning Matters)
You’ll compare direct sensors, which measure pressure at the wheel, with indirect systems that infer pressure from wheel-speed data and understand how each triggers the TPMS warning. You’ll learn common limitations and delays—sensor battery life, slow detection after gradual leaks, and false triggers from temperature shifts. Use that knowledge to prioritize immediate checks when the horseshoe warning appears rather than assuming it’s a transient fault.
Direct Vs Indirect Sensors
Think of TPMS as two different diagnostic approaches: direct systems mount pressure sensors on each wheel and report exact psi per tire, while indirect systems infer low pressure by comparing wheel rotational speeds from the ABS sensors. You’ll choose based on accuracy, maintenance, and control. Direct TPMS Sensors give real-time psi, faster fault isolation, and require sensor battery/service. Indirect systems need no wheel sensors, cut hardware cost, but can miss simultaneous losses and lag detection.
- Direct provides calibrated, per-wheel readings for targeted intervention.
- Indirect relies on algorithmic inference; calibration after tire changes is required.
- Sensor batteries last ~10 years; plan replacements during service.
- Indirect can’t measure absolute pressure; it flags relative differences.
- Both improve safety, handling, and fuel economy when used properly.
How Alerts Are Triggered
Because TPMS monitors pressure continuously, it triggers a warning when a tire falls about 25% below the vehicle’s recommended psi, alerting you to a condition that can impair safety and handling. You’ll see the light whether sensors are direct (mounted in each wheel) or indirect (using wheel-speed data). Temperature shifts can lower psi—roughly 1 psi per 10°F—so you’ll act fast when TPMS warns. When alerted, check each tire immediately with a gauge, correct to spec, and inspect for leaks or damage. Treat TPMS as a guard, not a substitute for routine checks. Act decisively to regain control and freedom on the road.
| Risk | Response |
|---|---|
| Loss of control | Inflate/check |
| Delay in action | Inspect/repair |
Limitations And Delays
The TPMS warning gets your attention, but the system has limits and can delay alerts. You shouldn’t rely on the TPMS warning light as your sole safety check. It notifies you after about a 25% pressure loss, can lag during gradual leaks, and may miss simultaneous losses across multiple tires. Temperature changes (≈1 psi drop per 10°F) can trigger or mask warnings. Sensor faults cause fluctuating or delayed alerts; address them promptly to avoid underinflation.
- Verify pressures manually with a calibrated gauge regularly.
- Inspect sensors if the TPMS warning light behaves erratically.
- Account for ambient temperature when setting pressures.
- Treat TPMS as an alert tool, not maintenance.
- Replace faulty sensors to restore reliable monitoring.
Tools You Need: Gauges, Inflators, and TPMS Readers
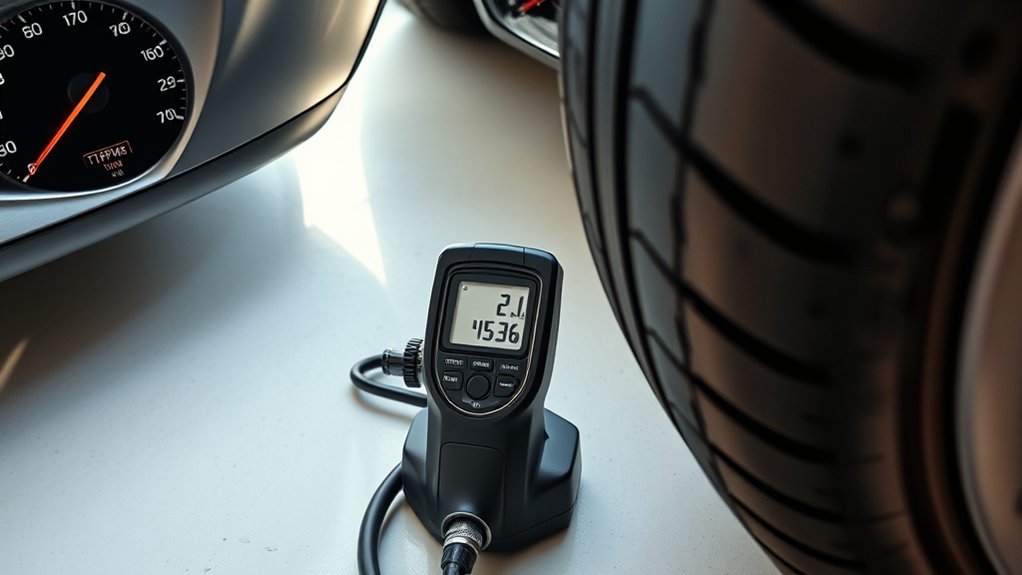
When you’re keeping tires at their recommended pressure, three tools are nonnegotiable: a quality tire pressure gauge, a reliable inflator (portable or workshop), and a TPMS reader for system diagnostics. You use a tire pressure gauge to get accurate PSI readings—typically around 35–36 psi per manufacturer specs—and you should check monthly and before long trips. Choose a calibrated, easy-to-read gauge (digital or dial) to reduce guesswork.
Select an inflator that matches your workflow: compact portable units for on-the-go fixes, or a shop-grade compressor for faster, consistent fills. Make certain the inflator has a precise pressure control and a leak-free chuck.
A TPMS reader gives you sensor IDs, battery status, and fault codes so you can isolate faulty sensors rather than chasing false warnings. Carrying these three tools frees you from dependence on service centers, lets you act immediately on low-pressure alerts, and preserves traction, tire life, and your autonomy on the road.
How to Check and Top Up Tire Pressure Step-by-Step
Start by checking each tire with a reliable pressure gauge and compare the reading to the recommended psi on your driver’s doorjamb or owner’s manual. If a tire is low, attach an air compressor or inflator and add air until the gauge reads the specified pressure, avoiding overinflation. Recheck each tire after inflating and drive briefly if the TPMS light stays on so the system can recalibrate.
Check Pressure With Gauge
1 simple tool — a reliable tire pressure gauge — lets you verify each tire’s pressure against the manufacturer’s recommendation (commonly 35–36 psi). When you check your tire, remove the valve cap, press the gauge firmly onto the stem, and read the value. Do every wheel, including the spare. Record readings and compare to the placard. If low, you’ll add air (covered later); avoid overinflation by checking frequently.
- Use a quality gauge (digital or dial) for consistent readings.
- Perform checks cold, before driving, for accurate baseline pressure.
- Note which tires deviate and by how much; document repairs or leaks.
- After adjustments, wait for the TPMS to update; drive briefly if needed.
- Inspect valve stems and caps for damage or corrosion.
Add Air To Specification
Begin by confirming the vehicle’s recommended psi on the door jamb or owner’s manual, then check each cold tire with your gauge; if a tire reads below spec, attach an air compressor or inflator to the valve stem and add air in short bursts, rechecking frequently until the gauge matches the specified pressure. You control safety and mobility by restoring correct Tire Pressure.
| Step | Action |
|---|---|
| 1 | Verify recommended psi (door jamb/manual) |
| 2 | Measure cold Tire Pressure with gauge |
| 3 | Add air in short bursts; recheck often |
| 4 | Drive briefly to allow TPMS reset |
Inflate to the specified psi, avoid overfilling, and repeat for all tires. Regular checks sustain efficiency, handling, and tire life—maintain autonomy by keeping pressure within spec.
Reset TPMS After Inflating Tires: Methods That Work

Although TPMS will often recalibrate itself after you inflate each tire to the manufacturer’s recommended pressure (commonly 35–36 psi), you’ll usually need to drive for 5–10 minutes for the sensors and ECU to register the change and extinguish the dashboard warning. You’ll confirm the system accepted the new pressures by watching the dash light; when it goes out, you’re done. If it stays on, recheck pressures and repeat driving. Some vehicles require a manual procedure or reset button—consult the owner’s manual, then execute the specified sequence.
- Inflate each tire to the exact recommended psi and tighten caps to prevent slow loss.
- Drive at normal speed for 5–10 minutes to allow sensor and ECU recalibration.
- Observe dashboard; verify TPMS indicator extinguishes to confirm success.
- If indicator persists, re-measure pressures with a calibrated gauge and adjust.
- Use the vehicle’s TPMS reset button or menu command if specified, following the manual.
Diagnosing Persistent TPMS Warnings: Sensors, Module, Antenna
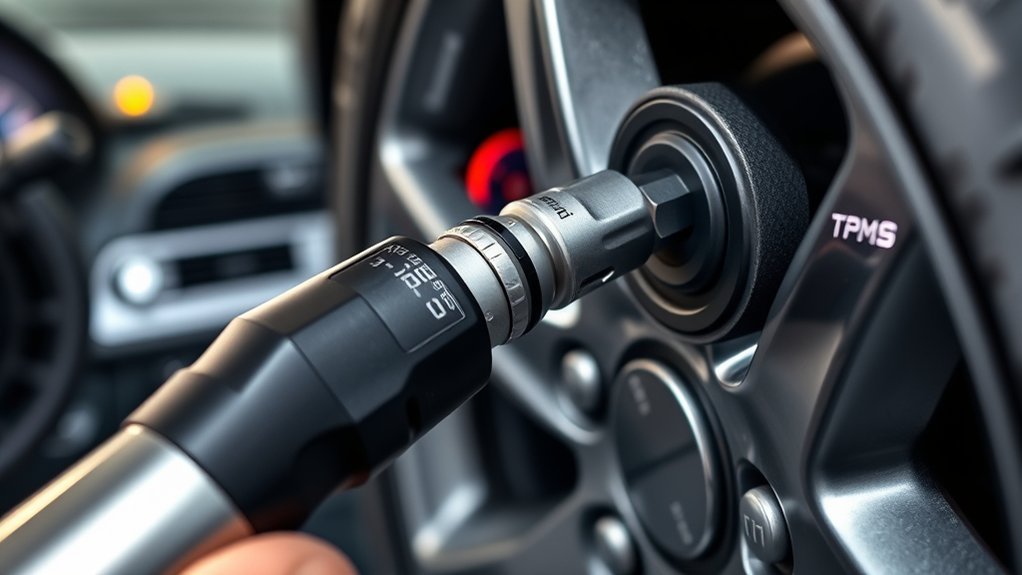
If the TPMS warning light stays on after you’ve inflated and driven, you’ll need to diagnose whether the problem is in the wheel sensors, the TPMS module, or the antenna/wiring that links them. Begin by visually inspecting each sensor area for damage or corrosion; sensor batteries typically last about 10 years, so note vehicle age and plan replacements if lifespan is exceeded. Next, check antenna connections and wiring for cuts, corrosion, or loose connectors between wheel wells and the module—repair or replace damaged harnesses to restore communication. Then assess the TPMS module itself: if wiring and sensors appear intact, module failure may be causing false warnings and will require bench testing or replacement. Use diagnostic tools to read TPMS-related faults and confirm which component reports errors, focusing your repair on that item. Maintain a routine inspection schedule, replace aging sensors proactively, and keep wiring secure to preserve system reliability and your mobility.
Reading TPMS Error Codes and Running a System Scan
Choose an OBD-II compatible TPMS scan tool that supports your vehicle’s protocols and sensor types, then connect it to the diagnostic port. Read and log the TPMS error codes, consult the code definitions to interpret whether the fault is a dead sensor, low battery, or communication/wiring issue, and prioritize repairs accordingly. While scanning, monitor live TPMS data (sensor IDs, pressure, temperature, and signal strength) to confirm sensor function and isolate intermittent faults.
Scan Tool Selection
When you need to diagnose TPMS issues, pick a scan tool that’s compatible with your vehicle and can read TPMS-specific error codes and run a full system scan; this lets you identify faulty sensors, low-pressure events, communication errors, and relearn/reset functions quickly. Choose a scan tool that supports your make/model, offers encrypted sensor ID reads, and can run both TPMS and broader diagnostic scans. Use it to verify sensor health, capture stored events, and perform resets after service so warnings don’t recur. Regular scans keep your system reliable and free you from dependency on dealers.
- Confirm vehicle compatibility and protocol support
- Verify TPMS-specific code reading capability
- Check full system scan and logging features
- Ascertain relearn/reset procedures are supported
- Prefer tools with firmware updates for future freedom
Interpreting TPMS Codes
Although TPMS codes look cryptic, you can quickly translate them into actionable diagnostics by running a full OBD-II TPMS scan and reading the specific alphanumeric codes. You’ll connect your scanner, initiate the TPMS module scan, and record any codes shown. Interpret common codes: C1181 indicates low tire pressure, C1182 flags a faulty sensor, and C1183 signals a communication error between sensor and ECU. Each code directs a different fix — inflate or inspect the tire for C1181, test or replace the sensor for C1182, and check wiring, antennae, or module connections for C1183. After you repair the root cause, clear the codes to reset the TPMS and confirm the warning won’t return. Regular scans free you from surprise failures.
Live Data Monitoring
After you clear codes and verify repairs, move on to live data monitoring to confirm sensors and the TPMS network are operating under real conditions. You’ll connect a scan tool, read TPMS error codes, and watch real-time sensor output to free yourself from guesswork. Follow a strict scan routine: capture baseline pressures, sensor IDs, battery status, and comms strength. Use codes to pinpoint dead batteries, damaged sensors, or network faults. Repeat scans after test drives to ascertain faults don’t recur. Live data monitoring speeds diagnosis, cuts downtime, and empowers you to maintain system integrity.
- Connect vendor-approved TPMS scanner and initiate full system scan
- Log sensor IDs, pressures, temperatures, battery voltages
- Interpret error codes to isolate sensor vs. network failures
- Test-drive and re-scan for intermittent faults
- Replace or reprogram faulty sensors, then verify with scan
Practical Fixes: Sensor Swap, Relearn Procedures, and Emulators (Safety Notes)
If you replace a failing TPMS sensor or its dead battery (typically around a 10‑year life), you’ll usually need to run the vehicle’s relearn so the ECU maps the new sensor IDs and stops false low‑pressure alerts; alternatively, a compatible TPMS emulator can be fitted to mimic sensor signals and avoid a costly module replacement, but you must verify emulator compatibility and continue scanning for TPMS error codes and wiring faults to maintain system accuracy and safety. Swap sensors one wheel at a time, record original IDs, and mount new sensors per torque and valve specifications. Use the manufacturer’s relearn procedure: tool-assisted ID programming or drive‑cycle relearn as specified in service literature. If you choose a TPMS emulator, confirm radio frequency, protocol, and connector fitment for your make/model before installation. After any change, run a full diagnostic scan, clear historic codes, and monitor live TPMS data for stability. Address wiring or grounding issues immediately—emulators and new sensors won’t mask electrical faults that compromise safety.
Seasonal Tips: Temperature Effects and Monthly Maintenance
When temperatures fall, expect tire pressure to drop roughly 1 psi for every 10°F change, so check and adjust pressures monthly during seasonal shifts; set them to the vehicle‑specified values (commonly 35–36 psi) when tires are cold, record readings, and repeat after any extended cold snap to prevent underinflation, excess wear, or TPMS warnings. You’ll perform monthly Tire Pressure inspections to maintain handling and efficiency. Use a calibrated gauge, inflate to spec with cold tires, and log values for trend analysis. If the TPMS lights activate after temperature swings, verify gauge readings before reacting; cold-induced drops often resolve with proper inflation. Prioritize routine checks before extended trips and after severe ambient changes. These steps free you from surprise failures and keep control where it matters.
Expect about 1 psi loss per 10°F—check cold tire pressures monthly, inflate to the vehicle placard, and log readings.
- Verify Tire Pressure when tires are cold, ideally first thing in the morning.
- Use a reliable digital or dial gauge; calibrate periodically.
- Inflate to the vehicle placard value, not the tire sidewall.
- Log pressures and ambient temperature for trend spotting.
- Recheck after prolonged cold snaps or rapid warming.
When to See a Pro: Costs, Parts, and What to Expect
Regular monthly checks will catch most pressure changes, but persistent drops or repeated TPMS warnings mean you’ll need professional diagnostics to find slow leaks or faulty sensors. Start by describing symptoms to the technician and request a diagnostic; expect fees around $50–$100. The shop will inspect valves, rims, and use a scan tool to read sensor IDs and module status.
If a sensor is bad, parts run about $45–$65 each; replace during tire service to lower labor. If module or antenna wiring is suspect, technicians will test continuity and module communication; module replacement labor typically adds $100–$200, varying by vehicle and center. Ask for a written estimate before work begins.
Request warranty terms and service guarantees to protect future costs. You’ll leave with documented repairs and calibrated TPMS. This procedural approach frees you from recurring alerts and keeps you in control of repair decisions and costs.
Frequently Asked Questions
How to Get Rid of Low Tire Pressure Notification?
Inflate all tires to the manufacturer’s recommended psi, drive briefly to let sensors recalibrate, then recheck pressures with a gauge; if the notification persists, scan for sensor faults or replace malfunctioning TPMS components.
Why Does My TPMS Say Low Tire Pressure but Tires Are Fine?
Because sensors sometimes enjoy drama, your TPMS says low pressure when tires are fine due to temperature drops, dead sensor batteries, or sensor faults; you’ll perform TPMS calibration, inspect sensors, reset system, and retest for liberation.
Can I Fix a TPMS Error Myself?
Yes — you can fix a TPMS error yourself: check and inflate pressures, inspect for leaks, drive to reset, use a TPMS Maintenance scan tool to read sensor faults, and replace or emulate faulty sensors if needed for freedom.
What Is the First Thing You Should Do When a Low Air Pressure Warning Comes On?
Pull over safely and check pressures with a reliable gauge (visual: hand gauge reading). You’ll avoid guessing; inflate underinflated tires to recommended psi, follow Tire Maintenance steps, then drive briefly to let systems recalibrate.
Conclusion
You’ve learned how to inflate tires, read TPMS data, run relearns, and swap or replace sensors—now act. Treat the warning like a smoke alarm: don’t ignore it. Check pressures monthly, use a calibrated gauge, and perform the relearn or reset after topping up. If codes persist, scan the system or swap sensors methodically. When repair exceeds your tools or comfort, seek a shop. Regular checks prevent roadside surprises and extend tire life.


Leave a Reply