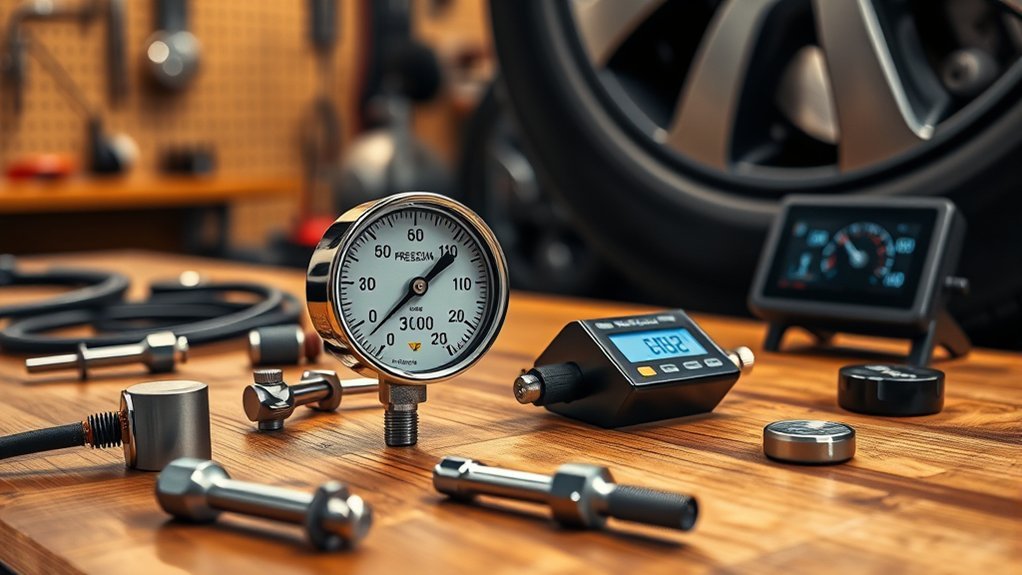
A tire inflator can stop at the number you set and still leave the tire a few PSI high or low. The safest way to check its built-in gauge is to compare it with a more accurate reference gauge under controlled conditions, repeat the reading, and look for a consistent error pattern.
Quick Answer
To test a tire inflator gauge, compare its static reading with a calibrated or recently verified reference gauge on the same cold tire. Take three readings near the pressure you normally use. A steady difference suggests an offset; changing differences, poor repeatability, or errors outside the manufacturer’s tolerance mean the gauge needs service or replacement.
Key Takeaways
- Use a reference gauge with a known accuracy specification or calibration record. Two unverified gauges agreeing does not prove either one is correct.
- Compare readings only after airflow has stopped. Pressure shown while the compressor is running can be higher because of flow through the hose, chuck, and valve.
- Repeat each test and check more than one safe pressure point. This separates a steady offset from erratic readings or a scale error.
- Do not use a vehicle tire to test the full range of a high-pressure gauge. Full-range calibration belongs on a controlled bench tester.
At a Glance
| Time Required | 10–20 minutes |
| Difficulty | Easy for a comparison check; professional equipment is needed for true calibration |
| Tools Needed | Tire inflator, trusted reference gauge, cold vehicle tire, and a phone or paper for recording results |
| Cost | Usually $0 if you already own a verified gauge; a tire shop may compare it with a master gauge |
Verification Is Not the Same as Calibration
A home comparison can verify whether your inflator gauge agrees with a better reference. Calibration is a formal process that compares a device with a known pressure standard, records measurement uncertainty, and may include adjustment. The National Institute of Standards and Technology explains that traceability alone does not guarantee that a reference is suitable; its uncertainty must also be small enough for the job.
For the best home test, use a reference gauge that has a current calibration certificate, a stated accuracy that is better than the inflator’s specification, or a recent comparison with a shop’s calibrated master gauge. A clean, repeatable gauge from a reputable maker is better than an unknown gas-station gauge, but it still does not establish laboratory-level accuracy.
What to Check Before Testing
- Gauge range: Use a reference designed for the pressure range you need. A 0–60 PSI gauge is usually easier to read precisely at passenger-car pressures than a very wide-range gauge.
- Zero: An analog needle should rest at zero with no pressure. A digital gauge should power on normally without an error or low-battery warning.
- Hose and chuck: Look for cracked hose, damaged seals, loose fittings, dirt, or a chuck that will not sit squarely on the valve.
- Reference condition: Let the inflator and reference gauge sit in the same shaded area long enough to reach a similar temperature.
- Tire condition: Use a tire that holds pressure and has an undamaged valve stem. A slow leak can make a good gauge appear inconsistent.
Quick At-Home Accuracy Test for Tire Inflator Gauges

Follow this method on a vehicle that has been parked in the shade for at least three hours. That matches the NHTSA definition of a cold tire.
- Find the correct cold pressure. Read the Tire and Loading Information label on the driver-side door area or the owner’s manual. Do not use the maximum pressure molded on the tire sidewall as the vehicle’s target.
- Inspect both tools. Check zero, battery condition, hose, fittings, chuck, and seals before adding air.
- Inflate slightly above the test point. Stop the compressor, release the trigger, and wait about 10 seconds for pressure in the tire and hose to settle.
- Set the tire with the reference gauge. Add or release small amounts of air until the reference gauge shows the chosen test pressure.
- Take a reference reading. Press the reference gauge straight onto the valve until the hiss stops, then record the reading.
- Take the inflator reading with no airflow. Attach the inflator chuck, keep the trigger released, let the display or needle settle, and record the number.
- Check the reference again. A second reference reading confirms that air loss during the comparison did not materially change the tire pressure.
- Repeat three times. Remove and reconnect each gauge for every reading. This tests the gauge and your chuck-placement technique.
- Test another safe point. Repeat near the pressure you normally use. A small check a few PSI above or below the placard pressure is enough for a home comparison, provided you remain within the tire, wheel, inflator, and vehicle limits.
Warning: Never use a vehicle tire to test 75% or 100% of a high-range inflator gauge. Do not exceed the tire, wheel, hose, chuck, or inflator pressure limit. Full-range testing must be done with a suitable pressure calibrator or by a qualified shop.
Pro Tip: Judge the inflator by its settled reading after airflow stops. The number shown while air is moving can be temporarily higher because the inflator is also measuring pressure loss through the hose, fittings, chuck, and valve.
How to Calculate Gauge Error
Use this simple formula:
Gauge error = inflator reading − reference reading
A positive result means the inflator reads high. A negative result means it reads low. Compare the result with the accuracy specification in the inflator’s manual. There is no single pass-or-fail tolerance for every consumer gauge.
| Reference | Inflator | Error | Interpretation |
| 30 PSI | 31 PSI | +1 PSI | Reads high |
| 35 PSI | 36 PSI | +1 PSI | Consistent offset |
| 40 PSI | 41 PSI | +1 PSI | Likely stable across this range |
How to Interpret the Test Results
Consistent Offset
If the inflator is always high or low by nearly the same amount, it has a steady bias. Check the manufacturer’s tolerance. A small error inside that specification may be acceptable, but a large offset should be corrected by authorized service or by replacing the gauge. Relying on mental math is easy to forget and can cause mistakes when another person uses the tool.
Poor Repeatability
If repeated readings at the same pressure vary noticeably, first check your connection technique, battery, chuck, hose, O-rings, and valve stem. If the reference remains stable but the inflator does not, the inflator gauge is unreliable.
Scale or Linearity Error
If the difference grows as pressure rises, the problem is not a simple offset. The sensor or mechanism may be inaccurate across its range. Do not correct this with one fixed number.
Hysteresis
Hysteresis means the gauge reads differently at the same pressure depending on whether pressure was increasing or decreasing. Professional verification checks both directions. Fluke’s guidance on verifying analog and digital pressure gauges describes bench testing as the best environment for inspection and recertification.
How Inflator Gauges Work and Why Readings Change
Digital inflator gauges use an electronic pressure sensor and circuitry to convert pressure into a number. Analog units use a mechanical element, linkage, and needle. Either design can be accurate, but accuracy, display resolution, and repeatability are different things. A digital display that shows tenths of a PSI is not automatically accurate to one-tenth PSI.
- Temperature change: Tire pressure changes as the air temperature changes. Michelin notes a rule of thumb of roughly 1–2 PSI per 10°F. Treat this as tire-maintenance guidance, not as a way to mathematically “correct” a gauge test.
- Airflow pressure: A running compressor can make the inflator display higher than the settled tire pressure.
- Leakage: A loose fitting, worn O-ring, cracked hose, bad chuck, or damaged valve can lower pressure during the test.
- Low battery: A weak battery can cause dim displays, slow startup, or unstable readings on some digital gauges.
- Mechanical shock: Drops and vibration can shift an analog mechanism or damage an electronic sensor.
- Dirt or moisture: Debris in the chuck or valve can prevent a complete seal or affect internal parts.
Can You Calibrate a Consumer Tire Inflator Gauge?
Many consumer inflators can be checked but cannot be adjusted by the owner. Some analog gauges have a zero or span adjustment, but turning it without the manufacturer’s procedure and a proper pressure standard can make accuracy worse. Digital units may require factory software, an internal service mode, or complete sensor replacement.
Check the manual before attempting adjustment. If the manufacturer provides no calibration procedure, treat the test as verification only. Have the unit serviced or replace it when the error exceeds its stated tolerance, changes across the range, or will not repeat.
Note: A calibration certificate should identify the instrument, date, test points, results, uncertainty, and traceability chain. A sticker that only says “calibrated” gives less useful information.
Bench Calibration Checklist for Tire Inflator Gauges

A bench check uses a controlled pneumatic pressure source and a reference instrument suitable for the inflator’s range. The reference should have enough accuracy and low enough uncertainty to judge the device under test.
- Inspect and identify the gauge. Record the model, serial number, range, resolution, and stated accuracy.
- Condition the equipment. Let the gauge, reference, hoses, and fittings stabilize in the test area.
- Check zero. With the system safely vented to atmosphere, confirm the gauge returns to zero or follows the manufacturer’s zeroing procedure.
- Leak-test the setup. Apply a moderate pressure, isolate the source, and confirm the reading remains stable.
- Apply ascending points. Test several points across the range, such as 0%, 25%, 50%, 75%, and 100%, only when every component is rated for that pressure.
- Apply descending points. Lower pressure through the same points to check hysteresis.
- Repeat the cycle. Repeated cycles reveal poor repeatability and drift.
- Calculate error. Compare each inflator reading with the reference and judge it against the manufacturer’s specification or the documented acceptance limit.
- Adjust only as authorized. If adjustment is supported, repeat the full test after adjustment.
- Document the result. Keep the as-found and as-left readings, reference details, test conditions, date, and next-check recommendation.
When and How Often to Check Your Inflator Gauge
Check tire pressure at least once a month and before a long trip. NHTSA recommends measuring all tires, including the spare, when cold. Recheck the inflator gauge against a trusted reference:
- when it is new;
- after it has been dropped or exposed to water;
- after replacing a hose, chuck, sensor, or gauge head;
- when the reading disagrees with another trusted tool;
- when the compressor begins stopping unusually early or late; and
- periodically based on use, storage conditions, and the manufacturer’s guidance.
A busy shop may need scheduled verification more often than a home tool used a few times a year.
Troubleshooting, Fixes, and When to Replace Your Gauge
| Symptom | Likely Cause | What to Do |
| Air hisses continuously at the valve | Crooked chuck, worn seal, dirty valve, or damaged stem | Reconnect squarely, clean the chuck, inspect the seal, and repair a damaged valve |
| Reading changes after the trigger is released | Normal pressure drop from flowing to static conditions | Use the settled, no-flow reading |
| Analog needle sticks, jumps, or misses zero | Mechanical wear, contamination, or drop damage | Follow the maker’s zero procedure or replace/service the gauge |
| Digital screen flickers or readings jump | Weak battery, loose connection, moisture, or sensor failure | Install a fresh battery, dry and inspect the unit, then retest |
| Error changes with pressure | Scale, linearity, or sensor problem | Stop using one fixed correction; service or replace the gauge |
| All tools disagree | No trustworthy reference or air loss during testing | Use a calibrated shop master gauge and repeat the comparison |
Replace or professionally service the gauge if it cannot hold zero, fails to repeat, has damaged pressure parts, or falls outside the manufacturer’s accuracy limit. Store it dry, protect it from impacts, keep the chuck capped or clean, and avoid leaving a digital unit in extreme heat for long periods.
Choosing a Trustworthy Reference Gauge
Do not choose a reference only because it is digital, expensive, or displays more decimal places. Look for:
- a published accuracy specification over the range you use;
- a range suited to your tires;
- repeatable readings when reconnected several times;
- a calibration record or comparison with a master gauge;
- a protected case, good seal, and replaceable battery for digital models; and
- clear units and a display you can read without parallax.
Michelin recommends occasionally having pressure checked by a professional or using a calibrated pressure gauge. California’s tire inflation regulation also shows why gauge accuracy matters in professional service: covered providers must use a gauge within the regulation’s permissible error.
Frequently Asked Questions
How do you test a tire pressure gauge for accuracy?
Compare it with a better reference gauge on the same cold tire. Use settled, no-flow readings, repeat the connection three times, and test near the pressure you normally use. Judge the error against the gauge maker’s accuracy specification.
How do you calibrate a tire inflator gauge?
True calibration requires a controlled pressure source and a suitable reference standard. Many consumer inflators have no user adjustment, so you can verify them at home but must use authorized service or replace the gauge if it is outside tolerance.
What type of tire pressure gauge is most accurate?
No design is automatically the most accurate. A quality digital, dial, or stick gauge can work well. Choose one with a stated accuracy, a suitable range, repeatable readings, and a current verification or calibration record.
How can you tell whether a pressure gauge is reliable?
It should return to zero, seal cleanly, repeat the same reading, and stay within its published accuracy when compared with a better reference. Wandering readings, a growing error at higher pressure, or a needle that sticks are warning signs.
What difference between two tire gauges is acceptable?
Use the manufacturer’s stated tolerance rather than a universal number. A small, repeatable difference may be within specification. A difference of several PSI, a changing difference, or an error that grows with pressure calls for another reference and likely service or replacement.
Can the vehicle’s TPMS display be used as a calibration reference?
Use TPMS as a warning and comparison clue, not as your only calibration standard. Its display may update slowly, round values, or differ by sensor and vehicle. Confirm tire pressure with a verified hand gauge.
Why does an inflator read higher while it is running?
Moving air creates a pressure difference through the hose, fittings, chuck, and valve. Release the trigger and wait for the reading to settle. The static, no-flow value is the useful tire-pressure reading.
Can you trust a gas-station tire inflator gauge?
It may be accurate, but heavy use, impact, weather, and poor maintenance can affect it. Use it to add air, then confirm the final pressure with your own verified gauge or a shop master gauge.
Conclusion
Checking a tire inflator gauge is simple when you control the conditions: use a cold tire, a better reference, static pressure, repeated connections, and more than one safe test point. A steady error may be a correctable offset, but poor repeatability or an error that changes with pressure means the gauge should be serviced or replaced. Keep using the vehicle manufacturer’s cold PSI from the door label or owner’s manual.
Sources
- NHTSA TireWise — cold-tire definition, monthly checks, placard pressure, and tire-pressure safety.
- NIST Policy on Metrological Traceability — reference standards, traceability, and fitness for the measurement purpose.
- Fluke: Verifying Analog and Digital Pressure Gauges — inspection and controlled bench verification.
- Michelin: How to Properly Inflate Your Tires — calibrated-gauge guidance, monthly checks, and temperature effects.
- California Air Resources Board Tire Inflation Regulation — professional tire-pressure gauge accuracy requirements.

1 thought on “Tire Inflator Gauge Accuracy: How to Test and Calibrate”