To repair paint chips on your Toyota Supra, start by cleaning the area with isopropyl alcohol and drying it. Identify the chip type and gather tools like touch-up paint, fine-grit sandpaper, and a small brush. Apply several thin layers of touch-up paint, allowing each to dry for 2-5 minutes. Once finished, lightly sand for a smooth finish and seal with a specialized sealant. For additional insights and preventive measures, continue exploring this guide.
Why Repairing Paint Chips on Your Toyota Supra Is Essential
When you notice paint chips on your Toyota Supra, it’s essential to address them immediately to prevent further complications. Repairing paint chips not only safeguards the damaged area from moisture but also helps prevent rust formation, which can jeopardize your vehicle’s structural integrity over time. Neglecting these small imperfections can lead to peeling and cracking, resulting in costly bodywork down the line.
Timely action is important for restoring your car’s finish and maintaining its aesthetic appeal. A well-maintained exterior enhances your car’s overall market value, ensuring it remains attractive to potential buyers. Regular maintenance, including fixing paint chips, preserves the quality and longevity of your Supra, keeping it in top condition for years to come. Don’t let minor damage escalate into a major issue; take charge of your Supra’s care and enjoy the liberation of driving a vehicle that looks and performs its best.
What Types of Paint Chips Are on Your Vehicle?
Paint chips on your Toyota Supra can be categorized into three distinct types, each requiring different repair approaches. Understanding these types is vital for effective repair.
| Type of Paint Chip | Description |
|---|---|
| Surface Chips | Only the clear coat is damaged. |
| Mid-Level Chips | Paint is affected, but primer remains intact. |
| Deep Chips | Exposes bare metal beneath paint and primer. |
Surface chips are relatively easy to address with minimal intervention, while mid-level chips demand more attention to guarantee the paint adheres correctly. Deep chips pose a risk of rust formation, necessitating sanding and priming before applying touch-up paint. Identifying the specific type of paint chip on your vehicle is essential; it determines the materials and methods you’ll use. Neglecting any of these could lead to further damage, so tackle those paint chips promptly to maintain your Supra’s appearance and integrity.
Must-Have Tools for Your Paint Chip Repair Kit
To effectively repair paint chips on your Toyota Supra, you’ll need a well-equipped paint chip repair kit. Start by gathering essential tools like touch-up paint, fine-grit sandpaper, and automotive primer, which are vital for surface preparation and paint adhesion. Additionally, include cleaning supplies such as isopropyl alcohol and a microfiber cloth to guarantee a smooth application process.
Essential Tools Overview
While repairing paint chips on your Toyota Supra, having the right tools on hand is essential for achieving a seamless and professional finish. Your Chip Repair Kit should include:
| Tool | Purpose | Importance |
|---|---|---|
| Touch-up Paint | Matches your car’s color code | Guarantees color accuracy |
| Fine-Grit Sandpaper | Sandpaper to smooth edges of damage | Prepares surface for adhesion |
| Small Brush | Even application of touch-up paint | Achieves a professional finish |
| Clear Coating | Seals repair and adds gloss | Protects against environmental factors |
These tools will empower you to restore your Supra’s beauty, making those chips virtually disappear. Embrace the journey of restoring your vehicle to its former glory!
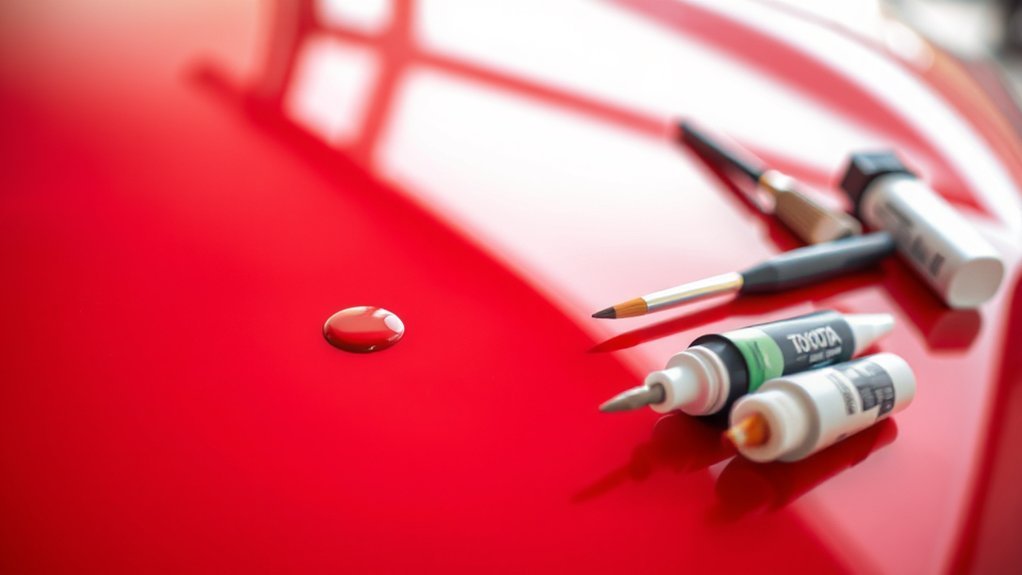
Recommended Paint Supplies
Achieving a flawless paint chip repair on your Toyota Supra requires specific supplies tailored for the task. Start with touch-up paint that matches your vehicle’s color code, easily found on the identification plate. You’ll need fine-grit sandpaper (2000-grit) to smooth edges and a small brush or applicator for precise application. Masking tape is essential to protect surrounding areas from overspray during your repair. For deeper chips, a quality automotive primer guarantees proper adhesion and prevents rust. After applying the paint, don’t forget the clear coat; it seals the repair, providing protection and a glossy finish that blends seamlessly with existing car paint chips. With these supplies in hand, you’re ready to restore your Supra’s beauty.
Cleaning and Preparation Items
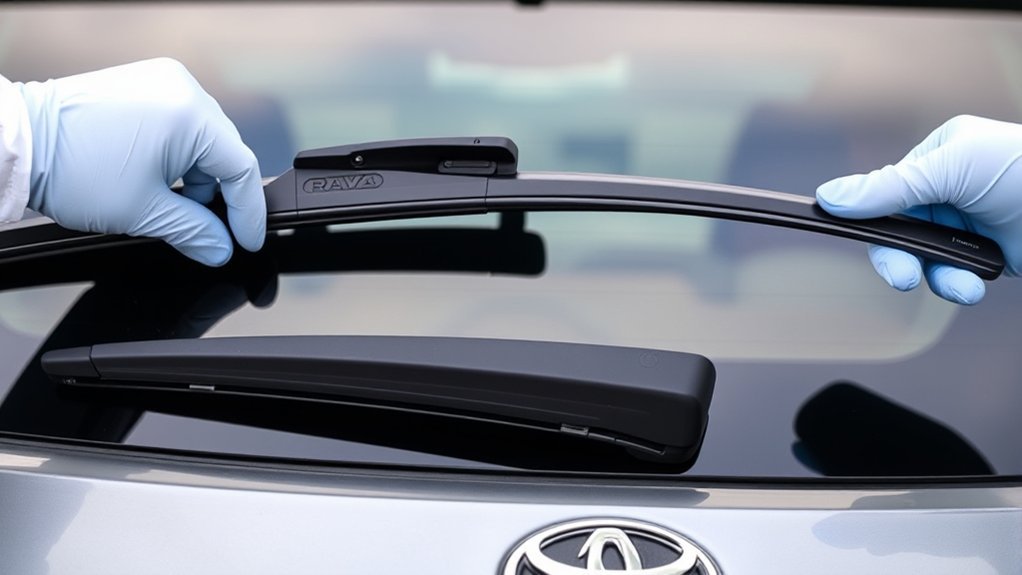
Before diving into the paint chip repair process, you need to gather essential cleaning and preparation items that guarantee a successful outcome. Start with fine-grit sandpaper (2000-grit) to smooth edges around the chip. You’ll need a clean, lint-free cloth for thorough cleaning. Use a mild soap and water solution, followed by isopropyl alcohol to eliminate any wax or grease. This guarantees better adhesion for your touch-up paint. Masking tape is vital—apply it around the repair area to protect unaffected paint. Finally, have a small brush or applicator ready for precise application of primer and touch-up paint. With these tools, you can achieve a flawless finish on your Toyota Supra.
How to Repair Paint Chips Step-by-Step
To effectively repair paint chips on your Toyota Supra, start by evaluating the damage severity to determine the best approach. Next, gather the necessary tools and materials to guarantee a smooth application process. Follow the step-by-step instructions to achieve a durable, professional-looking finish.
Assessing Damage Severity
Evaluating the severity of paint chips on your Toyota Supra is vital for determining the appropriate repair method. Start by closely inspecting the chipped area for size and depth. Document your findings with clear photos to track repair progress and reference future touch-ups. Identify the type of paint chips: surface chips affect only the clear coat, mid-level chips penetrate the paint but leave the primer intact, while deep chips expose the metal. For deeper chips, applying primer before paint is essential to guarantee proper adhesion and prevent rust. If you’re evaluating damage severity and find that the chips are extensive or numerous, consider seeking professional assistance to ensure a seamless and high-quality repair.
Tools and Materials Needed
Gathering the right tools and materials is essential for effectively repairing paint chips on your Toyota Supra. Start by ensuring you have the following items on hand:
- Touch-up paint that matches your Toyota Supra’s paint code
- Fine-grit sandpaper (2000-grit)
- Automotive primer
- Clear coat
Locating your vehicle’s color code on the identification plate or in the owner’s manual is vital for purchasing the correct touch-up paint. Prepare the affected area by cleaning it thoroughly with a mild soap and water solution. Once dry, use fine-grit sandpaper to smooth the edges of the paint chips, enhancing paint adhesion. After applying the touch-up paint, don’t forget to apply a clear coat to protect and complete your car paint chip repair.
Step-by-Step Application Process
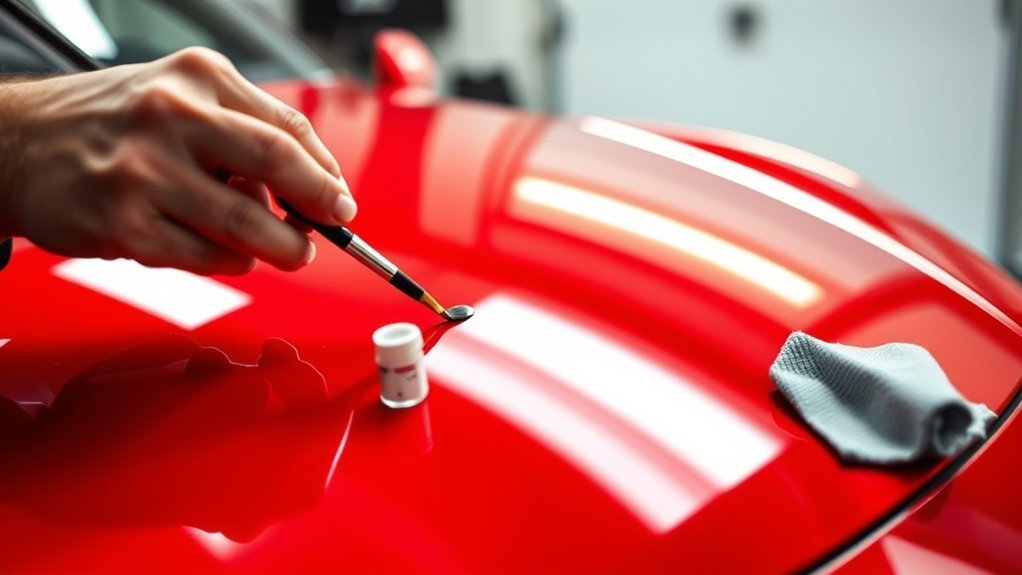
As you initiate the paint chip repair process for your Toyota Supra, start by meticulously cleaning the affected area with a mild soap and water solution. Dry it completely to guarantee proper paint adhesion. Next, use fine-grit sandpaper to smooth the edges of the chips.
| Step | Action | Purpose |
|---|---|---|
| Clean | Wash and dry the area | Guarantees adhesion |
| Apply Primer | Apply a thin layer of automotive primer | Prepares the surface for paint |
| Touch-Up Paint | Carefully apply a thin layer, allowing to dry before applying the next | Builds color depth |
Finally, finish with a clear coat over the dried touch-up paint to protect the repair and enhance gloss. This guarantees a seamless blend with the surrounding paint.
Tips for a Professional-Looking Paint Chip Repair
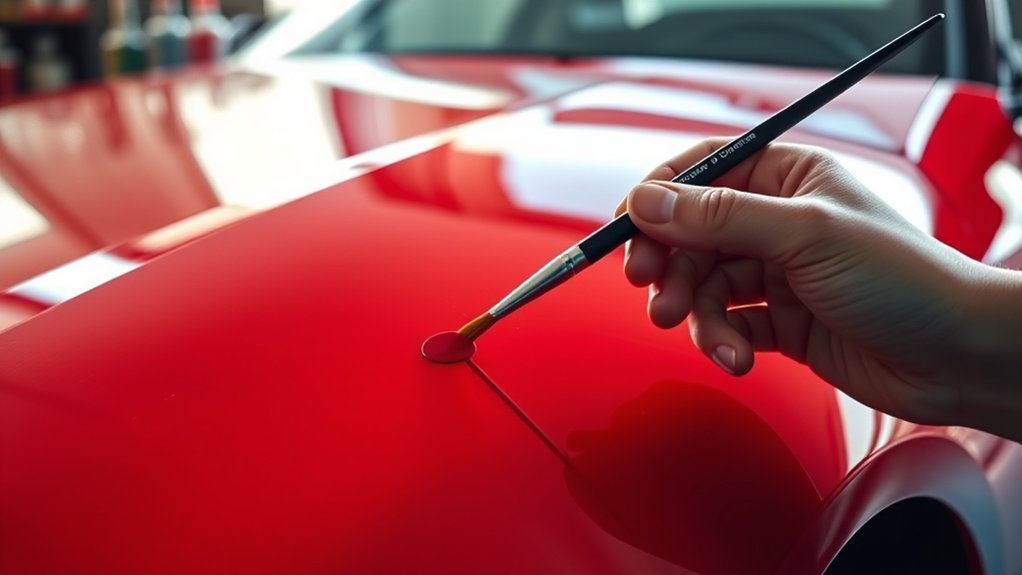
To achieve a professional-looking paint chip repair on your Toyota Supra, it’s crucial to start with the right materials and techniques. Begin with a touch-up paint that matches your car’s specific color code for a seamless blend. Before you start, clean the area thoroughly using isopropyl alcohol and a microfiber towel.
- Use the right tools for the job.
- Apply multiple thin layers of paint.
- Allow each layer to dry before adding the next (2-5 minutes).
- Seal the repair with a specialized sealant.
After the final layer has fully dried, lightly sand the area with ultra-fine sandpaper (2000-3000 grit) to guarantee a level surface. This meticulous approach not only enhances the repair’s appearance but also protects it, giving your Supra a polished look that rivals professional work.
Best Practices to Prevent Future Paint Damage
Even with a successful paint chip repair on your Toyota Supra, proactive measures are essential to safeguard your vehicle’s finish from future damage. Regularly apply a high-quality wax or sealant to create a protective barrier against environmental contaminants and harmful UV rays. This preventive measure not only enhances the shine but also helps prevent paint chips. Consider installing Paint Protection Film (PPF) on high-impact areas like the front bumper and hood. This absorbs debris impact, preserving the paint underneath. Additionally, maintain a safe following distance from trucks and gravel vehicles to reduce the risk of rock chips. Wash your Supra frequently using a pH-balanced car wash solution and microfiber cloth to prevent dirt from scratching the finish. Finally, park in shaded areas or cover your vehicle when not in use to protect it from prolonged sun exposure, which can lead to fading and degradation.
Frequently Asked Questions
How to Properly Fix Paint Chips?
To fix paint chips, use proper paint matching techniques, select chip repair tools, apply touch-up paint meticulously, and finish with a clear coat application. This guarantees a seamless, professional-looking repair on your vehicle’s surface.
Can I Just Paint Over Chipped Paint?
No, you can’t just paint over chipped paint. For long-lasting results, make certain you DIY touch ups with proper paint matching, apply a clear coat, and prepare the surface to prevent peeling and flaking later.
How to Repair Chipped Paint Work?
To repair chipped paint, match your paint using techniques like color blending, apply touch-up paint carefully, and seal with clear coat options. For paint chip prevention, maintain your vehicle’s surface and regularly wash it.
How to Prep a Car for Paint Chip Repair?
How can you guarantee a flawless repair? Start with thorough car washing for surface cleaning, then use drying techniques to eliminate moisture. Finally, match the paint precisely for an undetectable finish.
Conclusion
By taking the time to repair paint chips on your Toyota Supra, you’re not just fixing blemishes; you’re resurrecting a masterpiece! Picture your Supra gleaming like a jewel under the sun, each repaired chip transforming it into a work of automotive art. With your newly acquired skills and essential tools, you’re equipped to tackle any chip like a pro. Remember, prevention is key—shield your car from future damage and keep it looking showroom-fresh for years to come!