
To install a rear dash cam, first choose a central location on the rear windshield, avoiding defroster lines for unobstructed views. Clean the area thoroughly for good adhesion. Next, connect the rear camera cable to the front camera and route it neatly along the headliner through the A, B, and C pillars. Use cable clips for a tidy finish. Finally, verify the camera angle using a live view feature. You’ll find more insights on troubleshooting common issues.
Choosing the Right Location for Your Rear Dash Cam Installation
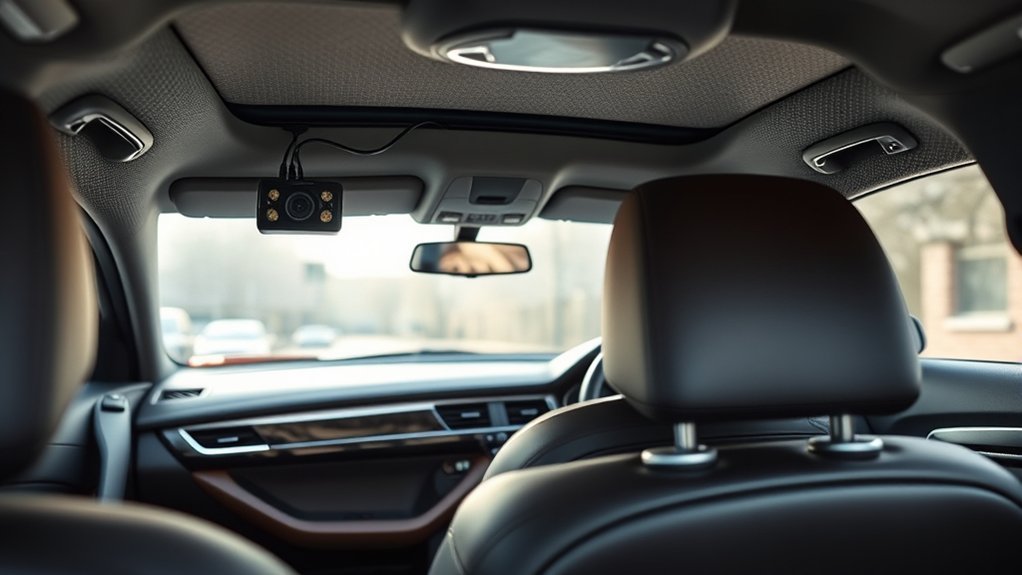
When selecting the right location for your rear dash cam installation, it’s essential to prioritize both functionality and safety. Mount the rear camera in the center of the rear windshield to guarantee it doesn’t obstruct your view or interfere with the defroster lines. Before installation, clean the rear window thoroughly for maximum adhesion and visibility. If the rear windshield isn’t suitable, consider alternative mounting options like the roof or trim near the roof using adhesive platforms.
Once you’ve chosen a location, verify the camera’s angle and coverage using the live view feature on a smartphone app. This step guarantees it captures the desired field of vision. To maintain a neat appearance, route the correct cable through the vehicle’s trim and hoses, avoiding visible wiring and potential damage. Following these guidelines will guarantee your rear dash cam is both functional and discreet, enhancing your driving experience.
[Products Worth Considering]

★S60 with 10 different joints, suitable for most popular brand dash cam, such as Z-Edge/ YI /OldShark/Falcon Zero/G1W, G1W-B, G1W-C, G1W-CB…/HP /Transcend/ TaoTronics……For the corresponding brand and model, please check the picture .
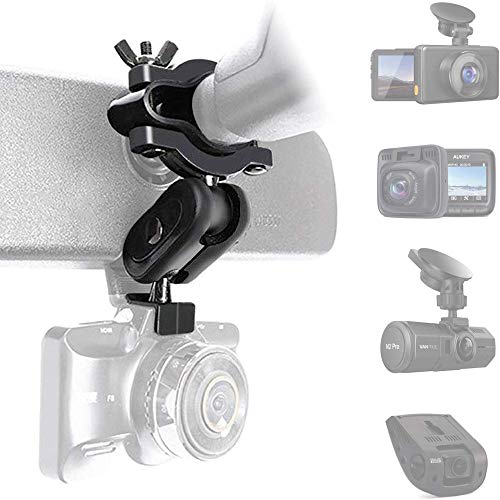
☑️ PERFECT COMPATIBILITY: New 16 different joints kit suitable for 99% (NOT ALL) dash camera. The ball dia of the dash cam mount is 0.63inch. ⚠️For easy installation, please make sure the car rearview has (MORE THAN 0.4 INCH) space on the back of the mirror. If you are unsure whether it is applicable, please contact us through Amazon.

Come with 10+ different joints, suitable for 99% dash cam, Different joints kit to suit most Car Dash Camera, GPS, Action Camera. Not compatible Garmin Dash Cam.
Essential Tools and Materials for Installing Your Rear Dash Cam
To successfully install your rear dash cam, you’ll need a specific set of tools and materials that guarantee a smooth process. Start with the rear dash camera itself and a rear camera cable to connect it to your power source. An adhesive mount is essential for securing the camera, while cable clips will help manage and route the wiring neatly along your vehicle’s interior. Don’t forget microfiber towels and glass cleaners to verify your rear window is thoroughly cleaned before mounting, which is vital for a strong adhesive bond and ideal visibility. A trim tool will assist with accessing tight spaces for cable routing. Additionally, use rubber hoses connecting the rear windshield to the vehicle’s body for a clean appearance. Finally, tidy up any excess wiring with electrical tape or cable clips to prevent kinks and maintain a professional look after installation.
[Products Worth Considering]

Our rearview mirror dash cam mount is made of high-quality all aluminum alloy material, with exquisite craftsmanship and comfortable touch. The anti slip strip design increases the friction coefficient, making installation more stable.

Dash cam mirror mount holder is equipped with 16 different connectors, suitable for 99% of driving recorders, GPS, sports cameras,compatible with driving recorders such as Rove APEMAN CHORTAU VANTRUE Crosstour Falcon F170 Old Shark GoPro Roav YI Z-Edge KDLINKS Falcon Zero Peztio UGSHDI Vantrey Rejing V1P.

【High Quality】The rear view camera bracket is made of high-quality metal material, which is corrosion-resistant, rust proof, and has good waterproof performance. It is not easily damaged and can be used for a long time.
Wiring Your Rear Dash Cam: A Step-by-Step Guide
Before you begin wiring your rear dash cam, make sure you have the necessary tools and materials at hand. Start by connecting the rear camera cable to the front camera and the power source to guarantee proper power distribution. For effective cable routing, run the rear camera cable along the headliner, passing it through the A, B, and C pillars to keep it concealed. Utilize rubber hoses linking the rear windshield to the vehicle’s body, allowing slack for the liftgate’s movement.
Secure the cable neatly with adhesive mounts, cable clips, and electrical tape to avoid kinks and maintain a clean appearance. Before final installation, check for wiggle room in the hoses. If needed, use a thin, rigid wire to thread the cable through, ensuring a waterproof seal when you reattach the trim. Proper wiring your rear dash cam not only enhances safety but also guarantees you capture clear dash cam footage.
[Products Worth Considering]

【Low Voltage Protection】 Once the input voltage drops below 11.6V (23.2V for 24V input), the battery drain protection will cut off the power supply, leaving enough power to ignite the engine without damaging the battery.

【Wide Compatible】Input:12V-24V; Output:5V/2A. With Type-C ports, this hardwire kit compatible with all of dash cams.
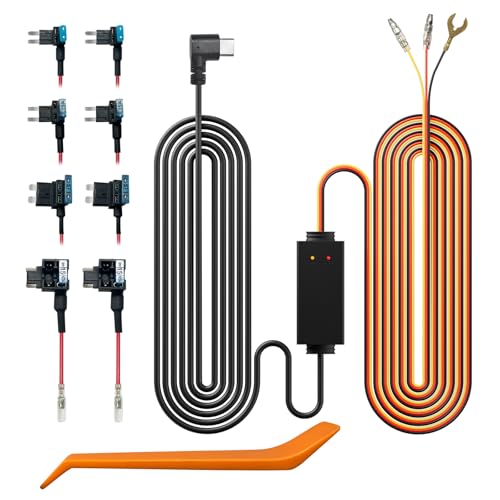
[Universal Fit] Designed for multi-voltage adaptability, this acc muti-size hardwire kit supports 12V to 24V inputs, delivering a consistent 5V/3A MAX to any dash cams via Type-C ports, ensuring a perfect fit for the vast majority of vehicles
Tips for Properly Mounting Your Rear Camera for Optimal Performance
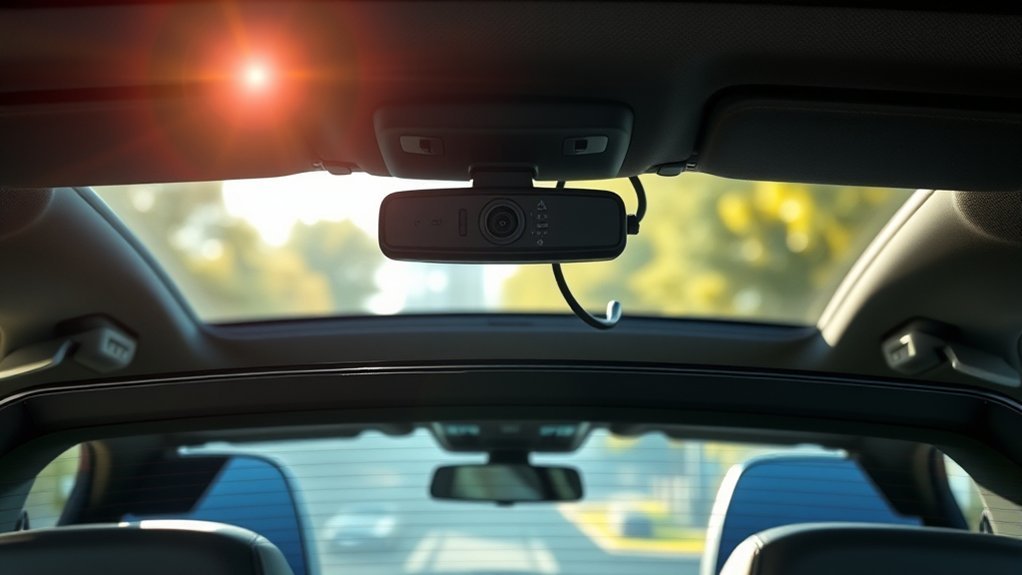
For peak performance of your rear dash camera, it’s vital to mount it correctly, as the placement directly influences visibility and recording quality. Start by thoroughly cleaning the rear window to guarantee a strong adhesive bond. Position the rear camera at the center of the windshield, avoiding defroster lines to prevent obstruction.
Consider these tips for ideal mounting:
- Use adhesive platforms or alternative mounting options for better stability.
- After mounting, check the live view on the smartphone app to verify the camera’s angle.
- Secure wiring with cable clips and electrical tape to maintain a neat installation.
These steps not only enhance camera performance but also help capture the desired area behind your vehicle effectively. By following these guidelines, you’ll make sure that your rear dash camera operates at its best, providing peace of mind while driving.
Troubleshooting Common Issues After Installing Your Rear Dash Cam
When you encounter issues with your rear dash cam after installation, a systematic approach to troubleshooting can quickly identify and resolve the problem. Start by checking the power connections; verify they’re secure and correctly wired. If the rear camera isn’t operating, confirm that the rear camera cable is properly connected to the front camera and power source. A loose connection can prevent functionality.
Inspect the cable routing for kinks or tight spots, particularly around A, B, or C pillars. Such areas can restrict cable performance. If the rear camera’s view is distorted, check the mounting position and angle; a misalignment can hinder visibility. Additionally, clean the rear windshield to enhance clarity and verify no obstructions like defroster lines interfere with the camera’s line of sight. By following these steps, you’ll maintain your dash cam straight and effective in delivering reliable recording.
Frequently Asked Questions
Can I Use a Rear Dash Cam While Parked?
Yes, you can use a rear dash cam while parked. With parking mode benefits, it monitors your surroundings, utilizing battery options effectively, and rear cam features guarantee you capture incidents even when you’re not in the vehicle.
How Do I Maintain My Rear Dash Cam?
Maintaining your rear dash cam’s like tending a garden; regular care guarantees growth. Clean the lens, perform firmware updates, and conduct regular checks to keep it functioning at peak performance and safeguard your driving experience.
Does a Rear Dash Cam Record Audio?
Yes, a rear dash cam can record audio, depending on its design. Make certain sound sensor placement is ideal for clear audio recording quality, but be mindful of privacy concerns when capturing conversations or sounds outside your vehicle.
What Resolution Should I Choose for Recording?
Choose a resolution that balances video quality and storage capacity. A higher resolution, like 1080p, enhances clarity, especially for night vision. Verify your dash cam’s storage can handle the increased file size effectively.
Are There Legal Restrictions for Dash Cams in My Area?
Dash cam laws vary wildly, so you’ve got to check local regulations. Privacy concerns might restrict recordings in certain areas, but your quest for liberation through technology is worth traversing these legal nuances.
Conclusion
To sum up, installing a rear dash cam is like placing a guardian watchfully behind you, ensuring safety on your journeys. By carefully selecting its location, wiring it with precision, and mounting it securely, you create a reliable shield against the unpredictability of the road. Should issues arise, remember that troubleshooting is merely a part of the installation journey. With patience and attention to detail, you’ll have a vigilant companion, ready to capture every moment of your travels.


Leave a Reply