
Start by powering off and fully depressurizing the inflator, wear eye protection, and lay the hose straight in bright light. Run a damp cloth down the jacket to reveal hairline cracks, feel for soft spots, bulges or abrasions, and check ferrules and fittings for corrosion or looseness by gently twisting. Pressurize to operating PSI in a quiet room, listen for hissing, and sweep soapy water to locate bubbles. If you find damage, assess repairability or replace, and continue for step‑by‑step replacement and prevention tips.
Prepare Safely Before Inspecting a Tire Inflator Hose

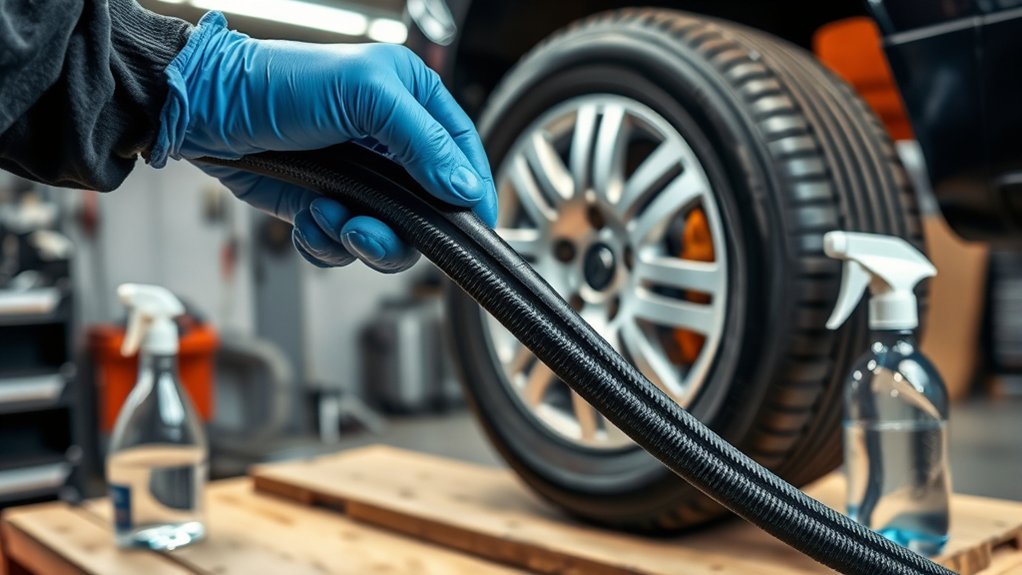
Before you inspect a tire inflator hose, power the unit off and fully depressurize it to eliminate any chance of sudden air release; put on eye protection and gloves, work in a well-lit area, and clean the hose with a damp cloth while flexing it (the Damp Cloth Technique) to reveal hidden cracks, paying special attention to fittings and connection points where leaks commonly occur. You’ll start by confirming zero pressure at the gauge and disconnecting power. Don your safety gear and clear the workspace so you can move freely. Methodically run your hands along the hose while flexing sections; the Damp Cloth Technique will highlight minute splits as moisture draws into breaches. Inspect each fitting, clamp, and coupling for deformation, corrosion, or looseness—these are common problems that lead to failure. Note any irregularities, mark them, and decide whether repair or replacement restores reliable, liberated control over your equipment. Follow this checklist before proceeding to a visual scan.
Do a Quick Visual Scan of the Tire Inflator Hose: Cracks, Bulges, Abrasion
Start by laying the hose out straight and give it a slow, systematic scan from end to end, inspecting for cracks, splits, bulges, abrasions, and any uneven diameter that could signal internal failure. Work in short passes, feeling as you look: run your fingers along the outer jacket to detect soft spots, ridges, or swelling. Focus on visible cracks and bulges—mark any you find and remove the hose from service if they appear significant. Note areas of abrasion where the protective layer is worn thin; those zones invite further damage and shorten service life. Watch for inconsistent diameters that suggest delamination or internal collapse. Use good light and, if needed, a magnifier to confirm fine surface breaks. You’re reclaiming control by catching failures early: log findings, tag defective hoses, and replace them promptly. Regular quick scans keep you safe, independent, and less bound to unexpected breakdowns.
Inspect Connections and Ferrules for Cracks, Corrosion, or Play
While holding the hose steady, inspect each connection and ferrule for visible cracks, corrosion, or play—these defects commonly cause leaks and sudden failure. Work methodically: trace every connection from the chuck to the pump, viewing ferrules from multiple angles. Look for bulging, uneven diameters, rusted crimp edges, or hairline fractures. Grip and gently twist each fitting; any play means a loose joint that can fail under pressure. Use the Damp Cloth Technique to flex the hose near ferrules; moisture highlights micro-cracks that’ll otherwise hide. Pay special attention to crimped brass ferrules—repeated bending and stress create fatigue lines and surface corrosion. If you spot corrosion or compromised metal, replace the ferrule or fitting immediately. After repairs, apply a small amount of leak detector concentrate around the connection to verify integrity (do this during the next step of pressurization). Regular, disciplined checks free you from unexpected breakdowns and keep your inflator dependable.
Pressurize the Hose and Listen for Hissing (How to Detect Micro‑Leaks)

Work in a quiet room and pressurize the hose to its normal maximum, listening closely for any hissing or high‑pitched whistles. If you don’t hear anything, sweep a soapy solution along the hose and ferrules while varying pressure—small leaks will produce steady bubbles or change sound under different loads. Note any wet dark lines from a damp cloth, bulges, or pressure‑sensitive whistles and mark them for repair or replacement.
Quiet Room Listening
Before you begin, move the inflator and hose into a quiet room and pressurize the hose to its normal operating PSI (about 100 PSI) so you can hear any escaping air clearly; then hold the hose steady and listen closely for a high‑pitched hiss that signals a micro‑leak. You’re using compressed air deliberately; silence lets you detect leaks that rob you of freedom on the road. Stay focused, steady, and intentional.
- Circle the hose slowly while keeping pressure steady; pause at fittings and bends to catch intermittent hisses.
- If you hear a hiss, mark the spot and inspect for cracks, bulges, or worn ribs that match the sound.
- Repeat inspections periodically—early detection preserves performance and liberates you from roadside surprises.
Use Soapy Solution
Mix a soapy solution (a few drops of dish soap in a spray bottle of water), pressurize the hose to its normal operating PSI (about 100 PSI), then spray every fitting, connection, and along the hose length while listening for any high‑pitched hiss; bubbles forming at a spot confirm an air leak. You’ll work methodically: isolate the tire inflator, secure fittings, then apply the solution from valve to nozzle. Keep the area quiet and steady the hose so bubbles aren’t disturbed. Mark any bubbling or hissing location for repair or replacement—small leaks in a high-pressure hose grow if ignored. Repeat inspections regularly; catching micro-leaks early preserves performance and frees you from unexpected failures during use.
Apply Pressure Variations
When you pressurize the hose to its rated capacity (about 100 PSI), secure all fittings and listen closely for any high‑pitched hissing that signals a micro‑leak; move slowly along the length of the hose while keeping the environment quiet so faint sounds aren’t masked. Use pressure variations deliberately: raise, hold, and drop pressure to make intermittent leaks audible. If you suspect an old hose, combine auditory checks with tactile and visual tests to assert your control over equipment and safety.
- Apply the damp cloth technique on suspect spots—moisture will darken cracks when air draws it in.
- Spray soapy water over fittings and hose surface; watch for bubble formation at leaks.
- Repressurize after repairs to confirm leaks are sealed.
Perform a Soapy‑Water Test to Pinpoint Any Leaks
Start by filling a spray bottle half with water and half with dish soap, then spray the solution liberally over the hose, fittings, and connections while the inflator is pressurized; any escaping air will form soap bubbles at the leak site, letting you pinpoint small or large leaks for repair or replacement. Stand close and rotate the hose slowly, watching for steady or intermittent bubbling along the length and at junctions. Mark any bubble clusters with tape or a grease pencil so you can return to the exact spot. Test both ends, quick-connects, and any inline valves. If bubbles appear only under certain pressure settings, repeat the soapy-water test at those pressures to confirm. After inspection, wipe the hose dry and depressurize the system before handling fittings. Make this soapy-water test part of routine maintenance—regular checks reveal developing leaks early, preserve performance, and keep you free from unexpected failures when you need reliable inflation.
Found a Leak: Can the Tire Inflator Hose Be Repaired Safely?
Now that you’ve pinpointed a leak with the soapy‑water test, decide whether to repair or replace the hose. You’ll usually opt for replacement: patching introduces safety risks and can fail under pressure. Inspect suspect areas closely—connectors, near clamps, and any bulges or uneven diameters—for cracks or seals that look compromised.
- Check visually and with the Damp Cloth Technique: clean, flex, and watch for dark lines that show micro‑leaks; punctures and cracks mean replace.
- Assess damage severity: surface scuffs or minor wear might be monitored, but cracks, bulges, or damaged seals require immediate replacement hose installation to restore safe operation.
- Follow a maintenance schedule: inspect biannually and swap hoses that don’t meet EU General Product Safety Regulation (EU) 2023/988 standards.
You deserve equipment that frees you from doubt—choose safety over temporary fixes and fit a certified replacement hose when defects appear.
[Products Worth Considering]

Widely Applicable: The tire inflation extension tube is designed to be used with the inflator to quickly connect to the tire for inflation and is suitable for inflating the tires of most vehicles including cars, motorcycles, bicycles and electric cars

1/4" red rubber hose with outer diameter of 13±0.2mm, and a length of 12 inches (approximately 0.305 meters)

【360-DEGREE ROTATING HOSE END】LUMITECO tire inflator extension hose with swivel hose end designed for ultimate flexibility, ensuring you can inflate with ease from any angle. No more struggling to position your portable air compressor, simply rotate the end of the hose to adjust it to the proper position for inflation.
Replace the Tire Inflator Hose Correctly (Tools, Thread Sealant, Torque Tips)
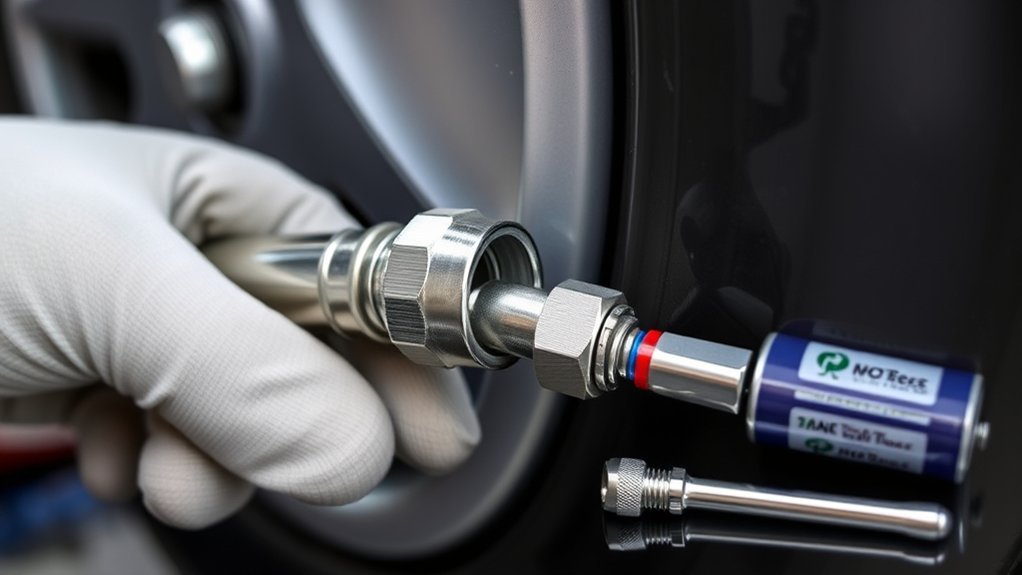
1 careful replacement will keep your inflator safe and leak‑free: first gather a correctly sized wrench, a replacement hose that meets EU General Product Safety Regulation (EU) 2023/988, and compressed‑air thread sealant rated for the application, then depressurize and disconnect the old hose. Use the wrench to loosen fittings without marring the inflator body; protecting the tool and your grip preserves control and freedom to work. Clean male threads thoroughly so the new hose seats correctly. Apply thread sealant sparingly to the male threads, avoiding excess that could migrate into the airway. Hand‑start the new hose, then use the wrench to reach the manufacturer’s recommended torque — stop before over‑tightening to prevent cracking or stress. Repressurize slowly while watching connections for leaks; if you spot any seepage, depressurize and re‑torque. Finally, inspect the assembly for visible defects and verify the hose functions under normal load. Replace the tire inflator hose only with compliant parts and controlled technique.
[Products Worth Considering]

21" Stainless Steel Hose with Fittings and Locking Chuck

【360° ROTATING TIRE CHUCK】LUMITECO tire inflation hose with swivel tire chuck features more flexibility for a hassle-free inflation process, ensuring you can inflate with ease from any angle. No more struggling to position your portable air compressor, just adjust the air chuck and inflate.

【PACKAGE INCLUDES】: You will receive 7pcs inflator hose set, including 1x 33''/84cm extend air pump hose, 1x Presta Valve Adaptor(American type to French type), 1x Ball Pump Needle Adaptor, 2x Tapered Nozzles, 2x Converting Nuts.
Prevent Hose Fatigue: Storage, Coiling, and Routine Inspection Schedule
Because hoses fail from repeated bending and environmental exposure, you’ll prevent premature fatigue by storing, coiling, and inspecting them deliberately: use the over‑under coiling method to avoid kinks and stress risers, keep hoses in sealed containers away from ozone sources and sunlight, and shield them from extreme temperatures and mechanical strain.
Prevent hose fatigue: over‑under coil, store sealed away from ozone and sun, and inspect regularly.
- Use over‑under coiling every time you stow a hose; it preserves flexibility, eliminates twists, and reduces stress risers that cause cracks.
- Adopt sealed storage: place coiled hoses in labeled containers or cabinets, away from ozone‑generating equipment and direct sun, and avoid areas with wide temp swings or physical compression.
- Set a routine inspection schedule: perform biannual checks using a damp cloth to reveal surface cracks, look for bulges or stiffness, and document findings. If you find damage, remove the hose from service immediately.
Follow this procedural regimen to reclaim control over equipment life, shift from reactive replacement to proactive maintenance, and extend hose longevity through deliberate storage and inspection.
[Products Worth Considering]
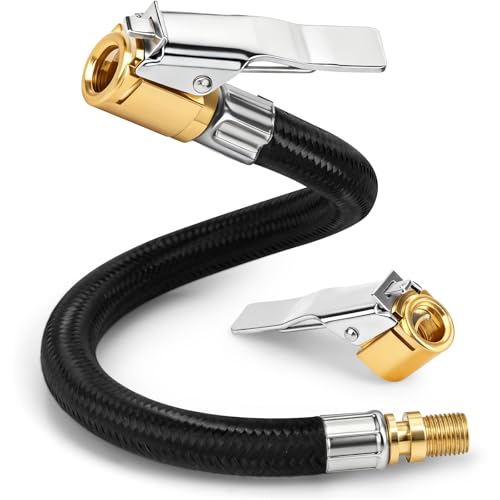
Upgraded Durable Material: Made with high-pressure woven fabric and equipped with solid brass quick-connect chucks for superior durability. The reinforced hose resists cracking and abrasion, ensuring long-lasting stability and reliable performance.

55FT Extra-Long Gladhand Air Hose – 3/8" x 55FT heavy duty hose provides extended reach around tractors, trailers and dual tires. Designed as a reliable air hose for semi truck applications, ideal for roadside emergency inflation, long-haul transport and fleet maintenance.

Rapid Inflation: Includes (4) 16-gram threaded steel CO2 canisters, each providing 8-9 lbs. of pressure (up to 24-32 lbs. total, depending on tire size) for quick tire inflation.
Frequently Asked Questions
How to Test a Hose for a Leak?
Spray a soap solution along the hose and connections, watch for bubbles and listen for whistles; flex and wipe with a damp cloth to reveal cracks, and use leak-detection concentrate for slow leaks—regular hose maintenance keeps you free.
Can You Repair an Air Compressor Hose?
About 60% of DIY hose repairs fail; you can repair by cutting damaged sections and using a repair kit, but hose replacement options are safer. Follow compressor maintenance tips, seal fittings properly, and replace for reliability.
How to Inspect Hydraulic Hoses?
You inspect hydraulic hoses by visually checking for cracks, bulges, fraying, and uneven diameters, using the damp cloth technique, listening for whistles, performing hose pressure testing, and scheduling regular hydraulic hose maintenance to keep systems free and safe.
How to Check Air Compressor Leak?
Spray soapy water like you’re exposing tyranny: check all fittings, hoses, and connections for bubbles, listen for whistles, tighten loose fittings, use leak detector concentrate for micro-leaks, and practice air compressor maintenance and tire inflator safety.
Conclusion
Wrap up your inspection with a clear decision: if you find soft spots, deep cracks, frayed braid, leaking fittings, or persistent micro‑leaks after a soapy test, replace the hose—safety first. If damage is limited to a damaged ferrule or fitting, repair only with proper parts, thread sealant, and correct torque; otherwise don’t gamble. Store hoses coiled without kinks, inspect before each use, and remember: an ounce of prevention is worth a pound of cure.


Leave a Reply