
Before you drive, identify whether your spare is full‑size, donut, run‑flat, or a kit, and confirm it’s compatible with your wheel studs. Check the door placard or owner’s manual for the correct PSI, inspect the tire and rim for cracks, corrosion, punctures, bulges, and the DOT date, and verify TPMS or sealant expiration. Use a calibrated gauge and inflator to reach the specified pressure, recheck, and note driving limits; continue for step‑by‑step procedures and safety tips.
Quick How‑To: Inflate a Spare Tire

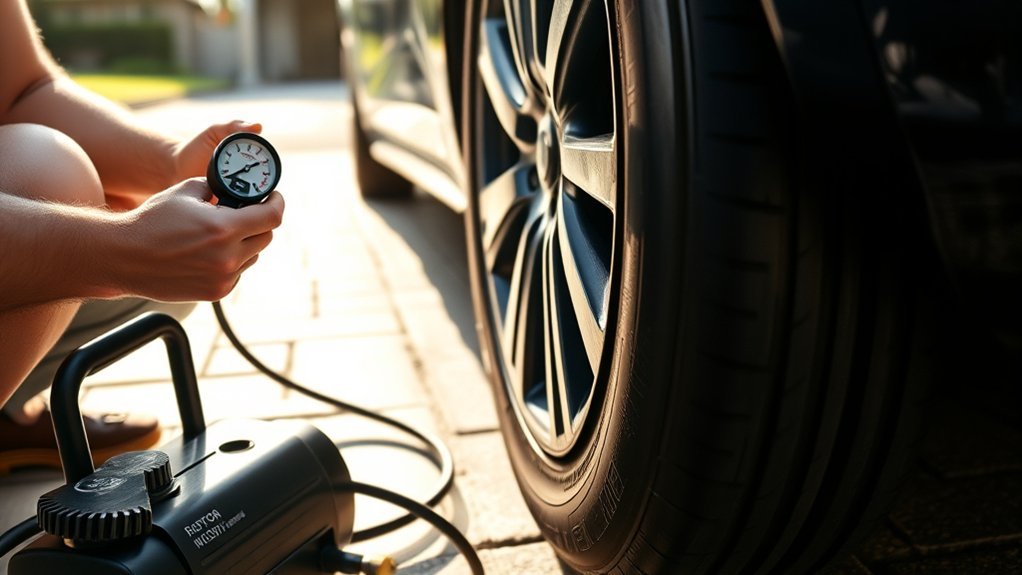
Start by removing the spare from its trunk or storage area and set out a tire pressure gauge and an air compressor. You’ll locate the valve stem, remove the cap, and use the tire pressure gauge to get an initial reading. If the reading’s below the specified pressure—typically 60–80 PSI for donut spares or the vehicle manual’s value for full-size—connect the air compressor. Attach the hose to the valve stem, engage the compressor in short bursts, and monitor pressure frequently with the tire pressure gauge to prevent overinflation. Once you reach the target PSI, disconnect the compressor, replace the valve cap, and perform a visual inspection for cuts, bulges, or seepage. Align the spare with the wheel studs, mount it securely, and torque the lug nuts per spec. Check tire pressure one final time before driving. Proceed with confidence: you’ve restored mobility and retained control over your journey.
Identify Your Spare: Full‑Size, Mini/Donut, Run‑Flat, or Kit
First, determine which spare you have: full‑size, mini/donut, run‑flat, or a mobility kit. Then check the spare’s size and pressure specs and confirm it’s compatible with your vehicle and wheel studs. Finally, consult the owner’s manual for any usage limits or required maintenance before you inflate or drive on it.
Determine Spare Tire Type
Because spare types have different purposes and limits, you should identify which one your vehicle carries before inflating or driving on it. Inspect the stored unit visually and by label: full-size spares match your regular tires and use the same inflation pressure; mini or donut spares are smaller, clearly marked, and usually require 60–80 PSI; run-flat tires look like normal tires but are reinforced and are driven on without immediate inflation, though they need manufacturer-specific service afterward; temporary tire mobility kits consist of sealant and a compressor, not a tire, and provide only short-range, emergency repair. You’ll note markings, size, and tool presence. Make a decisive choice: treat each type according to its constraints, follow specified inflation pressure, and plan to reach professional service without delay.
Check Compatibility And Size
When you inspect the spare, confirm its type and size so you use the correct inflation and driving limits. Identify whether the Spare Tire is full‑size, mini/donut, run‑flat, or a temporary mobility kit. Measure diameter, wheel bolt pattern, and sidewall markings; note the stamped size code. Full‑size spares match standard tires and need the same inflation pressures. Mini/donuts typically require about 60 psi and have strict speed and distance limits. Run‑flats allow limited driving with specific servicing rules and shouldn’t be mixed with conventional tires except in emergencies. Mobility kits use sealant and a compressor for temporary repair only. Consult the owner’s manual for exact compatibility, tire pressure specs, and operational limits before you drive.
Find the Correct Spare Tire Pressure
Want to be sure your spare will perform? You check tire pressure and spare tires with intent. First, read the driver’s door placard and your owner’s manual; full-size spares usually match listed PSI, while mini-spares (donuts) need about 60–80 PSI. Use a calibrated tire pressure gauge and compare readings to specifications — don’t guess.
| Location | Checkpoint | Action |
|---|---|---|
| Placard | Vehicle PSI | Follow listed value |
| Sidewall | Max/service info | Verify compatibility |
| Gauge | Measured PSI | Inflate or deflate to spec |
Inspect the spare’s sidewall for stamped pressure guidance and note any discrepancy with the manual. Check monthly and before trips. Underinflation risks rapid wear and blowouts; overinflation affects handling. If specs conflict, prioritize the owner’s manual, then consult a dealer. Keep a reliable gauge and a compact inflator accessible so you can act immediately. This methodical routine frees you from uncertainty and keeps you mobile.
Tools You Need Before You Start
Gather a small kit before you start: a calibrated tire pressure gauge, an air compressor or portable inflator (or plan to use a station pump), and your owner’s manual for the correct PSI; include a jack if the spare is stored under the vehicle or otherwise inaccessible. You’ll need a reliable tire inflator — choose a portable unit with an integrated gauge or a compressor rated for automotive tires. Carry a separate calibrated gauge to verify readings; built-in inflator gauges can drift. Keep your owner’s manual accessible so you can confirm the pressure of your spare and any vehicle-specific notes. Include basic accessories: valve-core tool, cap wrench, and a short extension hose to reach awkward valves. Inspect batteries and power cords for the inflator; test the unit periodically. Store the kit where you can grab it without a second thought. Check and adjust the pressure of your spare monthly so you’re not stranded with a pack of tools that can’t set you free.
Access and Remove the Spare Safely
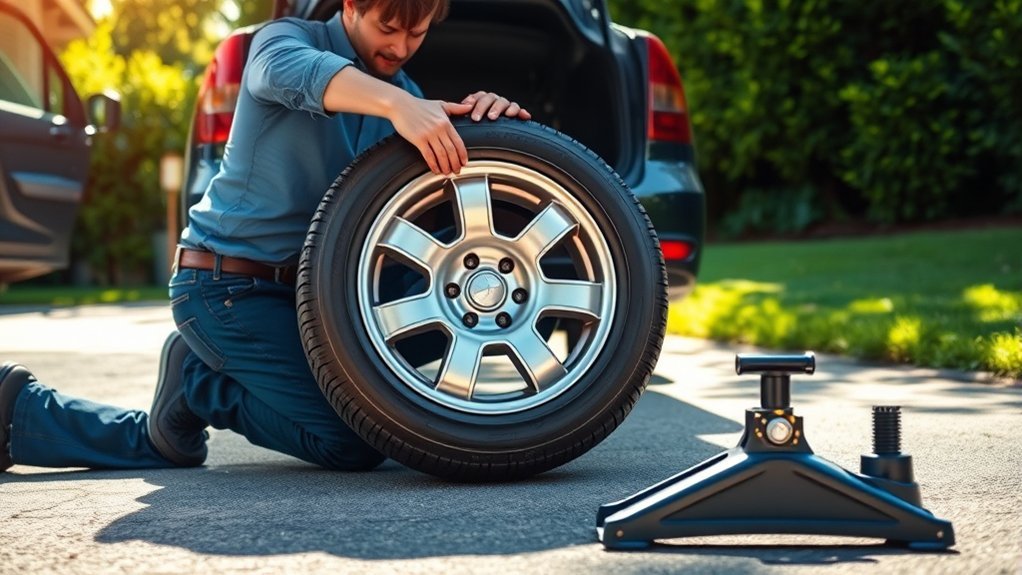
Locate the spare tire per your owner’s manual, whether it’s in the trunk or mounted under the vehicle. Park on a flat surface, set the parking brake, and position the jack at the recommended lift point. Lift only as needed to free the spare, then detach it carefully and inspect for damage or corrosion.
Locate Spare Tire Well
Start by checking your owner’s manual to confirm where the spare is stowed—most cars keep it in the trunk well or under the vehicle—then clear any cover or debris that blocks access. You’ll locate the well, remove panels or fasteners, and free the spare. If it’s underneath, position the vehicle on level ground before working. Gather tools (lug wrench, jack) so removal is efficient. Inspect the wheel for corrosion or cuts, then check inflation pressure before fitting. Act methodically, keep movements deliberate, and claim control — you’re restoring mobility.
| Step | Action |
|---|---|
| 1 | Consult manual |
| 2 | Remove cover |
| 3 | Inspect tire |
Use Proper Jacking
With the spare freed and tools at hand, position the vehicle on level, stable ground and engage the parking brake before you lift. Consult your owner’s manual to locate specified jacking points; using incorrect points risks structural damage and unsafe lifting. Place wheel chocks opposite the side to be raised to prevent rollaway. Position the jack under the designated point, confirm contact, then raise the vehicle slowly and steadily while monitoring jack alignment. Once elevated to access the donut spare, verify the vehicle is stable and the jack sits squarely; never rely solely on a hydraulic jack—use stands if you must work beneath. After removal or access for tire inflation, lower the vehicle deliberately and stow the jack and chocks securely.
Measure the Spare Tire Pressure
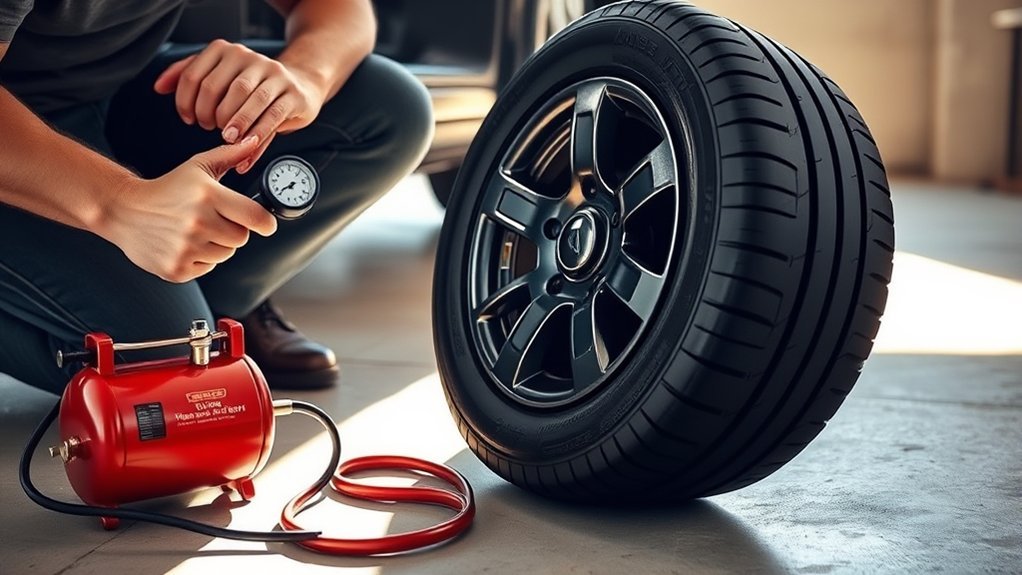
Because spare tires slowly lose air over time, you should measure the spare’s pressure with a tire pressure gauge before using it. Use a reliable gauge, press it firmly to the valve stem, and read the PSI. Knowing the tire air value lets you act decisively; donut spares commonly require 60–80 PSI, but always follow your owner’s manual or the tire sidewall marking.
Systematically compare the measured pressure to the recommended range. If it’s low, you’ll need to inflate it (see next section); if it’s high, release air until within spec. Record the reading and date, and mark a reminder to inspect the spare periodically. Underinflation speeds wear, risks blowouts, and reduces control—so don’t skip this step.
After you reinstall the spare, check the pressure again to confirm it stayed within the appropriate range for safe driving. This habit preserves your freedom to travel without surprise failures.
Inflate the Spare Tire and Recheck Pressure
Inflate the spare to the manufacturer’s recommended PSI, then immediately confirm the reading with a tire pressure gauge—donut spares usually need 60–80 PSI, while full-size spares should match the placard in the driver’s door jamb or the owner’s manual. Use a quality gauge at the valve stem, add air in short bursts, and recalibrate as you go until the target PSI is reached.
Mount the spare by aligning the holes with the wheel studs and hand-thread the lug nuts, then torque them in a star pattern to the vehicle’s specification. Recheck the pressure after the wheel is seated and lug nuts are snug; pressures can shift slightly during installation. If pressure drops below spec on recheck, don’t assume temporary variance—low pressure may indicate a leak needing professional repair. Maintain the spare monthly; tires typically lose about one PSI per month through normal seepage. Keep the spare ready so you can leave when you choose.
Inspect for Damage, Age, and TPMS/Sealant Issues
After you’ve confirmed and tightened the spare, inspect it visually and by date to make sure it will perform when you need it. You’ll inspect for damage: look for cracks, bulges, cuts, punctures, and rim corrosion. Any structural deformity or sidewall damage invalidates safe use. Read the DOT code to verify manufacture date; treat spares older than about eight years as expired even if unused. Confirm the wheel’s bead area is clean and free of rust that could prevent a proper seal.
Check TPMS/sealant issues next. Verify the TPMS sensor mounts and battery status if fitted, and confirm the system reports correct pressure before leaving. If you carry a temporary mobility kit, inspect the sealant’s expiration date and compatibility with your tire type; expired or incompatible sealant can damage the tire and TPMS. Document findings, replace compromised parts, and free yourself from uncertainty before you drive.
Reinstall, Driving Limits, and When to Replace the Spare
When you’ve seated the spare and tightened the lug nuts, verify that the wheel holes line up with the studs and recheck tire pressure to match the value in your owner’s manual. After confirming alignment and torque, lower the vehicle and perform a final pressure check with a calibrated gauge. Note the recommended tire pressure in your manual and set the spare accordingly.
Drive cautiously: temporary spares are limited. Do not exceed 50 mph and avoid trips longer than 50 miles. These constraints preserve control and prevent structural failure. Monitor handling, vibration, and noise; reduce speed if abnormalities appear.
Inspect the spare regularly for cuts, dry rot, or tread degradation. If the spare has been used, assess it immediately for damage and schedule replacement without delay if you detect issues. Even unused spares warrant replacement about every eight years per manufacturer guidance. Consult your owner’s manual for specific replacement intervals and maintenance steps to maintain freedom of movement safely.
Frequently Asked Questions
How to Check Spare Tire Air Pressure?
You check spare tire air pressure by using air pressure tools: remove cap, press gauge firmly, read PSI, compare to recommended value, inspect sidewall and condition, repeat monthly or before trips to guarantee spare tire maintenance.
What Is the 3% Tire Rule?
Like a precision scale, the 3% tire rule means you keep pressures within 3% across an axle; you’ll perform tire maintenance, follow safety tips, and guarantee balanced handling, even wear, and safer, liberating driving control.
What Is the 50 50 Rule on Spare Tires?
The 50 50 rule says you’ll limit driving on a temporary spare tire to about 50 miles and avoid speeds above its rating; follow spare tire inflation guidelines, replace promptly, and don’t rely on it for long-term use.
Why Is It Essential to Check the Tire Pressure of the Spare Before Driving?
You must check spare tire pressure because spare tire importance ties to safety concerns: an underinflated spare reduces handling, risks blowouts, and limits emergency mobility, so you’ll regularly inspect and inflate it to specified PSI for liberation.
Conclusion
You’ve checked type, pressure, tools, and condition, and topped the spare to the correct psi; now reinstall it securely, tighten lug nuts in a star pattern, and stow tools. Drive cautiously—short distance, moderate speed—until you repair or replace the damaged tire. Treat a spare like a temporary bridge: it gets you across, not to the destination. Log the spare’s age, any sealant use, and plan a permanent fix as soon as possible.


Leave a Reply