
You should inspect your tire inflator’s air filter frequently and clean it every few uses or about every 2,000 operating hours, sooner in dusty or moist conditions. Always isolate and depressurize the system before service. Clean foam with soapy water and air-dry, blow out gauze with low-pressure compressed air, and replace damaged or heavily soiled paper elements. Log date, hours, and condition; keep spares on hand. Continue for step‑by‑step removal, cleaning, and replacement guidance.
Quick Answer: When and How to Service the Air Filter
If you want reliable inflation and consistent airflow, check the inflator’s air filter regularly and replace it every 2,000 operating hours or sooner if you see visible dirt, debris, or a pressure drop during inflation. You’ll inspect visually and log the date, hours, and condition. If you spot contamination or a measurable pressure loss, plan immediate service. First, isolate the inflator and depressurize the system. Remove the filter element per manufacturer procedure. For light fouling, use moderate compressed air from the inside out to dislodge particles; don’t exceed recommended pressure to avoid damage. For heavily clogged or damaged elements, replace air filter rather than attempt repair to restore integrity and airflow. Reinstall correctly, torque fittings to spec, and pressurize while watching for leaks and proper output. Record the action in your maintenance log. This routine keeps your equipment free and operational so you can move without constraint.
Why the Tire Inflator Air Filter Matters
Clean air keeps your inflator working: the filter blocks dust, dirt, and moisture that would abrade seals, clog valves, and shorten motor life. You rely on the air filter to preserve internal tolerances and maintain steady airflow; contaminants compromise pressure delivery and force the motor to work harder. Inspecting and servicing the filter prevents performance loss, longer inflation cycles, and premature component failure.
You’ll want measurable inspection steps: visually check for dust buildup, pass air through the element to detect restriction, and note any discoloration or debris trapping. When the element shows visible contamination, clean or replace it to restore specified flow rates and reduce motor load. Keeping the intake path clear also preserves seal integrity and valve function, which protects you from unexpected breakdowns. Treat the air filter as a liberating control point—maintain it to keep the tool responsive, efficient, and durable under varied operating conditions.
How Often to Clean : and When to Replace
You’ve seen why the filter matters; now set a repeatable inspection and service rhythm. Inspect visually after every use for dirt and debris. Clean with compressed air or a vacuum as needed — typically every few uses, more often in dusty environments. Track hours and schedule Replace filters at 2,000 hours of operation for peak performance; shorten interval if conditions are harsh. Maintain a log to free yourself from guesswork and keep the inflator reliable.
| Action | Interval |
|---|---|
| Visual inspection | After every use |
| Cleaning (compressed air/vacuum) | Every few uses or as needed |
| Log/check hours | Weekly or per shift |
| Replace filters | Every 2,000 operating hours (sooner if dirty) |
Follow the table as a minimum protocol. Clean proactively to prevent reduced airflow and overheating. When logs show accelerated contamination, Replace filters early. This procedural cadence preserves performance and grants you control over equipment longevity.
Signs Your Filter Needs Replacing
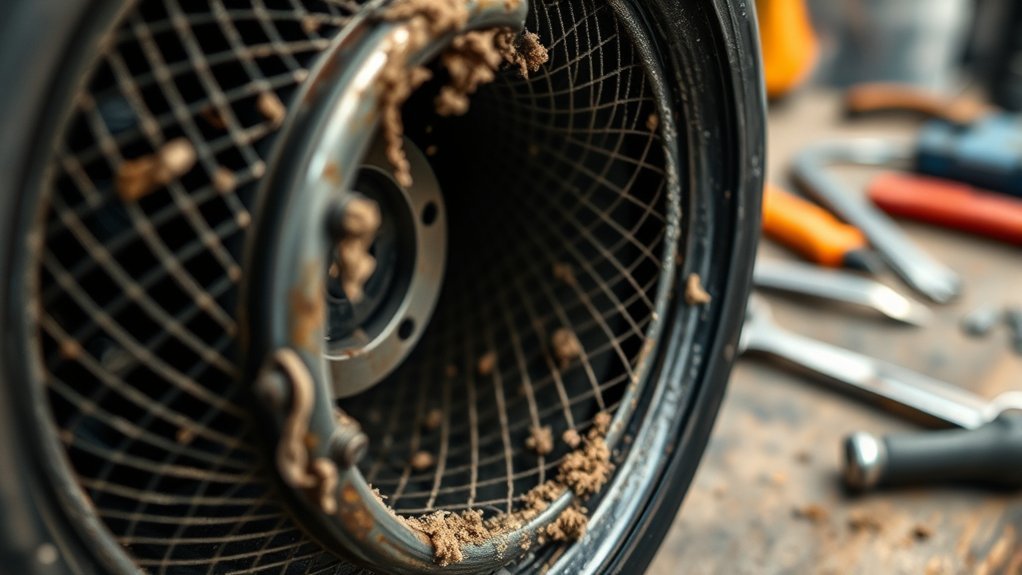
Notice slower inflation or lower final pressures — that usually means the filter’s restricting airflow and needs replacing. You’ll also see longer run times to reach target pressure; log cycle durations and compare to baseline. Inspect visually: visible dirt, debris, or dark discoloration on Filters is a direct indicator to Replace the element.
Monitor operational cues: elevated compressor temperature, unusual sounds, or reduced airflow at the outlet all point to a compromised filter that you should Replace immediately. Check for oil mist or moisture in the air output — contamination indicates filter saturation or failure and demands replacement to prevent system damage.
Adopt a brief diagnostic routine: measure inflation time, perform a visual check, listen for abnormal noise, and inspect output for oil or water. If any criterion is met, Replace the filter. Regularly scheduled checks and prompt Replacement preserve performance, reduce overheating risk, and free you from avoidable breakdowns while extending the inflator’s service life.
How to Remove, Clean, and Reinstall the Filter
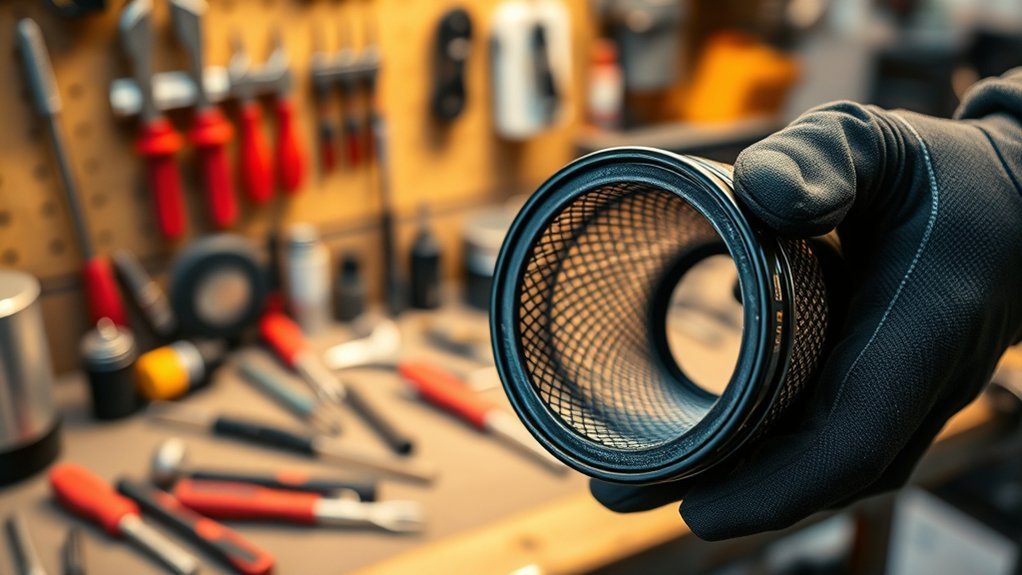
Before you start, power down the inflator and relieve any trapped pressure; then unscrew or unclip the housing cover to access the filter element. Wear gloves and eye protection. Grasp the filter by its edges and withdraw it straight out to avoid dislodging seals. Inspect the seating groove and O-rings; clean debris from the cavity with a dry cloth or compressed air.
If the element is dirty but intact, remove trapped particles with compressed air from the inside out and allow it to dry completely before reinstalling. If you detect tears, deformation, or persistent clogging, perform filter replacement using the manufacturer’s part.
Reinsert the cleaned or new filter into its designated slot, seating it fully and evenly so it won’t bypass contaminants. Replace any worn seals. Reattach the housing cover and torque or clip to spec. Power up and verify operation. Check the filter every few months or after heavy use to protect performance and preserve your autonomy.
Cleaning Methods for Foam, Gauze, and Paper Filters
Start with foam: soak it in warm soapy water, rinse thoroughly, and let it air dry completely before reinstalling. For gauze, use compressed air blown from the inside out to dislodge debris without deforming the media, and avoid solvents or heat. Treat paper as disposable—tap lightly to remove surface dust only if it’s not heavily soiled, then replace.
Foam Filter Cleaning
When cleaning foam filters, soak them in warm soapy water, rinse thoroughly, and let them air-dry completely before reinstalling to prevent moisture-related damage; gently tap to dislodge loose debris and, if needed, blow compressed air from the inside out to remove trapped particles without deforming the foam. Inspect the foam filters for tears, compression, or material degradation; if damaged, replace rather than attempt repair. Avoid solvents and heat — they’ll weaken the foam and shorten service life. Clean on a regular schedule based on use intensity to preserve airflow and inflator efficiency. Handle with minimal force, use only filtered compressed air, and store dry spare foam elements in a ventilated container. Proper routine upkeep frees you from avoidable failures.
Paper And Gauze Care
Foam elements clean with soapy water and careful drying, but paper and gauze filters need different handling to avoid damage and preserve filtration. Inspect paper filters visually; if debris is light and media intact, replace—paper filters are generally single-use. Don’t use compressed air or aggressive tapping; that forces particles deeper and tears fibers. For gauze filters, perform gentle hand-cleaning: hold the element, strum the gauze with a soft brush or fingertips to dislodge dirt, then rinse lightly if the matrix allows. Air-dry gauze completely before reinstalling. Throughout, check for holes, deformation, or thinning; any compromise means you replace the element. Maintain a regular inspection schedule so you can act decisively and keep airflow free while protecting your freedom to maintain gear.
Maintenance Schedule and Tracking Checklist
Set a recommended replacement interval (typically every 2,000 hours, sooner in dusty conditions) and record each service in a maintenance log with date, hours, condition, and action taken. Use the checklist to capture visual inspection results, performance notes (longer inflation times, unusual noises), and parts used so entries are auditable and repeatable. Maintain an inventory of spare filters tied to the schedule so you never run out and can replace filters immediately when logs or inspections indicate.
Recommended Replacement Intervals
1 clear rule: replace the tire inflator air filter every 2,000 hours of operation, and log each change on a maintenance tracking checklist so you can enforce interval-based replacements. You’ll inspect visual dirt, listen for unusual noises, and monitor heat. In harsh environments, shorten intervals to prevent clogging and preserve performance. Use the checklist to track hours, conditions, and parts so you can act before failure.
| Item | Action |
|---|---|
| Interval | 2,000 hours standard |
| Shortened Interval | Dusty/dirty environments |
| Trigger | Visible debris |
| Trigger | Increased temperature |
| Record | Date, hours, technician |
Follow this procedural schedule, replace air filters promptly, and record each replacement to maintain freedom from unexpected downtime.
Maintenance Log Best Practices
Maintain a concise maintenance log that records each air filter inspection, cleaning, and replacement with date, operating hours, technician, and observed condition so you can enforce the 2,000-hour interval (or the shortened interval for dusty environments). Use a standardized checklist entry for each event: visual condition (clean, soiled, damaged), measured pressure drop, corrective action, and next scheduled check. Track operating hours cumulatively and log environmental notes when conditions are harsher. Review the maintenance log weekly to spot trends—accelerated contamination or repeated failures—and adjust intervals accordingly. Assign responsibility for entries and audits so data stays reliable. Keep entries retrievable and immutable to support accountability, continuous improvement, and your freedom from reactive, downtime-driven maintenance.
Spare Parts And Inventory
A reliable spare-parts inventory keeps you ready to replace air filters quickly and prevents downtime: list exact part numbers, compatible brands, quantities on hand, minimum reorder points, and preferred suppliers, and link each item to the machine(s) it serves so technicians can pull the correct filter immediately when a scheduled 2,000-hour (or compressor-specific) check calls for replacement. Maintain a worksheet tying spare parts to compressor models and service intervals (rotary screw/portable 2,000 hours; reciprocating quarterly/biannual). Use a preventative maintenance checklist to record filter changes, oil inspections, and dates. Set minimum reorder points based on consumption rates and lead times. Log condition notes to spot accelerated wear. Review inventory monthly, reconcile physical counts, and reorder to restore minimums. This system frees you from reactive shortages and keeps operations moving.
Buying Replacement Filters: Compatibility and Tips
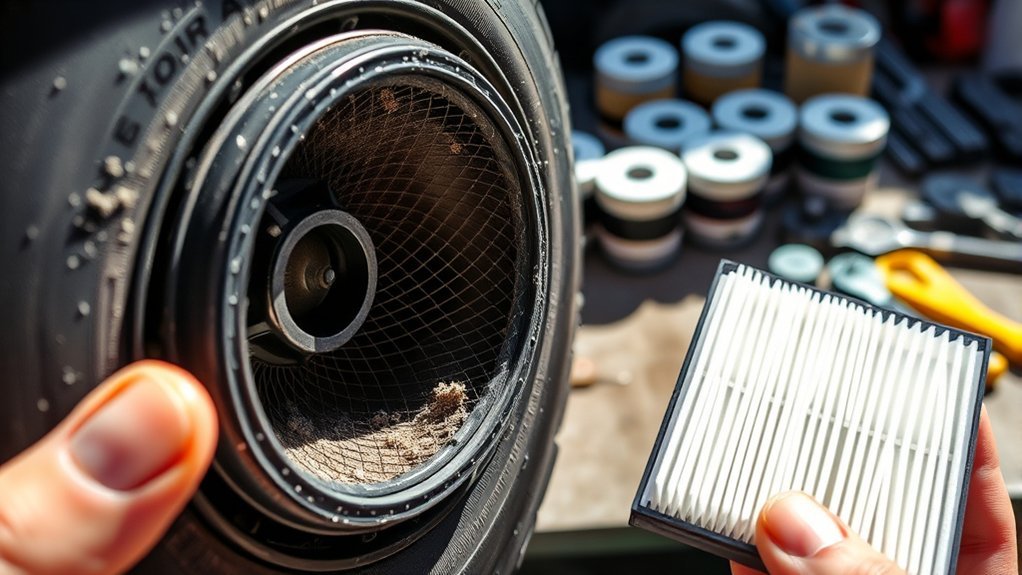
Wondering which replacement filter will work with your tire inflator? You’ll start by buying replacement filters that match the manufacturer’s specifications for model, part number, and dimensions. Confirm fit first; a correct physical match preserves sealing, flow rates, and device longevity. If the OEM option is available, choose it for guaranteed compatibility and predictable performance. When considering aftermarket alternatives, verify positive reviews, documented reliability, and matching dimensions. Buy in bulk if you want spares and lower per-filter cost.
- You’ll feel secure knowing you’ve matched specs and avoided failures.
- You’ll gain freedom from downtime with reliable spare parts on hand.
- You’ll be empowered choosing OEM for guaranteed fit or vetted aftermarket for savings.
- You’ll reduce anxiety by documenting part numbers and purchase sources.
Procedure: verify model number, compare dimensions, check reviews, and purchase OEM or proven aftermarket in the desired quantity. Keep records to simplify future replacements.
Frequently Asked Questions
How Do I Know When It’s Time to Replace My Air Filter?
Replace it when Filter Performance drops: you notice pressure loss, longer cycles, visible dirt, oil or moisture, excess heat or noise, or after about 2,000 operating hours; follow a scheduled replacement to maintain freedom from failure.
How Often Should You Change the Air Compressor Filter?
You should change the air compressor filter every 2,000 hours for rotary screw/portable units and every 3–6 months for reciprocating units; adjust based on filter lifespan, dusty conditions, pressure drop, heat, noise, or longer cycle times.
How Do You Know When to Clean Your Air Filter?
You clean the air filter when you see dirt buildup, reduced pressure or longer inflation times, unusual noises or overheating; monitor Air Quality, log inspections, and follow scheduled intervals so you can maintain efficient, liberated operation.
How Often Should Compressor Intake Filters Be Cleaned?
See dust streaming like gray smoke? You should clean intake filters regularly—inspect monthly, replace per hours: ~2,000 for screw/portable, quarterly or semiannual for pistons—to preserve filter efficiency and free compressor performance.
Conclusion
You should inspect and service your tire inflator air filter regularly — about every 50 hours or when pressure drops — because clogged filters can cut airflow by up to 30%, reducing efficiency and risking motor damage. Clean foam or gauze filters with mild detergent, let them dry, re-oil if required, and replace paper elements. Keep a simple log or sticker with dates and hours. If you see tears, persistent pressure loss, or contamination, replace the filter immediately.


[…] puncture or a faulty valve stem; if the unit works elsewhere, the problem isn’t the inflator. Clean the inflator’s air filter and openings regularly to prevent clogging that reduces output. These steps give you a clear, fast […]