How to Charge a Cordless Tire Inflator Battery
Charging a cordless tire inflator is usually simple, but the correct method depends on whether it has a built-in USB battery, a removable power-tool battery, or no rechargeable battery at all. Before connecting anything, check the model label and manual so the charger, cable, voltage, and charging temperature match the manufacturer’s instructions.
Quick Answer
Turn the inflator off and let it cool. Identify whether it uses a built-in USB battery or a removable battery pack, then use only the manufacturer-approved charger and cable. Charge at a safe indoor temperature, watch the status light, and disconnect when the manual says charging is complete.
Key Takeaways
- Confirm how your inflator is powered before trying to charge it. Some have an internal USB battery, while others use a removable power-tool battery.
- Use only a charger and cable approved for the exact inflator or battery pack. A plug that fits is not proof that the voltage, polarity, or charging system is compatible.
- Charge in a dry, ventilated area away from flammable materials, extreme heat, and freezing temperatures.
- Charging time and light behavior vary by model. Follow the manual rather than relying on a universal time limit.
- Stop using a swollen, leaking, cracked, hissing, smoking, or unusually hot battery and arrange proper lithium-ion battery disposal.
At a Glance
| Time Required | About 2–5 minutes to inspect and connect the charger. Full charging time varies by model; one current Slime model takes about four hours with the specified 2.1A USB source. |
| Difficulty | Easy, provided you have the correct charger and can identify the charging system. |
| Tools Needed | Owner’s manual, approved charger or charging adapter, correct cable, and a clean dry cloth. |
| Cost | Usually no added cost when the correct charger is already available. Replacement chargers and battery packs vary by model. |
Warning: Do not charge or continue using a battery that is swollen, cracked, leaking, hissing, smoking, producing a chemical smell, or becoming rapidly hotter. Disconnect power only if it is safe to do so, move away from the device, keep others clear, and contact emergency services if there is smoke, fire, or an immediate threat.
Identify the Inflator’s Battery and Charging System
Do not assume every cordless inflator charges through a port on the inflator. Check the model label, battery compartment, charger label, and owner’s manual before connecting a cable.
| Inflator type | Correct charging method | Common mistake |
|---|---|---|
| Built-in USB battery | Connect the specified USB cable and an adapter or power source that meets the manual’s input requirements. | Using a weak computer port, damaged cable, or unsupported charging protocol. |
| Removable power-tool battery | Remove the battery and charge it in the battery manufacturer’s approved charger unless the manual says otherwise. | Searching for a charging port on the inflator or using a charger from a different battery platform. |
| Proprietary battery or cradle | Use the exact charger, dock, and battery specified for that model. | Assuming that a physically similar barrel plug has the correct voltage and polarity. |
| 12V corded inflator | Connect it to the approved vehicle accessory socket or power supply. It may not contain a rechargeable battery. | Trying to charge a unit that is powered only while connected to 12V. |
Some inflators support more than one power source. For example, the DeWalt DCC020IB can use a removable 20V MAX battery, 12V DC power, or an AC power adapter. The removable battery is charged with its compatible battery charger rather than through a general USB cable.
Note: A connector that fits is not necessarily safe. Charger voltage, current limits, polarity, battery chemistry, temperature monitoring, and communication between the battery and charger may all matter.
Quick Checklist Before You Plug In the Cordless Inflator Battery
Complete these checks before every charging session:
- Turn the inflator off: Do not run the compressor while charging unless the manual specifically says the model supports simultaneous use and charging.
- Let it cool: If the inflator was just used, wait until the compressor, battery, and charger return to a normal temperature.
- Confirm compatibility: Check the model number, battery platform, required voltage, connector, and charger specifications.
- Inspect the equipment: Do not use a cable, plug, battery, adapter, or charger with cuts, exposed wires, bent pins, scorch marks, cracks, swelling, or loose connections.
- Clean the connection: Wipe dust from the charging port and battery contacts with a dry cloth. Do not insert metal tools or apply liquid cleaner inside the port.
- Choose a safe location: Use a dry area with airflow and a stable surface. Keep the equipment away from fuel, paper, bedding, direct sun, heaters, and other flammable or hot materials.
- Check the temperature: Do not charge a frozen or excessively hot battery. Use the temperature range specified in the manual.
How to Connect the Charger Safely
- Read the charging label or manual. Confirm whether charging takes place through the inflator, through a removable battery charger, or through a proprietary dock.
- Check the charging source. Use an intact outlet, USB adapter, vehicle port, or battery charger that the manufacturer approves for the model.
- Seat the connector correctly. Align guides and insert the plug without twisting or forcing it. Remove and inspect it if it does not fit smoothly.
- Connect in the order shown in the manual. Connection order can vary, especially with proprietary chargers and removable battery packs.
- Check the indicator. Confirm that the expected charging light, screen icon, or charger LED appears.
- Monitor the first few minutes. Stop if the connector repeatedly disconnects, the charger buzzes abnormally, an error light appears, or the equipment becomes unusually hot.
- Disconnect when complete. Remove the device or battery from the charger when its instructions indicate a full charge.
OSHA’s lithium-battery safety guidance recommends following manufacturer instructions, using approved replacement batteries and chargers, removing batteries or devices from the charger when full, and storing them in a cool, dry location.
Pro Tip: Photograph the charger label and the inflator’s model label. If the charger is later misplaced, you will have the exact voltage, current, polarity, model, and certification information needed to find an approved replacement.
How Long Charging Takes and How to Tell When It Is Full
There is no universal charging time for cordless tire inflators. Battery capacity, battery condition, temperature, charger output, and the charging system all affect the result. Use the time range and indicator description in the manual for your exact model.
As a verified example, Slime’s current instructions for Cordless Tire Inflator part #40084 say to use a USB-A phone or tablet charging block, not a computer USB port. Slime states that charging takes about four hours from a 2.1A USB outlet. It also recommends charging before first use, recharging after use, and charging the inflator every four months during storage.
The correct charging time is the time specified for your exact inflator and charger—not a general four-hour rule for every portable inflator.
| Situation | What the indicator may mean | What to do |
|---|---|---|
| Blinking or moving battery icon | Often means charging is in progress. | Confirm the pattern in the manual because some blinking patterns indicate faults. |
| Solid light or full battery icon | Often means charging is complete. | Disconnect when the manual identifies this pattern as full. |
| Alternating or unusual light pattern | May indicate excessive temperature, a damaged battery, poor contact, or an incompatible charger. | Stop and look up the exact error code before continuing. |
| No light | May indicate no power, a loose plug, a deeply discharged battery, or equipment failure. | Check the outlet, charger, cable, port, temperature, and manual troubleshooting steps. |
Fast Charging vs. Standard Charging
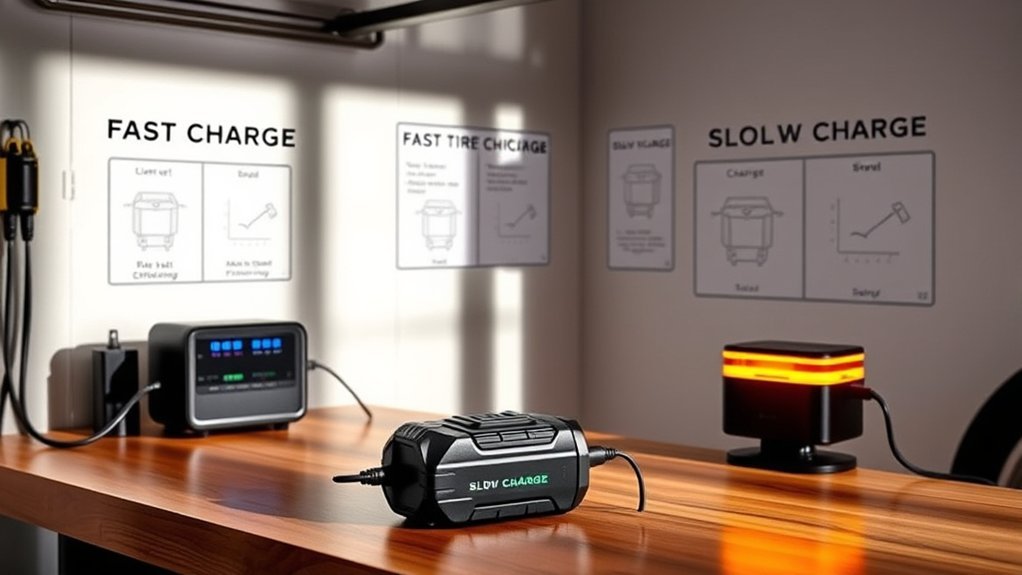
Use a faster charger only when the inflator or removable battery pack specifically supports it. Many portable inflators offer only one approved charging input, so there may be no fast-charge option to select.
- Check the input specification: Look for the required voltage, current, charging standard, and charger model.
- Do not judge compatibility by connector shape: A USB-C or barrel connector can be used with many different electrical specifications.
- Do not improvise with an ultra-fast charger: OSHA warns that ultra-fast charging should not be used unless the manufacturer includes it as an option.
- Watch for heat or error indicators: Pause charging if the battery or charger becomes unusually hot, and allow it to return to the approved temperature range.
- Use a normal approved charger when speed is not important: There is no need to search for a faster charger when the supplied or recommended charger meets the manual’s requirements.
Choose a Safe Charging Temperature and Location
Charge the inflator in a dry, ventilated area where you can notice heat, odor, smoke, or warning lights. Do not cover the charger or place it under clothing, bedding, paper, or other material that can hold heat.
OSHA notes that lithium-ion batteries may be damaged when charged below freezing, or when exposed to excessive heat. The manufacturer may specify a narrower safe charging range, so let a battery that has been stored in a hot vehicle or freezing garage return to an approved temperature before charging it.
Warning: Do not charge an inflator on a hot vehicle dashboard, beside a heater, in direct summer sun, near fuel or solvents, or while the battery is wet. Never attempt to cool a hot battery with water or place it in a refrigerator or freezer.
How to Store and Care for the Battery
Store the inflator and battery in a cool, dry place at normal room temperature. The U.S. Environmental Protection Agency advises avoiding prolonged exposure to extreme heat or cold, including storage on a vehicle dashboard in direct sunlight.
Do not apply one storage-charge percentage to every inflator. Some manufacturers recommend a partial charge, while others provide a time-based maintenance schedule. Follow the instructions for your model. Slime, for example, tells owners of part #40084 to recharge after use and charge the unit every four months during storage.
- Keep the charging port, battery terminals, and battery compartment clean and dry.
- Protect the inflator from drops, crushing, punctures, and loose metal objects.
- Do not store a removable battery where keys, tools, or other metal can bridge its terminals.
- Check the charge level at the interval listed in the manual.
- Recharge before a road trip or seasonal use rather than assuming the stored battery is still full.
- Inspect the battery for swelling, cracks, leaks, corrosion, or unusual odor before use.
Troubleshooting Charging Problems and Battery Failure
If the inflator does not charge, start with the charging system rather than assuming the battery has failed. Confirm that the unit is rechargeable, identify the correct charger, and then work through the checks below.
Battery Not Charging
- Confirm that the inflator contains a rechargeable battery. A 12V-only inflator works only while connected to vehicle power.
- Test the power source. Try a known-good outlet or approved power source.
- Verify the charger. Match its model, voltage, connector, polarity, and battery platform to the manufacturer’s requirements.
- Inspect and clean the connection. Remove dry dust and reseat the plug or removable battery.
- Check temperature. A charger may delay charging when the battery is too hot or too cold.
- Read the indicator code. Look up flashing, alternating, red, amber, or other warning patterns in the manual.
- Allow for deep discharge only as instructed. A battery stored empty for a long period may need time before an indicator appears, but do not leave it connected indefinitely without supervision.
- Stop if damage is visible. Do not keep testing a swollen, leaking, cracked, hissing, smoking, or unusually hot battery.
Slow or Intermittent Charging
Slow or stop-and-start charging commonly points to inadequate power, a loose connection, excessive temperature, cable damage, dirty contacts, or a worn battery.
| Symptom | Likely cause | Quick action |
|---|---|---|
| Charging is much slower than normal | Low-output adapter, weak USB source, cold or hot battery, damaged cable, or battery aging. | Use the specified charger and cable at an approved temperature. |
| Charging cuts in and out | Loose plug, dirty contacts, damaged port, broken cable, or charger fault. | Disconnect, inspect, clean dry contacts, and test only with an approved replacement. |
| Shows full but runtime is short | Battery capacity has declined, the battery is cold, or the inflator is working under a heavy load. | Test at normal temperature and consider an approved battery replacement if the problem continues. |
| Works from 12V but not from battery | Discharged, disconnected, overheated, deeply depleted, or failed battery. | Charge with the approved system, inspect the battery, and follow the model’s diagnostic instructions. |
When to Replace the Battery or Inflator
Replacement may be necessary when the battery repeatedly fails to charge, takes much longer than before, reaches “full” but provides little runtime, causes sudden shutdowns, or triggers a persistent charger fault.
- Replaceable pack: Buy only a battery approved for the exact platform and charger.
- Internal battery: Do not open the inflator or replace individual lithium cells unless the manufacturer provides an authorized service procedure.
- Physical damage: Remove the unit from service immediately if the battery is swollen, leaking, cracked, punctured, hissing, smoking, or rapidly heating.
- Recall: Search the manufacturer’s website and the relevant product-safety authority before buying a replacement or continuing to use a suspicious battery.
How to Dispose of a Damaged or Depleted Battery
Lithium-ion batteries and devices containing them should not go into household garbage or curbside recycling. EPA guidance says they should be taken to a specialist battery recycler or household hazardous-waste collection point.
Contact the inflator manufacturer, battery manufacturer, local waste authority, or household hazardous-waste facility before transporting a swollen or damaged battery. Facilities may have special acceptance and packaging rules. For an undamaged removable battery, protect exposed terminals with nonmetallic tape or place the battery in its own plastic bag when the collection program instructs you to do so.
Warning: Do not puncture, crush, open, burn, or place a lithium-ion inflator battery in normal trash. Do not handle or transport a smoking, burning, or rapidly heating battery. Move away and call emergency services.
Frequently Asked Questions
How do I charge my portable tire inflator?
Turn the inflator off, let it cool, identify its charging system, and connect the manufacturer-approved charger or cable. Confirm that the expected charging indicator appears, monitor the unit for unusual heat or errors, and disconnect it when the manual says the battery is full.
Do portable tire inflators drain their batteries during storage?
Rechargeable batteries gradually lose charge during storage, and standby electronics may use a small amount of power. Check and recharge the inflator at the interval in its manual. Slime recommends charging part #40084 every four months during storage.
How long does it take to charge a cordless tire inflator?
Charging time depends on battery capacity, battery condition, temperature, and charger output. Follow the manual for your model. Slime states that part #40084 takes about four hours from its specified 2.1A USB source, but that figure does not apply to every inflator.
How do I charge a Slime cordless inflator?
Check the exact Slime model first. For Cordless Tire Inflator part #40084, Slime specifies a USB-A phone or tablet charging block, the included USB-C cable, and approximately four hours from a 2.1A USB outlet. Slime says not to charge that model from a computer USB port.
Can I use a phone charger for my tire inflator?
Only when the manufacturer permits it and the adapter meets the required charging specifications. Some USB-charged Slime inflators are designed for a phone or tablet charging block, while removable power-tool batteries require their dedicated battery charger.
Can I charge a cordless inflator from a computer USB port?
Do so only when the manual approves it. A computer port may provide less power than the inflator requires, and some manufacturers specifically prohibit it. Slime tells owners of part #40084 not to use a computer for charging.
Can I leave a cordless tire inflator charging overnight?
It is safer to charge while you are awake and able to notice heat, odor, smoke, or a fault indicator. Disconnect the inflator or battery when the manufacturer’s indicator shows that charging is complete rather than leaving it connected for long periods.
Why will my inflator not charge after long storage?
The battery may be deeply discharged, too hot or cold, disconnected, or permanently damaged. Use the approved charger at the correct temperature and follow the model’s recovery procedure. Stop if the battery swells, leaks, smells unusual, or becomes hot.
Conclusion
Charge a cordless tire inflator according to its exact battery and charging system. Turn it off, let it cool, inspect the port, cable, charger, and battery, and use only approved equipment. Monitor the charging indicator and disconnect when the manual identifies a full charge.
Store the inflator in a cool, dry place and follow its maintenance-charge schedule. If charging becomes unreliable, check compatibility, power, connections, temperature, and indicator codes before replacing the battery. Remove damaged batteries from service immediately and take lithium-ion batteries to an appropriate specialist recycling or household hazardous-waste facility.
Sources
- Slime Cordless Tire Inflator, part #40084 — USB charging method, four-hour example, first-use charging, and four-month maintenance guidance.
- OSHA: Preventing Fire and Explosion Injury From Small Lithium-Battery Devices — charger compatibility, temperature hazards, damage signs, storage, and charging safety.
- OSHA Battery Safety Guidance — battery inspection, cool and dry storage, and keeping charging away from flammable materials.
- U.S. EPA: Frequent Questions on Lithium-Ion Batteries — storage temperature, swollen batteries, recycling, and disposal.
- DeWalt DCC020IB Cordless Inflator — example of an inflator with removable battery, 12V, and AC power options.