
What’s in This Article
- What Is a Manual Tire Inflator and When to Use One
- Before You Begin: What You’ll Need
- Quick Steps to Inflate a Tire With a Hand Pump
- Quick Steps to Inflate a Tire With a Foot Pump or Bellows
- Hand Pump vs Foot Pump vs Mini Bellows: Pros and Cons
- How Manual Inflators Work
- Pick the Right Manual Inflator for Car, SUV, Truck, or Bike
- What to Expect: Inflation Time and Max Pressure
- Common Problems and Fast Fixes
- Roadside Safety and Best Practices When Inflating
- When to Use a Manual Inflator and When to Switch to Electric
A low tire can stop your trip fast, especially when you don’t have power nearby. A manual tire inflator gives you a compact, non-electric way to add air with a hand pump, foot pump, or mini bellows. This guide shows you how to connect the pump, check pressure, avoid common mistakes, and decide when an electric compressor makes more sense.
Quick Answer
To use a manual tire inflator, check the tire pressure first, attach the nozzle tightly to the valve stem, and pump with steady strokes. Stop often to read the gauge and match the cold tire pressure listed on your vehicle placard or owner’s manual. Use a manual inflator for small top-ups and emergencies, but choose an electric compressor for large tires, very low tires, or faster roadside service.
Key Takeaways
- Use the pressure listed on your vehicle placard or owner’s manual, not the number on the tire sidewall.
- Check pressure when tires are cold for the most useful reading.
- Attach the nozzle firmly before pumping so you don’t waste effort through air leaks.
- Choose a hand pump for compact storage, a foot pump for easier pumping, and bellows only for light backup use.
- Call for help if traffic, poor lighting, tire damage, or tool limits make roadside inflation unsafe.
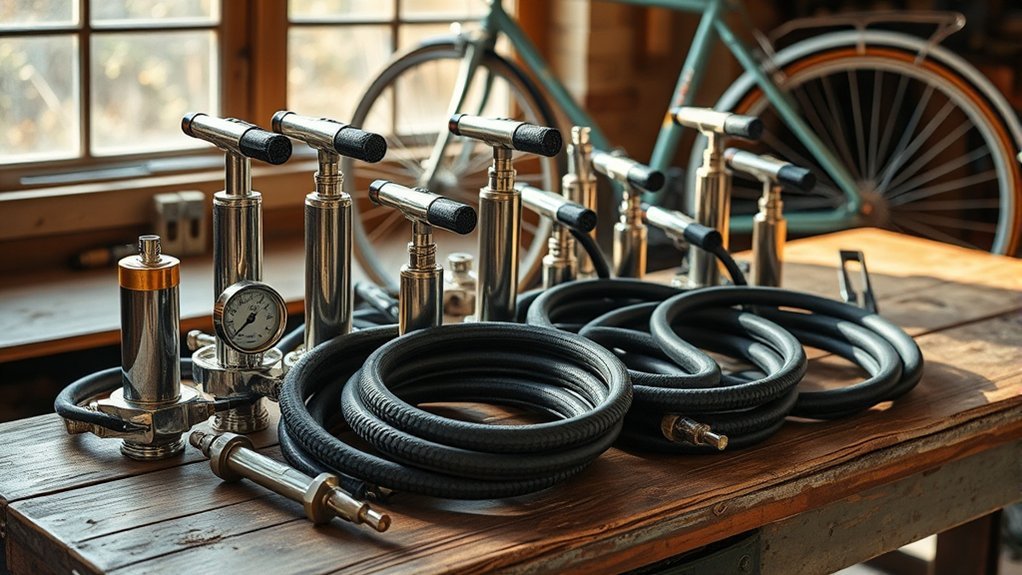
What Is a Manual Tire Inflator and When to Use One
A manual tire inflator is a compact, non-electrical pump that you operate by hand or foot to add air to a tire. It helps when you need pressure support in a parking lot, campsite, driveway, or roadside spot without power.
You move a handle, foot lever, or bellows to push air through a hose and into the tire valve. The tool takes physical effort, so plan for steady pumping until the tire reaches the recommended pressure.
Manual inflators work best for small top-ups, bicycles, light emergency use, and backup storage. They can help with a low car tire, but a severely underinflated tire, large truck tire, or damaged tire may need a compressor or roadside service.
Before You Begin: What You’ll Need
Estimated total time: Plan for 5 to 20 minutes per tire for a small to moderate top-up. A very low tire, large tire, small pump, or tired user can take longer.
Gather the right items before you start, then check the tire placard on the driver’s door jamb or the owner’s manual. According to the National Highway Traffic Safety Administration (NHTSA), you should use the recommended cold inflation pressure listed on the vehicle placard or certification label.
- Manual tire inflator: Use a hand pump, foot pump, or bellows rated for your tire’s pressure needs.
- Tire pressure gauge: Use a reliable gauge unless your pump includes one you trust.
- Valve adapter: Carry a Schrader or Presta adapter when you need one for bikes or specialty valves.
- Gloves and light: Keep your hands clean and make the valve easier to see.
- Reflective warning gear: Use hazard lights and warning triangles when the roadside location calls for them.
Pro tip: Check pressure when tires are cold, since heat from driving can raise the reading and mislead you.
Quick Steps to Inflate a Tire With a Hand Pump
Use these steps when you need to add air with a hand pump. Keep the pump straight, move at a steady pace, and stop often to check the gauge.
Check Tire Pressure
Check the tire’s current pounds per square inch (PSI) with a gauge before you pump. Compare that reading with the recommended cold tire pressure on your vehicle placard or owner’s manual.
If the tire sits below the recommended pressure, prepare your manual inflator. Remove the valve cap, keep it in a safe spot, and check the valve stem for dirt or damage.
Secure Pump To Valve
Press the pump nozzle onto the valve stem so it sits firmly. Lock or twist the nozzle if your pump uses that style of fitting.
Listen for hissing and feel around the connection. A leak means you need to reseat the nozzle before you start pumping.
Pump Until Target
Use smooth, consistent strokes to move air into the tire. Watch the pressure gauge after every few strokes so you don’t overshoot the target.
- Start pumping: Use steady strokes and keep the pump aligned with the valve.
- Check often: Pause and read the gauge every few strokes.
- Stop at target pressure: Match the pressure listed on your vehicle placard or owner’s manual.
- Detach carefully: Remove the nozzle quickly and straight so you lose as little air as possible.
- Replace the cap: Put the valve cap back on and recheck the pressure.
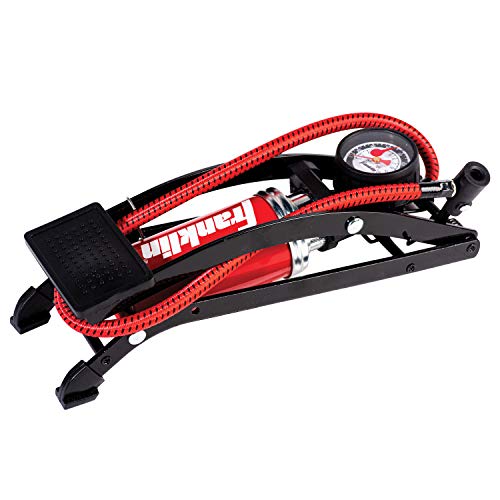
Quick Steps to Inflate a Tire With a Foot Pump or Bellows
Place the foot pump or bellows on a stable surface before you attach it to the tire. A flat surface helps you apply steady force without slipping.
- Remove the valve cap: Put the cap where you won’t lose it.
- Attach the nozzle: Seat the nozzle firmly on the valve stem and check for leaks.
- Use full strokes: Press the foot lever or bellows through its full range to move more air per stroke.
- Watch the gauge: Stop often and compare the reading with your target pressure.
- Finish cleanly: Detach the nozzle, replace the valve cap, and confirm the pressure again.
Foot pumps usually feel easier than hand pumps because you can use your body weight. Mini bellows save space, but they move less air and suit small top-ups better than full car-tire inflation.
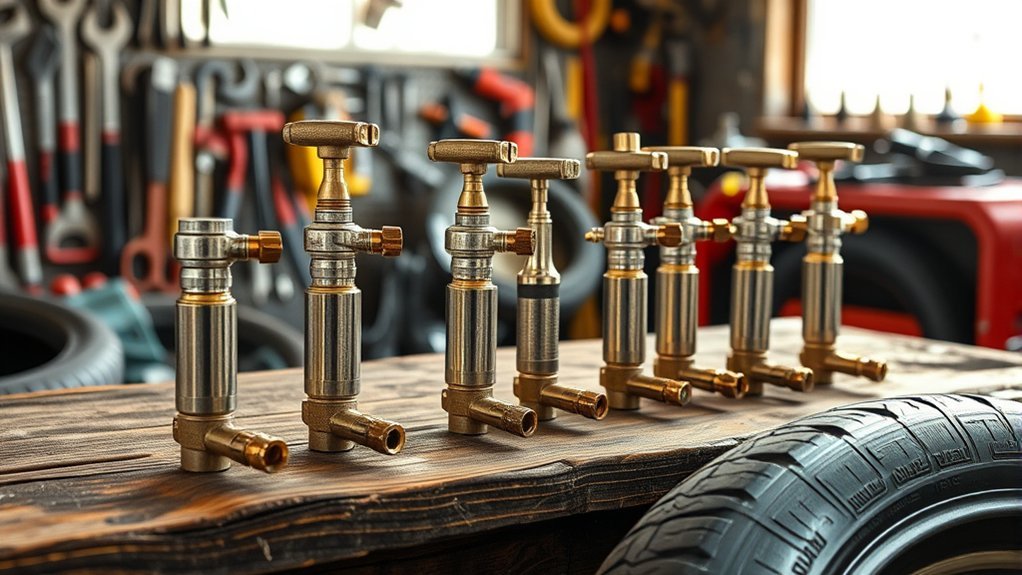
Hand Pump vs Foot Pump vs Mini Bellows: Pros and Cons

Compare pumping effort, inflation speed, and portability before you choose a manual inflator. Each type can help, but each one fits a different use case.
[Products Worth Considering]
MULTI-USE: This pump is perfect for inflating sports ball, bike tires, car tires, and other inflatables with ease
Memory Function:This smart air pump features a convenient memory function. It stores your preferred pressure settings, so you can easily access them. With just one touch, you can inflate things like car tires or sports equipment
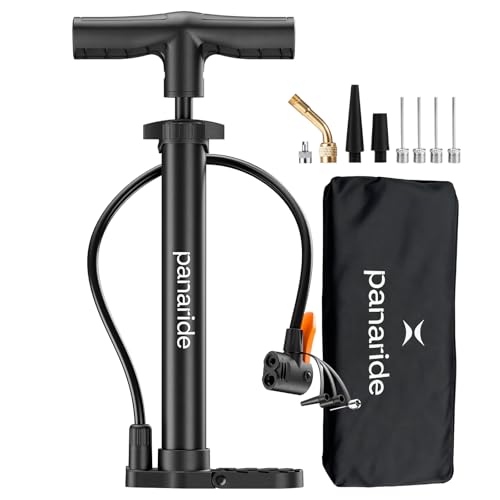
EXCELLENT COMPATIBILITY: Our versatile bike air pump seamlessly accommodates both Presta and Schrader valves, making it a perfect choice for various tasks including bicycles, baby stroller tires sports equipment, or inflatables. Ideal for use with BOB, Bumbleride, Joggers, Thule, Graco, Bugaboo, Trend strollers, and more.
Pumping Effort Required
Hand pumps require repeated upper-body movement, so they can tire you during long jobs. Foot pumps let you use body weight and often feel easier for car tires.
Mini bellows keep weight low, but they demand many strokes because each stroke moves less air. Choose the tool that matches your strength, storage space, and tire size.
- Hand pumps: Compact and useful for small tires or short emergency top-ups, but tiring on larger tires.
- Foot pumps: Easier on your arms and better for steady pumping, but bulkier to store.
- Mini bellows: Very portable and light, but slow for car, SUV, or truck tires.
Inflation Speed Comparison
Inflation speed depends on pump size, tire volume, starting pressure, and your pace. A small top-up may take only a few minutes, while a very low tire can take much longer.
Hand pumps usually favor compact storage over speed. Foot pumps often move air faster with less fatigue, while mini bellows trade speed for easy packing.
Portability And Storage
Portability often decides which manual inflator you actually keep in the car. The best pump is the one you can store, reach, and use safely when you need it.
- Hand pumps: Store easily in a trunk or garage, but require more arm effort.
- Foot pumps: Work well for roadside top-ups, but need more storage space.
- Mini bellows pumps: Fit backpacks or glove compartments, but suit light-duty use best.
How Manual Inflators Work (Simple Explanation)
A manual tire inflator uses your motion to compress air inside a pump chamber. When you push the handle, lever, or bellows, pressure sends air through the hose and into the tire valve.
A one-way valve system helps air move toward the tire instead of back into the pump. A tight nozzle connection matters because any leak wastes effort and slows inflation.
Some manual inflators include a built-in pressure gauge, while others require a separate gauge. Use a separate gauge if you don’t trust the built-in reading or need more accuracy.
Pick the Right Manual Inflator for Car, SUV, Truck, or Bike
Choose a pump that matches your tire type, pressure range, valve type, and storage space. Don’t assume one small pump can handle every vehicle.
Check your pump’s listed maximum PSI and compare it with the pressure listed on your vehicle placard, tire placard, owner’s manual, or bike tire sidewall. For cars and trucks, use the vehicle maker’s pressure guidance when it applies.
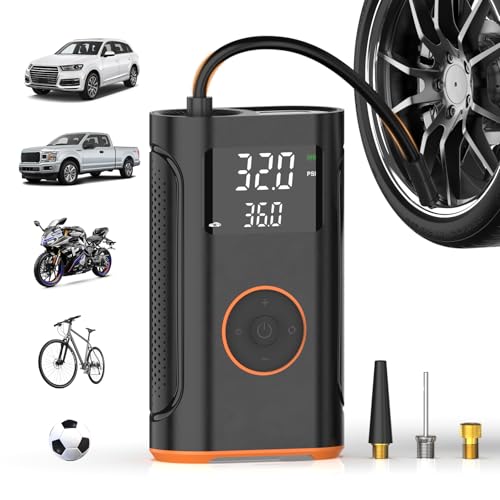
[Products Worth Considering]

3X FASTER INFLATION: Powools portable air pump is born with a powerful motor and a high-performance chip, providing a maximum pressure of 150PSI and a strong airflow. This portable tire inflator for cars can pump up a standard car tire from 30 to 36PSI in less than 1 minute, offering 3X faster inflation than others. It can save you valuable time in emergencies or routine maintenance.

ADVANCED TRUEGAUGE SCREEN: This battery tire inflator includes updated sensor technology, capable of collecting pressure data from tire inflators at a frequency of 200 times per second. Its valid data rate is higher than 80%, which is 60% better than the market average. From routine maintenance to roadside emergencies, its accurate readings ensure confident pressure checks and a safer driving experience.Suitable as a Father's Day gift for your dad.
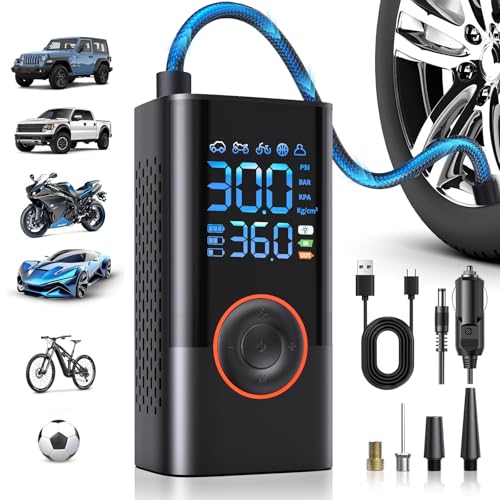
👍【𝗗𝘂𝗮𝗹 𝗜𝗻𝗳𝗹𝗮𝘁𝗶𝗼𝗻 𝗠𝗼𝗱𝗲𝘀 – 𝗔𝗹𝘄𝗮𝘆𝘀 𝗣𝗼𝘄𝗲𝗿𝗲𝗱】This portable air compressor has a built-in high-capacity rechargeable battery and can also be powered via a 12V DC car power cord, ensuring the inflator always has a sufficient power supply. It inflates up to three times faster than other ordinary cordless inflators on the market, with 35% more power. Can inflate 7 car tires or 21 bicycle tires, away from the problem of insufficient battery power
Vehicle Tire Compatibility
Vehicle tire compatibility starts with valve type and pressure range. Most car tires use Schrader valves, while many road bikes use Presta valves.
- Check valve type: Confirm Schrader, Presta, or adapter needs before you leave home.
- Check pressure range: Choose a pump rated above your recommended target pressure.
- Check gauge readability: Use a gauge with clear markings in the range you need.
Pump Size And Portability
Pump size affects both storage and effort. Compact models fit bikes and small emergency kits, while larger pumps move more air with fewer strokes.
Look for a stable base, durable hose, clear gauge, and the right nozzle attachments. These features help you pump with less frustration.
| Vehicle type | Recommended feature |
|---|---|
| Bike | Compact size, light weight, correct valve adapter |
| Car/SUV | Mid-size pump, clear gauge, strong hose connection |
| Truck | Higher pressure rating, sturdy build, larger air volume |
Pressure Range Needs
Your inflator should reach the pressure your tire requires without pushing the pump beyond its rating. The Tire Industry Association says the correct pressure usually appears on the driver’s doorjamb sticker and in the owner’s manual.
- Cars and SUVs: Follow the vehicle placard, since pressure varies by model, tire size, and load.
- Trucks: Check the placard and load guidance, since higher loads may need higher pressure.
- Bikes: Read the tire sidewall or bike maker guidance, then use the correct valve adapter.
What to Expect: Inflation Time and Max Pressure
Manual inflators work through physical effort, so inflation time changes from one situation to another. Pump design, tire size, starting pressure, weather, and your stamina all affect the job.
Check your inflator’s maximum pressure rating before you rely on it. Some compact pumps suit bikes and small top-ups, while stronger foot pumps or compressors suit larger tires better.
According to the U.S. Tire Manufacturers Association (USTMA), you should check tire pressure at least once a month and before long trips. Check tires when cold, meaning the vehicle has been parked long enough for the tires to cool.
If your tire is severely low, damaged, or losing pressure again after inflation, don’t keep driving as usual. Use the repair only as a short safety step and get the tire inspected.
Common Problems and Fast Fixes (Leaks, Seals, Hard Pumping)
After you attach the pump, check for problems that waste air or make pumping harder. Most issues come from a loose nozzle, worn gasket, blocked hose, bent valve, or stiff pump mechanism.
Check pressure, listen for hissing, use soapy water to find leaks, seat the nozzle again, and lubricate moving parts if the pump design allows it.
- Fix a loose seal: Remove the nozzle, clean the valve area, and attach the nozzle again with firm pressure.
- Find leaks: Add soapy water to the valve, hose, and nozzle area, then watch for bubbles.
- Replace worn parts: Change a cracked rubber gasket or damaged hose before you trust the pump again.
- Reduce hard pumping: Straighten hoses, clear blockages, and lubricate moving parts according to the pump manual.
If pressure keeps dropping after you finish, the tire may have a puncture, damaged valve stem, rim leak, or bead issue. Get the tire checked before you drive far.
[Products Worth Considering]

Package Included: <br> 25 X Tire Inflation Clamp Sealing Ring

【PACKAGE INCLUDES】: You will receive 7pcs inflator hose set, including 1x 33''/84cm extend air pump hose, 1x Presta Valve Adaptor(American type to French type), 1x Ball Pump Needle Adaptor, 2x Tapered Nozzles, 2x Converting Nuts.
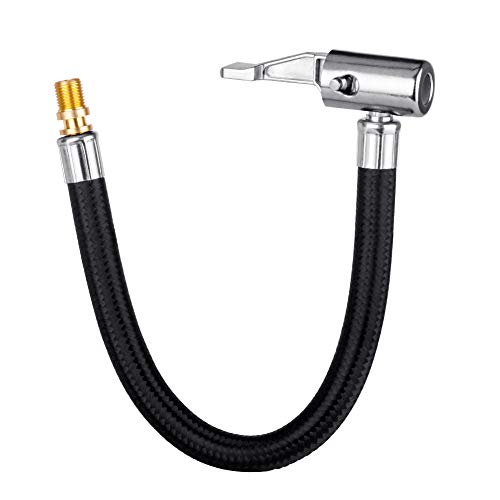
Please Note Before You Buy This:this is only an inflator hose adapter, was designed to convert screw-on(twist-on) air chuck to lock-on air chuck, not for connecting to tire inflator/pump directly, please refer to the left second&third product image.Hose end thread is standard us fine thread connection(0.305"x32TPI), the same as the thread on all USA standard car valve stems, compatible with screw-on(twist-on) air chuck's inner thread.
Roadside Safety and Best Practices When Inflating
Before you inflate a tire at the roadside, move as far from traffic as you safely can. Park on firm, level ground, turn on hazard lights, set the parking brake, and put the vehicle in Park or gear.
Keep your body away from traffic whenever possible. Use reflective triangles or other warning gear when you have them and local rules allow safe placement.
Warning: If traffic, poor lighting, weather, or tire damage makes the job unsafe, stay clear and call roadside assistance.
Attach your manual inflator nozzle firmly to the valve stem. Pump steadily, read the gauge often, and avoid overinflating the tire.
After you reach the specified tire pressure, remove the inflator and replace the valve cap. Recheck the pressure once more before you drive.
When to Use a Manual Inflator and When to Switch to Electric
Use a manual pump when you need a small top-up, a power-free backup, or a simple tool for bikes and light emergencies. It also helps when you want a compact item that stays in the trunk without charging.
Switch to an electric unit when the tire is very low, the tire is large, you need faster inflation, or you lack the strength to pump safely. An electric compressor can also reduce your time near traffic.
- Use manual for small corrections: Top off a slightly low tire when the location is safe.
- Use electric for speed: Choose a compressor when time, tire size, or effort matters.
- Keep both if possible: Store a manual inflator as backup and use an electric inflator for routine convenience.
Frequently Asked Questions
What Are the Different Types of Tire Inflators?
You can choose manual hand pumps, foot pumps, mini bellows, portable electric inflators, air compressors, bicycle pumps, and carbon dioxide (CO2) inflators. Each type trades speed, effort, power needs, and storage space in a different way.
How Do You Use a Manual Tire Inflator?
Check the tire pressure first, attach the nozzle firmly to the valve stem, and pump with steady strokes. Stop often to read the gauge and finish at the pressure listed on your vehicle placard or owner’s manual.
How Do You Choose the Right Manual Inflator?
Choose a pump that matches your tire pressure range, valve type, tire size, and storage space. Look for a clear gauge, strong hose, stable base, and nozzle adapters that fit your vehicle or bike.
Is a 150 PSI or 300 PSI Inflator Better?
A higher PSI rating does not automatically make an inflator better for your car. Choose the rating that safely covers your tire’s required pressure, then compare build quality, gauge accuracy, hose strength, and ease of use.
Safety Disclaimer: This article is for informational purposes only and does not replace your vehicle owner’s manual, tire manufacturer’s guidance, or professional roadside help. If traffic, weather, lighting, tire damage, or tool limits create risk, move to safety and contact a qualified roadside professional.
Conclusion
A manual tire inflator gives you a simple backup for small tire top-ups when power isn’t available. Check the correct cold pressure first, attach the nozzle firmly, and pump with steady control.
Use a hand pump for compact storage, a foot pump for easier pumping, and a bellows only for light-duty backup. Switch to an electric compressor or roadside service when the tire is very low, damaged, large, or unsafe to handle.
Keep your pump, gauge, valve caps, and safety gear in good shape. That small habit can help you stay calm, safe, and ready on the road.
References
- Tire Safety Ratings and Awareness, TireWise — National Highway Traffic Safety Administration, accessed 2026
- Tire Inflation Pressure — Tire Industry Association, accessed 2026
- Tire Care Essentials — U.S. Tire Manufacturers Association, accessed 2026
- Roadside Assistance Safety Guidance — U.S. Army Safety Center, accessed 2026


Leave a Reply