To change the battery in your Toyota RAV4, start by gathering your tools: a 10mm socket wrench, flathead screwdriver, gloves, and safety glasses. Disconnect the negative terminal first, followed by the positive. Remove the battery clamp and lift out the old battery carefully. Install the new battery by connecting the positive terminal first, then the negative. Verify all connections are secure and test the battery afterward. For more detailed steps and tips, keep exploring this guide.
Recognizing When Your 2017 Toyota RAV4 Battery Needs Replacement
How can you tell if your 2017 Toyota RAV4 battery needs replacement? Start by observing how your vehicle behaves. If it struggles to start, showing longer crank times or making unusual sounds, that’s a red flag. Dim headlights or insufficient power to electrical components signal that your battery might be losing its charge. Additionally, if the check engine light illuminates, it could indicate battery issues or poor connections, warranting an inspection.
Don’t ignore strange smells, like a rotten egg odor, which often points to battery overheating or leaks—this calls for immediate replacement. Regularly monitoring your battery’s performance and scheduling checks is essential for keeping your RAV4 reliable and preventing unexpected failures. Stay proactive, and you’ll liberate yourself from the frustration of a dead battery when you need your vehicle most.
Tools You’ll Need for a Successful Battery Change
Changing a car battery requires the right tools to guarantee a smooth and efficient process. First, you’ll need a 10mm socket wrench for loosening and tightening the battery clamp and terminal screws. This tool is essential for working on the positive terminal and verifying secure connections. A flathead screwdriver is also vital; it helps create gaps for easier removal of battery terminals, especially if corrosion makes them stubborn. Don’t forget safety gear—wear gloves and safety glasses to protect against accidental sparks or battery acid exposure. A pair of pliers can be handy for dealing with any corroded connectors, while a clean cloth or rag is useful for wiping down terminals and removing corrosion before installing the new battery. Equip yourself with these tools you’ll need for a successful battery change to guarantee the process is as seamless as possible.
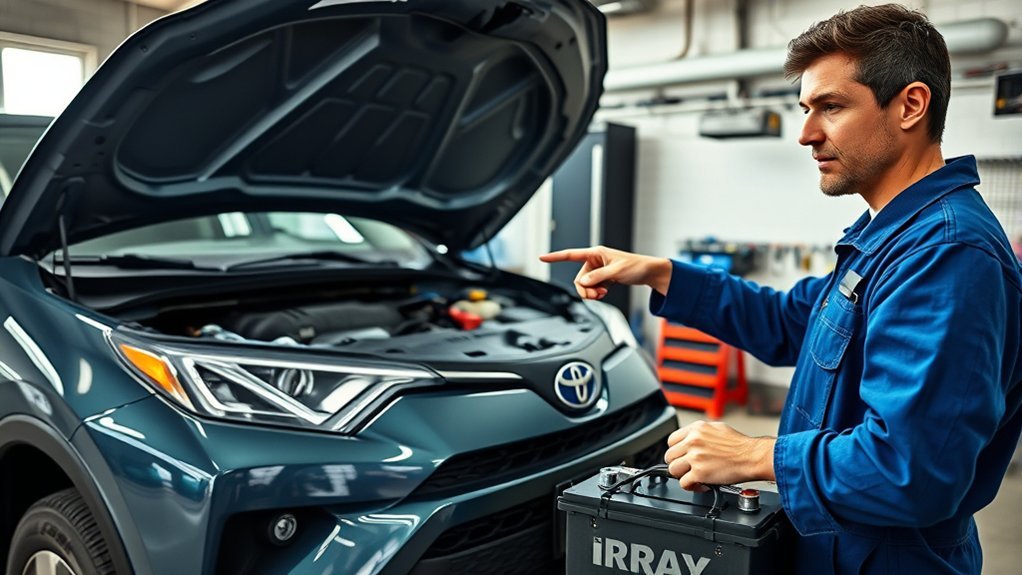
Step-by-Step Guide to Removing Your Old Battery
Before you start removing your old battery, make sure to follow essential safety precautions, including wearing gloves and goggles. First, disconnect the negative terminal to prevent any sparks, then proceed with the positive terminal. Once the terminals are disconnected, you can safely remove the old battery from its compartment.
Safety Precautions First
Ensuring safety is essential when you’re ready to remove your old battery, so take a moment to gather your safety gear and prepare your workspace. Follow these safety precautions to minimize risks:
| Safety Gear | Preparation Steps | Important Reminders |
|---|---|---|
| Gloves | Park on a flat surface | Engine must be off |
| Safety glasses | Engage the emergency brake | Remove keys from ignition |
| Flathead screwdriver | Keep tools organized | Disconnect negative terminal first |
With your gear on, remember to handle the battery carefully to avoid acid spills or debris injuries. Using the right tools will help you safely access the battery terminals without unnecessary strain. Stay focused and prepared!
Disconnecting Battery Terminals
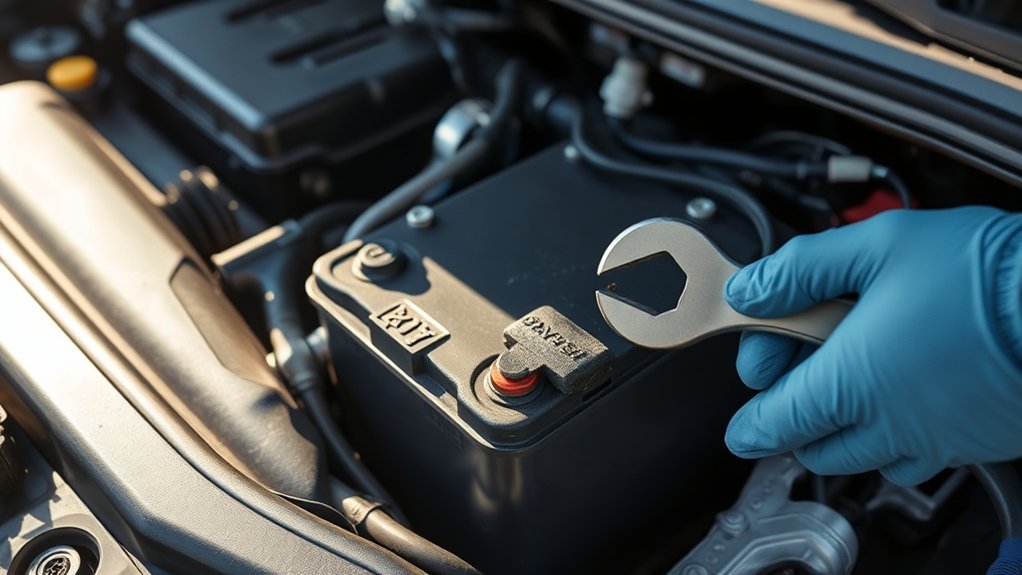
With your safety gear in place and the vehicle properly prepared, you can now focus on disconnecting the battery terminals. First, locate the negative terminal, marked with a minus (-) sign. Using a wrench, loosen the nut and disconnect the cable to prevent any sparks. Next, find the positive terminal, indicated by a plus (+) sign, and repeat the process of loosening the nut and removing the cable. If you encounter corrosion, use a flathead screwdriver to create gaps for easier removal. Guarantee a clean disconnection to maintain safety. Once both terminals are disconnected, you’ll be ready to proceed with removing the battery clamp and safely extracting the old battery from its compartment.
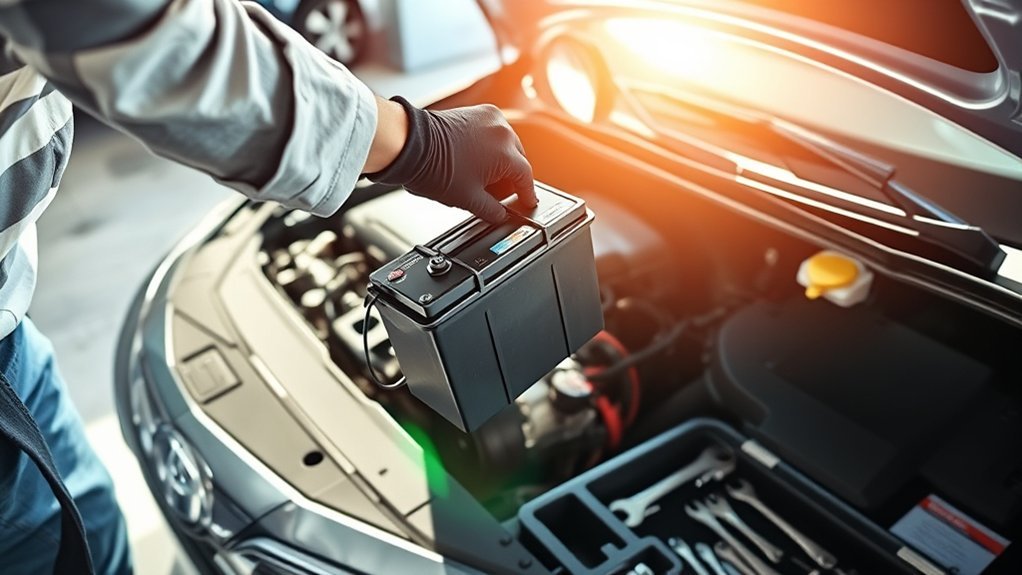
Removing Old Battery
Now that you’ve disconnected the battery terminals, it’s time to remove the old battery from your 2017 Toyota RAV4. Start by opening the hood and locating the battery on the right side. Next, unscrew the battery clamp to release the old battery. Be cautious of any metallic rods that might fall during this process. If the terminals are stuck, use a flathead screwdriver to create gaps for easier removal. Once you’ve loosened everything, carefully lift out the old battery. Make sure to handle it properly, as it’s heavy. After removing it, verify the grip number (35) matches on your new battery before installation. You’re one step closer to getting back on the road!
Important Steps for Proper Battery Installation
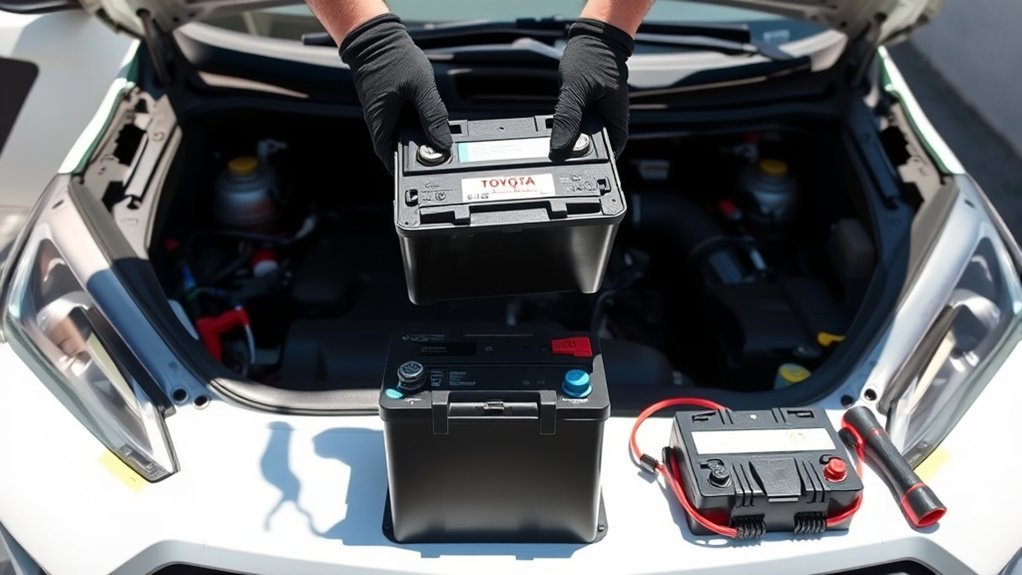
When installing your new battery, prioritize safety by always disconnecting the negative terminal first. Make certain you connect the positive terminal before the negative to establish proper electrical flow, and secure the battery firmly in its bracket. Finally, check all connections and confirm that everything functions correctly before closing the hood.
Safety First Always
To guarantee your safety during a battery replacement, always take the necessary precautions before you begin. First, park your vehicle on a flat surface and engage the emergency brake to prevent any movement. Wear safety gear, like gloves and goggles, to shield yourself from acid spills or electrical hazards. Confirm the ignition is off to avoid electric shocks or short circuits. Remember, safety first: disconnect the negative terminal first to reduce the risk of sparks while removing the battery. Finally, keep your work area well-ventilated to prevent inhaling any harmful gases emitted from the battery. By following these steps, you can guarantee a safe and efficient battery replacement process.
Correct Terminal Connections
Connecting the battery terminals correctly is essential for guaranteeing a safe and efficient installation. Start by connecting the positive terminal first to prevent electrical shorts, then attach the negative terminal. Before making these connections, apply a thin layer of terminal grease to enhance conductivity and prevent corrosion. When removing the old battery, always take off the negative terminal first to reduce the risk of sparks or shocks. After installing the new battery, verify the terminals are tightened securely to avoid loose connections, which can lead to starting issues or electrical failures. Finally, double-check that the battery is firmly fastened in its bracket. Proper attention to these correct terminal connections will promote a reliable and safe driving experience.
Secure Battery Properly
Securing the battery properly is essential for guaranteeing it remains stable during your drives. Follow these steps to achieve a secure installation:
- Confirm the new battery is seated firmly in its designated sleeve to prevent movement.
- Use securing brackets or straps to hold the battery tightly in place after installation.
- Tighten all terminal connections securely to avoid electrical issues.
Once installed, confirm that there are no gaps or loose fittings around the battery’s mounting. Regularly check the battery’s position to guarantee it remains securely fastened over time. By taking these measures, you can ensure your battery functions effectively and safely, allowing you to enjoy your driving experience without worries. Remember, a properly secured battery is key to your vehicle’s performance.
How to Properly Connect Battery Terminals
Properly connecting battery terminals is essential for guaranteeing your vehicle runs smoothly and safely. Start by connecting the positive terminal first. This prevents electrical shorts or sparks that could damage your vehicle’s electrical system. Before making any connections, check that the battery terminals are clean and free from corrosion to promote ideal conductivity. Once you’ve connected the positive terminal, move on to the negative terminal. Tighten both connections securely to avoid loose terminals, which can lead to starting issues or other electrical problems. After securing the terminals, apply terminal grease on the battery posts. This helps reduce corrosion and extends the lifespan of your connections. Remember, when it’s time to disconnect the battery in the future, always remove the negative terminal first to minimize the risk of electrical shock. Following these steps guarantees a reliable and safe battery connection for your Toyota RAV4.
Testing Your Toyota RAV4 Battery After Installation
Once you’ve completed the process of connecting the battery terminals, it’s important to test your new battery in the Toyota RAV4 to verify everything is functioning correctly. Start by turning the ignition to guarantee the engine starts smoothly, without strange sounds or hesitation. Pay attention to any unusual noises during startup, as these could indicate issues with your installation.
Next, check the dashboard for warning lights, particularly the check engine light, which may signal battery or electrical problems. Finally, test all electronic components to confirm they’re working properly.
- Verify headlights and interior lights function correctly.
- Gently shake the battery to check for any movement, indicating improper placement.
- Confirm there are no warning lights on the dashboard.
Doing these checks helps verify your new battery is securely installed and ready to go.
Common Issues to Watch for After Your Battery Replacement
After replacing your battery, it’s crucial to stay vigilant for any signs that something might be amiss. One of the common issues to watch for after your battery replacement is difficulty starting the engine, which can indicate a poor connection or a problem with the new battery itself. Keep an eye on the dashboard for warning lights, like the check engine light, signaling possible underlying electrical issues.
Monitor your headlights and electrical components for dimness or irregular functioning; this could suggest insufficient power supply or connection problems. Be alert for strange smells, such as rotten eggs, which may indicate overheating or gas leaks from the new battery. Finally, regularly check the battery terminals for corrosion or looseness, as these factors can adversely affect performance and battery life. Addressing these issues early can help you avoid the pitfalls often associated with an old battery.
Tips for Maintaining Your RAV4 Battery Life
To guarantee your RAV4 battery lasts as long as possible, regularly checking the battery terminals for corrosion is essential. Clean any buildup to confirm proper electrical connections, as this directly impacts your battery’s performance. Additionally, consider the following tips to meet your battery needs:
Regularly check your RAV4 battery terminals for corrosion to ensure optimal performance and longevity.
- Keep the battery securely mounted to minimize vibrations that can cause internal damage.
- Limit short trips; they prevent the battery from fully recharging, which shortens its lifespan.
- Turn off all electrical accessories before starting your vehicle to reduce strain during ignition.
Scheduling routine battery checks at your local Toyota dealership can also help identify potential issues early, maintaining the health of your battery. By following these straightforward guidelines, you can enhance your RAV4’s battery life and confirm reliable performance down the road.
When to Call in the Pros for Battery Help?
Maintaining your RAV4’s battery is important, but there are times when it’s wise to seek professional help. If you’re unsure about safely disconnecting and handling the battery, consulting a professional can prevent potential hazards. Also, if your vehicle continues to show electrical issues or warning lights after a battery replacement, it’s time to call in the pros for battery help. A qualified technician can diagnose underlying problems that might not be immediately apparent.
If you lack the necessary tools or experience, visiting a Toyota dealership or Service Center guarantees proper installation and testing of your new battery. Additionally, if starting issues persist despite a new battery or if signs of battery failure remain, a professional can conduct a thorough inspection of your electrical system. Finally, when it’s time to dispose of your old battery, a professional can make sure it’s recycled in compliance with local regulations.
Recycling Your Old Car Battery: What You Need to Know
Recycling your old car battery is essential not only for environmental protection but also for complying with local laws that mandate the proper disposal of hazardous materials. Lead-acid batteries contain harmful substances like lead and sulfuric acid, making their recycling vital. Here’s what you need to know:
Recycling your old car battery is crucial for environmental safety and legal compliance due to its hazardous materials.
- Find a recycling center: Check local auto parts stores and service centers; many offer battery recycling programs and even credits towards your next purchase.
- Store correctly: Keep your old battery upright in a cool, dry place to prevent leaks and spills before transporting it.
- Follow local guidelines: Recycling procedures can vary by region, so always verify specific drop-off locations and requirements with your local recycling center.
Frequently Asked Questions
Can I Replace My Car Battery Myself?
Yes, you can replace your car battery yourself. Prioritize battery maintenance by following safety precautions, using basic tools, and ensuring secure connections. This empowers you to manage your vehicle’s performance effectively and confidently.
How to Disconnect a Toyota RAV4 Battery?
Disconnecting your Toyota RAV4’s battery is like untangling a web. For battery safety, first, turn off the vehicle, engage the brake, then remove the negative terminal followed by the positive, ensuring a secure disconnection.
Do You Have to Reprogram a Toyota Key Fob After Changing the Battery?
You usually won’t need to reprogram your Toyota key fob after changing the battery. Just guarantee the new battery’s installed correctly. If it doesn’t work, reprogramming might be necessary.
How Much Is It to Replace a Toyota RAV4 Battery?
Replacing a Toyota RAV4 battery typically costs between $100 and $250. Labor charges might add another $20 to $50. Check online for battery pricing options and compare local dealership rates for the best deal.
Conclusion
Changing your 2017 Toyota RAV4’s battery is like breathing new life into your vehicle, ensuring it runs smoothly and efficiently. By following the steps outlined, you’ve not only replaced the old with the new but also empowered your RAV4 to navigate the road ahead. Remember, a well-maintained battery is the heart of your car, pulsating energy and reliability. So keep an eye on its health, and don’t hesitate to seek professional help when needed.