

You set RV tire pressure using actual weights, not sidewall maximums. Find your GVWR and GAWR, get per-wheel axle weights at a certified weighing service, then match each tire’s load to the manufacturer’s load/inflation chart to calculate cold PSI. Inflate both tires on an axle to the higher side’s PSI, check pressures cold with a calibrated gauge, do a short drive and recheck, and monitor your TPMS for changes. Read on for step-by-step procedures and troubleshooting tips.
Quick Answer
- The correct RV tire pressure depends on how much weight each tire actually carries, not the maximum number printed on the sidewall.
- Weigh your loaded RV at each wheel position (services like RVSEF offer per-wheel weighing at rallies and events). Standard truck stop scales give only axle totals, not individual wheel loads.
- Look up your tire’s exact size in the manufacturer’s load/inflation table to find the right cold PSI for that weight.
- Set both tires on the same axle to the PSI needed for the heavier side.
- Always check pressure when tires are cold (before driving), and use a TPMS to watch for drops while on the road.
Find Your RV Weights: GVWR, GAWR and Per-Wheel Weighing

Before you set tire pressures, you need to know exactly what your RV is carrying. GVWR (Gross Vehicle Weight Rating) is the vehicle’s maximum allowed total weight. GAWR (Gross Axle Weight Rating) is the limit for each axle. And per-wheel weighing reveals the real load on every tire.
You’ll find the GVWR and each GAWR on the vehicle’s certification placard, usually near the driver’s door or on the sidewall inside the RV. Next, plan to verify your actual weight by weighing the RV at each wheel position.
For the most accurate results, use a dedicated per-wheel weighing service. Organizations like RVSEF and Escapees SmartWeigh bring portable scales to RV rallies and weigh each corner individually. Note that standard truck stop scales (like CAT scales) provide only total and axle weights, not individual wheel loads. Axle-only weights can still help, but they won’t reveal side-to-side imbalances, which can be 500 to 1,000+ pounds on some RVs.
With those numbers in hand, consult your tire manufacturer’s inflation charts to find the proper inflation for each tire based on its measured load, not guesswork. Respecting maximum weight limits and matching pressure to real loads reduces heat buildup, uneven wear, and failure risk.
Match Tire Markings to the Manufacturer Load/Inflation Chart
With per-wheel weights in hand, match each tire’s sidewall code (like ST235/80R16) to the manufacturer’s load/inflation chart so you can set the correct cold PSI for the actual load on that tire.
Read the tire markings to identify width, aspect ratio, construction type, and rim diameter. These details link directly to the correct row in the load/inflation chart. You can find these charts on the tire manufacturer’s website or by contacting your tire dealer. For example, Michelin publishes RV load and inflation tables for their tire lines.
After weighing the RV at each corner, locate the chart row for your exact tire sidewall designation and find the recommended PSI for the measured per-wheel load. Don’t assume the maximum cold tire pressure stamped on the sidewall is the correct setting. That number is a limit, not a target. If your RV is loaded well below the tire’s max capacity, inflating to the max can cause a harsh ride, poor handling, and uneven center-tread wear.
Account for uneven weight distribution by using the per-wheel values from your weigh data. Record the recommended PSI for each tire and inflate when cold. Following the chart consistently helps preserve tire longevity and keeps you traveling safely.
[Products Worth Considering]

【EXTENDED REACH DUAL HEAD】LUMITECO 12" pencil-style pressure gauge is designed with the Integrated Straight foot air chuck and 30°reverse chuck. Ideal for dual wheels and other difficult reached valves. Your good choice for checking tire pressure as well as a great father's day gift.

PROCESS LEVEL ACCURACY: Each ETENWOLF’s digital tire pressure gauge is calibrated manually to ANSI B40.7 Grade 2A(plus-minus 1 PSI).Presta valve adapter not included, if used for bicycles, it must be purchased separately
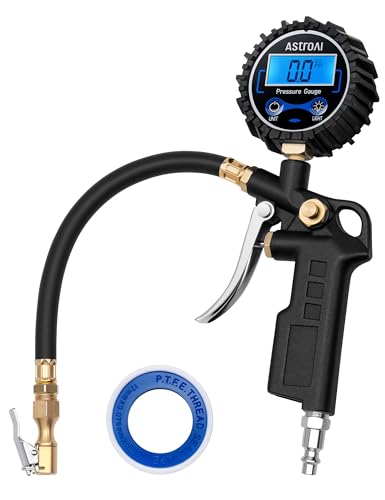
COMPATIBLE WITH both ¼” and ½” NPT air compressors outputs. COMPATIBLE WITH Standard Schrader Valves.
Calculate Each Tire’s Cold PSI (Use the Heaviest-Side Rule)
Once you’ve weighed each corner of your RV and matched the sidewall code to the manufacturer’s load/inflation chart, calculate cold PSI for every tire by applying the heaviest-side rule: inflate both tires on an axle to the PSI required for the heavier of the two loads.
Here’s why this matters. Side-to-side weight differences are common on RVs because of slide-outs, appliances, or tank placement. Setting both tires on the same axle to the higher PSI ensures neither tire is underinflated for its actual load. The tire carrying the lighter load will simply run with a small margin of extra capacity.
Use a calibrated tire pressure gauge to measure cold PSI. Always check pressures before driving so heat doesn’t skew readings. On tandem axles, set all tires across both axles to the PSI that matches the single heaviest wheel, so axle loads stay balanced.
Follow manufacturer recommendations for maximums and periodic rechecks whenever your load changes (such as filling or emptying water tanks). Properly applying the heaviest-side rule reduces heat buildup and protects your RV tires.
[Products Worth Considering]

Enhanced Visibility in Low Light: Features a green backlit LCD screen and integrated flashlight, allowing for clear reading of tire pressure even in dark or dimly light conditions.

PRO ACCURACY – mechanic recommended, performance tested, & calibrated accurate to professional ANSI 2A standards – with dual pressure sensors certified to ±0.50% FS (1 PSI), offering reliable readings up to 200 PSI w/ precise readout resolution of 0.10 PSI – so you can now maintain your tires with a shop-grade mechanic trusted tool

HIGH ACCURACY – Performance-tested and calibrated to ±0.50% FS, delivering dependable readings in precise 0.10 PSI increments for professional-level accuracy.
Inflate and Verify: Cold Checks, Short Drive Test, and TPMS Tips
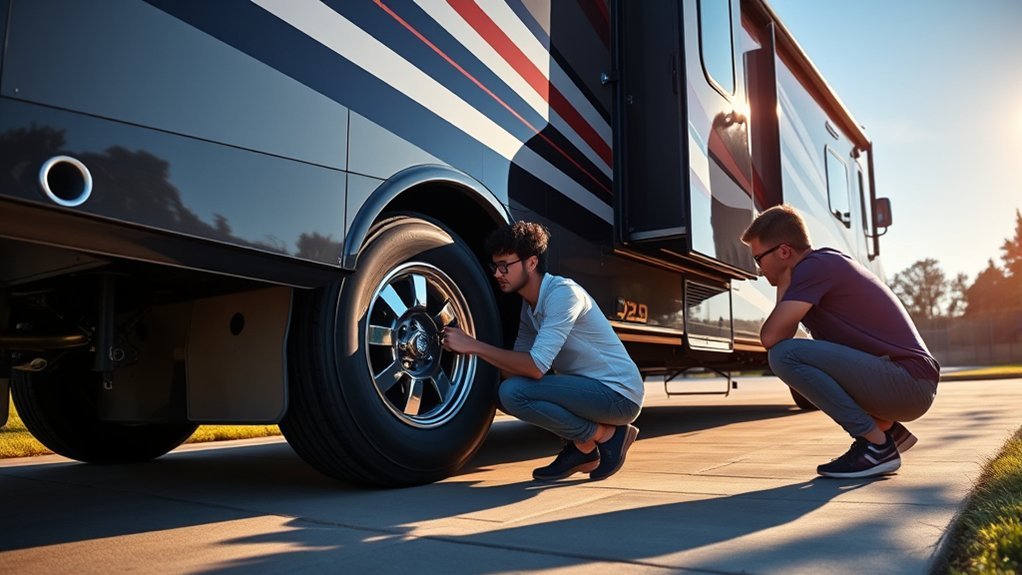
After setting each tire to the cold PSI from the heaviest-side rule, verify those pressures before you hit the road.
Perform cold checks with a calibrated gauge on every tire, confirming each axle’s tires match and meet the pressure you calculated. Complete inflation to the specified PSI, then arm your TPMS (Tire Pressure Monitoring System) and inspect sensors for faults or low-battery alerts.
Take a short drive of 10 to 15 miles at normal speeds to seat the tires. After parking and allowing them to cool, recheck pressures cold to verify values didn’t drift. If your TPMS reports changes during the run, pull over and inspect right away.
Make this a routine before every long trip. Consistent inflation checks prevent blowouts and reduce uneven tire wear. Accurate inflation, functional TPMS, and documented cold checks are the foundation of reliable, worry-free travel.
[Products Worth Considering]

[Discover Five Alarm Modes and Simple Setup for Alarm Thresholds]: With the Tymate Tire Pressure Monitoring System TM2, you'll access six distinct alarm modes, covering fast leak detection, high/low-pressure alerts, high-temperature warnings, and sensor low voltage/signal loss notifications. Upon pairing, the system seamlessly configures the current pressure as the reference point, allowing for easy setup of alarm thresholds (with an Alarming Range from +25% PSI to -15% PSI of Reference Pressure)

[Accurate Real-time Monitoring & Multi-Alert System]: Tymate TM7 tpms sensor can be used to monitor your tires’ pressure and temperature data within robust accuracy of ±1.5 PSI or ±3°F (The units can be displayed as ℃ or ℉ & BAR or PSI). Designed with six distinct alarm modes: high/low pressure, fast leakage, high temperature, sensor low battery, and sensor signal lost. This system is a reliable tool for maintaining tire health, and it is especially beneficial for DIY enthusiasts and pre-owned vehicle markets, where constant vigilance on tire conditions is paramount for safety and vehicle longevity

【Wide Application】The Masoll M13 Tyre Pressure Monitoring System commonly used on the vehicles with 4 tires include but no limited to Sedan, SUV, Pick-up truck, RV, Travel Trailer less than 38ft. When the trailer is longer than 38ft, a Masoll signal booster recommended to install to enhance the transmission signal.
How Often to Recheck RV Tire Pressure
Check your RV tire pressure before every trip, no matter how short. Tires naturally lose 1 to 3 PSI per month through normal air permeation, and temperature swings can shift pressure further.
If your RV sits in storage for weeks or months, always verify pressure before your first drive. Seasonal changes are especially important: a 30°F swing between summer and winter can shift tire pressure by 3 to 6 PSI. Re-weigh your RV whenever you make major load changes, such as adding a generator, swapping out furniture, or loading up for a longer trip, and recalculate your target PSI accordingly.
Avoid Mistakes and Troubleshoot Uneven or Incorrect Pressure
Incorrect pressure and uneven inflation create immediate safety hazards, so check for and correct mismatches before every trip. Always check RV tires cold. Pressure rises roughly 10% after driving, which can mask underinflation. Use the certification label as a starting point, and calculate inflation pressure from your actual Gross Axle Weight. Set PSI to support the heaviest tire on the axle so all tires share the load properly.
| Checkpoint | Action | Outcome |
|---|---|---|
| Cold check | Measure before driving | Accurate tire pressure |
| Certification label | Reference recommended PSI | Baseline for load |
| Axle weighing | Use actual GAWR | Adjust inflation pressure |
| TPMS | Monitor temp/pressure | Early detection |
| Inspection | Look for uneven tread | Prevent tire failure |
If you see uneven tread wear, vibration, or TPMS alerts, rebalance your loads, equalize pressures, and inspect for damage. Catching these problems early reduces tire wear and lowers the risk of tire failure on the road.
Frequently Asked Questions
What Pressure Should I Run in My RV Tires?
Run your RV tires at the PSI recommended by the tire manufacturer’s load/inflation chart for your actual per-wheel weight. If you haven’t weighed your RV yet, use the pressure listed on the vehicle’s certification placard as a starting point. The sidewall maximum is not a target; it’s the upper limit for that tire at full rated load.
What Is the 4 PSI Rule?
The 4 PSI rule is a quick way to check whether your cold tire pressure is roughly correct. After driving long enough for tires to warm up, measure the hot pressure. If it’s about 4 PSI higher than your cold setting, your cold pressure is in the right ballpark. Keep in mind that tire pressure typically changes about 1 to 2 PSI for every 10°F shift in temperature, so seasonal adjustments matter too.
How Does Tire Pressure Affect Load Rating?
A tire’s load rating is directly tied to its inflation pressure. Lower pressure means less carrying capacity. For example, dropping 15 PSI below the rated pressure on a truck tire can reduce its load capacity by over 1,000 pounds. Underinflated tires flex more, generate more heat, wear unevenly, and are far more likely to fail.
What Is the 5 PSI Rule?
The 5 PSI rule is a general guideline suggesting you can adjust tire pressure up to ±5 PSI from the manufacturer’s cold recommendation to account for temperature, load changes, and ride comfort. It’s a rough starting point, not a substitute for weighing your RV and using the manufacturer’s load/inflation tables for precision.
Conclusion
Getting RV tire pressure right starts with weighing your rig, matching tire markings to the manufacturer chart, and calculating each tire’s cold PSI using the heaviest-side rule. Inflate, verify cold, do a short drive test, and use TPMS to monitor. Avoid common mistakes and troubleshoot uneven pressures before they become dangerous. Check pressures before every trip for safe operation, because a few minutes with a gauge can save you from a blowout on the highway.


Leave a Reply