To replace the coolant in your Toyota RAV4, first gather essential tools: a drain bucket, pliers, and a coolant funnel. Begin by safely removing the underpanel and loosening the drain plug to let the old coolant flow into the bucket. After draining, fill the system with a 50/50 mixture of Toyota’s Genuine Super Long Life Coolant, using the funnel to avoid spills. Finally, verify there are no air pockets and regularly check coolant levels for peak performance. Keep reading for a detailed guide on each step.
The Importance of Regular Coolant Changes for Your RAV4’s Performance
While you might not think about it often, regular coolant changes are vital for maintaining your Toyota RAV4’s performance. By replacing the coolant approximately every 30,000 miles, you guarantee your cooling system operates effectively, preventing overheating and potential engine damage. Fresh coolant enhances heat transfer efficiency, which directly impacts engine performance and fuel efficiency, leading to a more enjoyable driving experience. Neglecting coolant changes can result in corrosion and blockages in your radiator and hoses, leading to costly repairs and potential engine failure. Monitoring the coolant level and condition is important for avoiding premature wear on engine components, ultimately extending your RAV4’s lifespan. Prioritize coolant changes to keep your vehicle running smoothly and efficiently.
Essential Tools and Materials for Your Coolant Change
To successfully change the coolant in your Toyota RAV4, you’ll need specific tools and materials on hand. Gather a drain bucket, a coolant funnel, and safety gear like gloves and goggles to protect yourself during the process. It’s also essential to have the correct coolant type, typically a 50/50 mix of antifreeze and distilled water, ready for peak performance.
Required Tools Overview
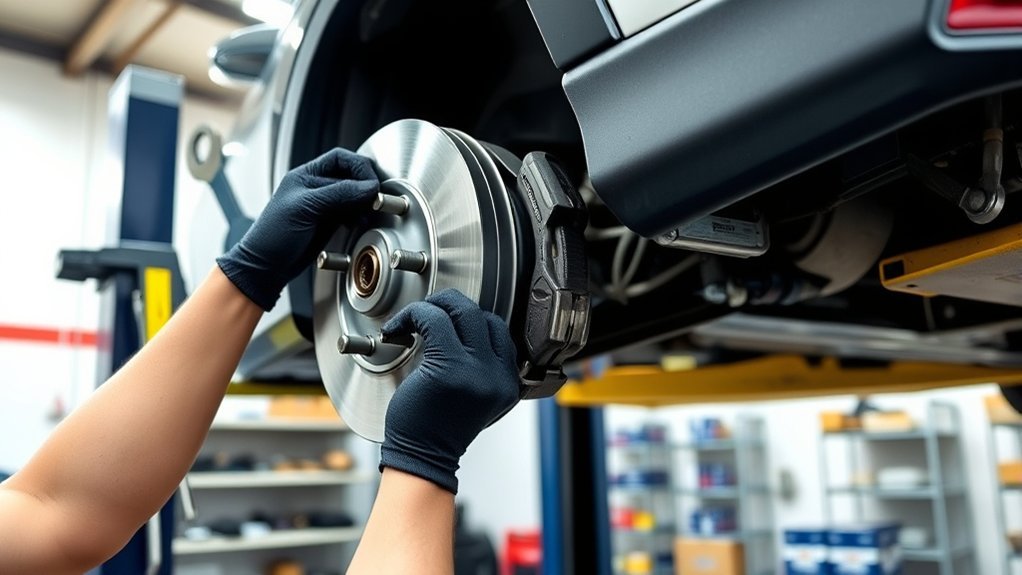
Replacing the coolant in your Toyota RAV4 requires a few essential tools and materials to guarantee the process goes smoothly. First, you’ll need a drain bucket to collect the old coolant efficiently. Pliers are important for loosening the drain plug, while a ratchet set or screwdriver helps remove any screws holding the underpanel for better access. A coolant funnel is critical for filling the system accurately, preventing spills. Don’t forget to have a new radiator cap on hand in case the old one is damaged, ensuring a proper seal. Finally, equip yourself with safety gear like gloves and goggles to protect against any spills or splashes during the coolant replacement process.
Recommended Coolant Types
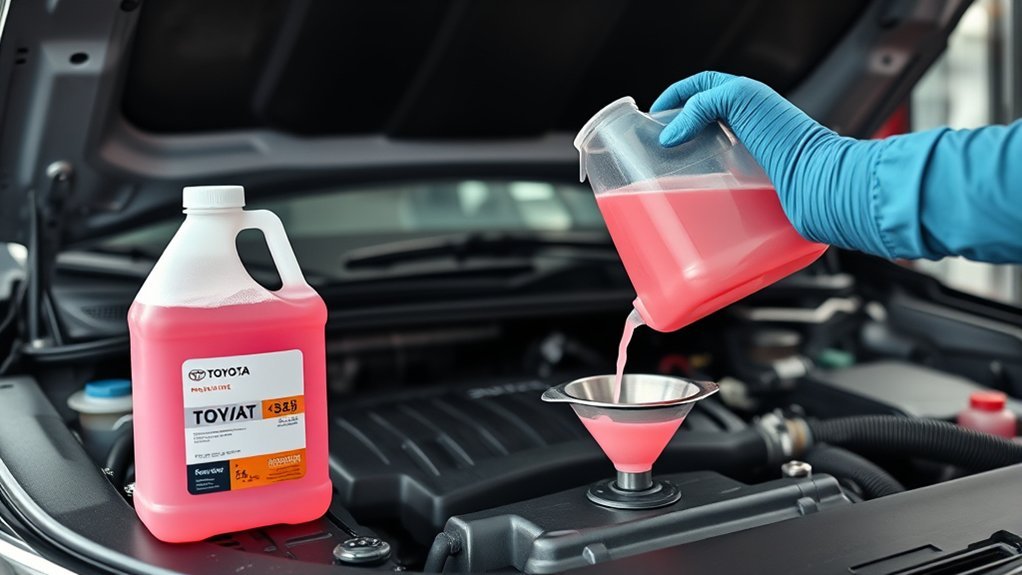
After gathering the necessary tools for your coolant change, choosing the right coolant type is essential to guarantee peak engine performance and longevity. For your 2010 Toyota RAV4, the recommended coolant type is a 50/50 mixture of Toyota’s Genuine Super Long Life Coolant (SLLC) or a compatible ethylene glycol-based coolant that meets the same specifications. This guarantees ideal protection against corrosion and overheating. Always refer to your owner’s manual for any specific coolant capacities and manufacturer recommendations. Additionally, if you opt for a non-Toyota coolant, make certain it aligns with the SLLC standards to avoid potential issues. Using the correct coolant type not only enhances your engine’s efficiency but also promotes its overall lifespan.
Safety Gear Essentials
Safety gear is vital when changing your coolant, as it protects you from harmful chemicals and potential accidents. Make certain to wear safety goggles and gloves to safeguard your eyes and skin. A drain bucket is essential for collecting old coolant; improper disposal can harm the environment. Additionally, using a coolant funnel helps avoid spills when refilling and allows you to monitor coolant levels accurately. To loosen the radiator drain plug, use pliers carefully to prevent breaking it.
| Item | Purpose | Importance |
|---|---|---|
| Safety Goggles | Protects eyes from chemicals | Vital for personal safety |
| Gloves | Shields skin from coolant | Prevents irritation and burns |
| Drain Bucket | Collects old coolant | Guarantees proper disposal |
| Coolant Funnel | Prevents spills during refilling | Maintains accurate coolant levels |
| Pliers | Loosens radiator drain plug | Avoids damage to components |
How to Safely Remove the Underpanel of Your RAV4
To safely remove the underpanel of your RAV4, start by identifying all the panel components, including push pins and screws. Carefully remove the fasteners using a flathead screwdriver or trim tool to avoid damage, ensuring you use the correct screwdriver size for the screws. Once all fasteners are removed, support the panel as you slide it down to gain effective access to the radiator.
Identify Panel Components
Removing the underpanel of your 2010 Toyota RAV4 requires careful attention to the various components that secure it in place. Start by locating the push pins and screws that hold the underpanel. Verify you have the right tools for this task.
| Component | Type | Purpose |
|---|---|---|
| Push Pins | Fasteners | Secure the underpanel |
| Screws | Fasteners | Hold the panel tightly |
| Hidden Clips | Fasteners | Additional support |
Carefully slide the underpanel down and out of the way to access the radiator. Be mindful of any fasteners that may be difficult to remove. After removal, inspect the underpanel for wear or damage before reinstallation to verify everything remains secure.
Remove Fasteners Carefully
Having successfully identified the panel components, you’re now ready to remove the fasteners securing the underpanel of your 2010 Toyota RAV4. Begin by locating the underpanel, which is typically held in place by a mix of push pins and screws. Use a flathead screwdriver or a trim removal tool to carefully pry out the fragile push pins, ensuring you don’t break them. Once the push pins are removed, grab a socket wrench to unscrew any screws that secure the panel. Gently slide the underpanel down and out of the way to access the radiator, being cautious not to damage any clips or brackets. Finally, inspect the fasteners for wear, as replacing them may be necessary for proper reinstallation.
Access Radiator Effectively
Accessing the radiator in your Toyota RAV4 requires careful removal of the underpanel, which is crucial for maintenance tasks like coolant replacement. Start by locating the underpanel, secured by push pins and screws. Use a flathead screwdriver to gently pry out the push pins, taking care not to damage them for reinstallation. Once the fasteners are removed, slide the underpanel down and out of the way, revealing the radiator area. Be cautious of any remaining fasteners that might be stuck; they may need extra effort to avoid breaking. Properly removing the underpanel guarantees you can access the radiator safely and effectively, facilitating the coolant replacement process.
Steps for Draining the Old Coolant From the Radiator
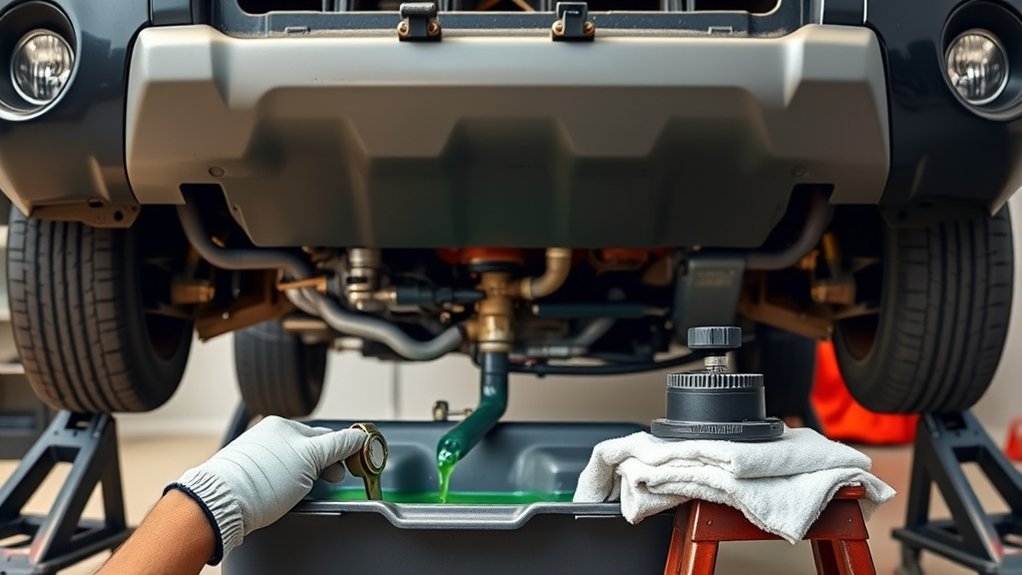
To drain the old coolant from your Toyota RAV4’s radiator, start by loosening the drain plug located at the bottom. Use pliers cautiously to avoid breaking the drain plug during removal. Position a drain bucket directly beneath the radiator to collect the coolant as it flows out. To expedite the draining process, remove the radiator cap, allowing air to enter and facilitate the coolant flow. Monitor the draining process and verify all old coolant is completely evacuated. Once the coolant has fully drained, securely close the drain plug to prevent any leaks. This step is essential for a successful coolant replacement, guaranteeing your RAV4 runs efficiently and remains in peak condition.
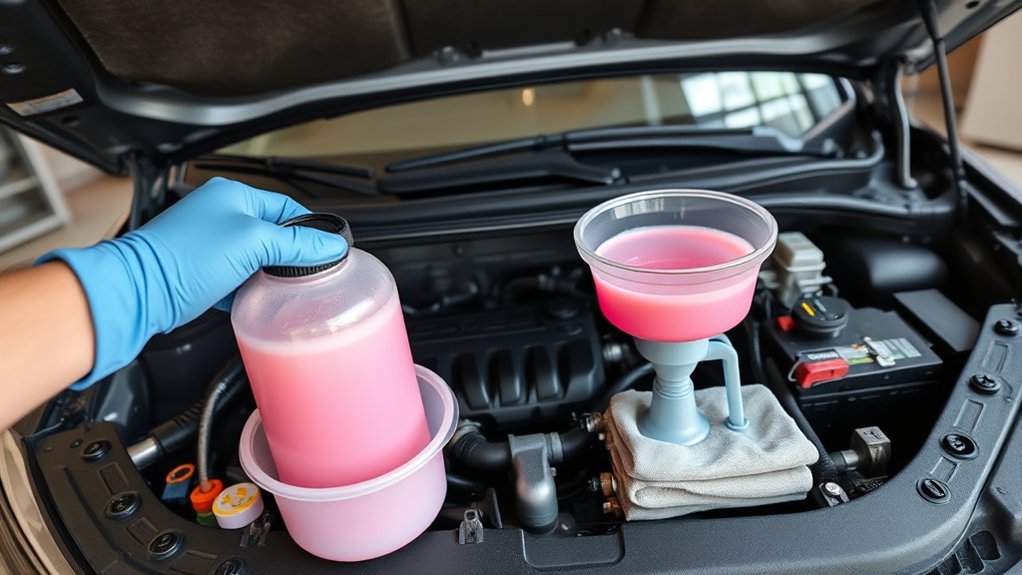
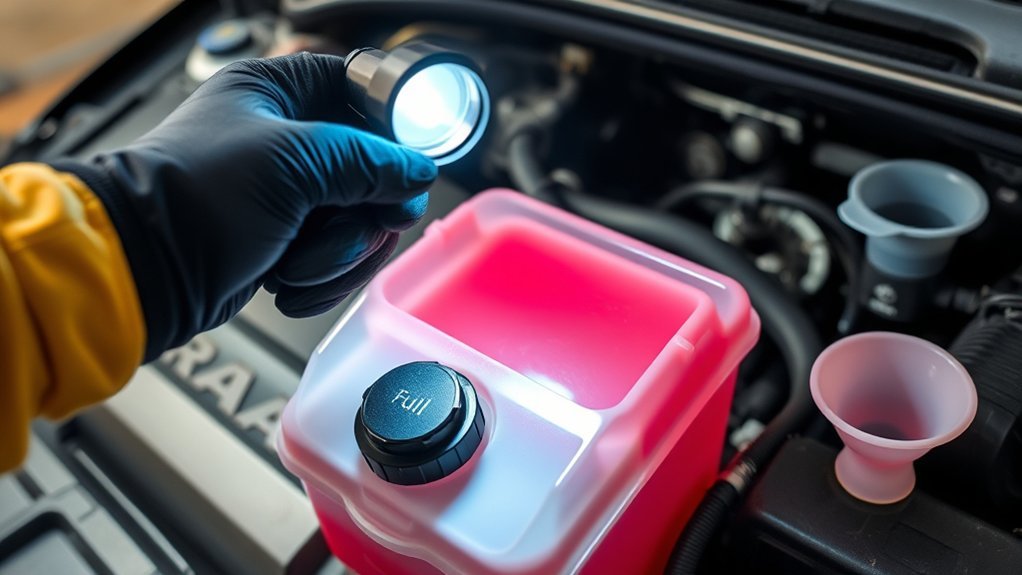
Step-By-Step Guide to Filling the Cooling System With New Coolant
After draining the old coolant, you’re ready to fill the cooling system with new coolant for your Toyota RAV4. Start by using a compatible coolant funnel to prevent spills. Refer to your owner’s manual for the correct coolant type, as using the wrong one can impact performance.
After draining the old coolant, use a compatible funnel and refer to your owner’s manual for the right type before filling your Toyota RAV4.
- Fill the cooling system slowly to minimize air pockets.
- Gently squeeze the radiator hose while filling to release trapped air bubbles.
- Once filled, run the vehicle with the heat on low speed to circulate the coolant.
This guarantees that the system is entirely filled and functioning correctly, preventing potential overheating issues. Remember, addressing air pockets is essential for peak engine performance.
Bleed Air Pockets From the Cooling System
Bleeding air pockets from the cooling system is essential for ensuring ideal engine performance and preventing overheating. Start by using a coolant funnel to fill the radiator slowly. This allows the coolant to flow and air bubbles to escape. As you fill, intermittently squeeze the radiator hose to help dislodge trapped air and facilitate coolant circulation. After filling, run the engine with the heater set to low speed. This process allows the thermostat to open and aids in releasing any remaining air pockets. Closely monitor the coolant level during this process, topping off as necessary. Once the engine reaches operating temperature, check that the heater inside the vehicle produces warm air, confirming the cooling system is free of air pockets and functioning correctly.
Keep an Eye on Your Coolant Levels After You Replace Them
Once you’ve successfully bled the air pockets from your cooling system, maintaining the right coolant level becomes essential for your Toyota RAV4’s performance. Regularly inspecting your coolant helps prevent overheating issues and guarantees your engine runs smoothly. Make it a habit to check the coolant level at least once a month or before long trips.
- Always check the level when the engine is cool to avoid burns.
- Look for any significant drops in coolant; this could indicate a leak that needs immediate attention.
- Keep an eye on the coolant’s color and consistency; it should be bright and free of debris.
Frequently Asked Questions
Can I Replace My Coolant Myself?
Yes, you can replace your coolant yourself. Use DIY maintenance tips to select the correct coolant types. Guarantee proper engine cooling by draining the old coolant and filling with the new, monitoring for air pockets as you proceed.
How Often Should I Change the Coolant on My RAV4?
How often should you change your coolant? Every 30,000 miles or 24 months. Regular checks are essential; watch for signs of an overheating engine, and remember coolant maintenance tips to guarantee peak performance and longevity.
How Much Does It Cost to Replace Coolant in a RAV4?
Replacing coolant in your RAV4 typically costs between $100 and $150. Consider coolant types for peak performance. For maintenance tips, compare DIY versus professional costs to maximize savings and guarantee efficient cooling system function.
How to Add Coolant to Toyota RAV4?
Pour the right coolant types into your RAV4 when the engine’s cooled, ensuring it’s at the fill line. Remember, maintaining proper engine temperature is key—follow these maintenance tips for a smoothly running vehicle.
Conclusion
In summary, replacing the coolant in your Toyota RAV4 not only enhances its performance but also extends its lifespan. Coincidentally, by regularly checking and maintaining your coolant levels, you’ll likely avoid costly repairs down the road. Following the steps outlined guarantees a thorough process, from draining the old coolant to bleeding air pockets. Remember, a well-maintained cooling system is vital for peak engine function—your RAV4 deserves nothing less. Keep an eye on those levels, and drive with confidence!