A dirty cabin filter can make your Toyota RAV4 feel stuffy and weak, even when the heating, ventilation, and air conditioning system is working. You can usually replace it in about 10 minutes by opening the glove box, removing the damper, lowering the glove box, and sliding out the old filter. This guide shows you how to inspect the old filter, install the new one in the correct airflow direction, and reassemble everything without trouble.
What’s in This Article
- Why Change Your Cabin Filter in a Toyota RAV4?
- What Tools Do You Need for the Replacement?
- Step-by-Step Guide to Accessing the Cabin Filter
- Inspecting Your Old Cabin Filter for Damage
- How to Ensure Airflow Direction Is Right for Your New Filter?
- Test Airflow Direction Before Installing the New Filter?
- Installing the New Cabin Filter: Best Practices
- Reassemble Your Glove Box After Filter Replacement
- Common Mistakes to Avoid When Changing the Cabin Filter
- Frequently Asked Questions
Quick Answer
To change a Toyota RAV4 cabin filter, open the glove box, disconnect the damper, press the glove box sides inward, and remove the filter cover. Pull out the old filter, match the new filter to the airflow arrow, then reinstall the cover and glove box.
Key Takeaways
- Replace your cabin filter when airflow feels weak, odors appear, or the filter looks dirty.
- Most RAV4 cabin filters sit behind the glove box, so access is simple.
- Match the new filter to the airflow arrow before you slide it into the tray.
- Use gentle pressure on the glove box tabs to avoid cracking plastic clips.
- Check the filter more often if you drive in dusty, smoky, or pollen-heavy areas.
Estimated time: About 10 minutes.
Difficulty level: Easy for most owners.
Why Change Your Cabin Filter in a Toyota RAV4?
When you skip cabin filter replacement, dust, pollen, leaves, and road debris can build up inside the filter. That buildup can reduce airflow from your vents and cause stale odors inside your RAV4.
A clean cabin air filter helps your heating, ventilation, and air conditioning system move air more freely. It also helps trap common airborne particles before they enter the cabin.
Check the filter if your vents feel weak, the cabin smells musty, or the windshield fogs more than usual. Replace it when it looks packed with dirt, leaves, or debris.
What Tools Do You Need for the Replacement?
You only need a few basic items to replace the cabin air filter in your Toyota RAV4. Keep the new filter nearby before you remove the old one, so the filter tray stays open for less time.
Essential Tools Required
Gather these items before you start:
- New cabin air filter: Choose one that fits your RAV4 model year.
- Flathead screwdriver: Use it only if the damper or cover feels hard to release by hand.
- Gloves: Keep dust and debris off your hands.
- Flashlight: Check the filter slot and confirm the airflow arrow.
- Clean cloth or paper towel: Wipe light dust from the glove box area.
Most RAV4 owners can complete this job without special tools. Use gentle pressure because the glove box tabs and filter cover clips are plastic.
Safety Gear Recommendations
Before you start changing the cabin air filter in your Toyota RAV4, gather simple safety gear. This helps you handle dust and old debris with less mess.
| Safety Gear Type | Purpose | Filter Handling Precautions |
|---|---|---|
| Safety Gloves | Protects hands from dust and debris | Prevents skin irritation |
| Flathead Screwdriver | Helps release tight clips if needed | Use light pressure on plastic parts |
| Vacuum Cleaner | Cleans loose debris from the area | Avoid touching wiring or clips |
| Flashlight | Improves visibility | Helps confirm proper installation |
| New Cabin Air Filter | Restores cleaner cabin airflow | Match the airflow direction |
These items make the job cleaner and safer. They also help you avoid forcing small plastic parts.
Optional Accessories To Consider
A vacuum cleaner with a narrow nozzle can remove leaves or dust near the filter slot. Don’t push the nozzle deep into the housing, because you could disturb clips or wiring.
Latex or nitrile gloves help keep dirt from transferring to the new filter. A flashlight also helps you inspect the old filter and read any arrow marks on the tray.
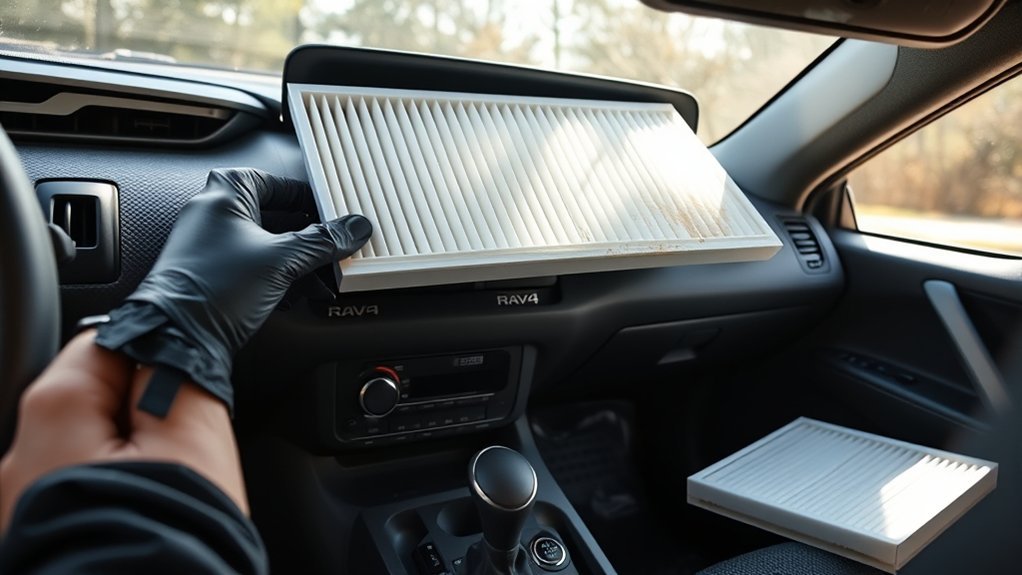
Step-by-Step Guide to Accessing the Cabin Filter
Accessing the cabin air filter in a Toyota RAV4 takes only a few steps. Park the vehicle, turn off the ignition, and empty the glove box before you begin.
- Open the glove box fully and remove any loose items inside.
- Detach the glove box damper from the side of the glove box.
- Press both sides of the glove box inward to release the stops.
- Lower the glove box carefully until you can see the filter cover.
- Press the filter cover tabs and pull the cover straight out.
- Slide the old cabin filter out of the housing.
Move slowly during this step so you don’t damage the glove box stops. If a clip resists, check its position instead of forcing it.
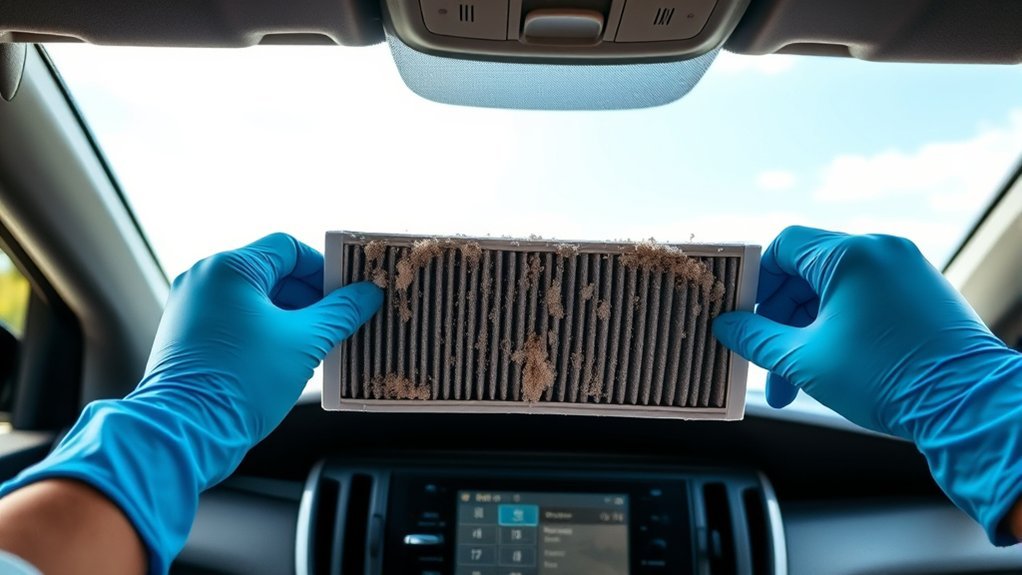
Inspecting Your Old Cabin Filter for Damage

Look at the old cabin filter before you throw it away. Its condition can tell you if your RAV4 needs more frequent filter checks.
Debris Accumulation Assessment
Check the filter pleats for dust, leaves, pollen, and dark buildup. Heavy debris means the filter has trapped a lot of material and should not go back into the vehicle.
Compare the old filter with the new one if you want a clear visual check. A clean filter should have open pleats and no packed debris between the folds.
Visible Damage Indicators
Look for tears, holes, crushed pleats, or broken edges. Damage can let dirty air pass around the filter instead of through it.
Also check for damp spots or mold-like odors. If the filter feels wet, inspect the surrounding area for signs of water entry before you install a new one.
Warning: Don’t reinstall a wet, torn, or heavily clogged cabin filter because it can reduce airflow and spread odors.
How to Ensure Airflow Direction Is Right for Your New Filter?
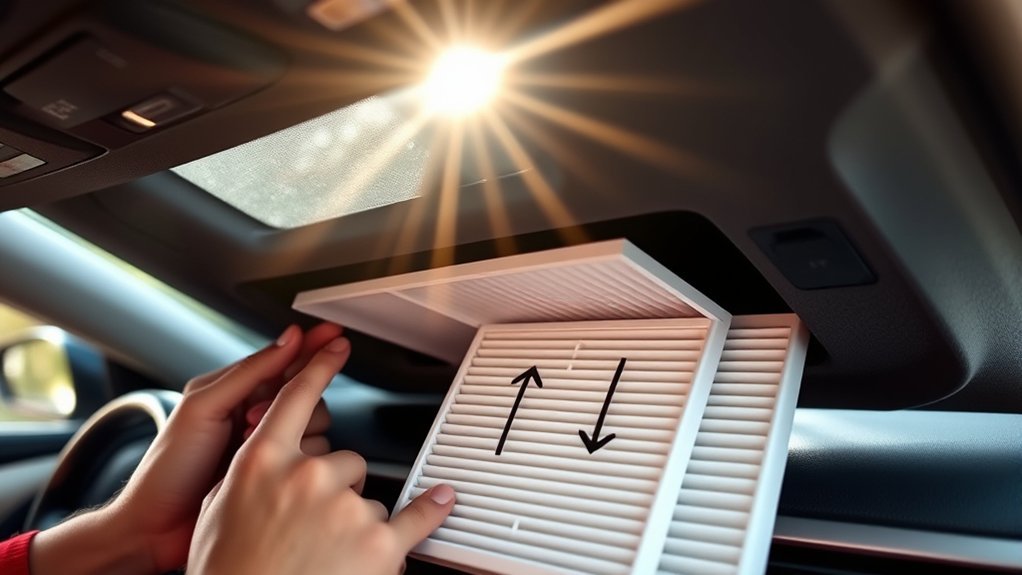
Correct airflow direction helps the new filter work as designed. Check the filter tray and the filter itself before you install it.
Match the airflow arrow on the new filter to the direction shown on the filter housing or tray.
- Check the tray mark: Look for an arrow or label near the filter housing.
- Read the filter label: Some filters show “Air Flow,” while others show “Up.” Follow the meaning of the label.
- Use the old filter as a clue: The dirtier side often shows where the air entered the old filter.
If the tray mark and filter mark seem different, read the filter wording carefully. “Air Flow” shows air direction, but “Up” only shows which side faces upward.
Test Airflow Direction Before Installing the New Filter?
You usually don’t need to test airflow if the tray and filter have clear markings. Still, a quick test can help if the old filter had no label or the new filter uses confusing arrows.
Turn on the fan briefly with the filter removed and hold a small piece of light paper near the opening. Watch which way the air pulls or pushes, then turn the fan off before you install the filter.
Do not place your fingers or loose objects inside the housing. Use the test only as a guide when the factory markings are unclear.
Note: If your filter says “Up,” install that side upward instead of treating the arrow as airflow direction.
Installing the New Cabin Filter: Best Practices
Install the new cabin air filter after you confirm the correct direction. Keep the pleats straight and avoid bending the filter frame.
- Align the filter with the airflow or “Up” marking on the housing.
- Slide the filter into the tray until it sits flat and even.
- Reinstall the filter cover and press it until the tabs click.
- Check that no filter edge sticks out of the housing.
A loose or crooked filter can let dust bypass the filter media. Take a few extra seconds to check the fit before you close the glove box.
Pro tip: Write the replacement date and mileage on the filter box or maintenance log.
Reassemble Your Glove Box After Filter Replacement
After you replace the cabin air filter, lift the glove box back into position. Press the sides inward again so the glove box stops pass the dash opening.
Reconnect the damper to its slot on the glove box. Then open and close the glove box once to confirm smooth movement.
Listen for rattles and check that the glove box closes evenly. If it sits crooked, reopen it and make sure both side stops engaged correctly.
Common Mistakes to Avoid When Changing the Cabin Filter
A few small mistakes can cause poor airflow or a loose glove box. Check these points before you finish the job.
- Forcing the glove box: Press the sides gently instead of pulling hard.
- Installing the filter backward: Match the correct airflow or “Up” mark.
- Leaving the cover loose: Press the cover until both clips lock.
- Ignoring debris: Remove loose leaves before they reach the blower area.
- Buying the wrong filter: Match the filter to your RAV4 model year and trim.
If airflow still feels weak after replacement, check the filter cover again. You may also need a professional inspection if the blower motor or vents have another issue.
Frequently Asked Questions
How do you replace a cabin air filter in a Toyota RAV4?
Open the glove box, disconnect the damper, press the glove box sides inward, and lower it. Remove the filter cover, pull out the old filter, then install the new one in the correct direction.
How often should you change the cabin air filter on a Toyota RAV4?
Many owners replace the cabin air filter every 15,000 to 30,000 miles. Check it sooner if you drive on dusty roads, park under trees, or notice weak airflow or bad odors.
What are three symptoms of a clogged cabin air filter?
A clogged cabin air filter can cause weak vent airflow, stale or musty cabin odors, and louder fan noise. You may also notice more dust inside the vehicle.
Will AutoZone change your cabin air filter?
Some AutoZone locations may help with simple cabin air filter replacement, but services can vary by store. Call your local store first and confirm they can help with your RAV4.
Can you drive without a cabin air filter?
You can move the vehicle without one, but you should not use it that way for normal driving. Dust, leaves, and debris can enter the heating, ventilation, and air conditioning system more easily.
Conclusion
Changing your cabin filter is one of the easiest ways to improve airflow and reduce stale cabin odors in your Toyota RAV4. Check the old filter, match the airflow direction, and secure the cover before you close the glove box. Add the replacement date to your maintenance notes so you know when to check it again. A clean filter helps every drive feel fresher and more comfortable.