
To replace your Toyota RAV4 antenna mast, first, gather a socket wrench or pliers, a flathead screwdriver, and a flashlight. Unscrew the old mast counterclockwise, checking for any remaining pieces in the base after removal. Choose a compatible replacement mast made of high-quality materials, ensuring it includes all necessary mounting hardware. Properly align the new mast and tighten it securely. Regular inspections and maintenance can help prolong its lifespan. Keep going to discover more tips on installation and maintenance.
Common Reasons for RAV4 Antenna Mast Replacement
When you notice a bent or cracked antenna mast on your Toyota RAV4, it’s essential to understand the common reasons for replacement. One primary cause is exposure to car washes; the brushes can inflict excessive wear and tear on the mast. Additionally, road debris can strike the antenna while driving, leading to damage. Regular checks on your antenna mast are crucial because visible wear can affect radio reception quality. If you spot any damage, replacing the mast promptly not only maintains your vehicle’s functionality but also its aesthetic appeal. Proactive maintenance can greatly extend the lifespan of the antenna mast. Avoiding situations that might damage it, such as low-hanging branches or aggressive car washes, can prevent frequent replacements. For those inclined toward DIY repairs, quality replacement parts for the Toyota RAV4 are readily available through online retailers like 1A Auto, streamlining the repair process.
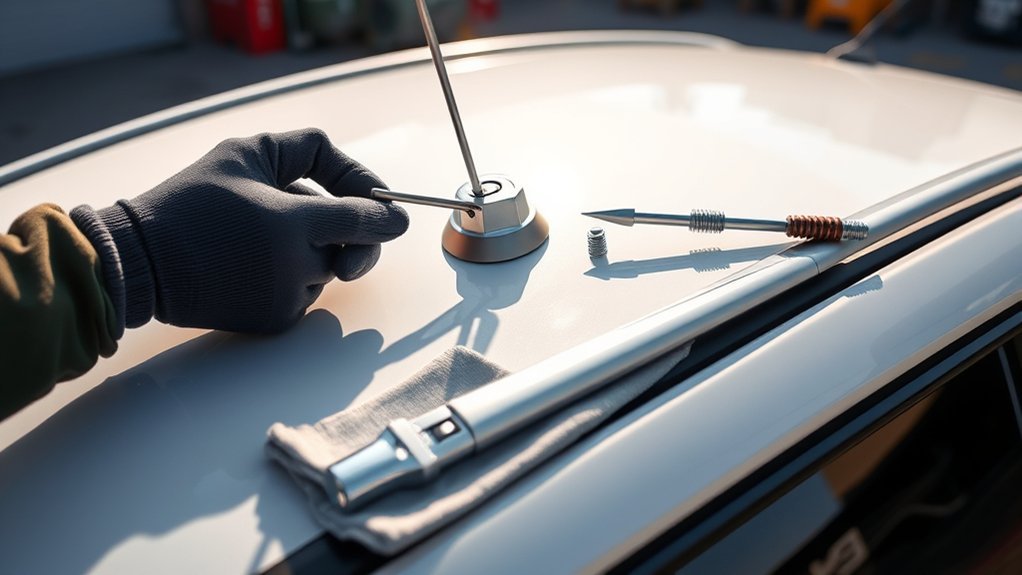
Tools You Need to Remove Your Antenna Mast
To effectively remove the antenna mast from your Toyota RAV4, you’ll need a few essential tools. Start with a socket wrench or a pair of pliers to securely unscrew the mast. If any remnants of the broken antenna remain, a flathead screwdriver can help pry them off. Keep a soft cloth handy to protect your vehicle’s surface while you work. It’s also wise to have the replacement antenna ready, as damaged masts require new parts for ideal functionality. Depending on the antenna types you’re dealing with, different masts may fit your RAV4, so verify compatibility beforehand. Finally, a flashlight can enhance visibility in tight or dark spaces around the antenna, ensuring you don’t miss any critical steps. Following these installation tips and maintenance advice will lead to a smoother removal process and set you up for a successful replacement.
Steps to Safely Remove the Old Antenna Mast
To safely remove the old antenna mast, you’ll need a wrench or pliers to unscrew it counterclockwise from the base. Be aware that common breakage causes, such as car washes and road debris, can complicate this process. Inspect the mast for damage before proceeding to guarantee a smooth removal.
Required Tools For Removal
Removing the old antenna mast from your 2010 Toyota RAV4 requires a few essential tools to guarantee a smooth process. Here’s what you’ll need:
| Tool | Purpose | Tips |
|---|---|---|
| Socket Wrench/Pliers | Loosen the antenna mast | Use the right size |
| Flathead Screwdriver | Pry off stubborn parts | Be gentle to avoid damage |
| Towel/Cloth | Protect vehicle paint | Keep it nearby |
| Container | Hold loose screws and parts | Organize as you go |
| Flashlight | Illuminate tight spaces | Check visibility |
These tools will help you effectively manage different antenna types and follow installation tips while considering maintenance advice for future reference.
Common Breakage Causes
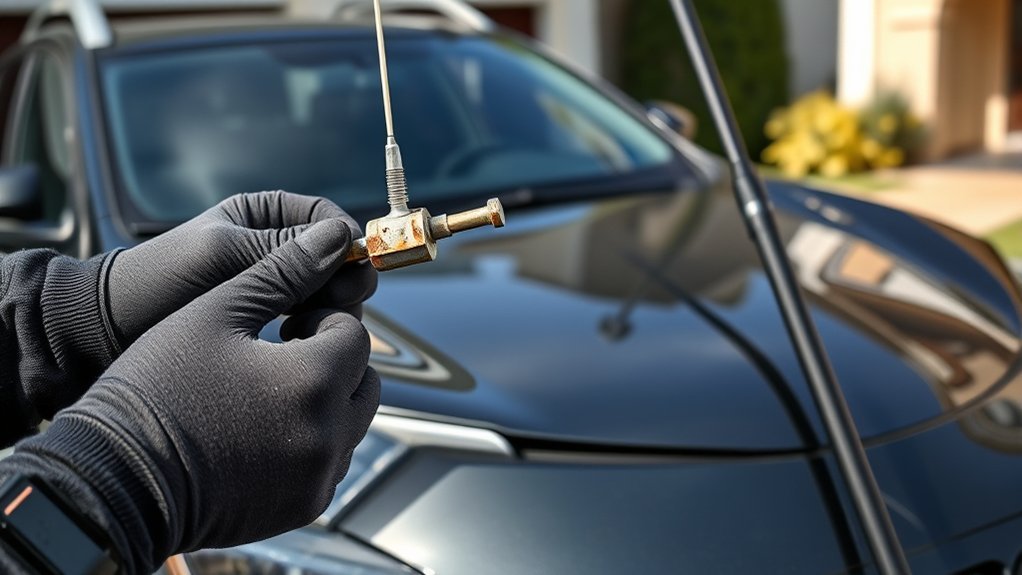
While you’re preparing to replace the antenna mast on your Toyota RAV4, it’s important to understand the common causes of breakage that could complicate the removal process. Automated car washes can exert high pressure on the antenna design, snapping the mast, while road debris may strike the antenna during drives, leading to damage. When you attempt to remove a broken mast, check for any remaining pieces lodged in the base to guarantee a clean extraction. Typically, you’ll unscrew the mast by hand, but pliers may be necessary if it’s too tight. After unscrewing, inspect the mounting area for any damage that could hinder the new mast’s installation. Prioritize material durability for a longer-lasting replacement.
How to Check for Remaining Pieces After Removal
After unscrewing the antenna mast from your 2010 Toyota RAV4, it’s essential to conduct a thorough inspection of the base for any remaining pieces. Use a flashlight to illuminate the area around the antenna base, making sure you can see any small fragments that may have broken off during removal. Gently feel around the base with your fingers to detect any uneven surfaces, which could indicate leftover parts.
If you find any remnants, carefully remove them to prevent interference with the installation of the new antenna mast. This step is critical for effective antenna maintenance. Removing all pieces guarantees a secure fit, enhancing signal reception and minimizing potential future issues. Implement these installation troubleshooting strategies to guarantee peak performance and enjoy uninterrupted radio signals. By taking these precautions, you’re empowering yourself with the knowledge to maintain your vehicle’s antenna effectively.
How to Select the Ideal Replacement Antenna Mast
Selecting the ideal replacement antenna mast for your Toyota RAV4 is crucial for maintaining peak radio reception and guaranteeing a seamless fit. Start by confirming compatibility with your specific model year, as dimensions and fittings can differ. While OEM (Original Equipment Manufacturer) masts guarantee fit and performance, don’t overlook aftermarket options. Many of these can also meet quality standards if you choose wisely.
Material durability is essential; opt for high-quality plastic or stainless steel to withstand breakage from road debris and car washes. Additionally, verify the replacement mast includes all necessary mounting hardware, as some kits may lack essential components for installation. Before finalizing your purchase, check customer reviews and ratings to gauge reliability and ease of installation. Following these installation tips will help you make an informed decision, ensuring your RAV4 maintains peak reception without hassle.
Step-by-Step Guide to Installing Your New Antenna Mast
To install your new antenna mast effectively, you’ll need a few essential tools, including pliers and a wrench. Proper alignment is vital; confirm the mast is correctly positioned over the base before securing it. Finally, check for a snug fit to prevent any future issues with reception or mast integrity.
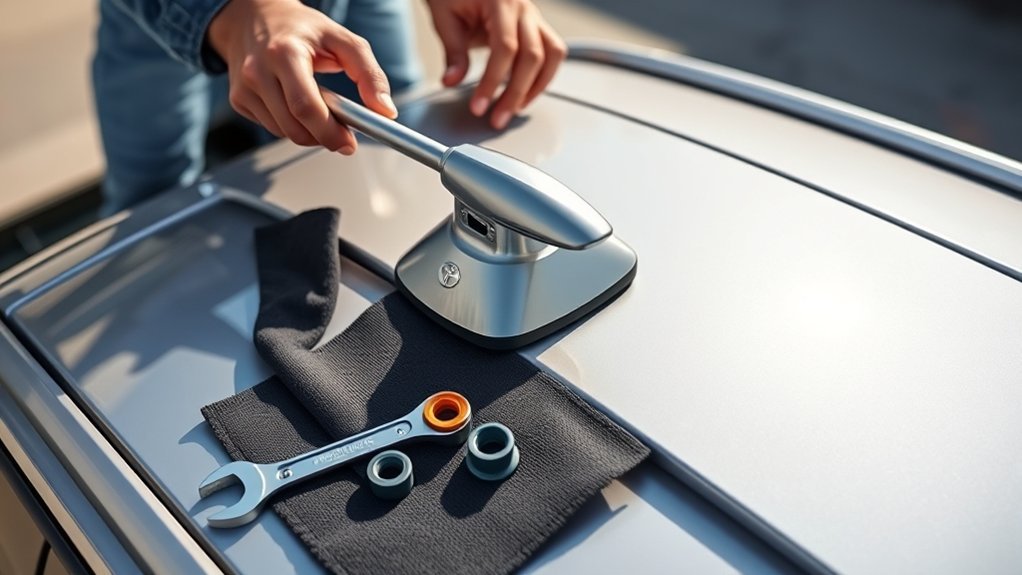
Required Tools For Installation
When replacing your Toyota RAV4 antenna mast, you’ll need a few essential tools to guarantee a smooth installation process. A clean workspace is vital, along with a soft cloth to protect your vehicle’s surface. You’ll typically require a socket wrench or pliers, depending on the tightness of the old mast. Here’s a quick overview of the required tools:
| Tool | Purpose |
|---|---|
| Socket Wrench | Remove and install the antenna mast |
| Pliers | Snug the mast if it’s too tight |
| Soft Cloth | Protect your vehicle’s surface |
Using these tools guarantees proper vehicle maintenance and ideal antenna signal. Remember these installation tips for a secure fit and to avoid future issues.
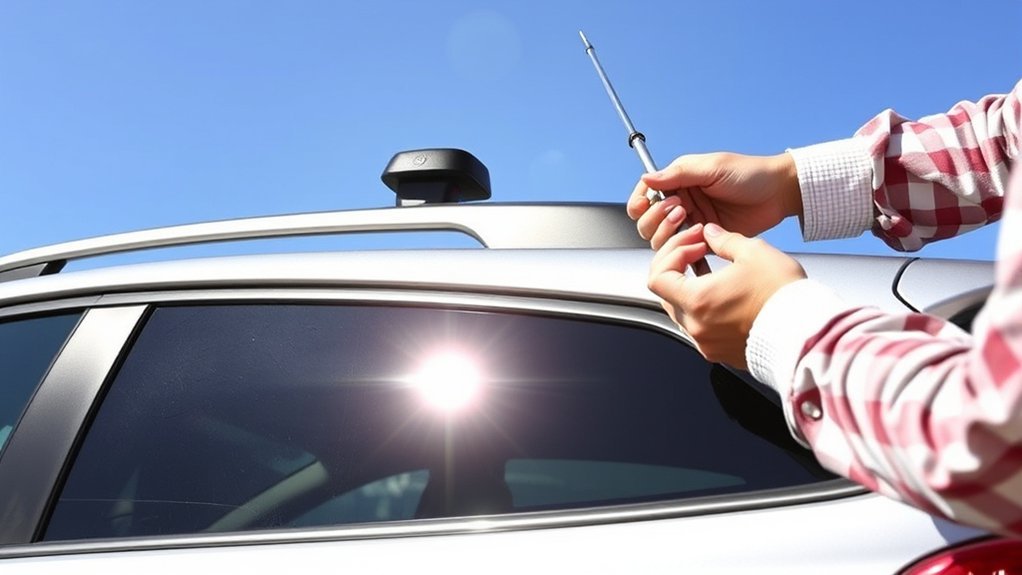
Proper Alignment Techniques
Once you’ve gathered the necessary tools and prepared your workspace, it’s time to focus on proper alignment techniques for installing your new antenna mast. To guarantee ideal antenna performance factors, follow these steps:
- Visualize alignment with the mounting base, centering the mast before securing it.
- Begin by screwing the antenna mast into the base by hand, avoiding cross-threading.
- Confirm the mast is perpendicular to the vehicle’s surface for the best appearance.
If the mast feels too tight, use pliers gently, avoiding overtightening to prevent damage. After installation, check its stability by gently wiggling the mast to verify it’s securely fastened and properly aligned. Choosing the right mast material options and installation tool types can further enhance your results.
Ensuring A Secure Fit
Guaranteeing a secure fit for your new antenna mast is essential for peak performance and longevity. Start by properly aligning the mast with the base to avoid common installation mistakes. Once aligned, insert the mast and snug it down by turning it clockwise until tight. If it’s too tight for hand installation, use pliers carefully to prevent damage. After installation, double-check for any gaps that could lead to water leaks. Employing these antenna maintenance tips will help you avoid frequent replacements. Regularly inspect the mast to confirm it remains secure. If you face any issues, apply installation troubleshooting techniques to rectify them. A secure fit guarantees your antenna operates effectively, enhancing your driving experience.
How to Properly Align Your RAV4 Antenna Mast During Installation
To achieve ideal reception from your Toyota RAV4’s antenna, align the mast properly during installation. Begin by verifying the base of the antenna mast matches the mounting point on your vehicle. This alignment is essential for both aesthetics and reception quality.
- Hand-tighten the mast until snug, avoiding overtightening to prevent damage to the threads.
- If needed, use pliers gently to secure it without stripping the base.
- After installation, confirm the antenna mast is straight and vertical; improper alignment can greatly affect reception quality.
Regularly check the alignment and condition of the mast to maintain peak performance. Remember, different antenna mast types may require specific considerations, so familiarize yourself with the appropriate installation tools beforehand. Proper alignment not only enhances reception but also contributes to the overall look of your RAV4.
Tips for Securing Your Antenna Mast for a Tight Fit
While securing your antenna mast, it’s vital to achieve a tight fit to prevent it from loosening during your drives. First, make certain the mast is correctly aligned to maximize signal reception improvement. After screwing it in place, snug it down securely by hand. If it’s too tight, don’t hesitate to use pliers for added leverage, guaranteeing a firm grip. Regular inspections are important; check the mast frequently to confirm it remains tight and undamaged. Maintaining a secure fit not only enhances signal reception but also contributes to vehicle aesthetics enhancement, keeping your RAV4 looking sharp. Remember these antenna maintenance tips for long-term performance and to avoid future repair issues. A well-secured antenna mast is key to enjoying clear radio signals and a polished vehicle appearance, so take these steps seriously for best results.
How to Maintain Your Antenna to Prevent Future Issues
Maintaining your antenna is essential for preventing future issues that could hinder radio performance. Regular checks will help you identify wear or damage early, ensuring your antenna remains functional and aesthetically pleasing.
- Antenna cleaning: Wipe the antenna with a soft cloth to remove dirt and debris, promoting superior reception.
- Preventive checks: Inspect your antenna regularly for signs of wear or damage, especially after rough road conditions.
- Damage assessment: Avoid automatic car washes and be cautious of road debris that might strike your antenna. If you notice any damage, replace the mast promptly.
What to Do If You Find Broken Pieces?
Finding broken pieces of the antenna mast can be frustrating, but addressing the issue promptly is crucial for maintaining ideal radio performance. Start by carefully inspecting the area where the mast was located, confirming no fragments remain. Any leftover pieces can interfere with the antenna signal and potentially damage your vehicle’s roof.
To help you manage the cleanup process, refer to the table below:
| Action | Tool Needed |
|---|---|
| Inspect for fragments | None |
| Retrieve tiny shards | Small magnet or vacuum |
| Check antenna base | Installation tools |
| Disassemble if necessary | Wrench or screwdriver |
| Install new antenna mast | Installation tools |
Following these maintenance tips will guarantee a secure fit for the new antenna mast. Always prioritize removing broken parts to enhance the performance of your radio system.
Frequently Asked Questions
What Is the Lawsuit Against the Toyota RAV4?
The Toyota RAV4 lawsuit centers on defective fuel pumps, affecting engine performance and safety. Plaintiffs allege Toyota failed to disclose issues, impacting consumer rights. Antenna mast problems are unrelated but highlight broader concerns about transparency.
Can You Replace Your Own Car Antenna?
Yes, you can replace your own car antenna. Nearly 70% of DIY auto enthusiasts report satisfaction with their car audio upgrades. Follow antenna maintenance tips, and guarantee proper alignment for effective DIY antenna installation.
How to Properly Ground an Antenna Mast?
To properly ground an antenna mast, connect it to the vehicle’s chassis using corrosion-resistant materials. Employ effective antenna grounding techniques and secure connections for ideal signal enhancement. Regularly inspect grounding for wear to maintain performance.
How to Remove Shark Fin Antenna Cover?
To remove the shark fin antenna cover, gently pry it off with a trim tool, inspect for clips, and disconnect wiring. This guarantees proper antenna maintenance during vehicle modifications, preventing damage and guaranteeing a secure fit.
Conclusion
Replacing your Toyota RAV4’s antenna mast might seem challenging, but with the right tools and steps, it can be a straightforward task. Just as a well-tuned antenna enhances your driving experience, neglecting maintenance can lead to frustration. By ensuring a proper fit and taking care of your new mast, you’ll not only improve reception but also extend its lifespan. Remember, a small effort today can prevent bigger headaches tomorrow, keeping your RAV4 connected and enjoyable on every journey.


Leave a Reply