When your Toyota Supra’s check engine light comes on, start with a simple check of the gas cap to ascertain it’s tight. Next, use an OBD-II scanner to retrieve diagnostic trouble codes (DTC) for insights into the problem. Inspect your mass airflow sensor and oxygen sensors, and look for vacuum leaks as common culprits. If issues persist or if the light is flashing, seek professional help to avoid further damage. More detailed solutions await you next.
Understanding What the Check Engine Light Means and What to Do Next

The check engine light serves as your Toyota Supra’s warning system, alerting you to potential issues within the engine or emissions system. When this light activates, it’s crucial to understand what it signifies. A steady glow typically indicates minor issues, while a flashing light points to more serious engine malfunctions that require immediate attention. Ignoring this warning can lead to costly repairs and reduced engine performance.
To diagnose the problem, use an OBD2 scanner to retrieve diagnostic trouble codes (DTC). These codes help pinpoint the source of the issue, which may involve faulty O2 sensors, vacuum leaks, or mass airflow sensor problems. Once you identify the underlying issue, seek a professional diagnosis to guarantee appropriate repairs are made. Addressing the check engine light promptly not only preserves your Toyota Supra’s efficiency but also empowers you to maintain your vehicle’s health and performance.
Common Causes of the Check Engine Light Activation
When your Toyota Supra’s check engine light activates, it often points to specific issues that need addressing. Common causes include a loose or damaged gas cap, which can lead to fuel evaporation and emissions problems. Faulty oxygen sensors are another culprit, negatively impacting your fuel efficiency and increasing emissions. You might also encounter vacuum leaks in the intake system, causing high RPMs at idle or engine surging, prompting the check engine light to illuminate. Additionally, malfunctioning mass airflow sensors disrupt the engine’s air-fuel mixture, resulting in poor performance. Engine misfires, often due to worn spark plugs or ignition coils, can also trigger the check engine light, leading to potential further damage if not resolved quickly. Having a robust diagnostic system at your disposal can help you identify these issues effectively and maintain your Toyota Supra’s performance.
Steps to Troubleshoot Your Toyota Supra’s Check Engine Light
How can you effectively troubleshoot the check engine light in your Toyota Supra? Start by examining a few common issues that could trigger the light. Here are the steps you should take:
Effectively troubleshoot your Toyota Supra’s check engine light by checking common issues and using an OBD2 scanner for diagnostics.
- Check for a loose gas cap: This is a frequent cause of check engine light activation, leading to fuel vapors escaping and affecting emissions.
- Use an OBD2 scanner: Retrieve diagnostic trouble codes (DTCs) from your vehicle’s ECM. These codes pinpoint the underlying issue.
- Inspect sensors and hoses: Look for faults in the mass airflow sensor and oxygen sensors, as well as any vacuum leaks in hoses that could disrupt engine performance.
If the check engine light persists after addressing these elements, it’s wise to consult a certified Toyota technician for a thorough diagnostic. Ignoring the light can lead to more severe engine damage, so stay proactive in your vehicle’s maintenance.
When to Seek Professional Help for Your Check Engine Light Issues

If your check engine light is flashing, seek professional help immediately to avoid serious damage. A persistent light after driving 20-40 miles, even with attempts to fix the issue, indicates that a certified mechanic needs to diagnose the problem. Additionally, if you’re encountering unclear codes after scanning, a Toyota Certified Technician can provide the expertise necessary for accurate assessment and repair.
Persistent Light After Driving
While driving your Toyota Supra, a persistent check engine light can signal that an underlying issue needs attention. If the light remains illuminated after 20-40 miles, it’s vital to seek professional assistance. Ignoring it may lead to engine damage or costly repairs down the line.
Consider these points:
- A steady check engine light often indicates a less urgent problem, but persistent illumination demands diagnostic attention.
- Changes in engine performance or additional warning indicators should never be overlooked.
- Professional technicians use diagnostic tools to access automotive computer codes, pinpointing the specific issues affecting your vehicle function.
Addressing the check engine light promptly can safeguard your engine’s health and guarantee peak performance.
Flashing Light Indicates Urgency
When a flashing check engine light appears on your Toyota Supra’s dashboard, it’s important to act quickly, as this signals a serious issue that demands immediate attention. A flashing light often indicates an engine misfire, which can severely damage your catalytic converter. It’s critical to stop driving and seek urgent attention from a certified mechanic. Continuing to drive may lead to significant repair costs, potentially exceeding $2,000. For clarity, use a diagnostic tool to read the trouble codes related to the flashing light, which will help pinpoint the issue affecting your engine performance and safety. Timely professional evaluation is essential to address the problem effectively and prevent further damage. Don’t ignore this warning; your Supra’s health depends on it.
Unclear Codes After Scanning
Unclear codes after scanning can complicate your troubleshooting process, leaving you uncertain about the next steps. When you encounter this situation with your Toyota Supra, it’s essential to know when to seek professional help. Consider the following signs:
- The check engine light persists even after clearing codes.
- Symptoms like rough idling or poor performance don’t match the retrieved codes.
- You lack the advanced diagnostic tools needed for an accurate diagnosis.
In these cases, professional technicians can provide expert analysis and utilize advanced diagnostic tools to pinpoint underlying issues. Regular consultations with a certified mechanic can enhance your understanding of unclear codes, ensuring your Supra maintains peak performance and safety. Don’t hesitate to reach out for help when needed.
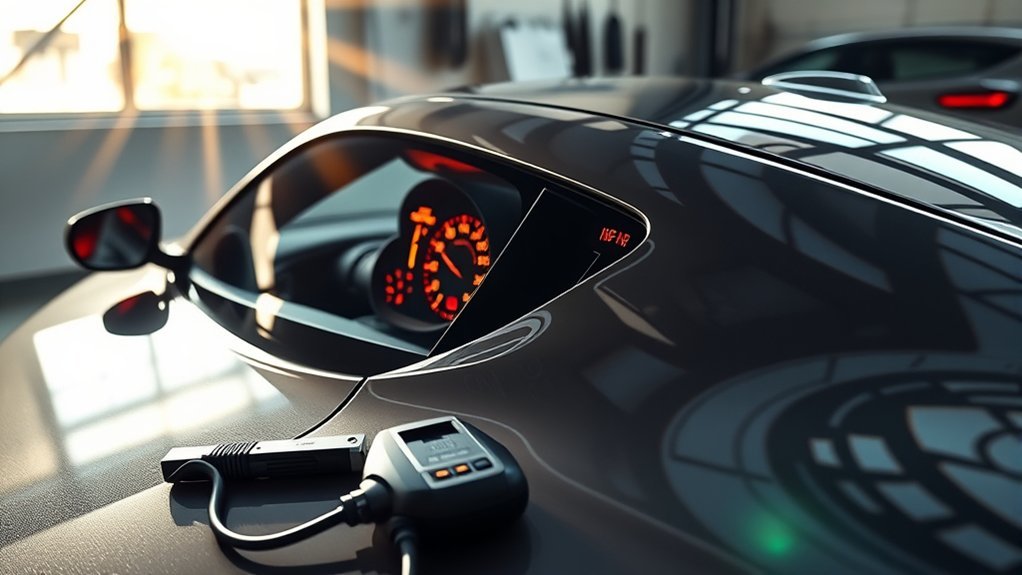
Using an OBD-II Scanner for Effective Diagnostics
How can you quickly diagnose issues with your Toyota Supra? Start by connecting an OBD-II scanner to the vehicle’s diagnostic port. This tool retrieves diagnostic codes stored by the ECU, illuminating the reasons behind your check engine light. With real-time data on engine performance and sensor readings, you’ll gain a thorough understanding of your vehicle’s health.
Many OBD-II scanners are user-friendly and portable, empowering you to perform initial diagnostics from home without a mechanic’s visit. Pairing the scanner with the FREE RepairSolutions2 app enhances your experience, offering detailed insights and repair recommendations based on the trouble codes retrieved.
Regularly using an OBD-II scanner not only identifies issues early but also supports proactive vehicle maintenance, ultimately saving you from costly repairs down the line. Embrace this essential tool and take control of your Toyota Supra’s performance.
Interpreting Diagnostic Trouble Codes (DTC): What They Mean for Your Supra
When your Toyota Supra’s check engine light activates, understanding the Diagnostic Trouble Codes (DTC) is essential for effective troubleshooting. Common codes, like those related to oxygen sensors or ignition system failures, signal specific issues that require your attention. By interpreting these codes accurately, you can streamline repairs and avoid unnecessary expenses.
Common DTC Examples
Understanding Diagnostic Trouble Codes (DTC) is essential for addressing issues in your Toyota Supra effectively. These alphanumeric codes reveal specific problems detected by your vehicle’s ECM, allowing for targeted troubleshooting. Here are common DTC examples:
- P0301: Indicates a misfire in cylinder 1, affecting engine performance.
- P0420: Points to a catalytic converter efficiency issue, impacting emissions.
- P0171: Suggests a lean fuel mixture, which could lead to powertrain issues.
Using an OBD2 scanner, you can retrieve these codes and cross-reference them for detailed diagnostics. By understanding these DTCs, you can swiftly identify and resolve problems, ensuring your Supra runs smoothly and efficiently while minimizing emissions.
Code Interpretation Techniques
To effectively troubleshoot issues in your Toyota Supra, it is crucial to interpret the Diagnostic Trouble Codes (DTC) accurately. These alphanumeric codes, stored by the electronic control module, signify specific problems like an engine misfire. Use OBD2 scanners to retrieve codes quickly, allowing you to bypass a mechanic for initial diagnostics. Pay attention to your check engine light; its blinking patterns can indicate which DTCs are present. To interpret codes correctly, refer to repair manuals or code interpretation apps that explain the severity and solutions for each issue. Familiarizing yourself with DTCs not only aids in timely troubleshooting but also helps prevent further engine damage and costly repairs down the road.
Tips for Preventing Future Check Engine Light Triggers
Preventing future triggers of the check engine light requires proactive maintenance and attention to detail. By staying ahead of potential issues, you can enhance your Toyota Supra’s performance and reliability. Here are some key tips to follow:
- Regularly inspect and tighten the gas cap to avoid triggering the check engine light from a loose or damaged cap.
- Schedule routine maintenance checks, focusing on spark plugs and ignition coil inspections to catch problems early.
- Clean or replace air filters to guarantee peak airflow, preventing mass airflow sensor issues.
Additionally, monitor battery health, as a low battery can cause electrical issues that activate the check engine light. Don’t overlook vacuum leaks; addressing them promptly can prevent performance problems and high RPM at idle. By implementing these practices, you can maintain your vehicle’s health and keep that pesky check engine light at bay.
Frequently Asked Questions
How to Diagnose a Toyota Check Engine Light?
To diagnose your Toyota’s check engine light, use diagnostic tools to retrieve codes. Inspect for sensor issues, electrical problems, and common repairs affecting engine performance and fuel efficiency. Follow maintenance tips and recognize warning signs for effective troubleshooting.
What Is the Most Common Reason for Check Engine Light on Toyota?
You won’t believe it, but the most common reason for your check engine light’s glow is a loose gas cap! Addressing this simple issue can prevent costly fuel system and emission problems—your engine performance will thank you!
How to Troubleshoot a Check Engine Light?
To troubleshoot a check engine light, use diagnostic tools to identify sensor malfunctions affecting engine performance and fuel efficiency. Look for warning signs during vehicle inspections, applying maintenance tips and repair techniques for effective solutions.
How to Check Engine Codes Without a Scanner Toyota?
Over 50% of check engine lights signal minor issues. To check engine codes without a scanner on Toyota models, bridge TE1 and E1 terminals, observe flashing patterns for error codes, and apply manual interpretation techniques for troubleshooting.
Conclusion
Your Toyota Supra’s check engine light is like a warning beacon, signaling that something needs attention beneath the surface. By understanding its language and following the troubleshooting steps, you can often resolve minor issues before they evolve into major repairs. Remember, just as a lighthouse guides ships to safety, your proactive measures can steer you clear of costly problems. If in doubt, don’t hesitate to consult a professional—they’re your navigators in the complex world of automotive diagnostics.