To replace your Toyota Supra’s brake pads and rotors, start by gathering essential tools like a jack, wrenches, and fresh grease. Park on a flat surface and engage the parking brake. Securely elevate the vehicle and remove the wheels. Use a 14mm wrench to detach the caliper, then remove the old pads and rotors. Install the new components in reverse order, guaranteeing proper torque. Finally, bed in the new pads for peak performance. There’s more vital info to guarantee a successful brake replacement.
Essential Tools for Brake Replacement
When replacing the brake pads and rotors on your Toyota Supra, having the right tools is essential for a smooth process. Start with a reliable jack and jack stands to safely elevate your vehicle. You’ll need a 14mm wrench to remove the caliper bolts and a 17mm wrench for the pad bracket bolts. When it comes to the rotor replacement, don’t forget the 30mm socket for the axle nut; it’s vital. A screwdriver and hammer may be necessary to carefully remove the dust cover that protects the wheel bearings. Finally, keep fresh grease on hand to repack those bearings during reassembly. With these essential tools at your side, you’ll tackle this car maintenance project with confidence and precision, liberating yourself from the dependence on mechanics and empowering you to take control of your Toyota Supra’s performance.
Preparing Your Toyota Supra for Brake Work
Before diving into the brake replacement process, it’s essential to confirm your Toyota Supra is properly prepared. Start by parking on a flat surface and engage the parking brake to prevent any movement. Next, make sure you’ve gathered all necessary tools and materials, including Brembo brake rotors and pads, a jack, jack stands, 14mm and 17mm wrenches, and a 30mm socket for the axle nut.
Don’t forget to wear safety gear, such as gloves and goggles, to protect yourself from debris and sharp components. Additionally, make sure to disconnect the negative battery terminal to avoid any electrical issues during the brake work. Finally, review the specific model year of your Supra—A70, A80, or J29—since the brake installation process can vary slightly among them. Taking these steps confirms a safer and smoother experience as you replace your brake components.
Step-by-Step Guide to Removing Old Brake Components
Before you start, gather all necessary tools, including a 14mm wrench, 17mm socket, and a 30mm socket. Safely elevate your vehicle using a jack and securely support it with jack stands to guarantee stability. Once the wheels are off, you can proceed to remove the caliper and brake pads for an effective brake component replacement.
Gather Necessary Tools First
Gathering the right tools is essential for a successful brake pad and rotor replacement on your Toyota Supra. Start by collecting a jack, jack stands, 14mm and 17mm wrenches, and a 30mm socket for the axle nut. You’ll need Brembo brake rotors and pads, as they’re vital for your brake system’s performance. A screwdriver and hammer are necessary to remove the dust cover for the bearings, so keep them handy. Make sure your workspace is clean to inspect and repack the bearings with fresh grease after removing the old components. Double-check that you have all necessary materials before you begin, adhering to safety precautions to prevent interruptions during the installation process. Following these maintenance tips will guarantee a smooth replacement.
Safely Elevate Vehicle Properly
To safely elevate your Toyota Supra for brake pad and rotor replacement, start by parking the vehicle on a flat, stable surface and engaging the parking brake. Next, use a jack, ensuring proper jack placement under designated lifting points to maintain vehicle stability and avoid damage. Once elevated, place jack stands underneath for extra support—never rely solely on the jack, as this can compromise safety.
| Task | Details |
|---|---|
| Parking | Use a flat, stable surface |
| Parking Brake | Engage to prevent movement |
| Jack Placement | Position under designated lifting points |
| Jack Stands | Always use for additional stability |
With the wheels removed, you can now access the brake components safely.
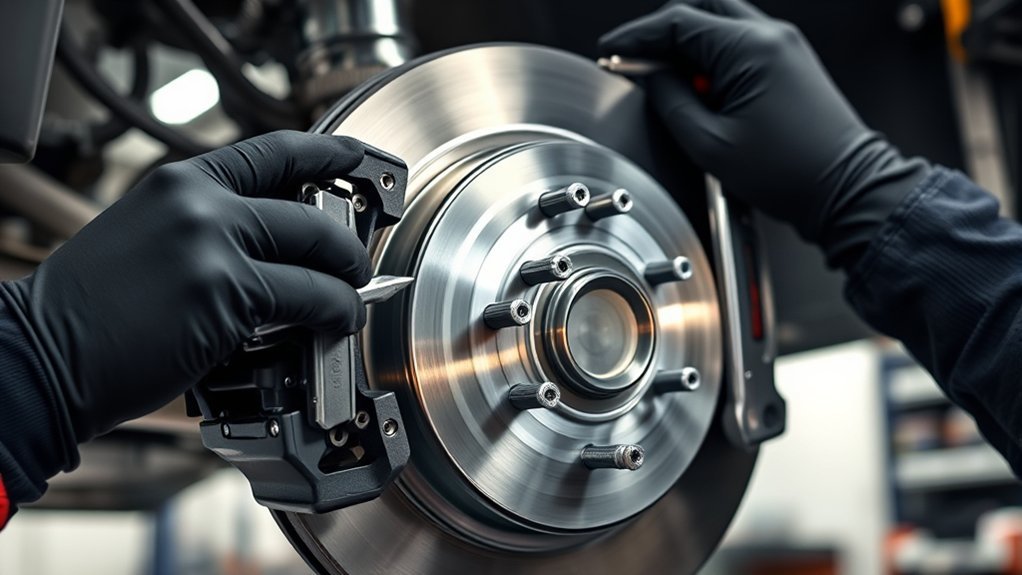
Remove Caliper And Pads
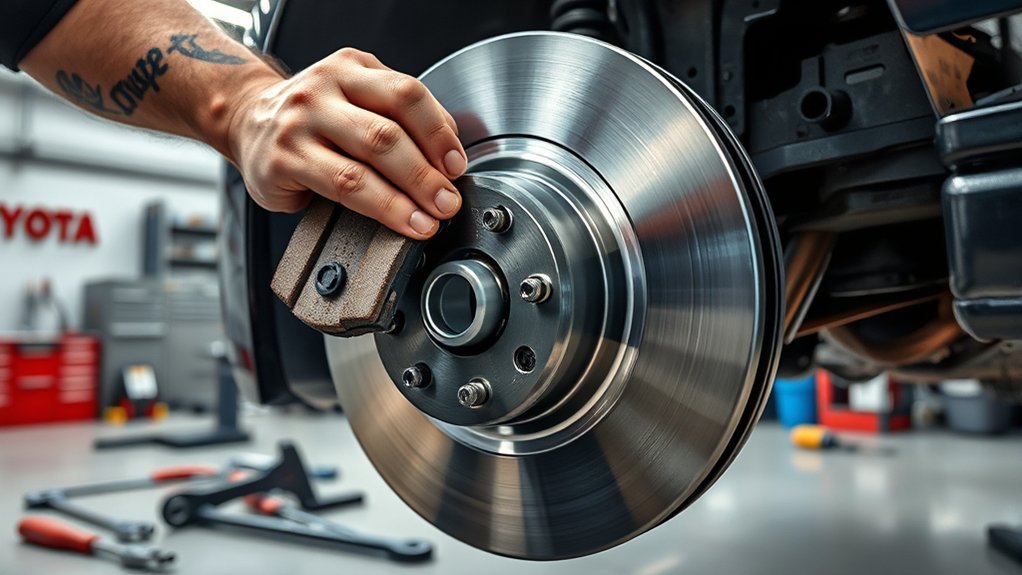
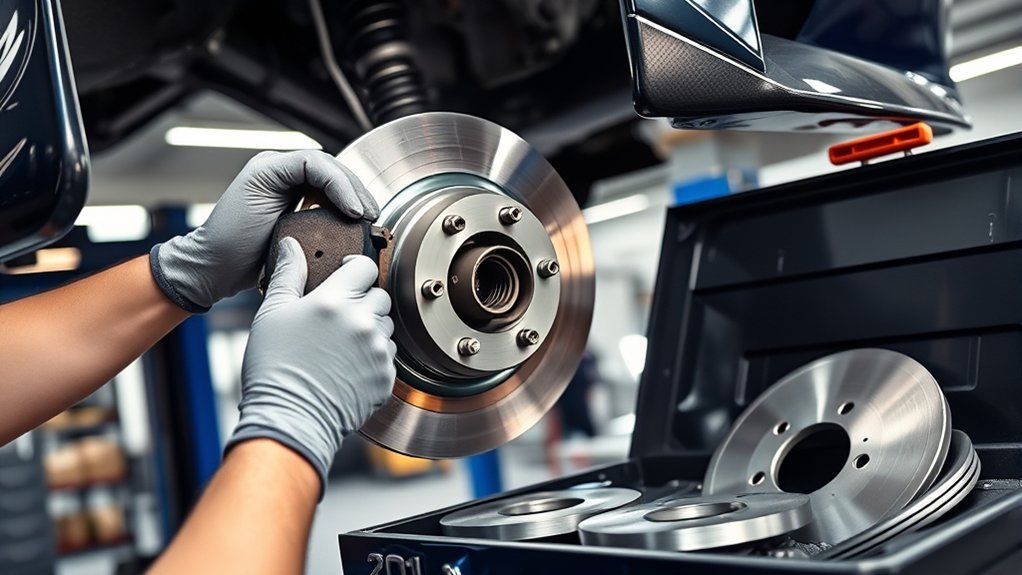
Begin by verifying the vehicle is securely elevated and the wheels are removed to gain access to the brake components. Use a 14mm wrench to loosen and remove the caliper bolts, allowing you to detach the caliper from the rotor. Carefully slide out the old brake pads from the caliper bracket, noting their orientation for proper installation of the new pads. Pay attention to the brake pad materials; this can affect performance and longevity. If necessary, remove the pad bracket by unscrewing the two 17mm bolts to facilitate rotor replacement. Before installing new components, inspect the caliper and bracket for wear. Clean any rust or debris, applying caliper maintenance tips to guarantee ideal performance and monitor rotor wear indicators for future maintenance.
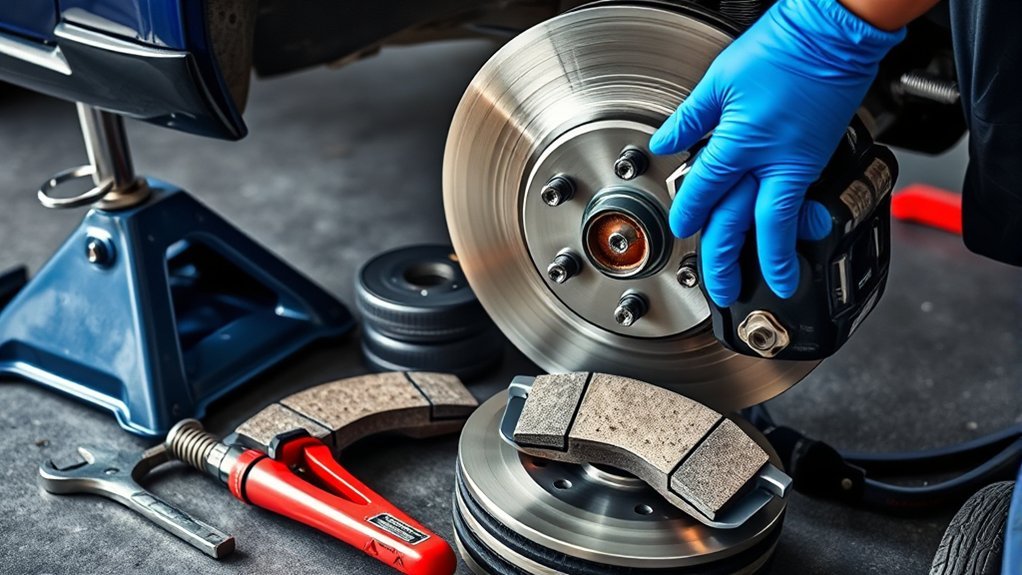
How to Install New Brake Pads and Rotors Properly
Start by safely jacking up your Toyota Supra and removing the wheels to access the brake components. Next, loosen and remove the caliper using a 14mm wrench, then detach the pad bracket held by two 17mm bolts to free the old brake pads. Carefully take off the dust cover with a screwdriver and hammer, then remove the cotter pin and cover before loosening the axle nut with a 30mm socket. Inspect and clean the bearings thoroughly, repacking them with fresh grease. Now, install the new rotors, considering rotor types suitable for your driving style. Align the rotors on the cleaned hub, guaranteeing a secure fit. Reassemble all components in reverse order, paying special attention to installation techniques. Finally, torque the axle nut to approximately 10-15 ft lbs to ascertain a proper, secure installation. This method will provide reliable performance with your new brake pads and rotors.
Tips for Bedding in Your New Brake Pads
Although it might be tempting to hit the brakes hard right away, properly bedding in your new brake pads is essential for achieving ideal performance and longevity. Start by employing effective bedding techniques: make 10-15 moderate stops from 30 mph, allowing the pads to conform to the rotor surface. This gradual approach prevents overheating and guarantees even contact. Avoid aggressive braking during this process; it can lead to uneven pad wear and potential glazing, compromising brake performance.
If your brake pad manufacturer provides a specific bedding process, like DBA’s gradual heat cycling, follow those recommendations closely to optimize the friction material’s effectiveness. Pay attention to your brake feel during this period; a well-bedded set of pads will noticeably reduce noise and enhance overall performance. By dedicating time to properly bed your brake pads, you’ll guarantee greater pad longevity and a smoother, more responsive braking experience.
How to Check and Care for Your Brake Bearings
To guarantee peak braking performance, you should regularly inspect your brake bearings for any signs of wear like pitting or scoring. After inspection, clean and repack the bearings with high-quality grease to maintain smooth operation and prevent overheating. If you notice any damage, especially to the outer bearing or seal, replace those components promptly to avoid compromising your braking system.
Inspect Bearings Regularly
Regular inspections of your brake bearings are essential for maintaining ideal performance and guaranteeing safety. During your brake performance checks, look for signs of wear like pitting, discoloration, or rough spots. Here are some bearing maintenance tips to follow:
| Inspection Aspect | Signs of Concern | Action Required |
|---|---|---|
| Pitting | Rough surfaces | Replace bearings |
| Discoloration | Heat damage | Inspect further |
| Corrosion | Rust or flaking | Clean and repack |
| Rough Spots | Uneven rotation | Replace bearings |
| Grease Condition | Old or contaminated grease | Repack with high-quality grease |
Always inspect and clean bearings before repacking them with fresh grease. Implement corrosion prevention methods to prolong their lifespan and guarantee reliable braking.
Clean and Repack Bearings
Inspecting and maintaining your brake bearings is essential for ideal braking performance. Start by removing the outer bearing and washer, then use a bearing inspection checklist to check for wear or damage. Confirm the bearings rotate smoothly without excessive play. Clean the bearings thoroughly with a suitable solvent and a soft brush to eliminate old grease and dirt. Once clean, apply high-quality grease using effective grease application techniques, confirming all cavities are filled and grease is evenly distributed. Don’t forget to inspect the rear axle seal for signs of wear or leakage; replace it if needed to prevent contamination. Finally, when reassembling, confirm the bearings are properly seated in the hub before reinstalling the rotor and other components.
Replace Worn Components Promptly
When it comes to maintaining ideal braking performance, promptly replacing worn brake bearings is crucial. Regularly inspect your brake bearings for signs of wear, like pitting or roughness, as these can signal the need for replacement. Pay attention to any excessive play or movement; this can lead to brake failure and severely impact your safety. Remember the importance of timely replacement—adhere to a maintenance schedule, replacing bearings every 50,000 km or as needed. When you remove the hub, always replace the rear axle seal to prevent contamination. By cleaning and re-packing your bearings with quality grease, you’ll guarantee maximum performance and longevity, safeguarding your vehicle for the road ahead.
Avoid These Common Mistakes in Brake Replacement
While replacing brake pads and rotors on your Toyota Supra, it’s essential to avoid common mistakes that can compromise safety and performance. Here are three critical pitfalls to watch out for:
- Neglecting Proper Torque Specifications: Always use a torque wrench to tighten bolts to manufacturer-recommended settings. This prevents common brake issues like warping or premature wear.
- Overlooking Bearing and Seal Inspection: Failing to check these components can lead to costly repairs down the line. Make sure to inspect and replace any worn seals or bearings for peak performance.
- Ignoring Brake Fluid Maintenance: Don’t forget to check the brake fluid level and quality. Contaminated fluid can affect braking efficiency, so replace it as necessary.
Frequently Asked Questions
How to Change Brakes and Rotors Step by Step?
To change brakes and rotors, begin by evaluating rotor wear indicators. Confirm proper brake fluid levels, then disassemble calipers, replace pads and rotors, and reassemble securely. Regular brake maintenance tips enhance performance and safety.
What Is the 30/30/30 Rule for Brakes?
The 30/30/30 rule for brakes involves making 30 stops from 30 mph, allowing cooling periods between each. This process enhances brake performance, ensuring safety and longevity, so follow these maintenance tips diligently for best results.
Can I Replace My Own Brake Pads and Rotors?
Yes, you can replace your own brake pads and rotors. Just choose appropriate brake pad types and rotor materials, and follow essential brake maintenance tips for peak performance and safety during your installation process.
Do I Need to Pump My Brakes After Changing Pads?
Yes, you need to pump your brake pedal after changing pads. This action helps circulate brake fluid, seating the new pads properly within the brake system and ensuring ideal braking performance during your initial drive.
Conclusion
To summarize, replacing the brake pads and rotors on your Toyota Supra can enhance your vehicle’s performance and safety. Did you know that regular brake maintenance can extend the life of your brake components by up to 50%? By following this guide, you not only save money on labor costs but also gain valuable hands-on experience. Remember to check your brake bearings regularly and avoid common pitfalls to guarantee a smooth and efficient braking system.