To replace the ignition coils in your Toyota RAV4, start by opening the hood and removing the engine cover. Use a 12 mm shallow socket to unbolt the bracket, then disconnect the coil connector. Remove the 10 mm bolt securing the ignition coil and carefully lift it out. Apply dielectric grease to the new coil’s boot before installation. Reconnect the coil and tighten the bolt securely. For further guidance on proper techniques and common mistakes, keep going.
How to Replace Ignition Coils in Your Toyota RAV4
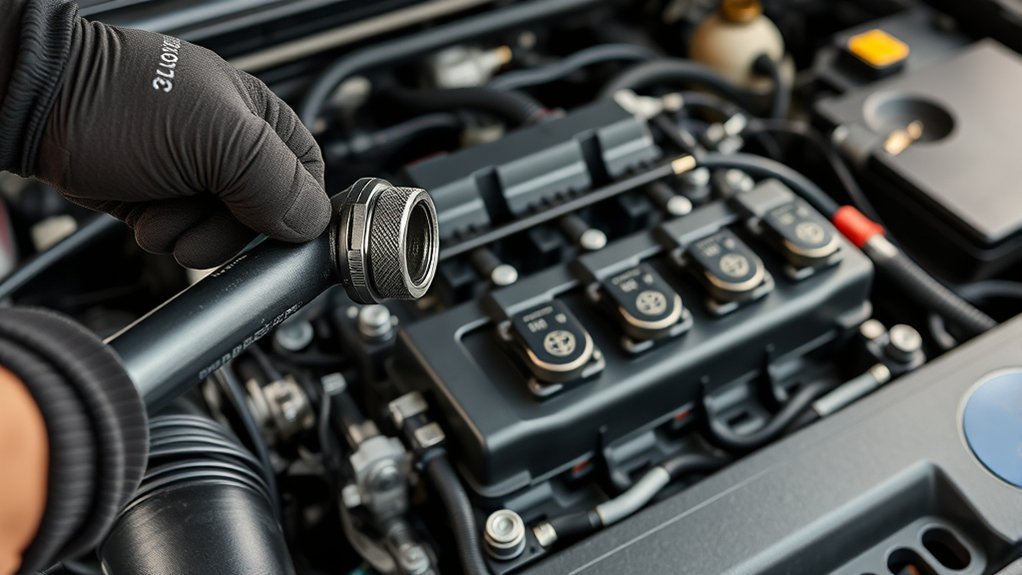
When you need to replace the ignition coils in your Toyota RAV4, start by opening the hood to access the V6 engine. Remove the engine cover to reach the coils located on both the front and back sides. For better access, use a 12 mm shallow socket and swivel head ratchet to unbolt the bracket securing the ignition coil on the back side. Disconnect the coil connector by pinching the spring tab, then remove the 10 mm bolt holding the ignition coil in place. Before installing the new ignition coil, apply dielectric grease to its rubber boot. Lower it into position, secure it with the 10 mm bolt, and tighten until snug. Finally, reinstall the bracket and engine cover, ensuring everything is secure before closing the hood.
Tools You’ll Need for Ignition Coil Replacement
Replacing the ignition coils in your Toyota RAV4 requires specific tools to guarantee a smooth and efficient process. You’ll need a 12 mm shallow socket to unbolt the bracket securing the ignition coil and a 10 mm socket to remove the bolt holding the ignition coil itself. A swivel head ratchet will help you access tight spaces around the ignition coils more easily. Safety gloves and goggles are essential to protect your hands and eyes during the replacement. Finally, don’t forget to apply Dielectric grease on the rubber boot of the new ignition coil. This allows for a proper seal and prevents moisture ingress, enhancing the longevity of your new ignition coils.
Step-by-Step Guide to Removing Old Ignition Coils
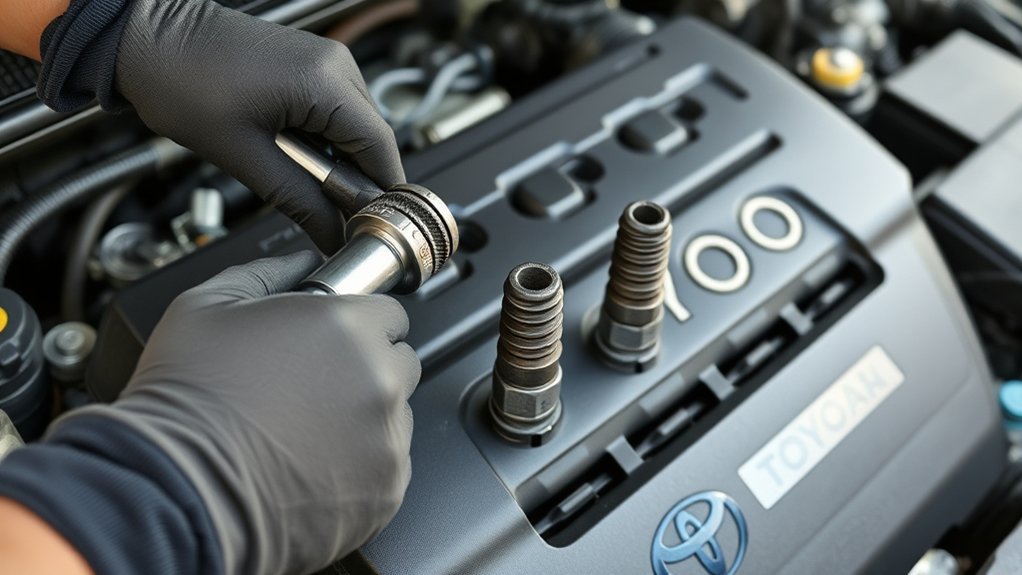
To remove the old ignition coils, you’ll need specific tools like a 12 mm shallow socket and a 10 mm socket for the bolts. Start by disconnecting the coil connectors; pinch the spring tab to release them securely. This guarantees a smooth and efficient removal process for each ignition coil.
Tools Needed For Removal
Having the right tools is essential for removing the ignition coils from your Toyota RAV4 efficiently. You’ll need a 12 mm shallow socket paired with a swivel head ratchet to access the bolts in tight spaces. A 10 mm socket is also necessary to secure each ignition coil. For best performance during installation, have dielectric grease ready to apply on the rubber boot of the new coils. A flathead screwdriver can help you pinch the spring tab to disconnect the coil connector safely. Additionally, consider using a magnetic pickup tool to retrieve any dropped bolts or components while you’re working in the confined engine area. This guarantees a smooth and liberating replacement process.
Disconnecting Coil Connectors
Before you plunge into removing the old ignition coils, disconnecting the coil connectors is vital for a smooth process. Start by locating the spring tab on the connector. Pinch it gently to release the connection without damaging the wiring or the coil. It’s important to keep the ignition system off during this step to prevent any electrical issues. Once you’ve disconnected the coil, verify the area is free of debris or contaminants; this helps maintain a clean workspace. Always double-check that the connector is completely detached before attempting to remove the ignition coil. This careful approach minimizes complications and sets the stage for a successful ignition coil replacement.
Preparing and Installing New Ignition Coils
Before installing your new ignition coils, apply dielectric grease to the rubber boot for a moisture-resistant seal. Carefully lower each coil into position, starting the 10 mm bolt by hand to confirm it’s aligned with the spark plug. Once secured, connect the coil firmly to assure a reliable electrical connection.
Apply Dielectric Grease
Apply dielectric grease to the rubber boot of your new ignition coil to guarantee a proper seal and prevent moisture ingress. This simple step helps reduce misfires by enhancing electrical conductivity between the coil and the spark plug. Follow these steps for effective application:
- Clean the rubber boot to remove any dirt or debris.
- Apply a thin, even layer of dielectric grease, covering the entire boot.
- Avoid excess grease that could drip into the ignition system.
- After lowering the new coil into place, verify the connector aligns and is pushed on securely.
Proper application of dielectric grease not only improves performance but also extends the lifespan of your ignition coil by minimizing environmental wear and tear.
Secure Ignition Coil
Secure the new ignition coil by carefully lowering it into position and starting the 10 mm bolt by hand to prevent cross-threading. Before you finish, use a socket and ratchet to tighten the bolt until snug, ensuring the coil is securely mounted. To enhance performance, make sure you’ve applied dielectric grease to the rubber boot beforehand, creating a moisture-resistant seal. Once you’ve installed the ignition coil, line up the coil connector and push it firmly onto the coil until you hear a click, indicating a secure connection. Finally, don’t forget to reinstall any brackets and the engine cover, pressing down to secure them in place for peak operation. Your ignition coil is now properly installed.
Connect Coil Properly
With the ignition coil securely mounted, the next step is connecting it properly. Follow these steps for a successful installation:
- Apply dielectric grease to the rubber boot of the new coil to create a moisture-proof seal.
- Carefully lower the coil into position, making sure it aligns with the engine’s mounting points.
- Start the 10 mm bolt by hand to secure the coil, preventing cross-threading.
- Tighten the bolt using a socket and ratchet until snug, but avoid overtightening to protect the coil and surrounding components.
After securing the coil, align the coil connector and press it on firmly until you hear a click. This guarantees a solid electrical connection, crucial for peak engine performance.
How to Securely Reattach the Engine Cover After Coil Replacement
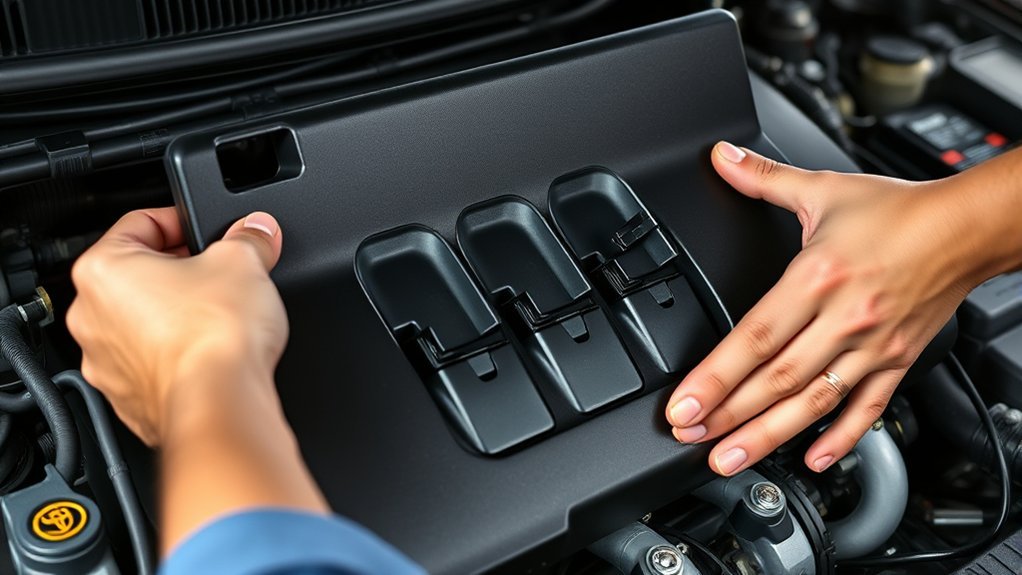
Before you reattach the engine cover after replacing the ignition coils, make sure that it’s properly aligned with the rubber grommets at the engine’s base for a snug fit. Gently push down on the engine cover to lock it in place, making certain it sits evenly without gaps.
| Step | Action |
|---|---|
| 1. Alignment | Align cover with grommets |
| 2. Secure Fit | Push down firmly |
| 3. Fasteners Check | Make sure all clips are engaged |
If you removed any components to access the coils, reattach them before securing the engine cover. Finally, visually inspect the engine cover for any signs of misalignment or improper attachment before closing the hood.
Avoid These Common Ignition Coil Replacement Mistakes
Replacing ignition coils can seem straightforward, but it’s easy to make mistakes that could lead to engine performance issues. To guarantee a successful replacement in your Toyota RAV4, avoid these common pitfalls:
- Skip Dielectric Grease: Failing to apply dielectric grease on the rubber boot can lead to poor connectivity and misfires.
- Neglect Tightening: Not securely tightening the 10 mm bolt can cause the coil to become loose, leading to vibration issues.
- Forget Connector: Forgetting to reconnect the coil connector can prevent your ignition coil from functioning, leaving your engine unable to start.
- Ignore Surrounding Components: Neglecting to check spark plugs can lead to repeated ignition coil failures due to underlying issues.
Stay vigilant to prevent these mistakes!
When Should You Call a Pro for Coil Problems?
If you’re encountering persistent misfires or a rough idle after replacing your ignition coils, it’s time to contemplate reaching out to a professional. These symptoms often indicate underlying ignition system problems that require a professional diagnosis. If you hear unusual engine noises, like knocking or pinging, don’t ignore them; these could be signs of coil issues that need evaluation by a qualified technician. Additionally, a noticeable decrease in fuel efficiency or poor acceleration may signal faulty ignition coils that warrant expert attention. If you’re lacking the tools or experience necessary for safe coil removal and installation, it’s best to consult a professional to avoid potential engine damage. Your vehicle deserves the expertise of a qualified technician for ideal performance.
Frequently Asked Questions
Can I Replace the Ignition Coil Myself on a Toyota?
Yes, you can replace the ignition coil yourself. With basic tools and some DIY repairs knowledge, you’ll handle this vehicle maintenance task efficiently. Just follow the steps carefully to guarantee peak performance and safety.
How Much Does It Cost to Replace Ignition Coils on a Toyota RAV4?
Replacing ignition coils on a Toyota RAV4 typically costs between $150 and $400. Factors influencing ignition coil pricing include parts quality and labor charges analysis, which can vary based on mechanic rates and complexity of the job.
Can You Replace Ignition Coils on Your Own?
Yes, you can replace ignition coils yourself. Look out for ignition coil symptoms like misfires. Gather tools like a 12 mm socket. Follow DIY repair tips for a successful and efficient installation process.
What’s the Most Common Problem With a Toyota RAV4?
The most common problem with a Toyota RAV4 is engine misfires. These can tank your fuel efficiency and trigger warning lights, leaving you frustrated. Regular maintenance can help you avoid these issues and keep your RAV4 running smoothly.
Conclusion
Replacing the ignition coils in your Toyota RAV4 can enhance engine performance and fuel efficiency. Curiously, faulty ignition coils are responsible for about 30% of engine misfires, which can lead to decreased fuel economy and increased emissions. By following the steps outlined, you can save on repair costs and make sure your vehicle runs smoothly. If you encounter persistent issues, don’t hesitate to consult a professional to avoid further complications. Keep your RAV4 in top shape!