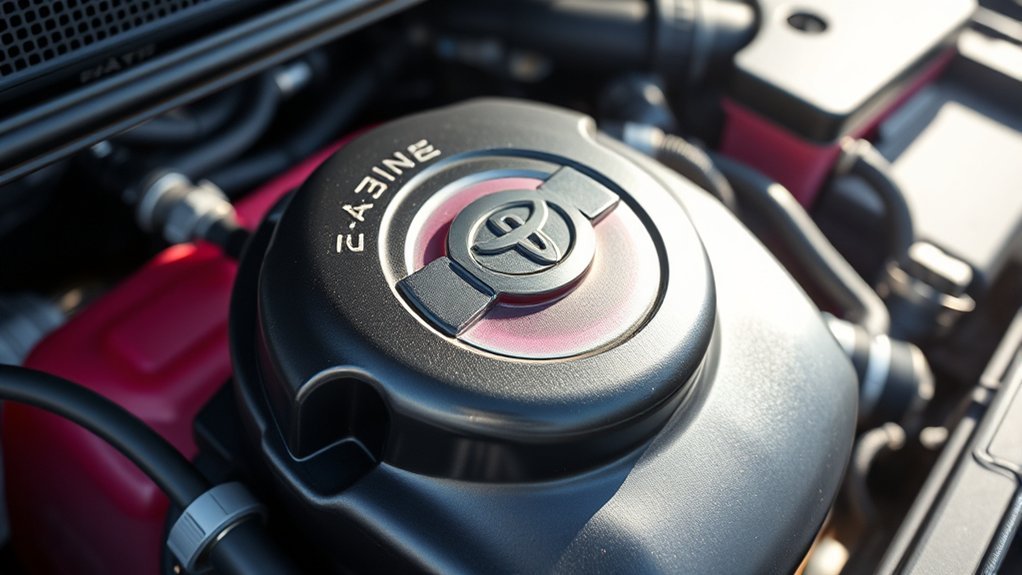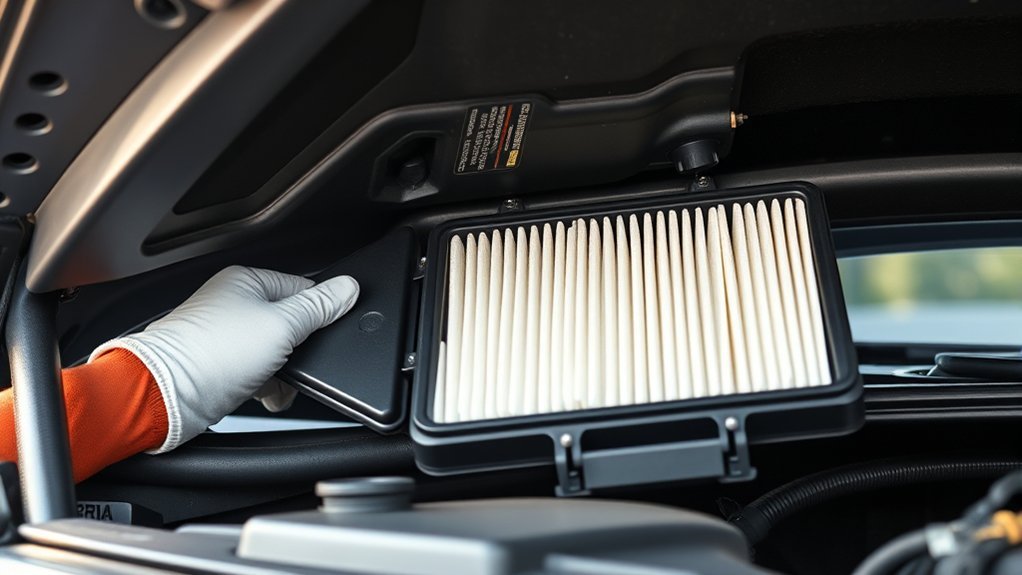
To replace the engine air filter in your Toyota RAV4, start by removing the clips from the airbox and disconnecting the vacuum line. Lift the airbox to access the old filter, gently prying open any clips if necessary. Remove the old filter and slide in the new one (OEM part number 17801 F50). Confirm everything fits snugly and reattach all connections. After installation, monitor for any unusual sounds or performance issues. There’s more to optimizing your filter maintenance practices.
How to Change Your Engine Air Filter?

Changing your engine air filter in a 2019 Toyota RAV4 is a straightforward process that can enhance your vehicle’s performance. First, you’ll need to remove the two clips securing the airbox for easy access. After that, disconnect the vacuum line and use a small pick to remove the connector clip. Once you’ve lifted the airbox, slide the new OEM filter (part number 17801 F50) into place, ensuring it fits securely. Next, align the two tabs of the airbox with their slots before seating it back in place. Finally, reattach the clips and vacuum line. By regularly checking and replacing the engine air filter, you’re ensuring peak engine performance and efficiency in your Toyota RAV. I’m going to show you how!
Step-by-Step Guide to Accessing the Airbox
Accessing the airbox in your 2019 Toyota RAV4 involves a few essential steps that streamline the process. Follow these instructions for efficient access:
- Remove the two clips securing the airbox.
- Disconnect the vacuum line by gently pulling it off, allowing for easier removal.
- Use a small pick to carefully take off the connector clip for better access.
- Once the connectors are removed, lift the airbox to reach the engine air filter for replacement.
Ensure your workspace is clear and organized, as this will facilitate a smooth filter installation process. Remember, understanding airbox materials and adhering to filter replacement intervals will enhance your vehicle’s performance. Common tools like picks and pliers will make this task much easier.
How to Remove the Old Engine Air Filter
To remove the old engine air filter, start by unfastening the two clips that secure the airbox. Next, carefully disconnect the vacuum line from the airbox to clear the way for lifting it. With these steps completed, you’ll gain direct access to the old filter for removal.
Access Airbox Clips
Start by removing the two clips securing the airbox of your 2019 Toyota RAV4, which will give you straightforward access to the engine air filter. Proper airbox maintenance is essential for peak performance. Follow these steps:
- Locate the two clips on the airbox.
- Use your fingers to pry them open gently.
- If needed, use a small pick to carefully remove the connector clip.
- Lift the airbox to reveal the filter, ensuring you have enough space to work.
Be mindful of different filter types, as they vary in installation tips. Gaining access to the airbox is a liberating step in your DIY journey, empowering you to maintain your vehicle with confidence.
Disconnect Vacuum Line
Gently disconnect the vacuum line from its connector to prepare for removing the old engine air filter in your 2019 Toyota RAV4. Carefully pull the vacuum line off, avoiding excessive force to prevent damage. If needed, use a small pick to assist in removing the connector clip without harming it. This step is essential for achieving proper airbox clearance; make certain the area around the vacuum line and airbox is clear to facilitate an easy disconnection. Once the vacuum line is detached, you can lift the airbox to gain access to the engine air filter. Remember, a clean workspace not only simplifies the process but also guarantees you’re ready for a smooth filter replacement.
Installing the New Engine Air Filter
Once you’ve removed the airbox for better access, slide the new engine air filter into place in your 2019 Toyota RAV4. Here’s how to guarantee a successful installation:
- Align the two tabs of the airbox with their corresponding slots.
- Firmly seat the airbox back into position to prevent air leaks, which can affect engine performance.
- Reattach the vacuum line and connector clips; a small pick can help with stubborn clips.
- Conduct a filter quality assessment after installation to guarantee peak performance.
Best Practices for Maintaining Your Engine Air Filter

Maintaining your engine air filter is essential for guaranteeing peak performance and longevity of your 2019 Toyota RAV4. Regularly inspect your filter every 15,000 to 30,000 miles to maximize its air filter lifespan and guarantee ideal airflow. When it’s time to replace it, opt for the OEM part number 17801 F50 for the best compatibility. If you’re using a reusable filter, remember to clean it, but factor in the drying time, which may impact immediate vehicle use. Utilize the simple airbox disassembly process—no special tools are required—to make replacement quick and efficient. Finally, share these maintenance practices with fellow vehicle owners to promote better upkeep and enhance the longevity of their air filters, guaranteeing everyone enjoys a well-maintained ride.
Troubleshooting Tips After Changing Your Engine Air Filter
After changing your engine air filter, keep an ear out for any unusual noises from the engine, which could indicate installation errors. Monitor your vehicle’s performance and fuel efficiency closely; any noticeable decline may point to issues with the filter or its placement. If the check engine light activates, double-check all connections and verify the airbox is securely seated to avoid potential problems.
Engine Performance Issues
While you might expect improved engine performance after changing your engine air filter, it’s crucial to monitor for any unexpected issues. Here are some maintenance tips to evaluate if you notice performance problems:
- Check for decreased acceleration or rough idling; this may indicate improper installation.
- If the check engine light illuminates, inspect for vacuum leaks from reconnected hoses or clips.
- Listen for hissing or whistling sounds, which could mean the airbox isn’t sealed correctly.
- If fuel efficiency drops, verify the new air filter is an OEM part and properly seated in the airbox.
Unusual Engine Noises
If you hear unusual engine noises following your engine air filter replacement, it’s essential to troubleshoot the issue promptly. First, check the installation; verify the air filter and airbox are secure, as loose components can cause rattling. A clogged or improperly installed air filter might restrict airflow, leading to engine misfires or knocking sounds from inadequate fuel combustion. Inspect vacuum lines and connectors for any damage or disconnections that could contribute to abnormal engine noise. Listen for whistling or hissing, which may indicate air leaks in the intake system or a faulty airbox seal. If these noises persist, it’s wise to consult a professional for a thorough diagnosis, confirming no other underlying issues exist.
Warning Light Activation
Unusual engine noises can sometimes accompany a recent air filter replacement, but another common issue you might encounter is the activation of a warning light on your dashboard. Here’s how to troubleshoot this:
- Check Connections: Verify all clips and connectors are securely fastened to prevent air leaks.
- Inspect the Airbox: Confirm the airbox is properly seated; a loose connection could trigger a warning light.
- Run Diagnostic Scans: If the light persists, running diagnostic scans can help identify underlying issues unrelated to the air filter change.
- Reset Onboard Computer: If necessary, reset your vehicle’s onboard computer to clear the warning light after resolving any installation errors.
Regular maintenance can help avoid future warning light causes and promote peak engine performance.
Frequently Asked Questions
How to Change Engine Air Filter on Toyota RAV4?
To change the engine filter on your RAV4, follow DIY car care steps: remove clips, disconnect the vacuum line, lift the airbox, replace the filter, and secure everything. This boosts your RAV4 performance through regular engine filter maintenance.
How Often Should I Change the Engine Air Filter on My RAV4?
You should change your engine air filter every 15,000 to 30,000 miles, depending on driving conditions. Following the maintenance schedule keeps your filter lifespan intact and guarantees peak engine performance throughout your vehicle’s life.
Can I Replace My Engine Air Filter Myself?
Absolutely, you can replace your engine air filter yourself! Embrace DIY maintenance tips to boost engine performance benefits while saving costs. Just a few simple steps can enhance your RAV4’s efficiency and longevity substantially.
What Are the Symptoms of a Dirty Engine Air Filter?
You’ll notice engine performance issues like sluggish acceleration, a decrease in fuel efficiency, and unusual engine noises. These symptoms indicate that your air filter may be dirty and restricting airflow, affecting overall engine health.
Conclusion
To sum up, keeping your Toyota RAV4’s engine air filter fresh fosters fuel efficiency and fortifies performance. By following this straightforward step-by-step strategy, you’ve successfully swapped out the soiled filter for a superior substitute. Remember, regular replacements and routine reviews will guarantee your engine breathes better, boosting longevity and reliability. Stay savvy and schedule your next filter change to sustain smooth sailing on the road ahead!