To replace the cabin air filter on your Toyota RAV4, start by opening the glove box and removing the dampener. Pinch the sides of the glove box to maneuver it out. Access the air filter housing, release it from the slots, and pull out the cabin air filter while noting the filter type (K&N). After cleaning or replacing the filter, reassemble by guaranteeing proper alignment and securing all tabs. Want to guarantee ideal maintenance? There’s more to know.
Step-by-Step: Accessing Your Cabin Air Filter
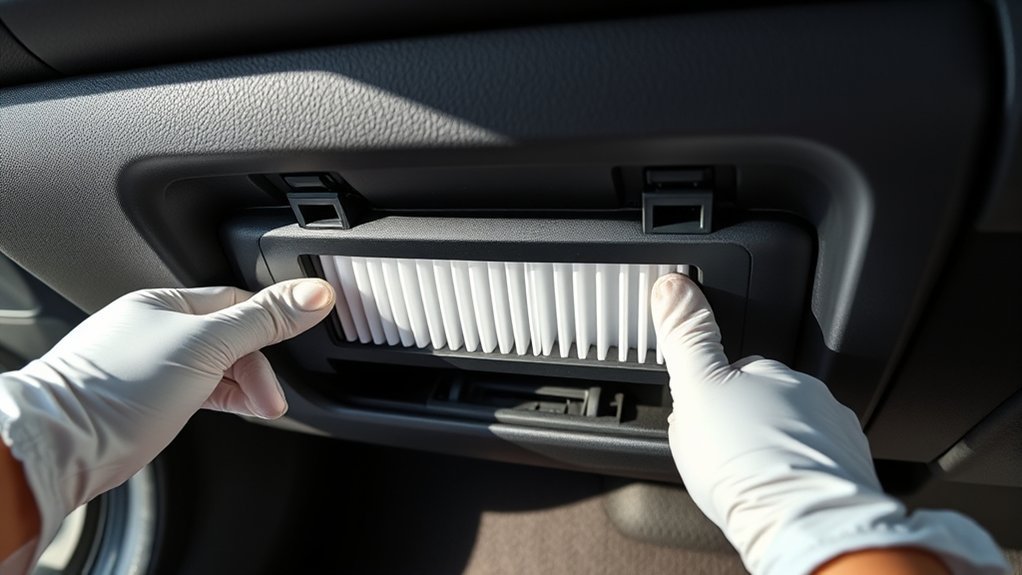
To access the cabin air filter in your Toyota RAV4, you’ll first need to open the glove box and detach the dampener located on the right side. Once you’ve done that, pinch the sides of the glove box and carefully maneuver it over the hump. This action reveals the air filter housing. I’m going to guide you through the next step: with the housing now visible, pinch its sides to release it and pull it away from the slots. Doing this will give you direct access to the cabin air filter. After replacing the filter, make certain to carefully reassemble the housing and secure all components to guarantee your Toyota RAV functions properly.
Why You Should Change Your Cabin Air Filter
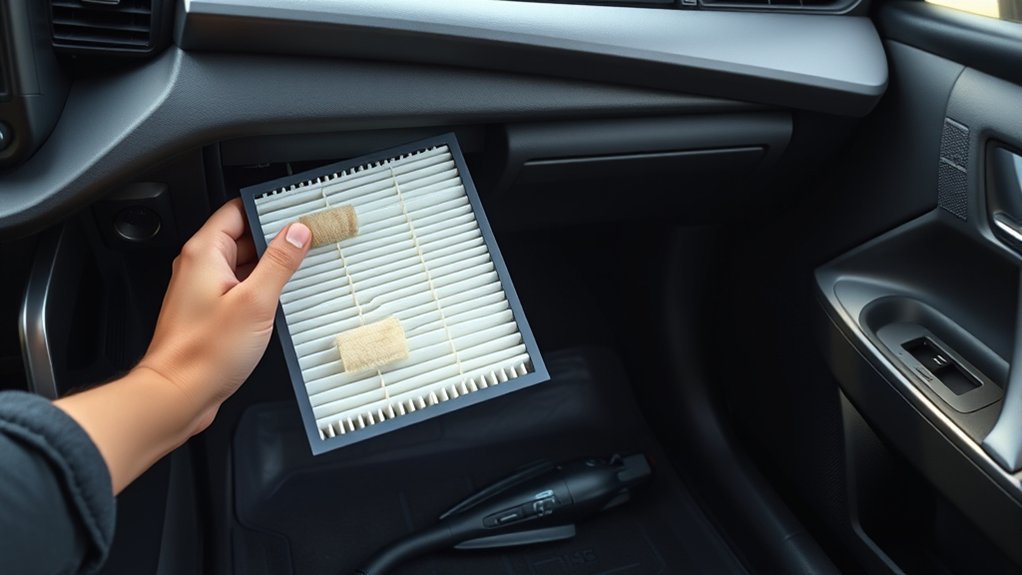
While many drivers overlook the importance of a cabin air filter, regularly changing it is essential for maintaining a healthy and comfortable environment inside your Toyota RAV4. A clean filter improves air quality by removing dust, pollen, and contaminants, enhancing your driving experience. Additionally, you’ll benefit from better HVAC efficiency, reducing strain on your vehicle’s systems.
| Benefit of Maintenance | Signs of Clogging | Impact of Neglect |
|---|---|---|
| Improved air quality | Reduced airflow | Costly HVAC repairs |
| Enhanced climate control | Unpleasant odors | Uncomfortable driving |
| Lower risk of allergies | Increased system strain | Higher fuel consumption |
| Longer filter lifespan | Dust accumulation | Compromised cabin comfort |
How to Remove the Cabin Air Filter
Maintaining a clean cabin air filter is essential for peak air quality and climate control in your Toyota RAV4. Here’s how to efficiently remove it:
- Open the glove box and undo the dampener on the right side.
- Pinch the sides of the filter housing to release it from its slots.
- Carefully undo the locking tab on the filter case.
- Pull out the cabin air filter, noting the filter type (K&N) for replacement.
Remember to adhere to the replacement intervals for superior performance. When reinstalling, pay attention to the arrows indicating the correct direction, as proper orientation guarantees maximum air quality. Following these steps empowers you to maintain your RAV4’s air system efficiently.
How to Effectively Clean Your K&N Air Filter
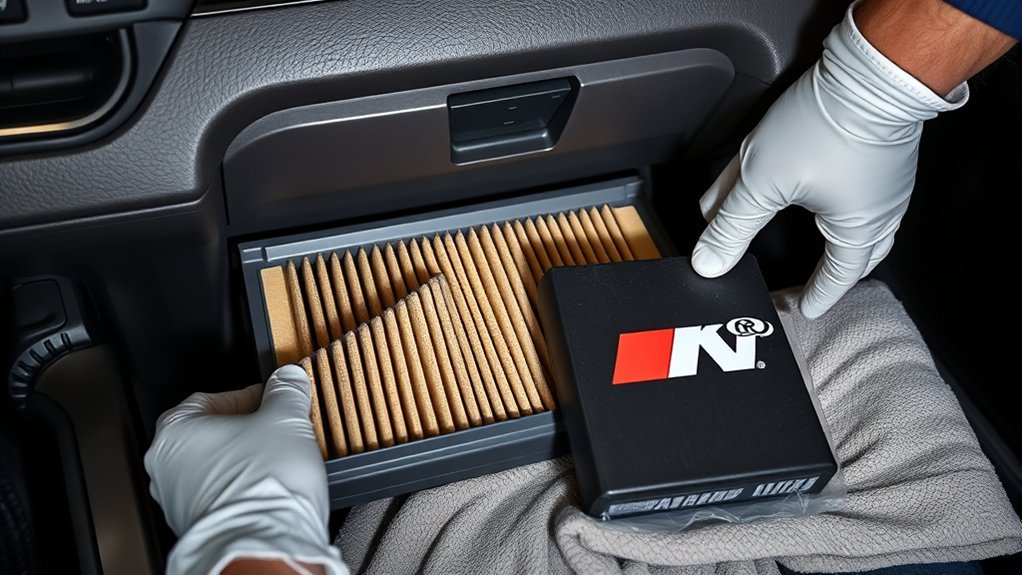
To effectively clean your K&N air filter, gather the necessary supplies, including K&N cleaning solution and low-pressure water. Follow a step-by-step process that involves rinsing from the clean side to the dirty side and allowing the filter to air dry completely. After cleaning, apply the filter oil evenly and verify proper reinstallation for peak performance.
Cleaning Supplies Required
Cleaning your K&N air filter requires specific supplies to guarantee effective maintenance and peak performance. Using the right cleaning solutions is vital for preserving the filter types you depend on. Here’s what you’ll need:
- K&N cleaning kit (solution and oil)
- Soft brush (for loose dirt)
- Low-pressure water source
- Clean, dry area for drying
These items will help you follow essential maintenance tips. Start by gently tapping the filter to dislodge debris, then apply the cleaning solution evenly. Allow it to soak before rinsing from the clean side to the dirty side. Finally, let your filter dry completely for at least 24 hours before oiling. This confirms maximum airflow and prolongs the life of your K&N filter.
Step-by-Step Cleaning Process
A thorough cleaning process for your K&N air filter guarantees peak performance and longevity. Start by gently tapping the filter to remove loose dirt and debris. Next, use a K&N filter cleaning kit, spraying the specially formulated cleaner evenly across the filter. Allow it to soak for about 10 minutes to loosen stubborn contaminants. Rinse the filter with low-pressure water from the clean side to the dirty side, ensuring dirt is washed away effectively. For filter longevity, allow the filter to air dry completely before re-oiling, distributing the oil evenly for maximum performance. Regular maintenance frequency recommendations suggest cleaning your filter every 50,000 miles, enhancing air quality benefits and prolonging the life of your filter.
Reinstallation Tips and Tricks
Once you’ve thoroughly cleaned and dried your K&N air filter, it’s crucial to reinstall it correctly to guarantee peak performance. Proper installation not only enhances air quality improvement but also safeguards filter longevity. Here are some key tips for effective reinstallation:
- Align the arrows on the filter upwards for maximum airflow direction.
- Position the small triangle on the filter case facing the front of the vehicle.
- Securely engage the locking tabs to prevent air leaks.
- Double-check that all components are locked in place and the cover is aligned.
Following these filter longevity tips will help you achieve cost-effective maintenance while ensuring your vehicle runs smoothly. Don’t underestimate the importance of a correct reinstall—your engine will thank you!
Installing Your New Filter: What You Need to Know
When installing your new K&N cabin air filter, pay close attention to the orientation; the arrows should face upwards, and the small triangle must point towards the front of the vehicle. After sliding the filter into place, make sure you engage the locking tabs for a secure fit. Finally, double-check that the filter housing cover aligns correctly to avoid issues during reassembly.
Filter Orientation Matters
Ensuring the correct orientation of your new cabin air filter is essential for ideal airflow and system efficiency. Misalignment can lead to installation mistakes that compromise filter airflow importance and reduce the filter’s lifespan. Here’s what to keep in mind:
- Align the arrows on the filter to face up for proper airflow direction.
- Make sure the small triangle on the filter case points toward the front of the vehicle.
- Check that the cover’s arrow matches the filter orientation during reassembly.
- Slide the filter into place until it locks securely to prevent any air leaks.
Locking Mechanism Engagement
After confirming the correct orientation of your new cabin air filter, focus on engaging the locking mechanism to secure it in place. Insert the filter into the housing, guaranteeing the small triangle on the filter case faces the front of the vehicle. Slide it in until you hear a click, which indicates proper locking tabs engagement and filter case security. This sound confirms that the filter is locked securely within the housing. Once installed, double-check all components, including the filter cover, to verify they’re aligned and locked. This prevents any jamming during operation. Finally, remember to reattach the dampener to its clip, which completes the installation and guarantees peak performance of your cabin air system.
Final Assembly Checks
Completing the final assembly checks is vital to guarantee your new cabin air filter operates effectively. Follow these steps for proper installation verification:
- Verify the locking tabs are fully engaged when reinserting the filter case into the housing.
- Confirm the arrows on the new K&N filter face upwards for correct orientation.
- Position the small triangle on the filter case toward the front of the vehicle for accurate filter seating.
- Align the cover properly to prevent jamming, verifying the right side is securely clipped.
After reassembly, double-check that all components are locked in place and reattach the dampener to its clip. These final assembly checks are essential for peak performance and air quality in your RAV4.
Reassembling the Glove Box and Cover
Reassembling the glove box and cover on your Toyota RAV4 requires careful attention to detail to guarantee everything functions properly. Begin by verifying the locking tabs on the filter case are fully engaged, securing the new cabin air filter. Next, focus on proper cover alignment; align the cover carefully to prevent jamming when closing. On the right side, make sure the cover clips in securely for a tight fit, which is essential for smooth glove box operation. Don’t forget to reattach the dampener to its clip on the right side, as this component plays a key role in the glove box’s functionality. Finally, perform a final check to confirm all components are locked in place before closing the glove box.
Cabin Air Filter Maintenance: Best Practices
Maintaining your cabin air filter is essential for guaranteeing clean air circulation and optimal HVAC performance in your Toyota RAV4. Follow these best practices for ideal air quality:
- Replace your cabin air filter every 15,000 to 30,000 miles for effective filtration.
- Clean and dry K&N filter types before reinstallation to maintain peak performance.
- Install the new filter with arrows facing up and the triangle indicating front orientation.
- Verify all locking tabs are engaged and the cover is aligned properly to prevent jamming.
Common Problems and Solutions When Changing Your Cabin Air Filter?
While changing your cabin air filter on a Toyota RAV4 may seem straightforward, several common problems can arise that might complicate the process. First, accessing the filter housing can be tricky, requiring you to carefully remove the glove box and its dampener. Be certain to have the right installation tools needed, like screwdrivers and a trim removal tool. A frequent mistake is installing the filter incorrectly; make sure the arrows on the filter material types are facing up. Also, properly engage the locking tabs to secure the filter; failure to do so can lead to rattling. Finally, check the cover alignment during reassembly to avoid jamming it. Regular maintenance prevents musty odors and improves air quality.
Frequently Asked Questions
How to Replace a Cabin Air Filter in a Toyota RAV4?
To replace your cabin air filter, open the glove box, pinch the housing sides, pull out the old filter, and install the new one. Follow RAV4 tips for proper orientation and secure reassembly for effective filter maintenance.
How Often Should I Replace the Cabin Air Filter on My RAV4?
You should replace your RAV4’s cabin air filter every 15,000 to 30,000 miles, depending on driving conditions. Regular maintenance keeps airflow ideal and enhances your driving experience, freeing you from unpleasant odors.
What Are Three Symptoms of a Clogged Cabin Air Filter?
You’ll notice reduced air quality, strange odors, and increased cabin noise when your cabin air filter’s clogged. Regular filter maintenance guarantees peak vehicle performance, keeping your driving experience comfortable and enjoyable while safeguarding your health.
How Much Does It Cost to Replace the Cabin Air Filter on a RAV4?
Replacing your RAV4’s cabin air filter can cost anywhere from $30 to over $100 at a dealership. Explore DIY options for significant savings, as they offer a remarkable cost comparison to dealership pricing and labor fees.
Conclusion
Now that you know how to replace your cabin air filter, don’t underestimate its importance. A clean filter can dramatically improve your air quality and driving comfort. Imagine the moment you take a deep breath inside your RAV4, feeling the difference. But what if you skip this simple maintenance task? Dust, allergens, and odors could linger, turning your driving experience into an uncomfortable journey. Don’t let that happen—take action and breathe easier on every ride.