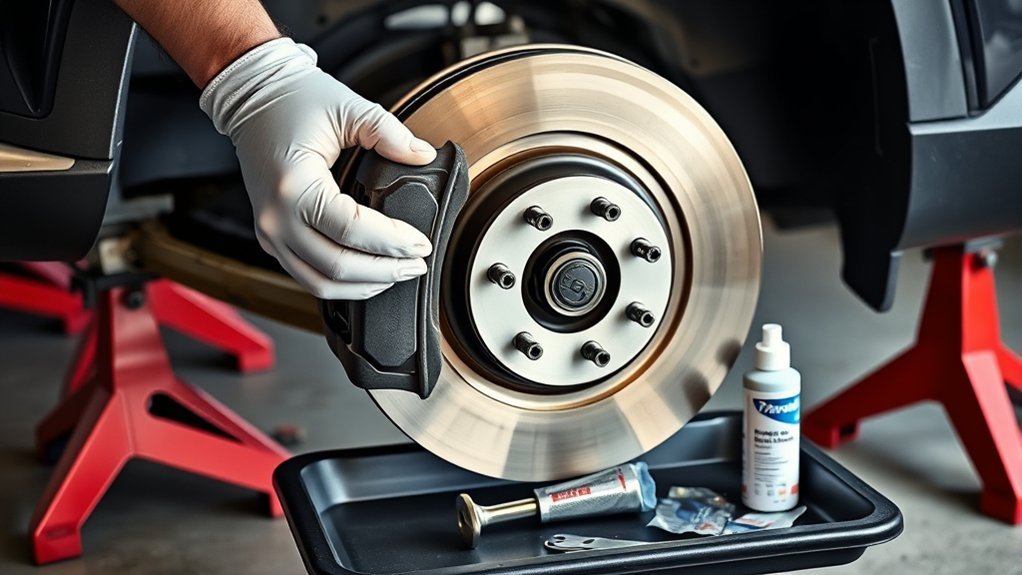
To replace the brake pads on your Toyota RAV4, start by lifting the vehicle securely and removing the wheel. Use a 14 mm socket to detach the caliper bolts and remove the caliper. Push the piston back for easier pad removal, then install the new pads and reattach the caliper, torquing the bolts to 25 ft-lb. Don’t forget to check all components and perform a final safety inspection. Learn more about torque specs and activation of service mode for best results.
Why You Should Replace Brake Pads on Your RAV4
Replacing brake pads on your Toyota RAV4 is crucial for your safety and vehicle performance. Worn pads can greatly increase stopping distances, putting you at risk in emergencies. You should replace your brake pads every 30,000 to 70,000 miles, depending on driving conditions, to guarantee peak responsiveness. Installing new ones prevents rotor damage, as neglected pads may gouge your rotors, leading to costly replacements. Upgrading to high-quality pads, like Bosch, enhances your driving experience with smoother braking and less noise. Timely replacement also boosts fuel efficiency, as dragging brakes from worn pads create unnecessary drag, making your vehicle work harder. Don’t wait until it’s too late; prioritize brake pad replacement for a safer, more enjoyable drive.
Essential Tools and Materials for Brake Replacement
When tackling brake pad replacement on your Toyota RAV4, having the right tools and materials is vital for a smooth process. Here’s what you need:
- 3-ton floor jack and jack stands: These are key for safely lifting and securing your RAV4 during the job.
- Size 14 mm socket: This will help you remove the front and rear caliper bolts.
- Bosch brake pads: Opt for these front and rear pads, as they come with the necessary hardware for effective replacement.
- Caliper grease: Applying this to the caliper bolts guarantees smooth operation and prevents seizing over time.
With these essentials in hand, you’re set for a successful brake pad replacement.
Safety Precautions Before Starting the Brake Replacement
Before diving into the brake pad replacement process, it’s crucial to prioritize safety to avoid accidents and injuries. Start by verifying your vehicle is on a flat surface and securely raised with a professional floor jack and jack stands. Always wear safety goggles and gloves to protect your eyes and hands from debris. Before you begin, disconnect the battery to prevent any electrical issues, especially with newer models featuring electronic parking brakes. Refer to your owner’s manual for specific safety guidelines and torque specifications. Keep a fire extinguisher nearby, as brake dust and fluid can be flammable. Finally, make sure you’re working in a well-ventilated workspace to minimize inhalation of harmful particles.
Step-by-Step Guide to Front Brake Pad Replacement
To successfully replace the front brake pads on your 2019 RAV4, start by removing the wheel bolts using a 14 mm socket. Follow these steps:
- Inspect the rotor for damage before proceeding.
- Use the same 14 mm socket to remove the two caliper bolts, detaching the caliper.
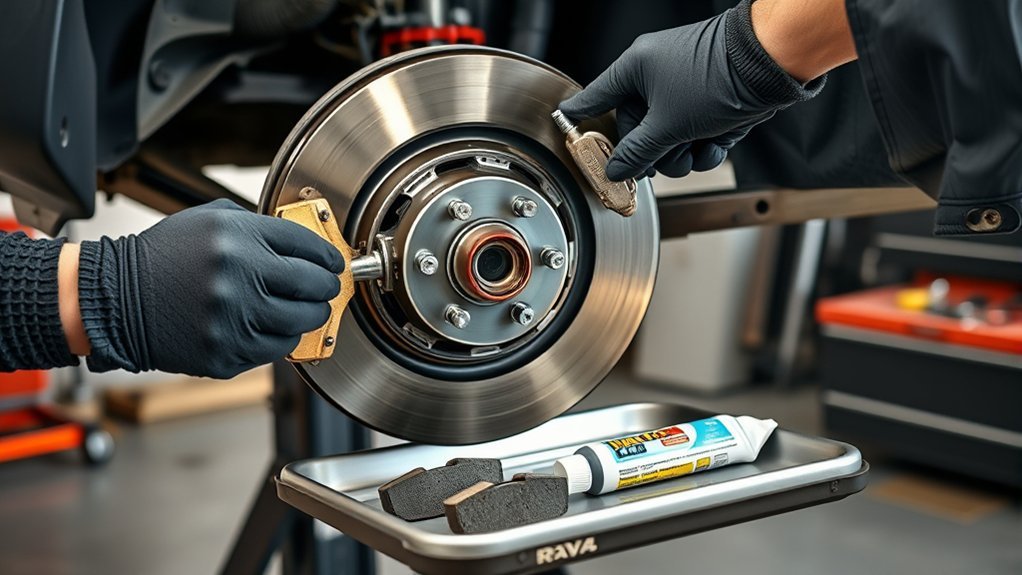
- Employ a flat screwdriver to push the caliper piston back, allowing for the easy removal of old brake pads.
- Install the new Bosch brake pads and hardware, applying caliper grease to the bolts for smooth operation.
Finally, torque the caliper bolts to 25 ft-lb to secure the installation before replacing the wheel. By following these precise steps, you’ll guarantee your brake system operates efficiently and safely.
Inspecting and Replacing Brake Pads on Your RAV4
Inspect your brake pads regularly to confirm your 2019 RAV4 operates safely and effectively. Check them at around 57,000 miles to assess wear. To replace them, start by using a size 14 mm socket to remove the caliper bolts, granting access to the brake pads. Once exposed, push the caliper piston back with a flat screwdriver, making it easier to remove the old pads and install new Bosch brake pads. Before installation, verify all hardware is cleaned and properly lubricated for smooth operation. After replacing the pads, torque the caliper bolts to 25 ft-lb for the front and 76-80 ft-lb for the rear, securing everything in place and ensuring excellent braking performance.
How to Activate Service Mode for the Electronic Parking Brake
Activating service mode for the electronic parking brake on your 2019 RAV4 is an essential step before replacing brake pads. Follow these steps to guarantee a smooth process:
Activating the service mode for the electronic parking brake is crucial before replacing brake pads on your 2019 RAV4.
- Turn the key to the accessory position.
- Press and hold the foot brake.
- Simultaneously press the parking brake switch multiple times to initiate the sequence.
- Listen for a sound indicating that the brakes are retracting.
Once activated, the rear brakes will flash, confirming that the vehicle is in service mode, which facilitates brake pad replacement. After you’ve completed the brake pad replacement, remember to reactivate the electronic parking brake by holding the brake pedal and using the switch for proper engagement. This guarantees your safety and the functionality of your vehicle.
Best Practices for Installing New Brake Pads
When installing new brake pads, ensuring component compatibility is essential for peak performance. You should always compare the original pads with your new replacements and clean the caliper to enhance contact. Proper lubrication techniques and accurate torque specifications will also help secure your installation and reduce noise.
Proper Lubrication Techniques
To guarantee maximum performance and longevity of your new brake pads, it’s essential to focus on proper lubrication techniques during installation. Follow these best practices:
- Clean any rust or debris from the caliper and hardware for ideal contact.
- Apply a thin layer of caliper grease to the back of the brake pads and contact points to reduce noise and prevent sticking.
- Lubricate the caliper bolts to guarantee smooth movement and minimize the risk of seizing.
- Make sure any new hardware included with the brake pads is properly lubricated to enhance braking performance.
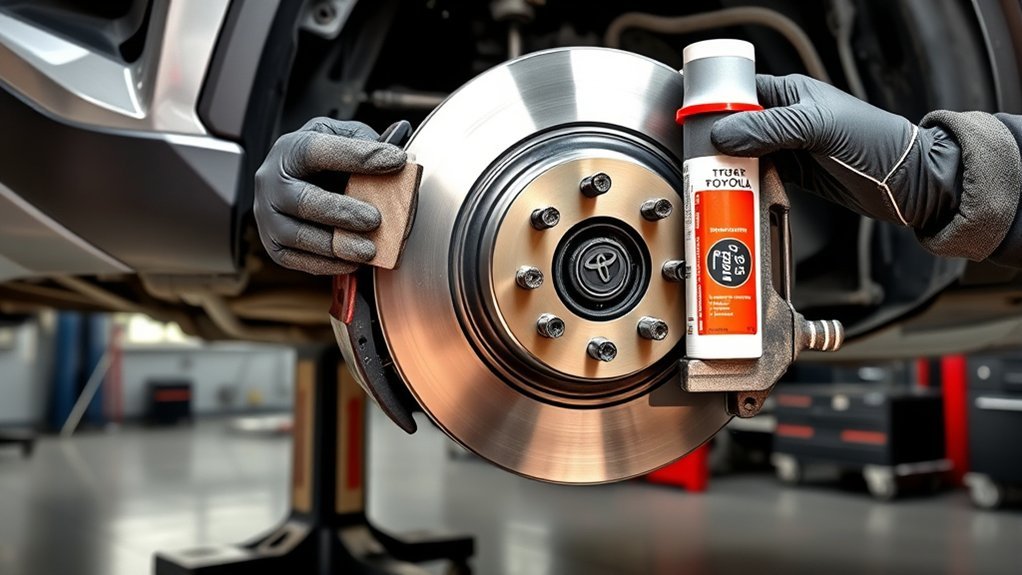
Ensuring Component Compatibility
Verifying component compatibility is essential for achieving ideal braking performance during your brake pad installation. Start by comparing the original brake pads with the new Bosch replacements to confirm they’re the same size and shape. Inspect the hardware included with the new brake pads, cleaning any rust to guarantee effective installation and operation. Apply caliper grease to bolts and moving components, promoting smooth operation and minimizing wear. Make sure the new brake pads and their hardware are adequately lubricated to enhance performance and longevity. Finally, verify that all components are compatible and securely fastened before finishing the installation. This diligence guarantees peak braking performance and extends the lifespan of your braking system.
Accurate Torque Specifications
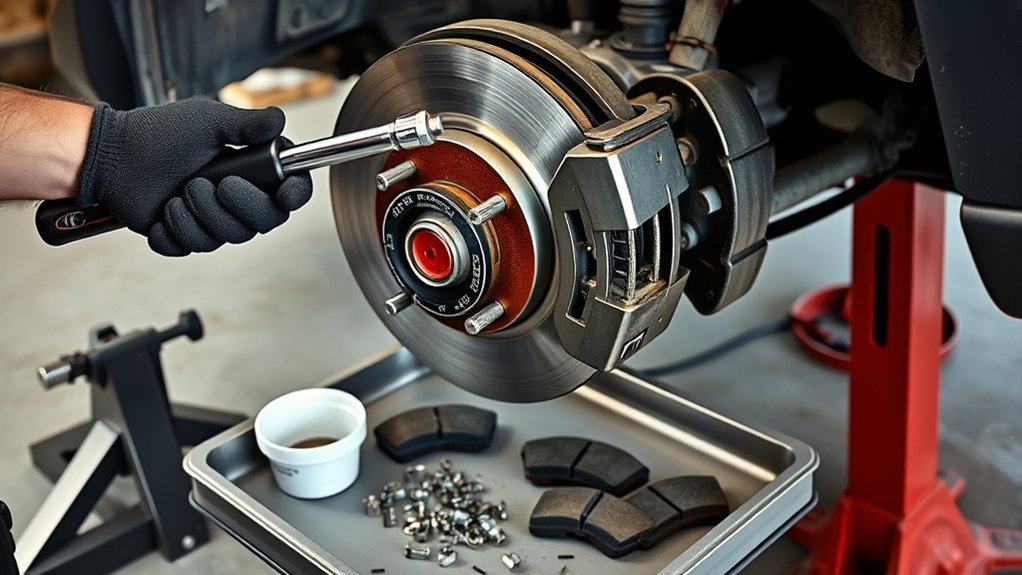
Accurate torque specifications are essential for the safe and effective installation of new brake pads on your Toyota RAV4. Here’s how to guarantee a secure installation:
- Front Caliper Bolts: Torque to 25 ft-lb for peak performance.
- Rear Caliper Bolts: Verify they’re within the range of 76-80 ft-lb to maintain safety.
- Use a Torque Wrench: Always utilize a torque wrench to achieve precise torque specifications; improper torque can lead to brake failure or uneven pad wear.
- Wheel Bolts: Double-check the torque on the wheel bolts after reinstalling, adhering to the manufacturer’s recommended specifications.
Regularly verifying these torque specifications during brake pad installation enhances braking efficiency and extends the longevity of your brake components.
Torque Specs for Brake Installation
Proper torque specifications are vital for the safe and effective installation of brake components on your Toyota RAV4. For the front brake caliper bolts, torque them to 25 ft-lb. This guarantees a secure fit that supports reliable braking performance. When addressing the rear caliper bolts, aim for a torque range between 76-80 ft-lb to maintain ideal function and safety. Always use a calibrated torque wrench to achieve these precise torque settings during installation. After reinstalling the wheels, double-check that all wheel bolts are torqued to the manufacturer’s specified value. Adhering to these torque specifications is essential to prevent uneven wear on your brake components and guarantee your vehicle operates safely and efficiently.
Final Checks and Tips for Maintaining Your New Brake Pads
Once you’ve installed your new brake pads, it’s crucial to conduct final checks to confirm everything is functioning as it should. Follow these steps:
- Final Torque Check: Secure caliper bolts at 76-80 ft-lb for the rear and 25 ft-lb for the front.
- Inspect Brake Pads: Check for proper placement and alignment; look for any signs of wear.
- Apply Pressure: Test the brakes by pressing the pedal to verify they engage correctly before driving.
- Use High-Quality Brake Lubricant: Apply lubricant to all contact points to minimize noise and promote smooth operation.
Additionally, reactivate the electronic parking brake by turning the key to accessory mode and pressing the brake pedal. Regularly inspect brake pads every 10,000 miles for peak performance.
Frequently Asked Questions
Can I Replace My Toyota Brake Pads Myself?
Yes, you can replace your Toyota brake pads yourself. For DIY brake replacement, gather the necessary tools, like a size 14 mm socket, and always prioritize safety precautions, ensuring your vehicle’s secure on stands before starting.
How Much Do New Brakes Cost for a Toyota RAV4?
So, you thought new brakes were free? Brace yourself! Brake pad pricing for your Toyota RAV4 ranges from $100 to $300, plus labor. Remember, Toyota maintenance costs can add up—don’t forget those installation tips!
How to Put Toyota Brakes in Service Mode?
To put Toyota brakes in service mode, engage the foot brake, turn the key to accessory, and follow the specific button sequence. This guarantees effective brake maintenance and facilitates smoother brake replacement during your brake service.
What Is the Biggest Issue With the Toyota RAV4?
The biggest issue with the Toyota RAV4 is premature brake wear, often leading to noise. For safety, consider regular maintenance tips and inspections to identify brake noise solutions before they become problematic, ensuring smooth driving.
Conclusion
In summary, replacing the brake pads on your Toyota RAV4 is essential for ensuring your safety and the vehicle’s performance. Did you know that worn brake pads can increase stopping distances by up to 30%? Regular maintenance not only enhances braking efficiency but also saves you money in the long run by preventing more extensive repairs. By following the steps outlined in this guide, you can confidently maintain your brakes and enjoy a safer driving experience.