To remove the right side mirror on your Toyota RAV4, start by removing the door panel to access the mirror’s wiring. Use a socket wrench with a 10 mm socket to unscrew the three nuts securing the mirror. Carefully disconnect the wiring harness by pressing the tab. Once detached, you can safely remove the mirror. If you follow these steps closely, you’ll avoid common mistakes and guarantee a smooth reinstallation process. More details are ahead.
Reasons to Remove Your Right Side Mirror
When you notice issues with your right side mirror, it’s essential to contemplate removal as a necessary step. A damaged or broken mirror compromises your driving visibility, making replacement critical for safety. If the mirror’s electrical components, like heating or adjustment features, malfunction, you’ll need to remove it for repairs. Additionally, if you’re considering aesthetic upgrades, installing a new mirror style or color requires removal of the existing one. Regular maintenance checks might also prompt you to inspect or clean internal mechanisms that impact operation. After a minor accident, removing the mirror becomes important to assess any underlying damage. To start the process, press and hold the appropriate buttons to deactivate any electrical functions before proceeding.
Essential Tools for Removing the Right Side Mirror
Removing the right side mirror on your Toyota RAV4 requires specific tools to guarantee the process is efficient and damage-free. You’ll need a socket wrench with a 10 mm socket to remove the nuts securing the mirror. An extension for the socket wrench can help you reach those nuts in tight spaces. A trim tool is essential for prying off plastic covers without damaging the door panel, while a clip remover tool assures the plastic cover comes off cleanly. Don’t forget a Phillips screwdriver for any screws hiding behind the trim cover. By following these mirror maintenance tips and employing effective tool organization strategies, you’ll simplify your mirror replacement options and complete the task with ease.
Step-by-Step Guide to Remove the Door Panel
To start the process of removing the door panel on your Toyota RAV4, you’ll need to access and remove several components carefully. Follow these steps for effective door panel removal:
- Use a trim tool to remove the plastic cover behind the inner door handle and unscrew the hidden screw with a Phillips screwdriver.
- Take off the large plastic trim cover along the armrest and unscrew any additional screws beneath it and at the bottom of the door panel.
- Carefully pull the door panel outwards from the corners and lift it upwards to detach it from the door frame.
After detaching the panel, make sure you manage any wiring connections, especially for the inner door lock and handle, to complete the process smoothly.
How to Safely Disconnect Wiring From the Door Panel
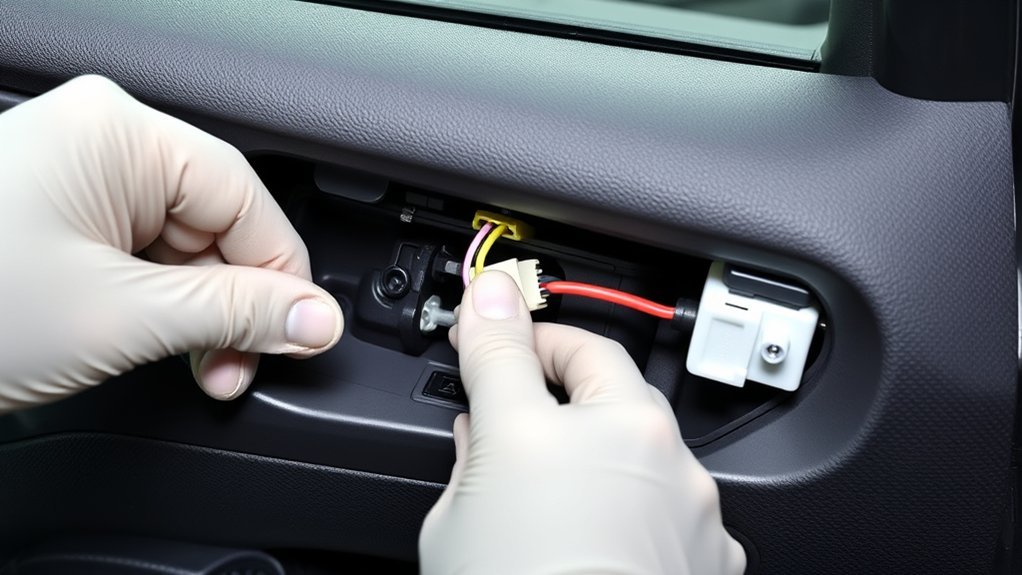
Before disconnecting the wiring from the door panel, it’s essential to identify the specific wires involved to avoid any mishaps. You’ll be working with two key wires: the green wire for the inner door lock and the white wire for the inner door handle. Begin with the green wire—press and hold the tab on the plug to release it, then pull it outwards. Next, disconnect the white wire using the same method, ensuring you press the tab and pull the plug outwards. Handle the wiring with care to maintain wiring safety and prevent damage to the electrical connections. If the switch panel disassembles during this process, reattach it securely before continuing with further disassembly.
Removing the Plastic Cover for Better Access
To gain better access to the side mirror, start by locating the plastic cover in the top left corner of the door. Remove the single 10 mm screw securing it, then use a clip remover tool to detach the cover carefully. Be sure to disconnect any harness that may be caught to prevent damage during this process.
Locate Plastic Cover Area
Locating the plastic cover area is essential for accessing the side mirror’s securing nuts on your Toyota RAV4. This step is vital before employing mirror adjustment techniques or exploring mirror replacement options. Follow these steps for effective removal:
- After removing the door panel, find the plastic piece in the top left corner of the door.
- Using a 10 mm socket and an impact gun, unscrew the single 10 mm screw holding the plastic cover.
- Carefully utilize a clip remover tool to extract the plastic cover, ensuring to detach any harness that may be stuck.
Always remember the safety precautions required during this process to avoid damaging components. Confirm the plastic cover is entirely removed before proceeding to detach the side mirror.
Unscrew and Remove Carefully
Once you’ve successfully located and removed the plastic cover in the top left corner of the door, it’s time to unscrew and take it off carefully for better access to the side mirror mounting area. Use a 10 mm socket and an impact gun to unscrew the single 10 mm screw holding the plastic cover in place. Before proceeding, remember to follow safety precautions to avoid injury. Employ a clip remover tool to detach the plastic cover completely without damaging surrounding components. Double-check that the cover is fully removed, ensuring unobstructed access to the side mirror nuts underneath. This step is essential for proper mirror replacement, especially when dealing with different mirror types and configurations.
Detach Stuck Harness Properly
Before disconnecting the side mirror plug, it’s important to properly detach the harness connected to the plastic cover. To guarantee a smooth process, follow these steps:
- Locate and unscrew the single 10 mm screw securing the plastic cover with your 10 mm socket and impact gun.
- Use a clip remover tool to carefully detach the plastic cover, avoiding damage risks to surrounding components.
- Gently pull the harness attached to the plastic cover to make sure it’s fully detached.
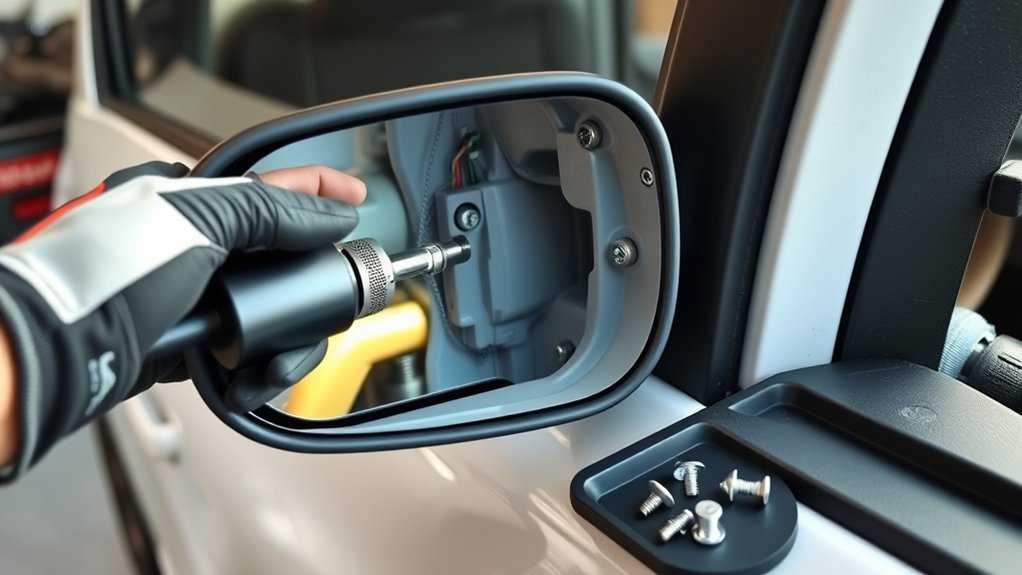
How to Remove the Side Mirror Securing Nuts
To remove the side mirror securing nuts, you’ll need a socket wrench with an extension and a 10 mm socket. Start by locating the three nuts that secure the mirror and unscrew them carefully. Remember to hold each nut as you remove it to prevent dropping and losing any during the process.
Required Tools For Removal
When removing the side mirror securing nuts on a Toyota RAV4, you’ll need specific tools to guarantee a smooth process. Here’s what you’ll require:
- Socket Wrench – Essential for applying even pressure when loosening the nuts.
- Extension – Helps reach the nuts easily, especially in tight spaces.
- 10 mm Socket – The correct size for the securing nuts.
Ascertain you work in a stable environment to avoid losing the nuts. As you carefully unscrew each of the three nuts, hold them with a finger to prevent them from falling. Following these installation tips and maintenance advice will ensure you handle various mirror types effectively. With the right tools, you’ll have a successful removal process.
Step-By-Step Nut Removal
Start by locating the three securing nuts for the side mirror, which are typically 10 mm in size. Using a socket wrench with an extension and a 10 mm socket, reach each nut. Unscrew them until they’re loose while holding each nut to prevent dropping. Repeat this for all three nuts carefully, ensuring they’re not lost during the process. Confirm that all nuts are completely removed before detaching the side mirror itself.
| Step | Action |
|---|---|
| 1 | Locate the 10 mm nuts |
| 2 | Use socket wrench & extension |
| 3 | Unscrew each nut carefully |
| 4 | Hold nuts to prevent drops |
| 5 | Confirm all nuts are removed |
Understanding these steps is essential for effective side mirror maintenance and exploring mirror replacement options or mirror adjustment techniques later.
Tips For Safe Handling
While removing the side mirror securing nuts, it’s crucial to handle each component carefully to prevent loss or damage. Here are some tips for safe handling during this process:
- Use a socket wrench: Employ a 10 mm socket and extension to unscrew the nuts carefully.
- Finger grip: Hold each nut with your finger as you loosen it to avoid dropping and losing them.
- Proper storage: Keep a container or magnet nearby for safe storage of the nuts during removal.
Always observe safety precautions, work in a well-lit area, and inspect the condition of the nuts for any damage before reinstallation. By following these handling techniques, you’ll facilitate a smoother and more efficient removal process.
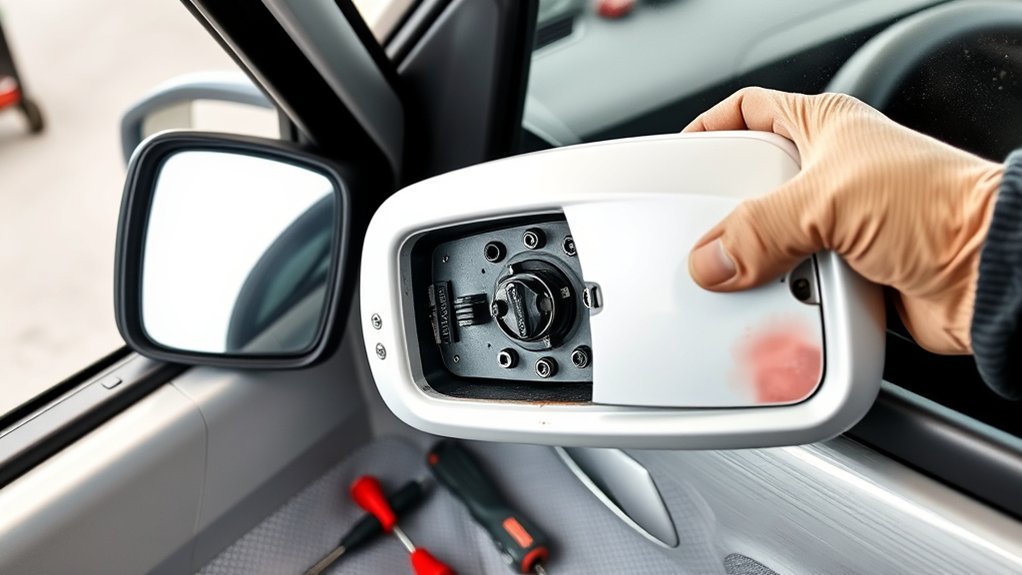
Best Practices for Safely Detaching the Side Mirror
To safely detach the side mirror from your Toyota RAV4, begin by ensuring the vehicle is completely powered off and the keys are removed. Use a socket wrench with a 10 mm socket to carefully remove the three securing nuts, holding each nut with a finger to avoid dropping them. When disconnecting the mirror plug, press and hold the tab securely before pulling it outwards to prevent damage. Gently rock and roll the side mirror during detachment, applying mirror alignment techniques to avoid harming the mounting mechanism or the door panel. Keep all removed parts organized for smooth reinstallation and explore mirror replacement options if needed. Always adhere to vehicle safety precautions to protect yourself and your vehicle during this process.
Mistakes to Watch Out for When Removing the Side Mirror
When removing the side mirror from your Toyota RAV4, it’s important to avoid common mistakes that could lead to damage or complications. Here are some key points to keep in mind:
- Remove All Nuts: Make sure all three nuts are completely removed; leaving any behind complicates reinstallation.
- Disconnect Carefully: When disconnecting the plug, press and hold the tab to avoid damaging the wiring harness, a crucial part of mirror maintenance tips.
- Gentle Detaching: Rock the mirror gently while detaching to protect the mounting mechanism and door panel.
Reinstalling the Right Side Mirror
Once you’ve removed the right side mirror, the reinstallation process requires careful attention to detail. Start by aligning the mirror with the mounting area, making sure the wiring harness is accessible. Insert the mirror gently, rocking it slightly to secure it snugly. Next, reconnect the wiring harness by pressing the tab and pushing it back into the socket until you hear a click.
Use the following table for reference:
| Step | Action | Tips |
|---|---|---|
| 1. Align | Confirm correct positioning | Use mirror alignment tips |
| 2. Insert | Rock gently into position | Confirm snug fit |
| 3. Reconnect Wiring | Press tab to connect | Follow wiring harness precautions |
| 4. Tighten Nuts | Use a socket wrench | Apply securing nuts techniques |
| 5. Reinstall Trim | Complete installation | Check all pieces |
Finally, reinstall the plastic cover and trim pieces.
Troubleshooting Common Issues When You Remove the Right Side Mirror
While removing the right side mirror on your Toyota RAV4 may seem straightforward, several common issues can arise that complicate the process. To help you navigate these challenges, here are some mirror replacement tips:
- Confirm all three securing nuts are fully removed before pulling off the mirror; missing one can cause frustration.
- Check for any additional clips or fasteners that might be holding the mirror in place, as ignoring these could lead to common repair mistakes.
- If the wiring harness is stuck, gently wiggle it while pressing the tab to avoid damage.
After removal, inspect for any signs of wear that could lead to mirror alignment issues during reinstallation. Always double-check mounting holes and wiring connections for proper positioning.
Frequently Asked Questions
How to Disassemble a Toyota Side Mirror?
To disassemble a Toyota side mirror, use proper mirror disassembly techniques. Gather side mirror tools, remove the door panel, unscrew the nuts securing mirror components, and disconnect the electrical plug for a clean separation.
How to Replace a 2017 Toyota RAV4 Side Mirror?
To replace your 2017 RAV4 side mirror, follow a mirror installation guide. Securely unscrew the old mirror, connect the wiring, and install the new one using RAV4 repair tips for a smooth, hassle-free process.
What Is the Lawsuit Against the Toyota RAV4?
The lawsuit against the Toyota RAV4 highlights serious safety concerns, alleging fuel system defects that could cause fires. You should stay informed about these issues while considering mirror replacement tips for your vehicle’s maintenance.
What Year of RAV4 to Stay Away From?
You’ll want to steer clear of the 2001-2003 and 2006-2008 RAV4 models. Their reliability issues, like excessive oil consumption and transmission failures, often overshadow other models, making comparisons unfavorable for potential buyers seeking dependable transportation.
Conclusion
To sum up, removing the right side mirror on your Toyota RAV4 is a manageable task when you follow the proper steps. Curiously, studies show that approximately 70% of drivers have experienced a side mirror issue at some point, highlighting the importance of knowing how to address it. By using the right tools and techniques, you can guarantee a smooth removal and reinstallation process, ultimately maintaining your vehicle’s functionality and safety.