Adding roof rails to your Toyota RAV4 can give you more cargo options, but the job can go wrong fast if the rails don’t match your trim. A poor fit can cause leaks, loose hardware, or roof damage. This guide shows you how to check compatibility, gather the right tools, install the rails, and avoid the most common mistakes.
Quick Answer
You can install roof rails on a Toyota RAV4 if the rails match your model year and trim. XLE and higher trims often have factory roof rails or roof mounting points, while LE models may need more parts and care. Check the fit kit, use a torque wrench, seal every mounting point, and test the rails before you carry cargo.
Key Takeaways
- Match the roof rails to your exact RAV4 year, trim, and roof style before you buy.
- Use a socket wrench, torque wrench, seals, and the hardware supplied with the rail kit.
- Do not drill or tighten bolts unless the instructions for your specific kit call for it.
- Seal the mounting points carefully so water cannot enter the cabin.
- Test the rails for movement before you add crossbars, racks, or cargo.
How to Install Roof Rails on Your RAV4: A Step-by-Step Guide
Installing roof rails on your Toyota RAV4 can improve cargo space and make the vehicle more useful for trips. Start by checking your specific trim level and model year. Some trims have factory rails or mounting points, while others may need extra parts.
Gather the roof rail kit, mounting hardware, seals, and the tools listed in the instructions. Remove any factory covers only if your kit tells you to do so. Align the rails with the roof grooves or mounting points, then fasten the hardware to the listed torque value.
Do not over-tighten the bolts. Too much force can damage threads, crush seals, or create leaks. After installation, check proper alignment, test for movement, and inspect every mounting point before you load gear.
Understanding Roof Rail Compatibility for Your RAV4
Roof rail fit depends on your RAV4 model year, trim, and roof design. Many XLE and higher trims come with roof rails or factory mounting points, while LE models may need more parts or a different kit. Always check the part number against your exact vehicle before you order.
Trim packages such as Adventure and TRD Off-Road can use different roof rail or crossbar systems. Parts that fit one roof style may not fit another. If the kit does not list your year and trim, choose another kit or ask a Toyota parts department to confirm the fit.
Trim Level Importance
Your trim level affects both the cost and difficulty of the job. RAV4 models with factory roof rails or roof mounting points usually need less work. Models without those features may require more hardware, sealing, or professional help.
Roof racks often attach to rails or approved mounting points. That makes rail fit a safety issue, not just a style choice. A rail that does not match the roof can loosen under load or let water into the cabin.
Model-Specific Compatibility Check
Before you buy, check the rail kit against your RAV4’s exact model year, trim, and roof type. Search by the full vehicle details, not just “RAV4 roof rails.” A kit for one generation or trim may not fit another.
Review the installation guide before you open the package. Confirm that the kit includes seals, brackets, bolts, and covers. If the guide requires drilling and you are not sure where to drill, stop and contact a qualified installer.
Before You Begin Installing RAV4 Roof Rails
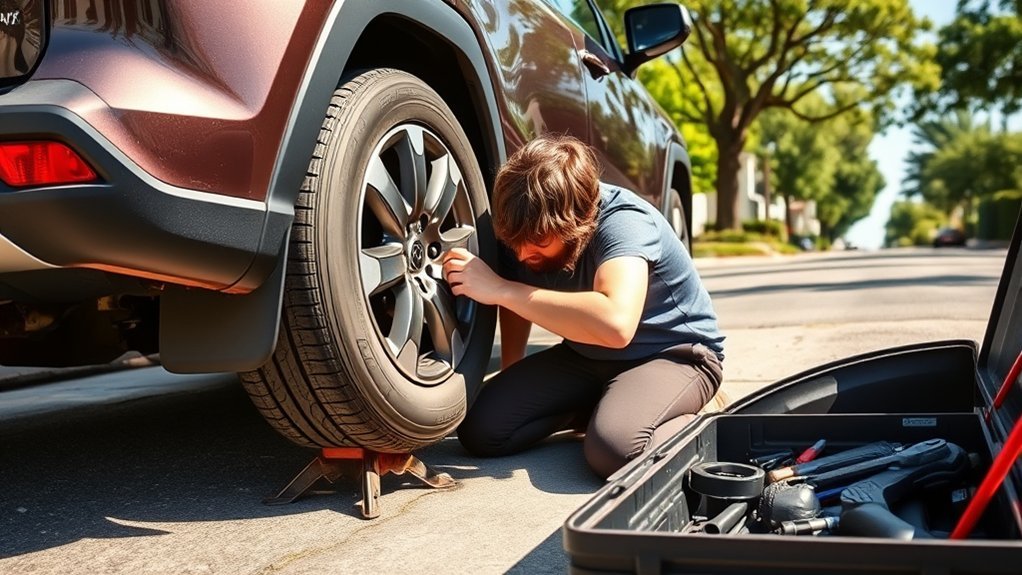
Plan the job before you place any hardware on the roof. Park the RAV4 on level ground, clean the roof, and lay towels near the work area to protect the paint. Read the full installation guide once before you start.
Estimated total time: Most bolt-on roof rail kits take about 60 to 120 minutes for a careful do-it-yourself installation. Kits that need drilling, trim removal, or extra sealing can take longer. Set aside more time if this is your first roof rail project.
Warning: Do not drill into your RAV4 roof unless the rail kit instructions clearly require it and show the exact mounting points.
Tools and Materials Needed for Roof Rail Installation
Before you start installing roof rails on your Toyota RAV4, gather the tools and materials listed for your kit. You will usually need a socket wrench set, a torque wrench, and a Phillips screwdriver. Some kits may also need trim tools, sealant, or a drill.
Essential Tools Required
Most roof rail installations need basic hand tools and careful alignment. Keep these items nearby before you start:
- Socket wrench set for the mounting bolts
- Torque wrench for the final tightening step
- Phillips screwdriver for covers or trim pieces
- Plastic trim tool for factory covers, if needed
- Level or measuring tape to check alignment
- Clean towels or mats to protect the paint
If your RAV4 lacks pre-existing mounting points and the kit calls for drilling, use the drill bit size listed in the guide. Do not guess the hole size. A second person can also help you hold the rails in place during alignment.
Recommended Installation Materials
Use roof rails that fit your exact RAV4 trim and model year. The rail kit should include mounting brackets, bolts, washers, covers, and weather seals. If any part is missing, do not install the rails until you replace it.
Use the sealant or gasket material recommended by the rail maker. The seal keeps water away from the roof openings and mounting hardware. Apply it only where the instructions tell you to apply it.
Safety Gear Considerations
Wear gloves and safety glasses while you work. Gloves protect your hands from sharp trim edges, and glasses help shield your eyes when you work overhead. A clean work area also reduces the risk of scratches and dropped hardware.
| Safety Gear Type | Purpose | Recommended Use |
|---|---|---|
| Gloves | Protect hands from cuts | During installation |
| Safety Glasses | Shield eyes from debris | While working overhead |
| Towels | Prevent scratches | Underneath installation area |
| Mat | Provide cushioning | For a stable workspace |
| Torque Wrench | Guarantee secure attachment | Tightening bolts accurately |
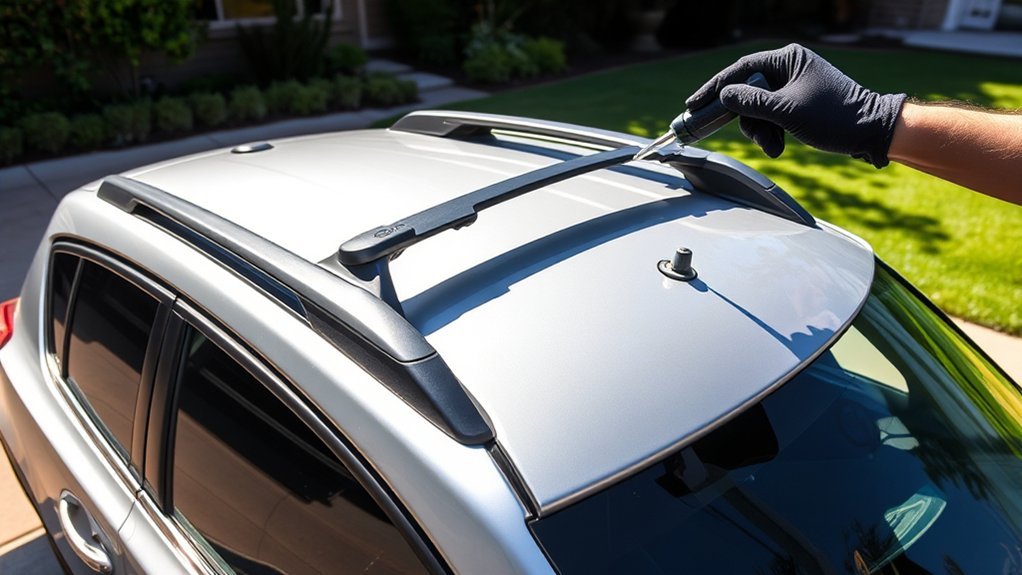
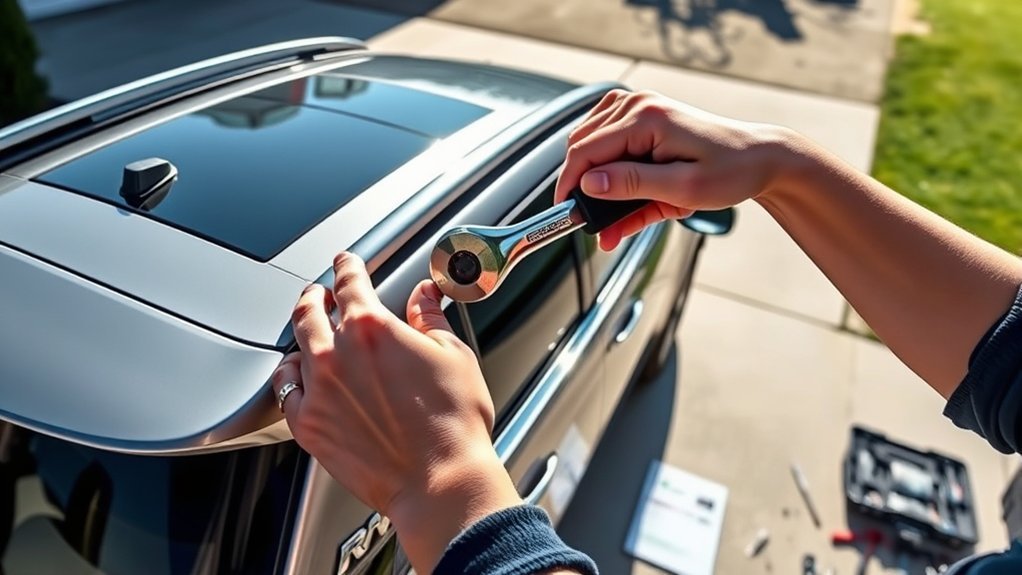
RAV4 Roof Rail Installation Steps
Follow the instructions for your rail kit first, since hardware and trim pieces can vary by model year. Use these steps as a general guide for a typical bolt-on installation. Stop if the kit does not match the roof or if the mounting points do not line up.
- Confirm the fit. Match the rail kit part number to your RAV4 year, trim, and roof style.
- Clean the roof. Wash and dry the mounting area so seals can sit flat.
- Remove factory covers. Use a plastic trim tool if your RAV4 has removable roof covers.
- Place the seals. Fit the gaskets or sealant exactly where the instructions show.
- Align the rails. Set each rail over the correct mounting points and check that both sides sit straight.
- Start the bolts by hand. Thread each bolt lightly before you tighten any one bolt fully.
- Tighten to spec. Use a torque wrench and follow the torque value from the rail kit or Toyota instructions.
- Install the covers. Snap or fasten the trim covers into place after the rails feel secure.
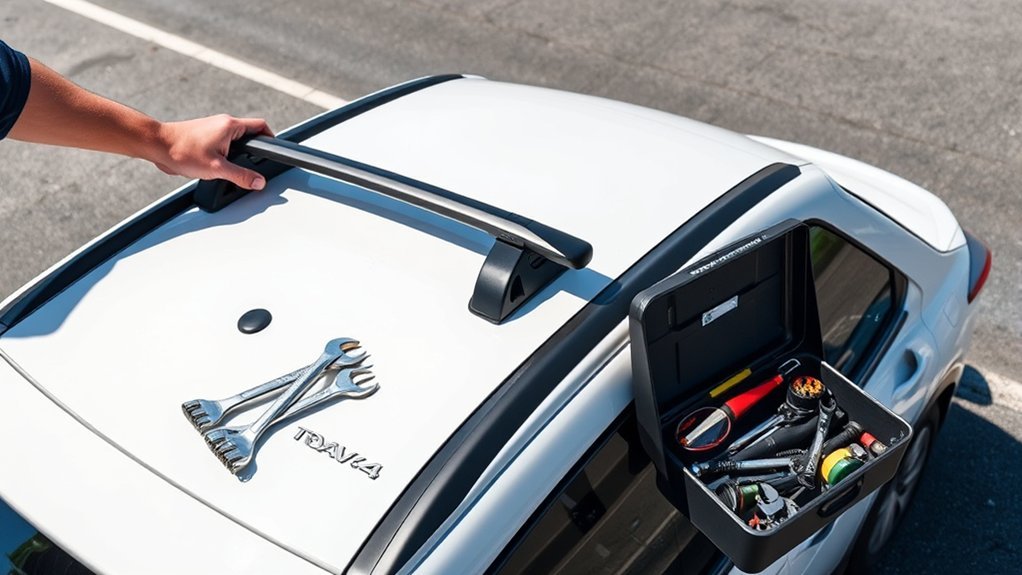
- Test the rails. Pull gently on each rail and check for movement before adding crossbars or cargo.
Pro tip: Start all bolts by hand before tightening so the rails stay aligned and the threads do not strip.
Tips for Securing a Proper Fit During Installation
To get a secure fit, check compatibility before you place the rail on the roof. Align the rails with the grooves or mounting points, then measure both sides before tightening. The rails should sit evenly and run parallel.
Follow the manufacturer’s instructions closely. Use a torque wrench for the specified tightness, and do not rely on feel alone. After the final tightening step, check rail stability before you load any gear.
Recheck the hardware after your first short drive. Road vibration can reveal a loose cover, bolt, or bracket. Fix any movement before you mount a roof rack or cargo box.
Top 5 Installation Mistakes to Avoid for Roof Rails
Installing roof rails on your Toyota RAV4 can add useful cargo space, but small errors can cause big problems. Avoid these common mistakes during the job:
| Mistake | Consequence | Installation Tips |
|---|---|---|
| Not verifying compatibility | Purchasing wrong roof rails | Check trim level |
| Neglecting manufacturer instructions | Improper fitting, leaks, instability | Follow the guide |
| Overlooking additional tools | Incomplete setups | Gather necessary hardware |
| Skipping sealing process | Water intrusion, interior damage | Use proper sealants |
| Ignoring torque specifications | Loose or damaged roof rails | Adhere to torque specs |
The most serious mistakes involve fit, sealing, and torque. If one of those areas feels uncertain, pause the installation. A short delay costs less than fixing a roof leak later.
Choosing the Best Roof Rack for Your RAV4 Roof Rails
To choose the best roof rack for your Toyota RAV4’s roof rails, start with the rack maker’s fit guide. Confirm the rack matches your model year, trim, and rail type. Then check the weight rating for both the rack and the vehicle roof.
Look at what you plan to carry. Bikes, kayaks, skis, cargo boxes, and baskets use different mounts. Pick a rack that supports your gear and stays within the listed load limit.
Do not mix parts unless the maker says they work together. Crossbars, clamps, and foot packs often use brand-specific designs. A poor mix can slip or damage the rails.
What Roof Racks Work Best With Your Roof Rails?
The best roof racks for your RAV4 are the ones that match your rail style and carry your gear safely. Many factory-style rails work with crossbars made for raised rails or flush rails, depending on the design. Always use the rack maker’s fit tool or installation guide.
For everyday use, choose crossbars with enough capacity for light cargo, skis, or a small cargo box. For heavier outdoor gear, look for a system rated for the load and shaped for your accessory. Never exceed the lower limit between the rack rating and the vehicle rating.
Note: Roof rail capacity and roof rack capacity are not always the same, so check both before loading gear.
Frequently Asked Questions
Can I Install Roof Rails Myself?
Yes, you can install roof rails yourself if you have a compatible kit, basic tools, and clear instructions. Use careful measurements and a torque wrench. Get professional help if the kit requires drilling or if the mounting points do not line up.
What Year of RAV4 to Stay Away From?
Some buyers report more concerns with certain model years, but reliability can vary by vehicle history, mileage, and maintenance. Before you buy any used RAV4, review service records and get a pre-purchase inspection. Focus on the exact vehicle instead of avoiding a year based on broad claims alone.
Can You Add Roof Racks to a RAV4?
Yes, you can add roof racks to many RAV4 models. You need the correct crossbars, clamps, or mounting feet for your roof rails or factory mounting points. Check the rack and roof load limits before you carry gear.
What Is the Biggest Issue With the Toyota RAV4?
The biggest issue depends on the model year and the vehicle’s condition. Some owners report concerns such as roof leaks, battery drain, transmission behavior, or infotainment problems. Review owner reports, recalls, and inspection results for the specific RAV4 you plan to buy.
Do Roof Rails Affect Gas Mileage?
Roof rails alone may have a small effect, but crossbars and cargo can create more wind drag. A roof box, kayak, or basket can reduce fuel economy more than bare rails. Remove unused crossbars and accessories when you do not need them.
How Much Weight Can RAV4 Roof Rails Hold?
The safe weight limit depends on your RAV4 model year, roof rails, crossbars, and accessory. Use the lowest rating listed by Toyota or the rack maker. Do not exceed that limit, even if one part lists a higher capacity.
Conclusion
The most important step is simple: choose roof rails that match your exact RAV4 before you install anything. Once you confirm the fit, use the right tools, seal the mounting points, and tighten each bolt to spec. Test the rails before your first trip, then recheck the hardware after a short drive. With a secure setup, your RAV4 will be ready for kayaks, cargo boxes, bikes, and weekend gear.