To replace your Toyota RAV4’s side view mirror, start by gathering tools like a Phillips screwdriver, 10 mm socket, and trim tool. Remove the door panel by unscrewing screws and disconnecting wiring. Unscrew the three nuts securing the mirror, then disconnect the wiring harness. After installing the new mirror and reconnecting everything, reattach the door panel. Follow proper steps to avoid mistakes for a successful replacement. Learn about essential maintenance tips next to keep your mirror in top shape.
How to Identify When You Need to Replace Your Side View Mirror
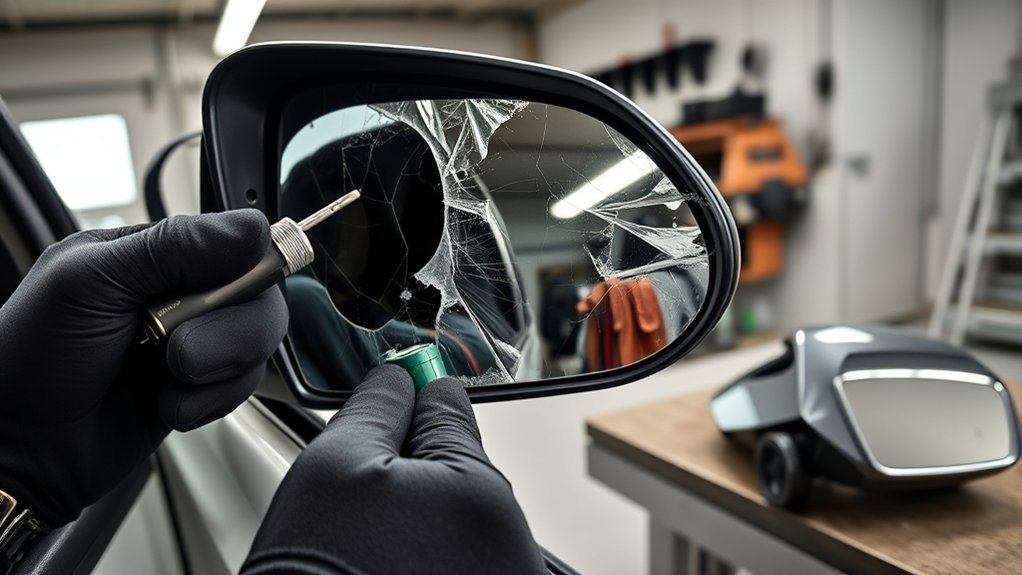
When you notice issues with your side view mirror, it’s essential to assess whether a replacement is necessary. A cracked or shattered mirror can severely impair visibility, increasing accident risks. If the mirror housing feels loose or wobbly, this often indicates damage that requires replacement for your safety. Additionally, malfunctions in the adjustment mechanism—like failure to move or hold position—signal that a new mirror is needed. Look for signs of water damage or corrosion around electrical connections, as these can also compromise proper operation. Finally, if the mirror glass is excessively fogged or pitted, it’s a clear indication of visibility issues that necessitate a replacement. Regular mirror maintenance can help prevent these problems.
Tools Required for Side Mirror Replacement on a Toyota RAV4
Before you start replacing your side view mirror on a Toyota RAV4, gather the essential tools to guarantee a smooth process. You’ll need a socket wrench with a 10 mm socket, a Phillips screwdriver, and possibly a trim tool for safe removal of plastic covers. Don’t forget to wear safety equipment for protection while working.
Essential Tools Overview
Replacing the side view mirror on your Toyota RAV4 requires a few essential tools to confirm the process goes smoothly. First, grab a Phillips screwdriver to remove screws from the door panel. You’ll need a 10 mm socket and an impact gun to detach the nuts securing the mirror in place. A trim tool is handy for prying off plastic covers without causing damage. Additionally, a socket wrench with an extension may be necessary for accessing tight spaces around the mirror. Finally, consider using a clip remover tool to safely detach plastic covers and harnesses. Understanding these tools enhances your installation techniques and confirms compatibility with different mirror types, making the replacement process efficient and effective.
Safety Equipment Importance
Safety is paramount during any DIY project, especially when replacing the side view mirror on your Toyota RAV4. Start by donning safety goggles to shield your eyes from debris and sharp edges. It’s vital to wear protective gear, as working on your vehicle can present various hazards. Use a trim tool to carefully remove the plastic cover without damaging the door panel, and a clip remover tool to detach plastic components safely. For securing the side mirror, a 10 mm socket and impact gun are essential for efficient torque. Keep a magnetic tray nearby to prevent losing nuts and screws during the replacement process. Prioritizing safety guarantees a smooth and successful repair experience.
Recommended Socket Sizes
When tackling the side mirror replacement on your Toyota RAV4, you’ll need specific tools to guarantee the job goes smoothly. The primary socket size you’ll require is a 10 mm socket, essential for removing the nuts that secure the mirror to the door. Here’s a quick list of what you’ll need:
- 10 mm Socket – The critical size for nut removal.
- Impact Gun or Ratchet Wrench – For efficient nut removal.
- Socket Extension – Helpful for reaching nuts in tighter spaces behind the mirror.
Don’t forget a trim tool to safely remove the door panel without damage, and a Phillips screwdriver to handle any screws. Equip yourself with these tools, and you’re ready to tackle various mirror types with confidence.
Step-by-Step Guide to Side Mirror Replacement
To replace the side view mirror on your Toyota RAV4, you’ll start by removing the door panel, which involves unscrewing necessary screws and disconnecting wiring connections. Pay attention to the wiring for the inner door lock and handle, as you’ll need to disconnect these before accessing the mirror. Once the panel is off, you can proceed with removing the side mirror and follow the installation tips to guarantee proper reassembly.
Door Panel Removal Steps
Before you start replacing the side view mirror on your Toyota RAV4, you’ll need to remove the door panel to access the mirror’s mounting area. Follow these steps:
- Use a trim tool to gently pry off the plastic cover around the inner door handle.
- Unscrew the hidden screw behind the trim cover with a Phillips screwdriver, then remove the large plastic trim cover along the armrest to access additional screws.
- After unscrewing all necessary screws, carefully pull the door panel outwards from the bottom corners and lift it upwards to detach completely.
Once the door panel is off, locate and unscrew the top left plastic cover, detaching the harness stuck with it to proceed with your side mirror replacement.
Wiring Connections Explained
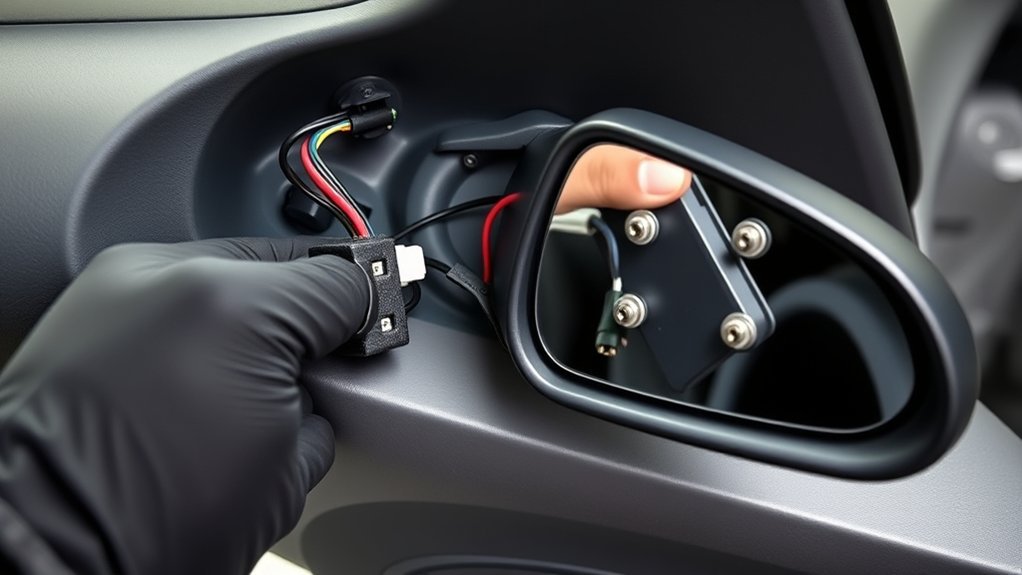
With the door panel removed, you can now access the wiring connections needed for the side view mirror replacement. Start by locating the plug; press and hold the tab to release it securely. You’ll identify two wiring connections behind the panel: the green wire for the inner door lock and the white wire for the inner door handle. Disconnect the green wire first to guarantee a smooth process. Make sure the wiring harness isn’t stuck to any components, like the plastic cover, to avoid damage. After removing the mirror, check that all wiring connections remain intact. When reinstalling, reverse the disconnection steps, ensuring each plug clicks into place for proper functionality and safety.
Side Mirror Installation Tips
Once you’ve verified that the new side mirror is properly positioned, you can move forward with the installation process. Here are some tips to overcome potential installation challenges, especially with different mirror types:
- Secure the Mirror: Hold the mirror steady and align the mounting points with the door frame before replacing the three securing nuts with a 10 mm socket.
- Reconnect Wiring: Press and hold the tab on the electrical plug, inserting it back into the socket until it clicks securely.
- Reattach Components: Align the plastic cover and secure it with the 10 mm screw. Finally, reattach the door panel, ensuring all screws and trim pieces are properly fastened.
Follow these steps for a smooth installation and enjoy your newly replaced side mirror!
How to Disconnect Wiring for the Door Lock and Handle
To disconnect the wiring for the door lock and handle, first, identify the two wires: the green wire for the inner door lock and the white wire for the inner door handle. Begin with the green wire; press and hold the tab on the plug, then pull it outwards to guarantee a secure release. Next, repeat this process for the white wire by pressing the tab and gently pulling the plug out to disconnect it safely. If the switch panel comes apart, reattach it before continuing. Always confirm that both wires are completely disconnected to uphold electrical safety and avoid any issues during your side view mirror replacement. Adhering to wiring color coding is essential for a smooth process.
Removing the Plastic Cover: A Detailed Process
Before you can access the side view mirror assembly, you’ll need to remove the plastic cover on the door. Follow these removal techniques carefully:
Before accessing the side view mirror assembly, removing the door’s plastic cover is essential. Follow the steps carefully for a successful removal.
- Locate the Screw: After removing the door panel, find the single 10 mm screw in the top left corner securing the plastic cover.
- Unscrew: Use a 10 mm socket and an impact gun to remove this screw. Confirm you keep it in a safe place for reassembly.
- Detach the Cover: Employ a clip remover tool to detach the plastic cover completely. Be cautious of the harness that may stick to it during removal.
Make sure the plastic cover is fully removed before moving on to further repairs or replacements.
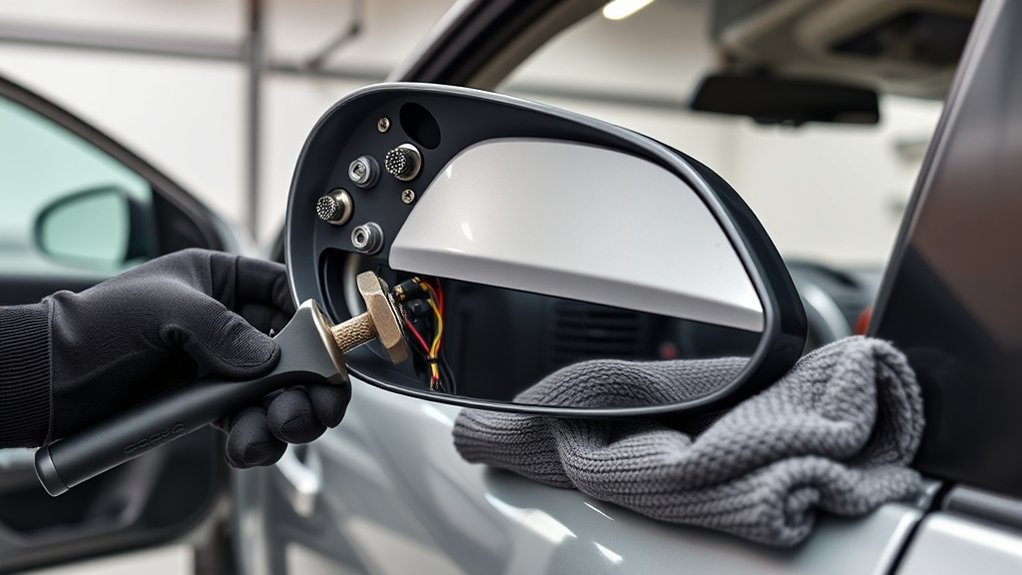
Essential Tips for Safely Removing Side Mirror Nuts
As you prepare to remove the side mirror nuts, making sure you have the right tools at hand—such as a socket wrench, extension, and a 10 mm socket—is essential for a smooth process. Start by carefully identifying the three nuts securing the side mirror; all must be removed for complete detachment. When unscrewing each nut, hold it with a finger to prevent it from dropping and getting lost. Exercise caution to avoid stripping the nuts, as this could complicate the removal. After you’ve removed all three nuts, double-check to make certain none are left behind; this will facilitate a seamless reinstallation of your new mirror. Finally, take a moment for mirror cleaning and adjustment once the new mirror is in place.
Safely Remove Your RAV4 Side Mirror

Begin by removing the door panel to access the side mirror. Follow these steps to safely detach your RAV4 side mirror:
- Unscrew screws behind the inner door handle cover and armrest trim, then pull the panel away from the door frame.
- Disconnect the wiring for the inner door lock and handle by pressing the tabs on the plugs.
- Unscrew the three 10 mm nuts securing the side mirror with a socket wrench, holding each nut to prevent dropping.
Once the nuts are removed, disconnect the side mirror plug by pressing the tab and gently pulling it out. Finally, rock the mirror to detach it completely from the door, ensuring you’re mindful of different mirror styles and required adjustments.
How to Reinstall Your Side Mirror After Replacement
To reinstall your side mirror, start by aligning it properly with the door and pressing it until it clicks into place. Next, reconnect the wiring harness by holding the tab while inserting it until it locks securely. Finally, secure the mirror by tightening the three nuts with a socket wrench to guarantee a firm fit.
Align Mirror Properly
When reinstalling your side mirror, proper alignment with the mounting bracket is essential to guarantee peak functionality. Follow these mirror alignment techniques to confirm a seamless installation:
- Carefully slide the side mirror into place, making sure it fits snugly against the door frame to eliminate any gaps.
- Reattach the wiring harness by aligning the connector and pressing it into place until you hear a click, confirming it’s secure.
- Once the mirror is positioned, hand-tighten the three nuts without overtightening to avoid damaging the mirror or mounting points.
After these steps, double-check the alignment and test the mirror adjustment methods for ideal functionality. This meticulous approach will confirm your side mirror operates efficiently, enhancing your driving experience.
Secure Nuts Firmly
After aligning the new side mirror, securing the nuts firmly is your next step in ensuring a stable installation. Start by threading all three securing nuts onto the bolts. Use a socket wrench with a 10 mm socket for nut tightening, applying enough pressure to hold the mirror alignment without overtightening, which could damage the mirror or mounting points. As you tighten each nut, hold it in place with your fingers to prevent it from falling into the door cavity. Once you’ve tightened all the nuts, double-check their security before proceeding. This meticulous attention to detail guarantees your side mirror remains stable and functional. Now, you’re prepared to reconnect the wiring harness for the side mirror.
Reconnect Wiring Harness
Reconnecting the wiring harness is an essential step in reinstalling your side mirror. Here’s how to guarantee a successful connection:
- Position and Secure: Confirm the mirror’s properly positioned and secured before proceeding.
- Align the Plugs: Locate the wiring plug from the vehicle and align it with the side mirror’s corresponding plug.
- Connect: Press and hold the tab on the wiring harness plug. Push it into the socket until you hear a click, confirming it’s securely connected.
Additionally, double-check that the green wire for the inner door lock and the white wire for the inner door handle are reattached. After wiring troubleshooting, test the side mirror’s functionalities, like adjustment and heating, before reassembling the door panel.
Avoid These Common Mistakes When Replacing Your Side Mirror
Replacing your side view mirror can be straightforward, but several common mistakes can complicate the process. First, always disconnect the vehicle battery to avoid electrical issues or accidental airbag deployment. When removing the door panel, handle it carefully—damaging clips or screws can lead to rattling sounds or improper reattachment. Another common pitfall is not following the correct order when disconnecting wiring; remove the green wire first to protect connectors. Additionally, use a magnetic tray to keep nuts and screws organized, preventing lost parts. Finally, make certain to double-check that all connections are secure and the mirror alignment is accurate before tightening the nuts. This guarantees ideal functionality and appearance for your newly replaced mirror.
Tips for Maintaining Your Side View Mirror After Replacement
To guarantee your newly replaced side view mirror remains in ideal condition, it’s essential to incorporate regular maintenance into your routine. Follow these tips for peak performance:
- Mirror Cleaning: Use a gentle glass cleaner to regularly clean the mirror, preventing dirt buildup and ensuring clear visibility.
- Protective Coating: Apply a protective coating or wax to the mirror surface. This helps repel water and reduces the risk of scratches.
- Alignment and Inspection: Periodically check the mirror’s alignment for peak visibility, adjusting as needed. Also, inspect the wiring and connections to prevent electrical issues.
Frequently Asked Questions
Can I Replace My Side View Mirror Myself?
Yes, you can replace your side view mirror yourself. With some basic tools, you’ll tackle DIY repairs efficiently. Just make sure you know the mirror types and follow a step-by-step guide for a successful installation.
How Much Does It Cost to Replace the Side Mirror on a Toyota RAV4?
Replacing a side mirror on your RAV4 typically costs between $150 and $600. Consider repair options like DIY to save money, as parts alone range from $50 to $100, excluding labor.
How to Replace a 2017 Toyota RAV4 Side Mirror?
So, you wanna be a mirror removal expert? Start by detaching the door panel, unscrew the mirror’s nuts, and unplug it. Follow up with mirror installation tips—reverse the process, and voilà, you’re a pro!
How Much Does Toyota Charge to Replace a Side Mirror?
Toyota charges between $300 to $600 for side mirror replacement costs at dealerships. This price typically includes parts, labor, and adjustments, particularly if your mirror has features like electric controls or heating.
Conclusion
Replacing your side view mirror on a Toyota RAV4 can seem intimidating, but with the right tools and guidance, it’s a manageable task. Remember, “a stitch in time saves nine”—addressing minor damages promptly can prevent bigger issues down the road. By following the steps outlined, you guarantee safety and visibility while maintaining your vehicle’s aesthetic. Keep your mirrors clean and check them regularly to extend their lifespan and enhance your driving experience.