
To change the oxygen sensor on your Toyota RAV4, first locate the rear O2 sensor after the catalytic converter. Unplug it by pressing the release button. Use a 7/8 inch box end wrench to remove the old sensor, tapping it gently with a dead blow hammer if needed. Apply high-temp anti-seize compound on the new sensor’s threads, thread it in by hand, and tighten to manufacturer torque. Finally, reset the check engine light and address any potential sensor issues.
What Oxygen Sensors Do in Your RAV4
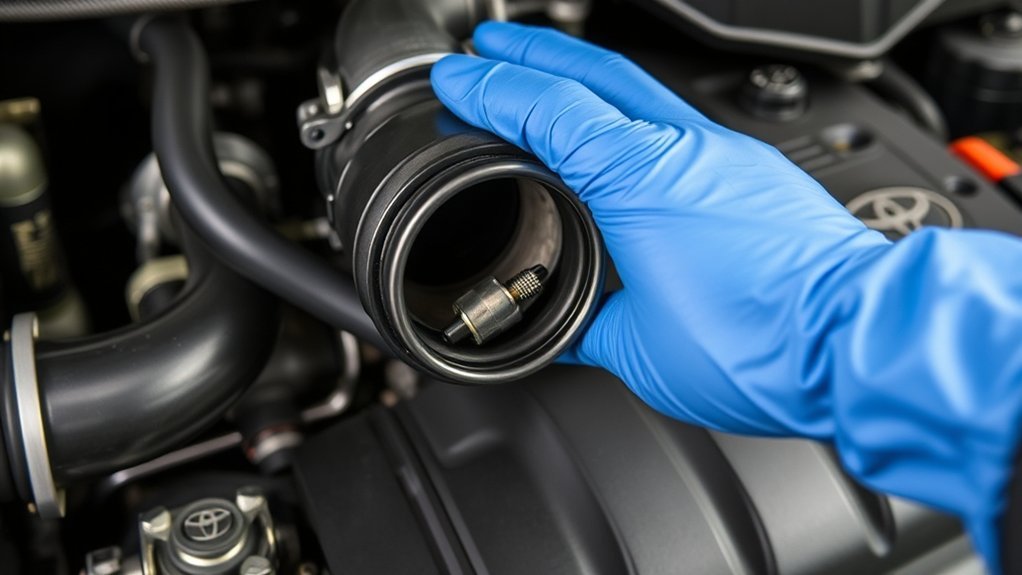
Oxygen sensors play an essential role in your Toyota RAV4’s engine management system by actively monitoring the level of oxygen in the exhaust gases. These sensors provide vital data to the engine control module (ECM), enabling it to adjust the air-fuel mixture for peak combustion efficiency. Typically, your RAV4 features two types of oxygen sensors: upstream sensors, located before the catalytic converter, measure the air-fuel ratio, while downstream sensors, positioned after the catalytic converter, assess its efficiency.
When an oxygen sensor malfunctions, you may experience decreased fuel efficiency, increased emissions, and engine performance issues, often triggering the check engine light (MIL). To maintain compliance with emission standards and guarantee your RAV4 runs smoothly, it’s important to monitor the health of these sensors. Generally, you should consider replacement around 60,000 to 100,000 miles, or sooner if diagnostic trouble codes (DTCs) appear.
Essential Tools for Changing Your Oxygen Sensor
To successfully change the oxygen sensor on your Toyota RAV4, you’ll need a few essential tools to guarantee a smooth process. A box end 7/8 wrench is vital for removing the sensor, while a dead blow hammer can help if the sensor is stuck. Additionally, having wire cutters on hand will simplify cutting the old sensor’s wires for easier access during removal.
[Products Worth Considering]
O2 Sensor Socket Set: The package includes 1PC 1/2" Dr. x 7/8" (22mm) offset oxygen sensor socket, 1PC 3/8" Dr. x 7/8" (22mm) offset oxygen sensor socket, 1PC 3/8" Dr. x 7/8" (22mm) long oxygen sensor socket, 1PC M12 x 1.25mm thread chaser and 1PC M18 x 1.5mm thread chaser

【Design】Standard 6 point with low profile and slotted design to enable you remove oxygen sensors with the wiring harness still attached, and the socket is offset and compact which allows extra leverage even in hard to reach spots.

Comprehensive Size Options: This Orion Motor Tech oxygen sensor socket set includes ten 1/2" and 3/8" drive sockets covering sizes 22mm, 27mm, 29mm, 7/8", 1", & 1-1/16", along with two 3/8" drive thread chasers to help you get the job done right
Recommended Tool List
Changing an oxygen sensor on your Toyota RAV4 requires a specific set of tools to guarantee the job is done efficiently and effectively. You’ll need a box end 7/8 wrench for a secure grip while loosening and tightening the O2 sensor. A dead blow hammer can help gently tap a stubborn sensor, while a propane torch may be necessary to heat the area around the sensor if corrosion is present. Wire cutters are essential for snipping the old sensor’s wires for easier access. Finally, don’t forget to use a high temp anti-seize compound on the threads of the new sensor to prevent future seizing. Having these tools on hand will streamline your oxygen sensor replacement process.
Essential Safety Equipment
When working on your Toyota RAV4, ensuring your safety is paramount, especially during tasks like replacing the oxygen sensor. Start with a box end wrench, specifically 7/8 inch, as it offers excellent grip and leverage for sensor removal. If you encounter a stubborn sensor, gently use a dead blow hammer to tap the wrench without causing damage. Wire cutters are essential for snipping any wires to disconnect the old sensor, allowing for easier access. If the sensor is particularly difficult to remove, a propane torch can help heat the surrounding area. Finally, apply high temp anti-seize compound on the new sensor threads; this prevents future seizing, ensuring you can easily remove it when necessary.
How to Identify When Your Oxygen Sensor Needs Replacement?
How can you tell if your oxygen sensor needs replacement? First, watch for the check engine light illuminating your dashboard. This light can indicate issues, including those related to the oxygen sensor, often accompanied by diagnostic trouble codes like P0137, which signals low voltage or performance problems. Additionally, if you notice a drop in engine performance or decreased fuel efficiency, it might be time to reflect on replacing the oxygen sensor. Unusual exhaust odors or a rough idle are also telltale signs, as these conditions suggest an improper air-fuel mixture due to sensor failure. Finally, if your vehicle fails an emissions test or you see a significant increase in emissions, it’s essential to address the oxygen sensor. Regular vehicle diagnostics can help you catch these issues early, preventing more serious engine problems down the line.
Step-by-Step Guide to Removing the Old Oxygen Sensor
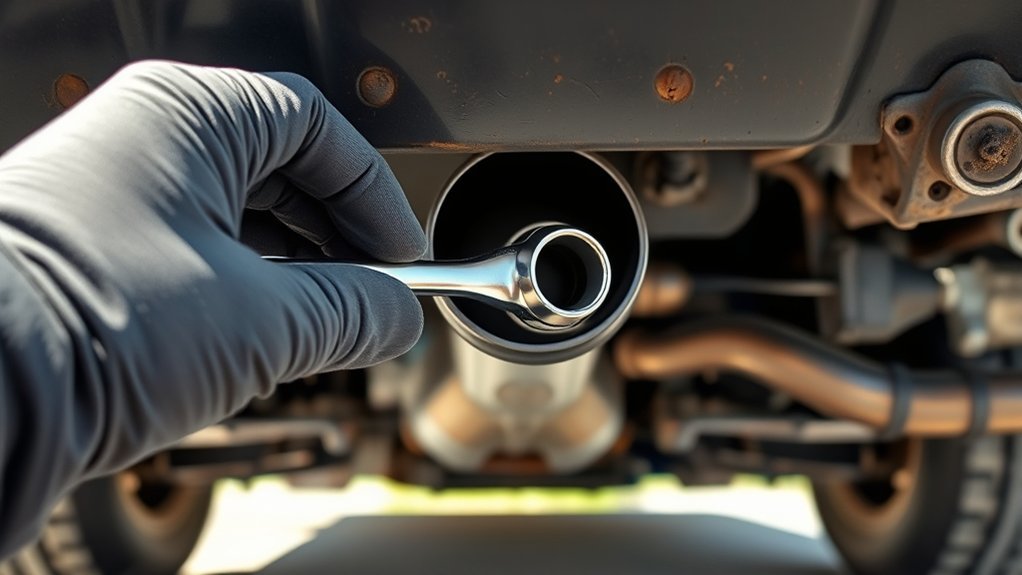
To start the removal process of the old oxygen sensor on your Toyota RAV4, first locate the rear O2 sensor, which is generally situated after the catalytic converter along the exhaust pipe. Begin by unplugging the existing O2 sensor; press the release button on the connector to disconnect the wiring harness. If the sensor proves stubborn, you may need to use wire cutters to snip the wires for easier access.
Next, attach a 7/8 inch box end wrench to the O2 sensor. If you encounter resistance, gently tap the wrench with a dead blow hammer to loosen it. Once you’ve successfully loosened the sensor, carefully unscrew it from the exhaust system. Take your time to guarantee you don’t damage the threads during this process. Following these steps will help you effectively remove the old sensor, preparing you for the next stage of your oxygen sensor replacement.
[Products Worth Considering]

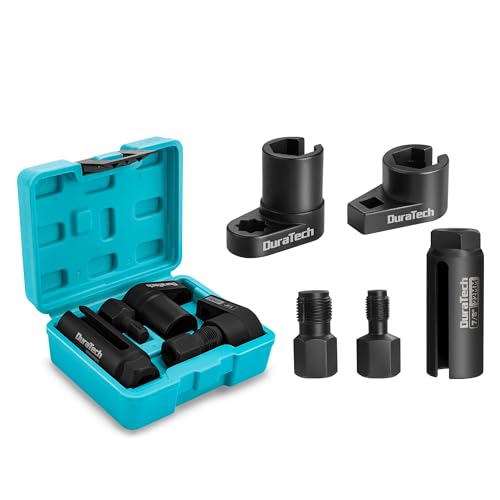
Product Size: The O2 sensor socket has a standard 6-point shape. The socket size is 22mm/(7/8"), which can fit most oxygen sensors. The square hole size is 10mm/(3/8"), suitable for 3/8" drive ratchet or breaker bar

O2 Sensor Socket Set: The package includes 1/2" Dr. x 1-3/16" (29mm) vacuum switch socket, 1/2" Dr. x 7/8" (22mm) vacuum switch socket, 1/2" Dr. x 1-1/16" (27mm) thermal sensor switch socket, 3/8" Dr. x 1" & 1-1/16" oil pressure sending unit socket, 3/8" Dr. x 7/8" long oxygen sensor socket, 3/8" Dr. x 7/8" offset oxygen sensor wrench, and 1/2" Dr. x 7/8" heated oxygen sensor socket

【Professional Oxygen Sensor Removal Tool】 This set is designed for the removal, installation, and maintenance of oxygen sensors. It includes a 7/8 in (22mm) oxygen sensor socket with 1/2 in drive, plus 3/8 in and 1/2 in drive offset wrenches for different working angles, compatible with most American, Japanese, and European vehicles. Ideal for both professional mechanics and DIY car owners to replace oxygen sensors efficiently.
Installing the New Oxygen Sensor: Best Practices

Before you install the new oxygen sensor, applying a high-temp anti-seize compound to the threads is essential for preventing future corrosion and guaranteeing easier removal down the line. Carefully thread the new sensor into the exhaust pipe by hand to avoid cross-threading. Once in place, tighten it to the manufacturer’s specified torque to guarantee a secure fit.
After securing the sensor, it’s time to reconnect the sensor’s electrical connector. Align it properly and press until you hear a click, guaranteeing a solid connection to prevent any electrical issues. Double-check that the wiring is routed correctly, free from obstructions or heat sources that could cause damage during operation.
[Products Worth Considering]

Copper Anti Seize Lubricant: Highly refined blend of copper powder, lithium composite and petroleum distillates. Protects metal parts from rust, corrosion, galling, and seizing.

Copper Anti-Seize Lubricant: Highly refined blend of copper powder, lithium composite and petroleum distillates. Protects metal parts from rust, corrosion, galling, and seizing.

Fit type: Vehicle Specific
Resetting the Check Engine Light
To reset the check engine light on your Toyota RAV4 after replacing the oxygen sensor, you’ll need either an OBD-II scanner or a simple tool: a wrench for the battery terminal. Start by disconnecting the negative battery terminal for about 15 minutes or use the scanner to clear the trouble codes directly. Make sure the new sensor is installed correctly to prevent the light from reappearing.
Tools For Resetting Process
Resetting the check engine light on your Toyota RAV4 requires a few essential tools that make the process straightforward. The most effective tool is an OBD-II scanner, which allows you to directly reset the check engine light by clearing trouble codes associated with the oxygen sensor. Here’s a quick overview of the tools you may consider:
| Tool | Purpose |
|---|---|
| OBD-II Scanner | Clear trouble codes and reset check engine light |
| Wrench | Disconnect battery terminal (if needed) |
| Fuse Puller | Remove engine control module fuse |
| Multimeter | Check electrical connections if necessary |
| User Manual | Reference for specific procedures |
Steps To Clear Codes
Once you’ve replaced the oxygen sensor on your Toyota RAV4, clearing the check engine light is vital to confirm the repair was successful. You can do this by disconnecting the negative battery terminal for about 15 minutes, which resets the vehicle’s computer. Alternatively, using an OBD-II scanner offers a quicker method to erase stored trouble codes, including those tied to the oxygen sensor, effectively clearing codes and turning off the check engine light. Some models might allow you to clear codes by cycling the ignition on and off, but this isn’t guaranteed. After resetting, it’s advisable to drive the vehicle briefly, as some systems require a drive cycle to verify the check engine light stays off.
Common O2 Sensor Issues and How to Troubleshoot Them
When dealing with common O2 sensor issues, recognizing the symptoms early can save you from more significant problems down the road. Code P0137, indicating low voltage in the oxygen sensor circuit, can lead to poor fuel efficiency and increased emissions. Watch for signs like rough idle, poor acceleration, and the Check Engine Light illuminating.
Start your troubleshooting by inspecting the wiring and connectors for damage or corrosion. These can severely impact sensor performance. Next, use a multimeter to measure the voltage output of the O2 sensor. A healthy sensor typically fluctuates between 0.1 to 0.9 volts.
Here’s a quick reference table:
| Issue | Symptoms | Troubleshooting Steps |
|---|---|---|
| Low Voltage | Check Engine Light (P0137) | Inspect wiring and connectors |
| Rough Idle | Poor acceleration | Measure voltage output |
| Increased Emissions | Poor fuel efficiency | Replace with OEM part (DENSO) |
Maintaining Your Oxygen Sensor for Longevity
To guarantee your oxygen sensor remains effective over time, regular maintenance is essential. By following these guidelines, you can enhance its performance and longevity:
Regular maintenance of your oxygen sensor is crucial for optimal performance and longevity. Follow these guidelines to ensure its effectiveness.
- Inspect regularly: Check the oxygen sensor for signs of damage or corrosion, as these can drastically affect its operation.
- Use anti-seize compound: Apply high-temperature anti-seize on the threads during installation to prevent seizing and facilitate future replacements.
- Calibrate the air-fuel mixture: Ascertain your vehicle’s air-fuel mixture is correctly calibrated; a rich or lean mixture can lead to premature sensor failure.
- Choose quality parts: Avoid low-quality aftermarket sensors; opt for OEM options that provide better performance and durability.
Frequently Asked Questions
How Much Does It Cost to Replace the Oxygen Sensor on a Toyota RAV4?
Replacing an oxygen sensor on a Toyota RAV4 typically costs between $100 to $300. If you’re considering a DIY sensor replacement, watch for sensor malfunction signs to guarantee a successful and cost-effective repair.
Can You Replace O2 Sensors Yourself?
Yes, you can replace O2 sensors yourself. Picture diagnosing your vehicle, confidently tackling sensor troubleshooting with basic tools. Embracing DIY car maintenance empowers you to enhance vehicle diagnostics and save money while learning valuable skills.
Where Is the Oxygen Sensor on a RAV4?
The oxygen sensor location on your RAV4 engine varies; typically, the rear sensor (Bank 1, Sensor 2) sits on the exhaust pipe. Consult your service manual for precise identification of sensor types and positions.
How Many Oxygen Sensors Does a Toyota RAV4 Have?
Your Toyota RAV4 typically has two oxygen sensors: upstream and downstream. Think of them as the lungs of your vehicle, essential for emission control. Regular maintenance guarantees they function properly, enhancing performance and efficiency.
Conclusion
So, you’ve tackled the oxygen sensor replacement like a pro, only to realize it was just a symptom of a bigger issue—classic, right? But hey, at least your RAV4’s fuel efficiency should improve! Remember, regular maintenance can prevent future replacements, so don’t let that dashboard light catch you off guard again. Embrace your inner mechanic, and keep those sensors in check; after all, it’s not just about fixing problems, but avoiding them in the first place.


Leave a Reply