To change the front brake pads on your Toyota RAV4, first gather the necessary tools like a 3-ton jack, sockets, and new Bosch brake pads. Secure your vehicle on a flat surface, engaging the parking brake and using wheel chocks. Remove the wheel, detach the caliper, and replace the old pads with the new ones, lubricating the caliper bolts. Reassemble everything and guarantee proper torque settings. Stick around to learn more about post-installation checks and ongoing maintenance.
Gather Your Tools and Materials for Brake Replacement
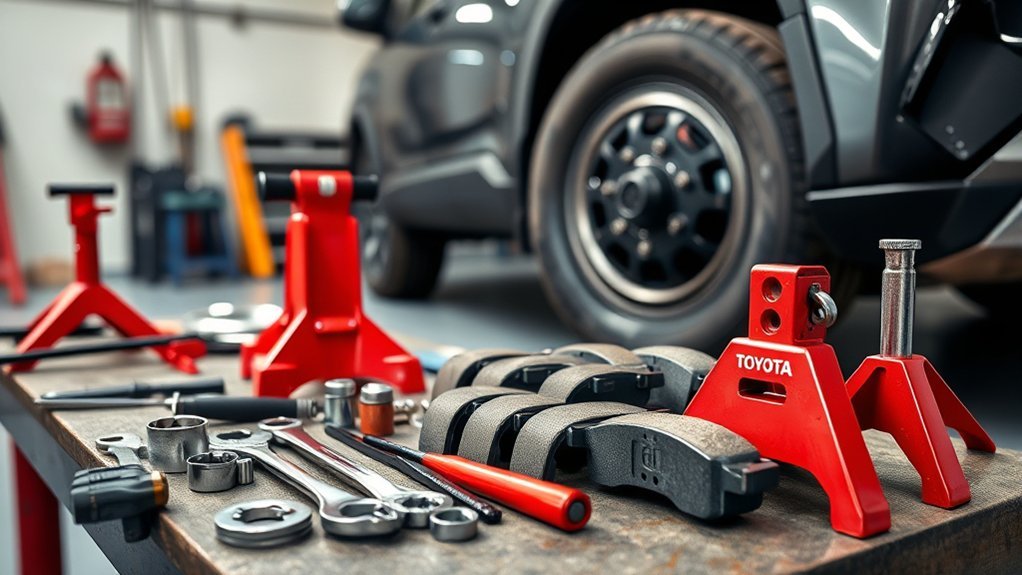
Before you begin changing the front brake pads on your Toyota RAV4, it’s important to gather the necessary tools and materials. Start with a 3-ton jack and jack stands to lift your vehicle securely. You’ll need a size 14 socket to remove the caliper bolts, so don’t forget that. Make sure you have Bosch front brake pads (part number BE 207 6H) along with any necessary hardware, including clips and metal pieces. Keep synthetic grease on hand to lubricate the caliper bolts, promoting smooth operation of the brake components. A flat screwdriver will also be essential for pushing back the caliper piston if needed during the replacement process. Finally, have a torque wrench ready to secure the caliper bolts to the specified torque of 25 ft-lb after installing the new brake pads. Gathering your tools and materials effectively sets you up for success in your brake replacement project.
Safety First: Secure Your Vehicle Properly
Once you’ve gathered your tools and materials, it’s time to fasten your vehicle properly. Begin by parking your Toyota RAV4 on a flat, stable surface to prevent any movement. Engage the parking brake to further enhance stability, and place wheel chocks behind the rear wheels. This step is essential for preventing any unexpected shifts while you work.
Next, use a professional floor jack to lift your vehicle, making certain the jack is positioned correctly and in good condition. Always follow this with jack stands to support the vehicle securely; never rely solely on the jack. Double-check that the stands are properly placed and can handle the vehicle’s weight. This good practice minimizes risks and guarantees that you can work safely underneath or around your vehicle. Remember, your safety is paramount during this process, so take the time to fasten your RAV4 appropriately.
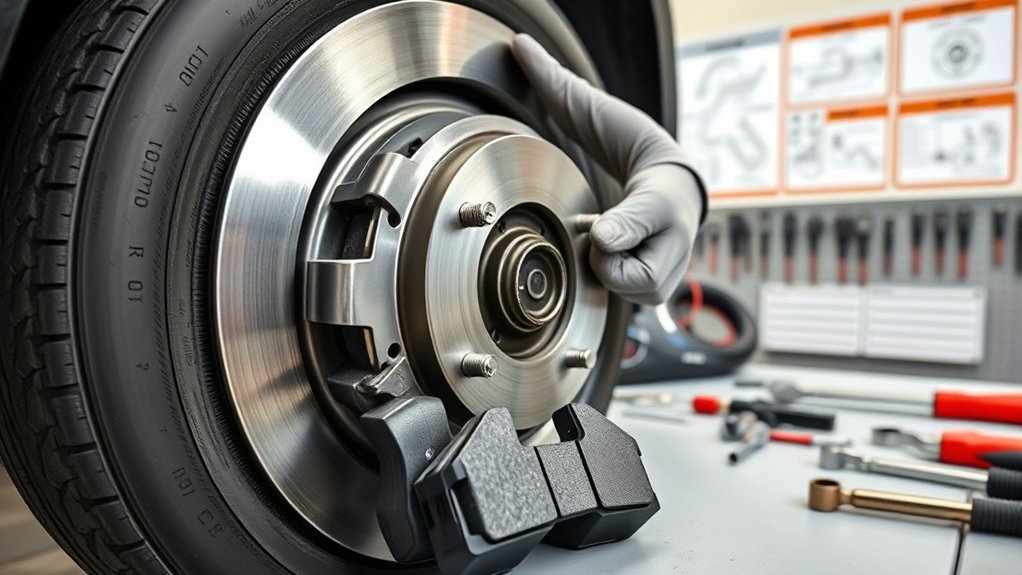
Remove the Wheel and Inspect Brake Components for Damage
Remove the wheel by using a size 19 socket to unfasten the wheel bolts; this grants you direct access to the brake components. Before diving into the inspection, make certain the vehicle is secured with a professional floor jack and jack stands for stability.
Once you’ve removed the wheel, inspect the brake components thoroughly. Pay special attention to the following:
Inspect the brake components carefully after wheel removal, focusing on rotors, pads, and the hardware area for optimal performance.
- Brake Rotors: Look for gouges or signs of pulsation, as these could mean you need a rotor replacement.
- Brake Pads: Check the thickness; if they’re less than 1/8 inch thick, it’s time to replace them.
- Hardware Area: Clean off any rust or debris to guarantee peak performance when you install new brake pads.
This inspection is essential for your safety and the longevity of your braking system. Take the time to do it right!
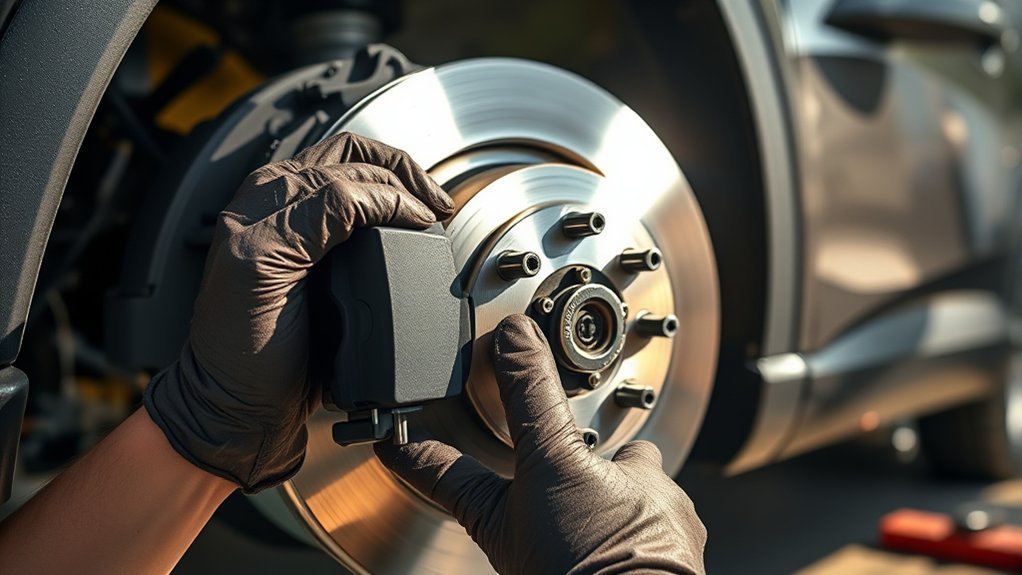
Detach the Caliper and Replace Brake Pads
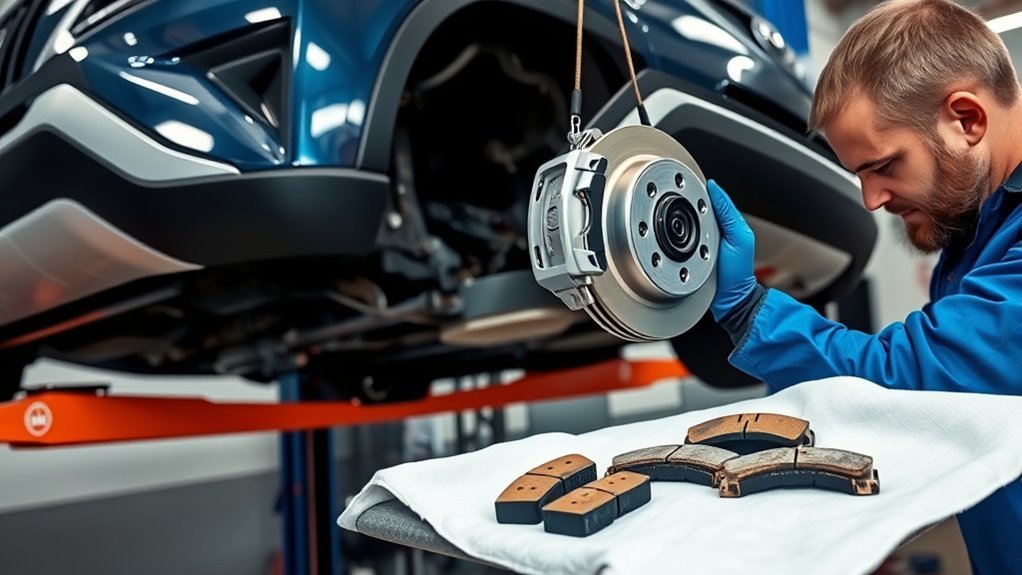
To detach the caliper, you’ll need a size 14 socket to remove the two caliper bolts. Once the caliper is free, push the piston back to make room for the new brake pads. Follow this step-by-step process to guarantee a proper installation and maintain braking efficiency.
Tools Required For Job
When tackling the task of detaching the caliper and replacing brake pads on a 2019 Toyota RAV4, you’ll need a few essential tools to guarantee the job goes smoothly. Here’s what you should have on hand:
- Size 14 socket: This is vital for removing the two bolts securing the caliper.
- Flat screwdriver: You’ll use this to push back the caliper piston, creating space for the new brake pads.
- Synthetic grease: Lubricate the caliper bolts with this before reinstallation to ensure peak performance.
Having these tools ready will empower you to complete the job efficiently, giving you the freedom to maintain your vehicle with confidence and precision.
Step-by-Step Detachment Process
With the right tools in hand, you’re ready to begin the step-by-step process for detaching the caliper and replacing the brake pads on your 2019 Toyota RAV4. Start by securing the vehicle with a professional floor jack and stands; this is a good idea for safety. Remove the wheel by unscrewing the bolts, and then use a size 14 socket to take off the two caliper bolts. Gently push the caliper piston back using a flat screwdriver to create space for the new pads. Replace the old pads with new Bosch pads, ensuring all hardware, including clips and metal pieces, is correctly installed and lubricated. Finally, torque the caliper bolts to 25 ft-lb for proper reassembly.
Installing New Brake Pads
Start by securing the caliper to guarantee a smooth installation of your new brake pads. First, detach the caliper by removing the two bolts with a size 14 socket. If needed, push the caliper piston back with a flat screwdriver to create space. Now, it’s time to install the new brake pads:
- Replace the old pads with the new Bosch pads.
- Confirm you install the new hardware clips correctly.
- Lubricate the caliper bolts before reattaching.
Once everything’s in place, torque the caliper bolts to 25 ft-lb. Finally, reassemble the wheel, ensuring you torque it to 76-80 ft-lb for proper installation. You’re now ready to hit the road with confidence!
Lubricate and Reassemble the Caliper
Lubricate the caliper bolts using synthetic grease to confirm smooth movement during reassembly and to prevent corrosion. This step is essential for maintaining performance and extending the lifespan of your braking system. Next, apply caliper grease to the hardware and metal clips; this enhances their performance and reduces noise when the brakes are engaged.
Position the caliper correctly over the new brake pads, guaranteeing proper alignment for peak function. Once secured, torque the caliper bolts to 25 ft-lb to firmly hold the caliper in place. After tightening, double-check that all components are securely fastened and verify there’s no interference with the brake rotor. This thorough inspection helps confirm safe and effective braking. Proper lubrication and reassembly will contribute to a smoother driving experience, allowing you to enjoy your Toyota RAV4 with confidence.
How to Put the Wheel Back On and Get the Right Torque
After replacing the brake pads, position the wheel onto the hub, ensuring the holes align with the lug bolts. Hand-tighten the lug nuts before lowering the vehicle, and then use a torque wrench to secure them to 76-80 ft-lb. Remember to tighten the lug nuts in a star pattern for even pressure distribution to maintain brake rotor integrity.
Proper Wheel Placement Techniques
When replacing the front brake pads on your Toyota RAV4, proper wheel placement is crucial for safe driving. After you lift the car and fit the wheel onto the hub, follow these steps to guarantee a secure installation:
- Align the holes with the wheel bolts for a proper fit.
- Hand-tighten the wheel bolts to secure the wheel in place.
- Tighten the bolts in a crisscross pattern to evenly distribute pressure.
Always double-check that the wheel is firmly seated and that all bolts are tightened. Proper torque guarantees safe driving, giving you the freedom to hit the road with confidence. Remember, a well-secured wheel is critical for your journey and peace of mind.
Correct Torque Specifications
Securing the wheel properly is just the first step; applying the correct torque specifications is what guarantees it stays in place. For your 2019 Toyota RAV4, make sure you torque the wheel bolts to a specification of 76-80 ft-lb. Using a torque wrench, apply the correct torque evenly to prevent warping or damaging the brake components. Remember to tighten the wheel bolts in a crisscross pattern for even pressure distribution.
| Bolt Position | Torque (ft-lb) | Notes |
|---|---|---|
| 1 | 76-80 | Start here |
| 2 | 76-80 | Crisscross pattern |
| 3 | 76-80 | Verify even pressure |
| 4 | 76-80 | Double-check |
| 5 | 76-80 | Final verification |
Always double-check that all bolts are securely fastened.
What to Check After Brake Installation?
Once you’ve installed the new brake pads on your Toyota RAV4, it’s crucial to perform a series of checks to verify everything is functioning correctly. These steps guarantee your safety and the longevity of your brakes:
- Torque Specifications: Make sure all bolts are tightened to the manufacturer’s specifications—25 ft-lb for caliper bolts and 76-80 ft-lb for wheel bolts. Look for that little sticker indicating proper torque settings.
- Brake Functionality: Press the brake pedal several times to seat the new pads against the rotors properly. This confirms they’re ready for action.
- Visual Inspection: Conduct a thorough visual check of all brake components, confirming they’re securely in place and free from leaks or damage.
After these checks, test your electronic parking brake by engaging and disengaging it. This final step confirms everything operates smoothly, giving you the freedom to drive with confidence.
Tips for Ongoing Brake Maintenance and Inspection
To maintain ideal braking performance in your Toyota RAV4, regularly inspect your brake system and address any issues promptly. Start by checking the thickness of your brake pads; if they’re worn down to less than 3mm, replace them to guarantee safety. During maintenance, clean brake components like calipers and hardware to prevent rust buildup, which can hinder performance. Lubricate caliper bolts and hardware with synthetic grease to reduce friction and extend component lifespan. After any brake service, always test the system by engaging and disengaging the parking brake to confirm everything looks good. Don’t forget to monitor your rotor condition; if you feel gouges or pulsation while braking, consider resurfacing or replacing them. Keeping an eye on these details will help you maintain effective braking, enhancing both performance and safety on the road.
Frequently Asked Questions
Can I Replace My Toyota Brake Pads Myself?
Yes, you can replace your Toyota brake pads yourself. With the right brake pad tools, like a size 14 socket and flat screwdriver, you’ll manage the process efficiently, ensuring proper torque settings for safety.
How to Put Electronic Parking Brake in Service Mode on a Toyota?
Like a knight preparing for battle, you must first switch the ignition to accessory mode. Press the brake pedal, cycle the parking brake switch, and watch for the flashing light indicating Service Mode is engaged.
How Much Are the Front Brake Pads for a Toyota RAV4?
Front brake pad pricing for a Toyota RAV4 typically ranges from $30 to $80. Consider additional costs for hardware, and remember that regular maintenance can save you from more expensive repairs down the line.
Can I Replace My Own Front Brake Pads?
Absolutely, you can replace your own front brake pads! With basic brake pad tools and a bit of know-how, you’ll feel empowered tackling this DIY project, ensuring your vehicle’s safety while saving some cash.
Conclusion
By following these steps, you’ve successfully changed the front brake pads on your Toyota RAV4. Coincidentally, taking the time to inspect your brakes regularly can save you from unexpected issues down the road. Remember, proper maintenance not only enhances your vehicle’s performance but also guarantees your safety. So, keep an eye on your brake system and address any concerns promptly. With your newly installed pads, you’re now ready to hit the road with confidence!