
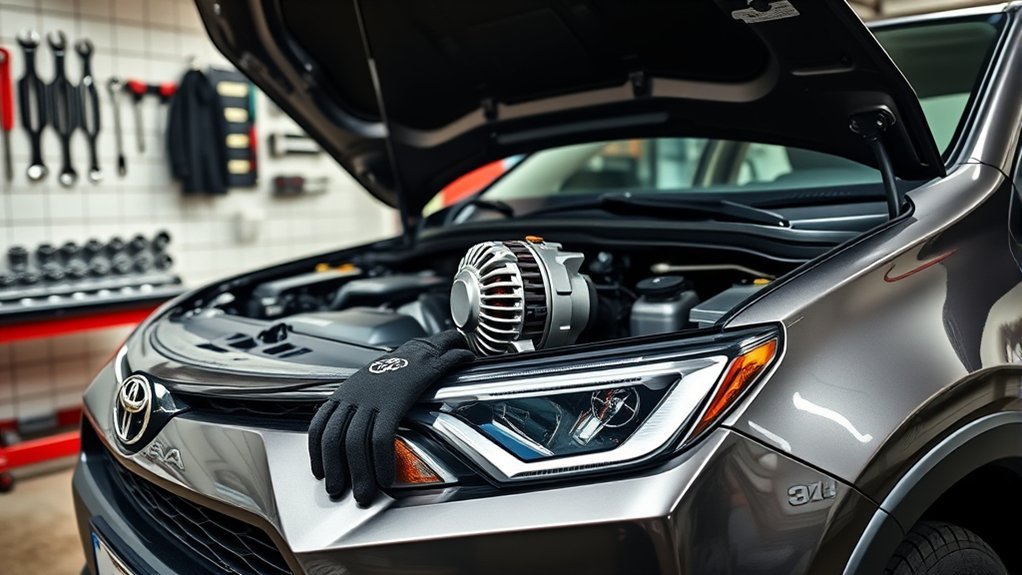
To change the alternator on your Toyota RAV4, first disconnect the battery for safety. Remove the serpentine belt by rotating the tensioner counterclockwise and slipping the belt off. Next, disconnect the wiring and remove two bolts securing the alternator. Install the new alternator, secure it with bolts, and route the serpentine belt back on. Finally, verify all connections are tight and the belt is seated correctly before reconnecting the battery. More details will guide you through each step.
Essential Steps to Prepare for Your Alternator Replacement
Before you plunge into replacing the alternator on your Toyota RAV4, it’s important to prepare properly to avoid any mishaps. Start by disconnecting the battery; this step is vital for your safety and to prevent electrical shocks. Once you’ve done that, inspect all electrical connections associated with the alternator. Check for any corrosion or damage, as these issues can hinder reliable operation after installation.
Next, familiarize yourself with the serpentine belt routing and the tensioner mechanism. This knowledge will be invaluable when you need to remove and later reinstall the belt.
Gather the necessary tools, including a 14mm hex wrench, a ratcheting wrench, and a punch. Finally, before removing the alternator, test its voltage output to confirm it’s faulty. Taking these steps guarantees a smoother replacement process and empowers you to reclaim your RAV4’s performance.
[Products Worth Considering]

[Vehicle Fitment]: Compatible with Toyota RAV4 2013-2017 L4 2.5L (Fits FWD only), RAV4 2018 L4 2.5L (Fits FWD only; Except Japan Built Models) — FWD(Front-Wheel Drive) Only; The Alternator comes with 1-Pin Plug (Not 4-Pin Plug)

【Exact Fit & Broad Compatibility】: Direct replacement alternator fit for (27060-28300,27060-28301,27060-2830184,104210-4790,104210-4791,11201). Verify your vehicle details and part number for a perfect, hassle-free fitment

Alternator Compatible with: for Toyota Camry 2.5L 2012-2015, for Toyota RAV4 2.5L 2009-2012, for Scion tC 2.5L 2011-2016.
Step-by-Step Guide to Removing the Serpentine Belt
Start by locating the auto tensioner on your Toyota RAV4. You’ll need a 14mm wrench to rotate the tensioner, releasing the tension on the serpentine belt. Here’s how to proceed:
- Use the 14mm wrench to rotate the auto tensioner counterclockwise.
- For better leverage, hold the tensioner open with a second wrench while you slip the belt off the pulleys.
- Take note of the serpentine belt routing to guarantee correct reinstallation.
- Remove any plastic clips securing the wiring loom to gain better access.
Once the belt is off, inspect it for wear or damage. This step is vital as it determines if you need to replace the serpentine belt during the alternator change. Following these steps will make sure you’re well-prepared for the next phase of your alternator replacement.
[Products Worth Considering]

Fits the special bolt that secures the pulley to the belt tensioner on most 1ZZ and all 2ZZ Toyota engines

Combining the innovation of a GEARWRENCH ratcheting wrench with the requirements of the serpentine belt removal tool to provide the best possible combination

[Vehicle Fitment-1]: "For Toyota fits L4 2.5L GAS Only, Not HYBRID": Compatible with Toyota Camry 2018-2024 L4 2.5L, RAV4 2019-2025 L4 2.5L, Avalon 2021 L4 2.5L
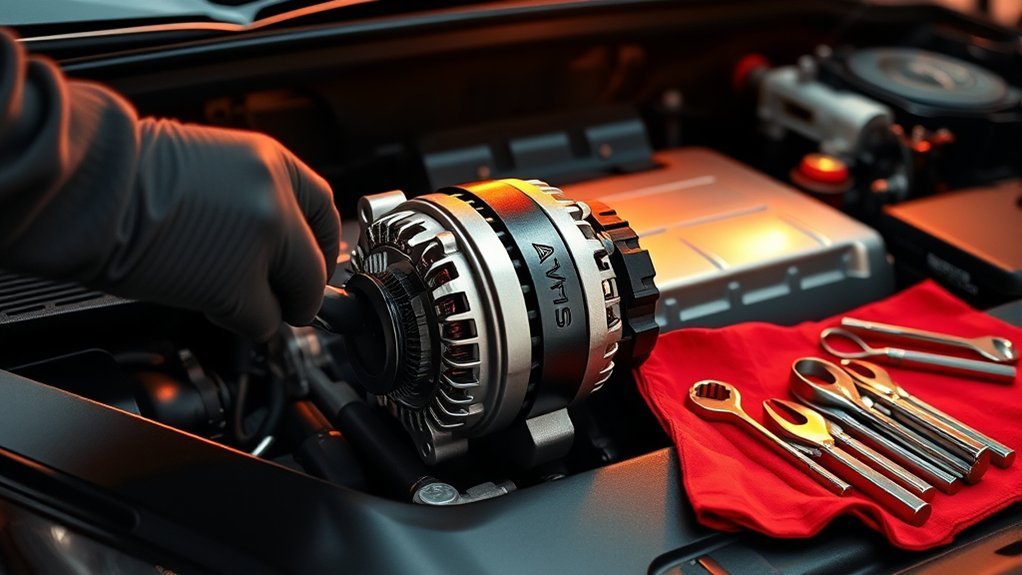
Disconnect and Install Your New Alternator
With the serpentine belt removed and any necessary components cleared, it’s time to disconnect the old alternator. Start by removing the 10mm nut securing the wiring loom and oil pressure sensor connector to create additional clearance. Next, locate and remove the two bolts securing the alternator using a stubby ratcheting wrench for those hard-to-reach areas.
| Action | Tool Required | Notes |
|---|---|---|
| Remove wiring loom nut | 10mm socket | Guarantee clearance for access |
| Remove two securing bolts | Stubby ratcheting wrench | Tight spaces may require finesse |
| Loosen bracket bolt | Socket wrench | Provides more room for removal |
| Secure new alternator bolts | Torque wrench | Start with top bolt first |
After disconnecting, loosen the bracket bolt for more space, then pull out the old alternator. You’re ready to install the new one!
[Products Worth Considering]

[Vehicle Fitment]:Alternator compatible with 2012-2015 Toyota Camry 2.5L(To 9/2014), 2009 2010 2011 2012 Toyota RAV4 2.5L(2010-2012 2494CC Only),2011-2016 tC 2.5L

[COMPATIBLE VEHICLE] —- Alternator fit for Toyota for Camry 2.5L 2012-2015 | for Toyota for RAV4 2.5L 2009-2012 | for Scion for tC 2.5L 2011-2016

Premium Alternators: Alternators are tested by high thermal environment and high power demand to ensure product quality and durability.
Install the Serpentine Belt Properly

Installing the serpentine belt on your Toyota RAV4 requires careful attention to the routing diagram typically found on a sticker in the engine bay. Follow these steps to install the serpentine belt properly:
Installing your Toyota RAV4’s serpentine belt requires following the routing diagram in the engine bay for proper alignment.
- Start by placing the belt around the alternator pulley.
- Route the belt over the remaining pulleys, maintaining tension throughout.
- Use a 14mm wrench to rotate the auto tensioner, allowing you to slip the belt over the last pulley.
- Verify the belt is fully seated in all grooves.
After securing the belt, double-check the belt path and alignment with all pulleys to avoid misalignment that could lead to premature wear or failure. Remember to check the bolt that holds the tensioner in place to confirm it’s secure. Finally, spin the belt by hand to ensure it’s properly installed and free from any obstructions before starting the engine.
Final Checks Before Starting Your RAV4
Before you fire up your RAV4, it’s crucial to conduct a series of final checks to make certain everything’s in order. First, verify the serpentine belt is properly seated in all pulley grooves; this prevents misalignment and potential damage. Next, double-check that all electrical connections, especially alternator wiring and the oil pressure sensor, are securely reattached—this maintains vehicle functionality. Then, confirm that both alternator bolts are tightened securely to avoid movement or noise during operation.
Don’t forget to inspect your workspace; make sure no tools or small parts are left behind that could interfere with what’s going. Finally, reconnect the battery and expect a brief engine run followed by shutdown—this is normal and indicates the vehicle’s systems are resetting. By completing these checks, you’ll be ready to enjoy the freedom of driving your RAV4 with confidence.
Frequently Asked Questions
How Long Does It Take to Replace an Alternator in a RAV4?
Replacing an alternator in a RAV4 typically takes 1 to 3 hours. For efficient completion, focus on your time estimation during the replacement process, ensuring you have the right tools and clear serpentine belt routing.
Can I Change My Alternator Myself?
Absolutely, you can change your alternator yourself! Gather your tools—like a 14mm socket wrench—and prioritize safety by disconnecting the battery. Follow a step-by-step guide to guarantee a smooth, liberating experience in your mechanical endeavor.
How Much Does It Cost to Replace an Alternator in a Toyota RAV4?
Replacing an alternator in your Toyota RAV4 typically costs between $300 and $800. Factors affecting alternator prices include labor rates, model year, and whether you choose OEM or aftermarket parts. Always compare quotes for the best deal.
What’s the Most Common Problem With a Toyota RAV4?
Like a ticking time bomb, engine issues and electrical faults plague Toyota RAV4s. You’ll often face overheating from water pump failures and premature suspension wear, so regular maintenance is essential to stave off these problems.
Conclusion
You’ve successfully changed your alternator, ensuring your RAV4 runs smoothly again. Double-check your connections, verify the belt’s tension, and inspect for any leaks. Remember, a well-installed alternator means reliable power, efficient performance, and peace of mind on the road. So, start your engine, listen for any unusual sounds, and hit the road with confidence. With these simple steps, you’re back in control, ready to tackle your next adventure without a hitch.


Leave a Reply