To remove the dashboard in your Toyota RAV4, start by disconnecting the battery to avoid electrical issues. Use basic tools like sockets and trim removal tools to take off panels and reveal fasteners. Carefully detach screws and bolts, ensuring all connections are unplugged. Document your disassembly for easier reassembly. Inspect wiring and clean parts before reinstalling. With these steps, you’ll be on your way, and there’s more to discover as you tackle this project.
Essential Tools for Dashboard Removal: What You Need
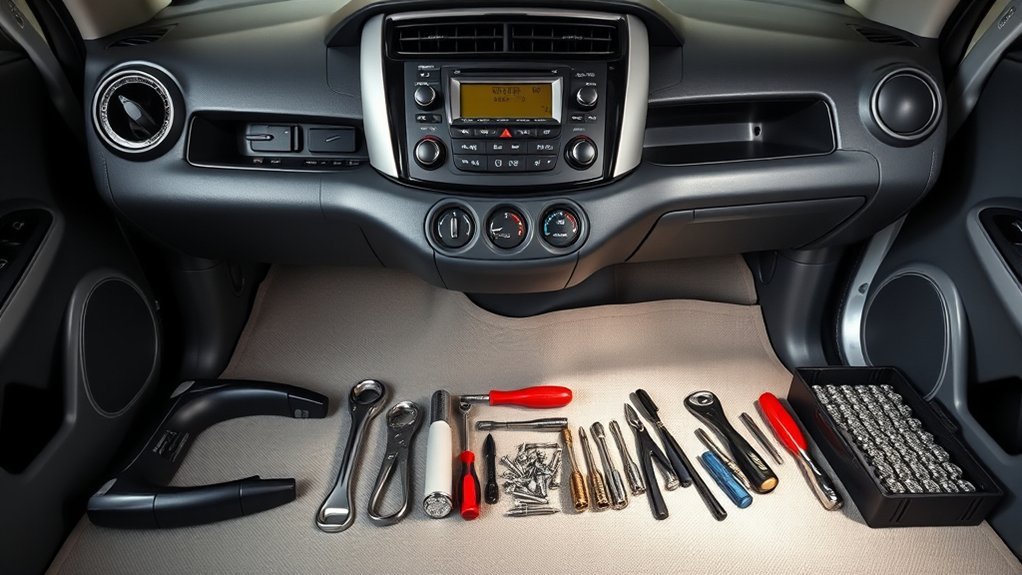
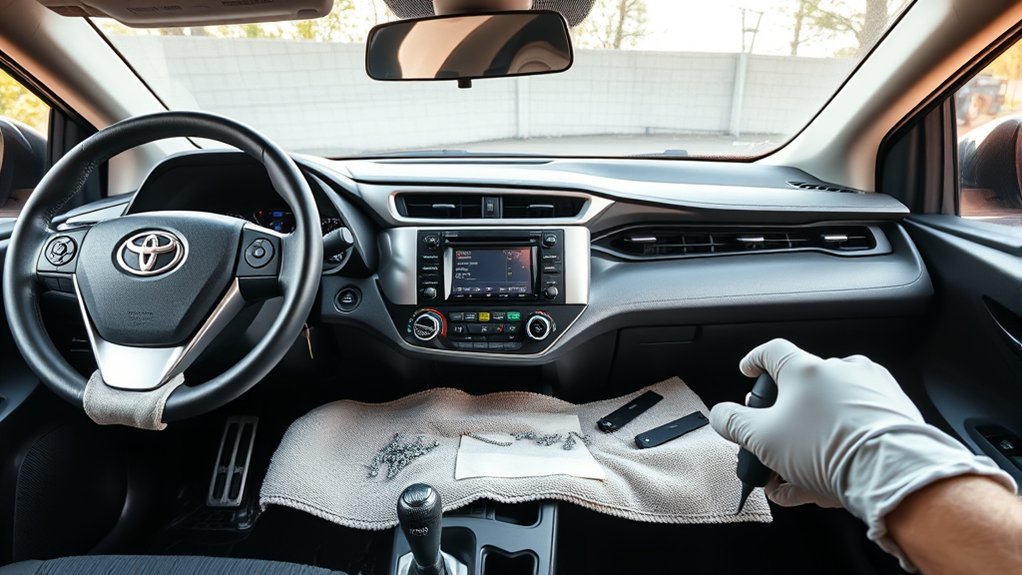
Removing the dashboard from your Toyota RAV4 requires the right tools to make the process smooth and efficient. Start with basic hand tools like sockets, screwdrivers, and pliers for unbolting and disconnecting components. A trim removal tool is essential for safely prying off plastic covers and trim pieces without causing damage. If your dashboard removal involves the AC system, you’ll need an AC machine to discharge it safely. Don’t forget a torque wrench to reinstall bolts to the manufacturer’s specified torque settings during reassembly. Additionally, having zip ties or a container for organizing screws and small parts keeps everything in order. With the right tools, you’ll feel empowered to tackle this project confidently!
Step-by-Step Guide to Dashboard Removal
Before you start removing the dashboard, gather the essential tools to guarantee a smooth process. Always follow safety precautions to protect yourself and your vehicle, and be aware of common mistakes that can complicate the task. With the right preparation, you’ll find the removal process much easier and more efficient.
Essential Tools Required
To successfully remove the dashboard of your Toyota RAV4, you’ll need a few essential tools that make the process smoother and more efficient. Start with a socket set and a variety of screwdrivers, including both Phillips and flathead types. A trim removal tool is vital for safely disengaging clips and panels without causing damage. Don’t forget a torque wrench to guarantee you reassemble components to the manufacturer’s specifications. A ratchet extension will help reach deeper screws in tight spaces, while an AC line disconnect tool is necessary for safely detaching AC components. Finally, keep a container or magnetic tray handy to organize screws and small parts, preventing loss during the dashboard removal and reassembly process.
Safety Precautions To Follow
Guaranteeing your safety during the dashboard removal process is essential, especially considering the potential hazards involved. Follow these safety precautions to protect yourself:
- Always disconnect the vehicle’s battery before starting to prevent electrical shock or airbag deployment.
- Wear safety goggles and gloves to shield your eyes and hands from sharp edges and debris.
- Make sure to unplug all airbag connections, particularly the passenger airbag wires and knee bolster, to avoid accidental deployment.
These steps will help create a safer environment as you tackle the dashboard removal. Remember, taking the time to prioritize safety can save you from serious injuries and guarantee a smoother reassembly process later on. Stay safe and focused!
Common Mistakes To Avoid
When removing the dashboard of your Toyota RAV4, it’s easy to overlook critical steps that can lead to frustration and potential damage. First, always disconnect the car battery to prevent electrical issues or airbag deployment. Next, make certain you remove all screws and bolts from the lower dash and heater box; missing even one can hinder the dashboard’s removal. Be cautious when unplugging wiring harnesses and components like airbag wires and speaker grills, as fragile connectors can easily break. Document the order of disassembly for a smooth reassembly process, and don’t forget to clean all parts thoroughly before putting everything back together. This attention to detail guarantees a successful dashboard removal and installation.
Inspecting and Replacing the Heater Box
Inspecting and replacing the heater box in your Toyota RAV4 is an essential step in maintaining ideal climate control and overall vehicle performance. Start by comparing the existing heater box with a newer model to assess cleanliness and condition. Disassemble it to inspect internal components like the expansion valve and evaporator core.
Inspecting and replacing your RAV4’s heater box is crucial for optimal climate control and vehicle performance.
- Identify and replace any bad doors or plastic mechanisms.
- Carefully align the heater hoses during replacement for proper fitment.
- Make certain the heater box is securely bolted to the firewall and dash after reinstallation.
Reassembling Your Dashboard: A Comprehensive Approach

When reassembling your dashboard, start by securely attaching all components to guarantee everything functions correctly. Pay special attention to managing the wiring harness; keeping it organized will prevent future issues and make installation smoother. Finally, double-check that all connections are tight before you finish up, so you can avoid any loose parts down the line.
Securing Components Effectively
Reassembling your dashboard requires careful attention to detail to guarantee everything is secured effectively. As you work, make sure to reconnect all wiring harnesses and plugs securely to avoid any electrical issues down the line.
- Use a belt molding installation tool to align and secure the top of the dash.
- Reattach the heater box with bolts to ensure stability and minimize vibrations.
- Double-check that all ductwork is properly connected for ideal airflow.
Perform a thorough inspection of every component and fastener before completing the reassembly process. This not only enhances functionality but also empowers you to enjoy your Toyota RAV4 without concerns over loose parts. Take your time, and you’ll achieve a solid, well-secured dashboard!
Wiring Harness Management Tips
After confirming that all components are securely fastened, it’s time to focus on managing the wiring harnesses effectively. Labeling the wiring during disassembly simplifies reassembly, saving you time and frustration. While routing the wiring harness, position it within designated channels to avoid pinching or damage.
| Task | Tip | Importance |
|---|---|---|
| Inspect connectors | Verify they click into place | Prevents future malfunctions |
| Check for frayed wires | Replace or repair before securing | Avoid electrical issues |
| Bundle with zip ties | Neatly secure wiring | Prevent interference |
Secure Seats and Trim Pieces

Securing the seats and trim pieces is a crucial step before diving into the dashboard removal process of your Toyota RAV4. Start by unbolting and removing the seats, taking care to pop off the plastic caps over the rear seat bolts and disconnect the seat connectors. Next, unbolt the center console and remove the emergency brake boot for easier dashboard access. Don’t forget to disconnect the shifter knob and detach the top console.
- Carefully remove the A-pillar trim to avoid damaging clips.
- Take out the speaker grills without harming attached wiring.
- Confirm all wiring harnesses, especially those related to airbags, are disconnected.
These steps will help you navigate the removal process smoothly!
Common Mistakes When Removing a Dashboard
When tackling the removal of your Toyota RAV4’s dashboard, it’s easy to overlook critical steps that can lead to frustrating setbacks. One major mistake is forgetting to disconnect the passenger airbag wires, which can pose safety hazards. Also, neglecting to unplug ducts from the AC box can complicate access and may damage the ducts. Here’s a quick reference table to help you avoid these common pitfalls:
| Mistake | Consequence | Solution |
|---|---|---|
| Forgetting airbag wires | Risk of airbag deployment | Always disconnect before removal |
| Missing screws and bolts | Difficulty detaching dashboard | Double-check all fasteners |
| Forgetting to unplug ducts | Damaged ducts and challenging access | Unplug ducts before removing the dash |
| Skipping carpet adjustment | Complicated reassembly | Adjust carpet for easier access |
Final Assembly and Cleanup Tips
Completing the removal process requires careful attention to reassembly and cleanup to guarantee your Toyota RAV4 functions smoothly. During the final assembly, verify all wiring harnesses and plugs are properly reconnected to avoid electrical issues. Utilize a belt molding installation tool for precise dashboard alignment, and confirm that all ducts and vent tubes are attached for ideal airflow.
Here are some helpful cleanup tips:
- Double-check that all bolts and screws are tightened securely to prevent rattling.
- Clean up any debris from your workspace to maintain a safe environment.
- Confirm every component is securely fastened to finalize the assembly process.
Frequently Asked Questions
How to Change Dashboard Display on Toyota RAV4?
To change your dashboard display, disconnect the battery, remove trim pieces, and unplug the old display. Install the new dashboard, adjust your display settings, and reattach everything before reconnecting the battery and testing functionality.
What Is the Lawsuit Against the Toyota RAV4?
The Toyota RAV4 lawsuit centers on allegations of safety defects, specifically dashboard issues related to unintended acceleration and malfunctioning airbags. Plaintiffs claim Toyota failed to disclose known risks, raising serious concerns about vehicle safety.
How to Remove Dashboard Trim Panel?
To remove the dashboard trim panel, unscrew the securing bolts, then carefully pry off the panel using a trim tool. Disconnect any wiring harnesses, and keep track of screws for reassembly.
What’s the Most Common Problem With a Toyota RAV4?
The most common issues with a Toyota RAV4 include excessive oil consumption, power window regulator failures, and transmission problems. These affect vehicle reliability, so staying informed helps you maintain your RAV4’s performance and longevity.
Conclusion
To sum up, removing the dashboard of your Toyota RAV4 can seem intimidating, but with the right tools and a methodical approach, you’ll have it done faster than a flip phone can ring. Remember to double-check your connections and avoid common pitfalls to guarantee a smooth reassembly. With patience and care, you’ll have your dashboard out and back in like a pro. Now, roll up your sleeves and get to work—your RAV4’s interior will thank you!