
To change the rear brake pads on your Toyota RAV4, start by securely lifting the vehicle and deactivating the electronic parking brake. Remove the rear wheel and caliper bolts with a 14 mm wrench to access the old pads. Replace them with new ones, ensuring proper alignment. Reassemble the caliper, tightening bolts to 25 ft-lb, and reinstall the wheel. Finally, perform a brake test for effectiveness. Learn how to troubleshoot any issues that may arise during this process.
How to Prepare Your Toyota RAV4 for Brake Pad Replacement and Troubleshooting Common Issues
To guarantee a smooth brake pad replacement on your Toyota RAV4, you need to prepare the vehicle properly before diving into the task. Start by securely lifting the vehicle with a professional floor jack and confirming it’s stable with jack stands. This prevents any accidents while you work. Next, deactivate the electronic parking brake; put your vehicle in accessory mode and cycle the brake to service mode until the dashboard light flashes.
Inspect the old brake pads for wear and thickness, checking for any gouges or pulsation on the rotors, which indicate potential issues. Verify you’ve got the special tools needed for this job, as they’ll make the process easier and safer. Before installing new components, clean any rust or debris from the caliper and hardware area to guarantee peak performance. After replacing the pads, re-engage the electronic parking brake and test its functionality while in park.
[Products Worth Considering]

【Application】This brake caliper compression tools suits for disc brake, NOT for drum brake. The automotive tools is equipped with 2 groups of push boards: 7.01×2.36"and…
Must-Have Tools for Changing Your Rear Brake Pads
Having prepared your Toyota RAV4 and confirmed the vehicle is safely lifted and stabilized, it’s time to gather the must-have tools for changing your rear brake pads. Having the right tools is essential for an efficient and safe brake pad replacement.
- 3-ton jack: For safely lifting the vehicle.
- 14 mm wrench and ratchet: To remove the caliper bolts for access to the brake pads.
- Brake pad retraction tool: Important for pushing back the caliper piston to fit the new brake pads.
- Synthetic grease: Used for lubricating caliper bolts and hardware, ensuring smooth operation.
- Torque wrench: Vital for tightening caliper bolts to the specified 25 ft-lb, securing the brake assembly.
With these tools in hand, you’re well-equipped to replace your rear brake pads effectively. Prepare to embrace the liberation of maintaining your vehicle!
[Products Worth Considering]

COMPLETE BRAKE CALIPER TOOL SET: This Orion Motor Tech 24-piece brake caliper tool set includes 2 retaining plates, left and right thrust bolt assemblies, 18 disc adapters, 2 brake hangers, a carry case, and a pair of gloves

Complete Tool Set: Orion Motor Tech's 24-piece brake caliper compression tool set includes 2 retaining plates, 2 thrust bolt assemblies, 2 brake caliper hangers, and 18 adapters, easily servicing your brakes without damage

Complete Tool Set: Orion Motor Tech's 24-piece brake caliper compression tool set includes 2 retaining plates, 2 thrust bolt assemblies, 2 brake caliper hangers, and 18 adapters, easily servicing your brakes without damage
Steps to Deactivate the Electronic Parking Brake
Before you can replace the rear brake pads on your 2019 Toyota RAV4, you’ll need to deactivate the electronic parking brake. Start by turning the ignition to the “on” position, verifying the vehicle’s in accessory mode without starting the engine. Firmly press the brake pedal and cycle the electronic parking brake switch; a flashing light on the dashboard indicates you’ve entered service mode.
| Action | Result |
|---|---|
| Press brake pedal | Engages service mode |
| Cycle electronic parking brake | Confirms system activation |
| Listen for retraction sound | Verifies readiness for brakes |
Once you hear the sound confirming the piston retracts, disconnect the electronic parking brake connector by pressing and pulling it out. You’re now ready to put in those new brake pads. After replacing them, remember to reactivate the electronic parking brake to verify everything functions properly.
[Products Worth Considering]

【Designed for Volkswagen(VAG) Cars Diagnostics】The VD500 OBD2 scanner is specifically designed to diagnose Volkswagen Group (Fits for VW/Audi/Skoda/ SEAT) 12-volt 16-pin vehicles, but can also be used with other 12-volt (non-Volkswagen) and light trucks (non-electric) vehicles manufactured in 1996 or later that are OBD II -compliant with standard 16-pin OBD II protocols (J1850 VPM, J1850PWM, ISO9141, KWP 2000 and CAN). For non-VAG vehicles, the scanner only supports basic OBD2 engine diagnostic functions, and does not support any special functions. Compatibility with new vehicles manufactured after 2024 cannot be guaranteed. Please check compatibility before purchase

【2026 Newest! Same Functions with Autel MK808/MX808】Autel AP200 obd2 scanner bluetooth adapter has EXACTLY the same diagnostics and service functions as Autel MK808/MX808. The price is much lower than MK808/MX808, along with the 12-month nationwide war ranty, it is ideal for any family DIYers looking for quality yet effective diagnostic device.

[Brand-New ArtiDiag500] We've got everything you're looking for! Forget basic OBD2 scanners; TOPDON's ArtiDiag500 car scanner offers more. The all-new ArtiDiag500 not only includes full OBD2 functions and 4-system diagnostics but also provides DIYers with 6 maintenance services. The brand-new, cost effective AD500 is back in full swing!
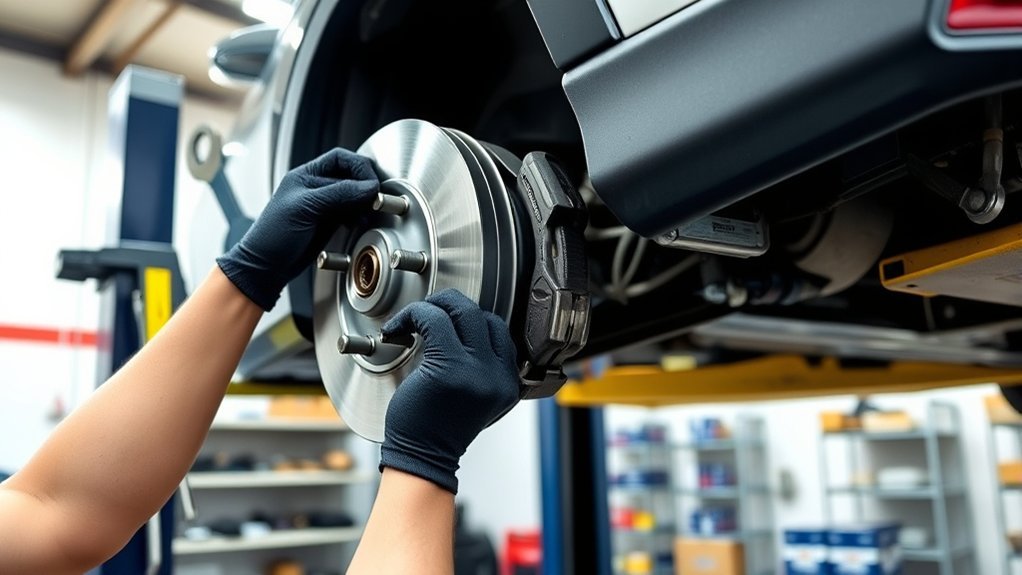
Removing the Wheel and Accessing the Rear Caliper
With the electronic parking brake deactivated, you’re set to remove the rear wheel and access the caliper. Begin by securely lifting the rear of your Toyota RAV4 with a professional floor jack, placing it on jack stands for safety. Once elevated, grab a suitable wrench to remove the wheel bolts. As you’re removing the wheel, keep your workspace organized.
Ensure the electronic parking brake is deactivated before safely lifting your Toyota RAV4 to access the rear caliper.
Follow these steps:
- Confirm the vehicle is in accessory mode.
- Remove the wheel bolts using a wrench.
- Take off the rear wheel to expose the brake components.
- Use a 14 mm wrench and ratchet to unscrew the caliper bolts.
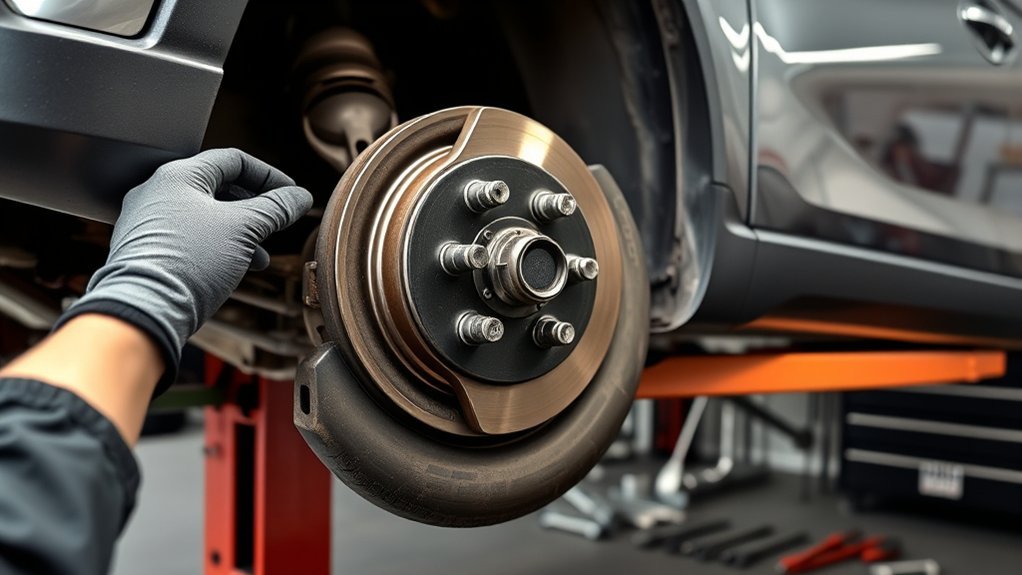
- Swing the caliper up to inspect the old brake pads for wear.
This methodical approach guarantees you access the rear caliper efficiently, allowing for a thorough inspection before proceeding with the pad replacement.
Step-By-Step Guide to Replacing Old Brake Pads With New Ones
Replacing old brake pads with new ones is a straightforward process that guarantees your vehicle’s braking system remains effective. Start by deactivating the electronic parking brake; activate accessory mode and cycle the parking brake to service mode while pressing the brake pedal. Next, remove the caliper bolts with a 14 mm wrench and ratchet, then swing the caliper up to access the rear brake pads.
Now, install the new Bosch brake pads and hardware, making certain the hardware sits atop the pads. Clean all old components before installation. Use a brake caliper tool to push back the piston, allowing it to fit the new pads. Secure the caliper bracket, torquing the bolts to 25 ft-lb.
Finally, reactivate the electronic parking brake from service mode. Test the brake functionality to make sure everything operates properly. If you have questions, just reach back and I’ll show you more!
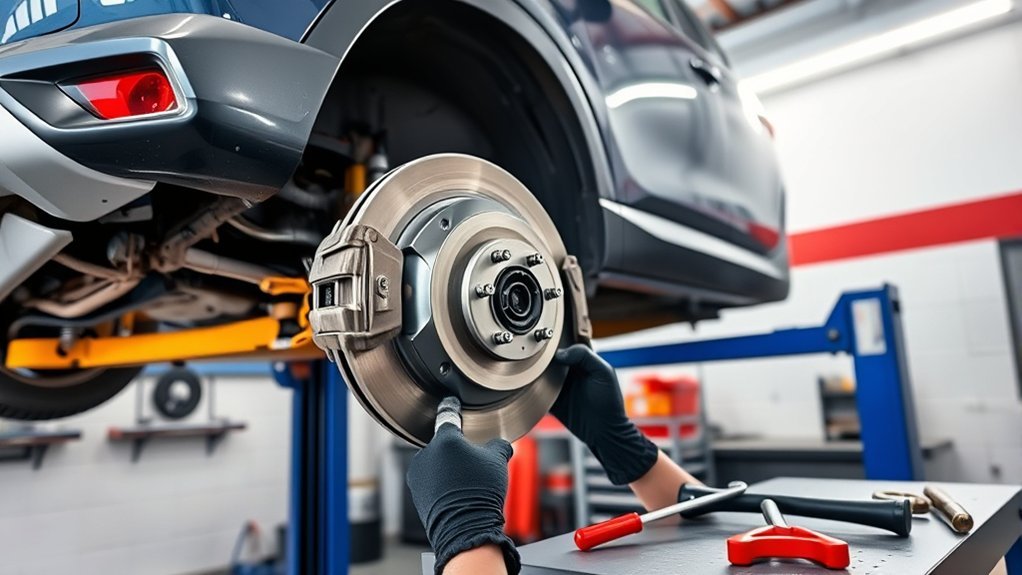
Properly Reassembling the Caliper and Reinstalling the Wheel
Once you’ve replaced the brake pads, it’s essential to guarantee the caliper is properly aligned over them to avoid any pinching of components. After securing the caliper bracket with bolts torqued to 25 ft-lb, you can proceed to reinstall the wheel, making sure to torque the wheel bolts to 76-80 ft-lb for maximum safety. Double-checking these specifications will help maintain effective braking performance and prevent future issues.
Caliper Alignment Importance
Guaranteeing proper caliper alignment is essential for achieving ideal braking performance and minimizing uneven wear on your brake pads. Misalignment can lead to compromised braking efficiency and premature pad degradation. To achieve peak caliper alignment, follow these steps:
- Securely position the caliper over the new brake pads.
- Confirm all clips and metal pieces are correctly seated.
- Use a torque wrench to tighten caliper bolts to 25 ft-lb.
- Double-check that the caliper aligns with the rotor before reinstalling the wheel.
- Torque wheel bolts to 76-80 ft-lb for a secure fit.
Wheel Torque Specifications
After confirming proper caliper alignment, focus shifts to reassembling the caliper and reinstalling the wheel. Start by lubricating the caliper bolts with synthetic grease to guarantee smooth operation. You’ll need a torque wrench for accurate settings; improper torque can lead to brake system failure.
| Component | Torque Specification |
|---|---|
| Caliper Bolts | 25 ft-lb |
| Wheel Bolts | 76-80 ft-lb |
Tighten the caliper bolts to 25 ft-lb to secure the caliper, then reinstall the wheel, torquing the wheel bolts to 76-80 ft-lb. Always double-check your work to verify all components are correctly positioned and secured, as safety is paramount. You don’t need any special tools, just precision and care.
Testing Your Brakes After Installation and Final Safety Checks
After installing the rear brake pads, you’ll need to conduct a thorough visual inspection to verify all components are securely fastened and properly lubricated. Next, perform a brake test drive at low speeds to evaluate braking performance and listen for any abnormal sounds. Confirm that the emergency parking brake engages correctly, as this is essential for your vehicle’s safety.
Brake Test Drive
Begin your test drive by driving at low speeds and gently applying the brake pedal to confirm that your newly installed rear brake pads engage smoothly. Before you start, make certain the emergency parking brake is reactivated from service mode. During the brake test drive, pay close attention to the following:
- Listen for grinding or squeaking sounds that indicate installation issues.
- Monitor the brake pedal feel; it should be firm and responsive.
- Check for any sinking or sponginess in the pedal, which could suggest air in the brake lines.
- Conduct a full stop from a moderate speed to assess braking efficiency.
- Verify the vehicle doesn’t pull to one side during stopping.
This methodical approach assures your brakes are functioning perfectly.
Visual Inspection Checklist
Following the brake test drive, it’s important to conduct a thorough visual inspection of your rear brake system. Begin your visual inspection checklist by ensuring all bolts are tightened to the specified torque of 25 ft-lb for both the caliper and bracket. Reactivate the electronic parking brake from service mode, confirming its functionality by engaging and disengaging it while in park. Next, check the positioning of the rear brake pads and hardware, ensuring there’s no debris or rust present. While testing the brake by pressing the pedal, listen for any unusual sounds that could indicate improper installation or component issues. This meticulous approach guarantees your brakes operate safely and effectively, empowering you on the road.
Frequently Asked Questions
Can I Replace My Toyota Brake Pads Myself?
Yes, you can replace your Toyota brake pads yourself. Just make certain you consider brake pad specifications, deactivate the electronic parking brake, use appropriate tools, and properly torque all components for safety and performance.
Can I Replace Rear Brake Pads Myself?
Yes, you can replace rear brake pads yourself. With basic tools and a little patience, you’ll guarantee your vehicle’s brake maintenance is excellent. Just follow the steps carefully, and you’ll regain confidence in your car’s performance.
How to Replace Rear Brake Pads With Electric Parking Brake?
To replace rear brake pads with an electric parking brake, engage brake calibration after retracting the piston. Follow the proper disconnection procedures, ensuring accurate installation of new pads for maximum performance and safety.
How to Put Electronic Parking Brake in Service Mode on a Toyota?
To put the electronic parking brake in service mode, activate accessory mode, press the brake pedal, and cycle the switch until the dashboard light flashes. Listen for the piston retraction sound to confirm success.
Conclusion
Changing the rear brake pads on your Toyota RAV4 can seem intimidating, but with the right tools and approach, it’s manageable. Did you know that worn brake pads can increase stopping distances by up to 30%? Regular maintenance not only enhances safety but also prolongs the lifespan of your braking system. After completing the replacement, make certain to test your brakes thoroughly and perform a final safety check to guarantee peak performance on the road.


Leave a Reply