
To change the front wheel bearing on your Toyota RAV4, gather essential tools like 14mm and 17mm sockets and a torque wrench. Start by disassembling the brake components, making certain the axle nut is loose for bearing removal. Clean the surface before installing the new bearing assembly. Secure it with the correct torque specifications, then inspect all components carefully. After reassembly, perform a test drive to check for any unusual noises. There’s more to guarantee a successful installation.
Identifying and Addressing Wheel Bearing Issues
When you notice abnormal noises coming from your Toyota RAV4, it’s vital to check the wheel bearings, as a loose bearing can greatly compromise your braking performance. Start by inspecting the wheel bearing for play; sometimes, the issue isn’t obvious, so listen carefully for any persistent noise while driving. If you suspect a problem, replacing the bearing is essential. Typically, this involves using a complete hub assembly, like the Timkin part number, priced around $250.
When you’re ready to address the issue, you’ll need the right tools, including a 30mm 12-point socket and an impact gun for efficiency. After installation, make certain to secure the assembly with two bolts and use a torque wrench to meet specified torque settings. This guarantees everything aligns properly and prevents future issues. Taking these steps will help maintain your RAV4’s performance and safety on the road.
Essential Tools for Wheel Bearing Replacement
Addressing wheel bearing issues on your Toyota RAV4 requires the right tools to guarantee a successful replacement. You’ll need a 30mm 12-point socket for removing the wheel, along with 14mm and 17mm sockets for the caliper and bracket. An impact gun will greatly assist in loosening and tightening those stubborn bolts efficiently. Don’t forget a wire brush; it’s vital for cleaning surfaces before installing the new bearing, ensuring a proper fit and function.
When selecting a replacement, opt for a compatible part like the Timkin bearing, which typically costs around $250. Finally, a torque wrench is important for achieving the correct torque specifications, especially near 200 foot-pounds for caliper bolts. By gathering these essential tools, you’ll streamline the process and enhance the performance of your Toyota RAV. Remember to washer back properly to maintain the integrity of your wheel assembly.
[Products Worth Considering]
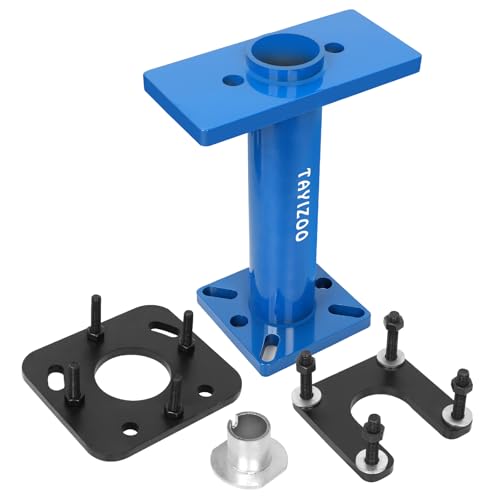
Complete Axle Bearing Tool Kit: This kit from TAYIZOO includes an axle bearing puller, an ABS tone ring driver, an ABS tone ring tool, an adapter plate, and a set of fasteners.

BEARING PRESS KIT: This 10 piece bearing press kit by Orion Motor Tech allows you to quickly and easily install bearing races and seals without damaging the axle housing
Step-by-Step Guide to Disassembly
To begin disassembly, gather the required tools, including a 14mm and 17mm socket. Start by removing the brake components, ensuring you safely hang the caliper to avoid damaging the brake line. Once the caliper and brake pads are detached, focus on removing the bearing bolts to access the wheel bearing.
[Products Worth Considering]

COMPATIBILITY – 513258 Wheel Hub assembly compatible with Scion 2011-2016 tC (Manual Transmission Only), Toyota 2016-2020 Mirai (All Models) | 2006-2012 RAV4 (3.5L V6) | 2013-2018 RAV4 (All Models)
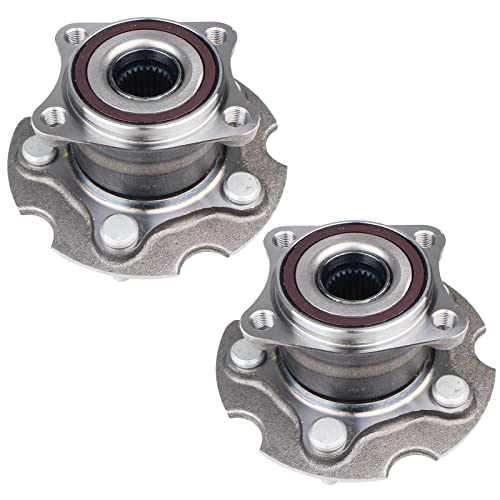
【Fitment Vehicle】- Fit for Lexus: 2015-2017 NX200t (Rear; AWD), 2018-2021 NX300 (Rear; AWD), 2015-2021 NX300h (Rear; AWD); Fit for Toyota: 2006-2018 RAV4 (Rear; 4WD/AWD)

Wheel Bearing Hub Replacement for Toyota 2019-2020 Avalon – [2021 Avalon (2.5L – Hybrid Models; 3.5L)] – 2022 Avalon – [2020 C-HR (LIMITED, LE, XLE, Japan Built, Built Before 02/2020)] – 2018 2019 2020 Camry (Except Japan Built) – [2021-2024 Camry (FWD)] – 2019-2020 RAV4 (FWD, LIMITED, LE, XLE, XLE PREMIUM, Japan Built) – [2019 2020 2021 2022 2023 Lexus ES300h] – 2019 2020 2021 2022 2023 Lexus ES350
Required Tools Overview
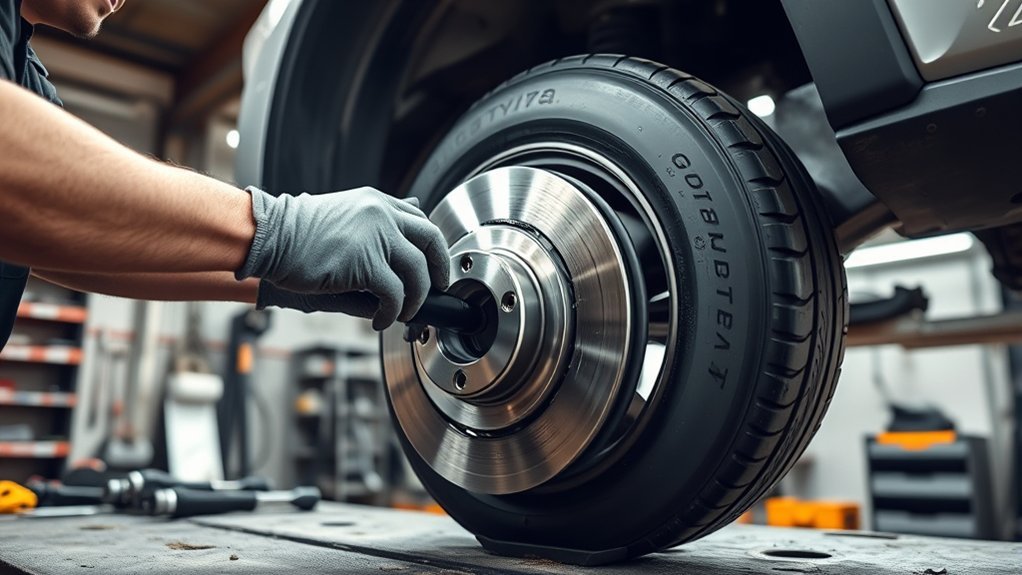
Starting the disassembly process for changing the front wheel bearing on your Toyota RAV4 requires a specific set of tools to guarantee efficiency and safety. You’ll need a 30mm 12-point socket to remove the wheel, granting access to the brake caliper and bearing assembly. A 14mm socket loosens the two bolts on the brake caliper – hang it securely to avoid damage. Use a 17mm socket to remove the brake pads and bracket, followed by the four bolts holding the bearing in place. Remember to verify the axle nut is loose, as this eases bearing removal. Understanding wheel bearing types can help identify common symptoms, and adhering to replacement intervals keeps your vehicle running smoothly.
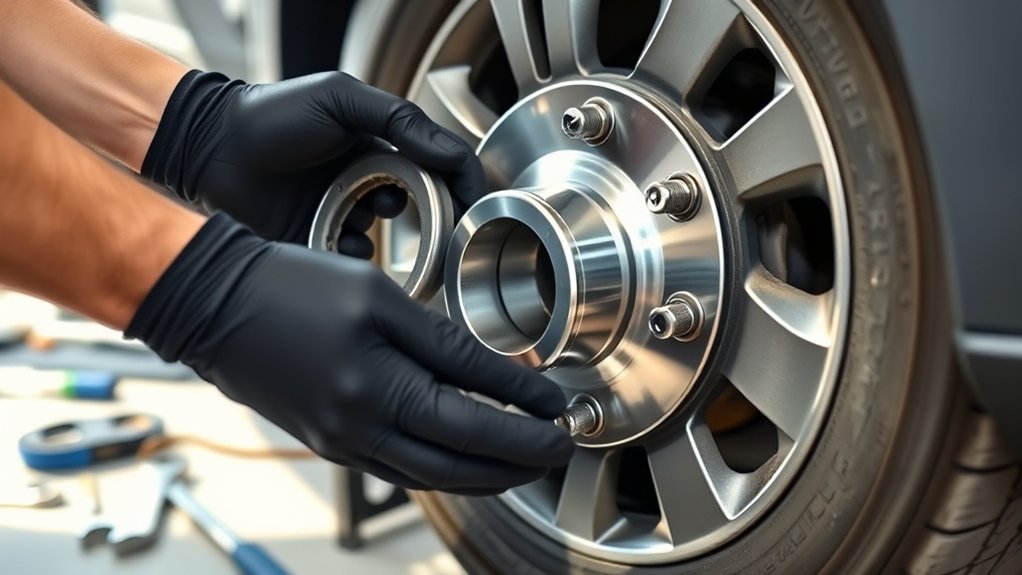
Removing Brake Components
Begin by carefully removing the brake caliper, which is secured by two 14mm bolts. After loosening these bolts, hang the caliper securely to avoid stress on the brake line. Next, take off the brake pads and the caliper bracket using a 17mm socket. Confirm all components are safely set aside to maintain wheel hub alignment during reassembly.
- Check the brake pad types to confirm compatibility.
- Clean the surface area thoroughly with a wire brush.
- Remove the four bolts securing the bearing assembly to the hub.
- Verify that the axle nut is loose for easier bearing removal.
Double-check all components, including washers and bolts, to confirm they’re present and correctly aligned before proceeding.
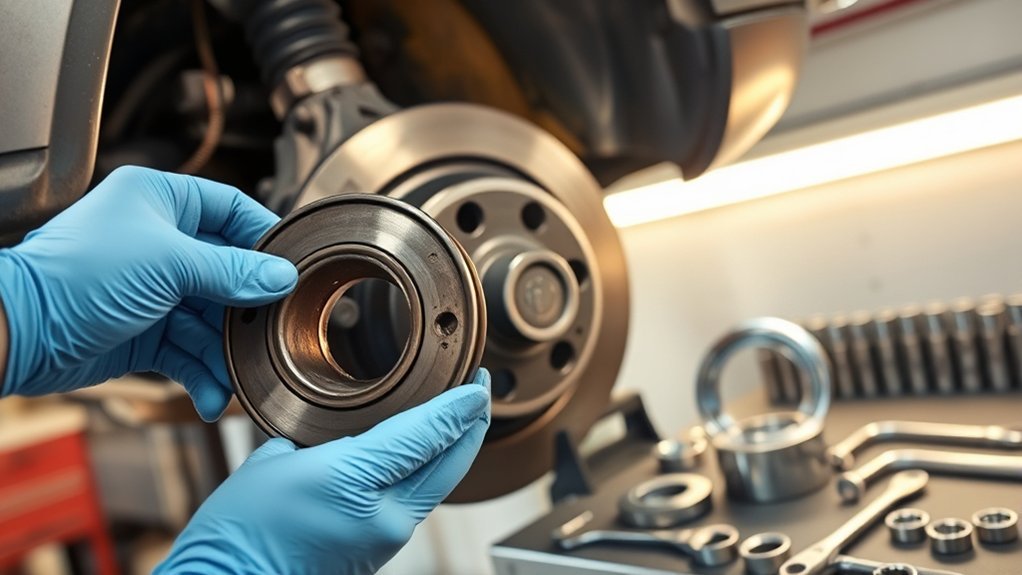
Bearing Bolt Removal
Loosen the four bolts that secure the bearing assembly to the wheel hub using a 17mm socket. This step is essential for a smooth bearing noise diagnosis; any unusual sounds may indicate wear. Carefully track each washer and component as you remove them, noting bearing wear indicators that suggest the need for replacement. Next, use a 30mm 12-point socket to loosen the axle nut, allowing for easier bearing assembly removal. Once the assembly is free, inspect it to determine the bearing replacement frequency necessary for peak performance. Before installing the new bearing, clean the surface area thoroughly to guarantee proper alignment and a secure fit. This meticulous approach will enhance your vehicle’s longevity and performance.
Cleaning and Preparing the Surface Before Installation
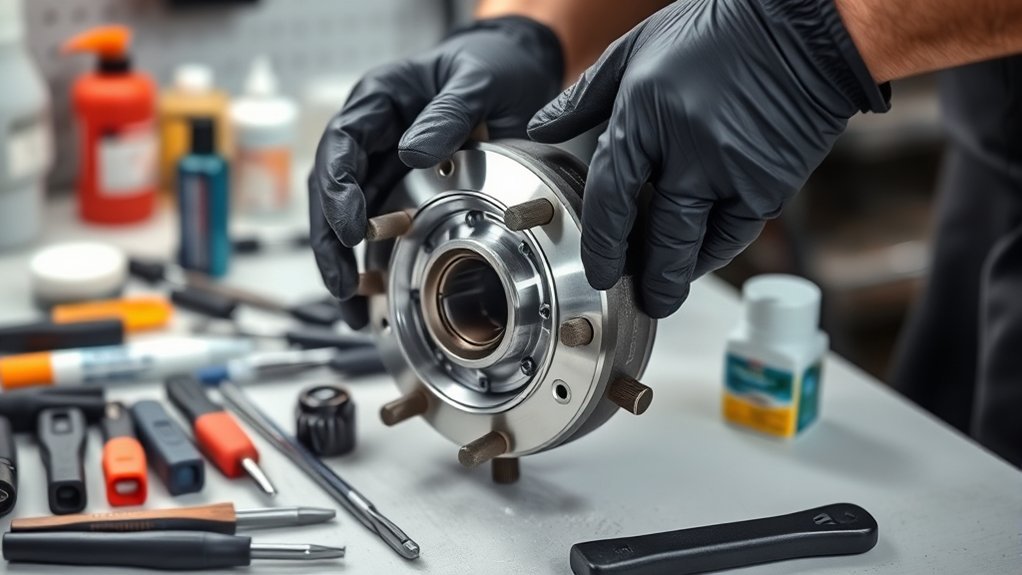
Before you install the new bearing, make certain to remove any old grease residue from the surfaces to guarantee a proper fit. Next, inspect the integrity of the cleaned surfaces for any signs of damage that might require attention. Finally, apply lubrication evenly to the mating surfaces to facilitate assembly and prevent future corrosion.
Remove Old Grease Residue
To guarantee a proper fit for the new wheel bearing, thoroughly clean any old grease residue from the hub assembly and surrounding surfaces. This step is essential to prevent common installation pitfalls that could compromise performance. Follow these cleaning techniques:
- Use a wire brush to scrub the hub and mounting area, removing dirt and debris.
- Inspect for rust and signs of wear that could affect the new bearing’s longevity.
- Clean the axle shaft as well; any grease left can hinder alignment.
- Confirm all surfaces are dry and free of moisture for ideal conditions.
Inspect Surface Integrity
Ensuring the integrity of the surfaces where the new wheel bearing will be installed is critical for peak performance. Start with a thorough surface damage assessment. Use effective rust removal techniques, like a wire brush, to eliminate any rust, debris, or residue that could compromise bearing fit importance. Next, check the mating surfaces of the hub and bearing for oil or grease, as any contaminants can lead to improper seating and accelerate wear. After cleaning, confirm that the surfaces are smooth and even; imperfections can jeopardize the integrity of the new bearing assembly. Proper surface preparation not only facilitates correct installation but also enhances the longevity and reliability of your wheel assembly, empowering you with a dependable driving experience.
Apply Lubrication Evenly
With clean and smooth surfaces established, the next step involves applying lubrication evenly to prepare for the new wheel bearing installation. Proper lubrication techniques are essential for peak performance and longevity. Use high-temperature grease, making sure you cover all contact surfaces thinly and evenly.
- Clean any old grease or contaminants from the axle and components.
- Apply grease to the threads of the bolts for smooth installation.
- Check compatibility of grease types with your vehicle’s specifications.
- Use an appropriate application method, like a brush or finger, to achieve even coverage.
After lubrication, double-check the alignment of the bearing and components to maintain even pressure and prevent misalignment. This guarantees your new bearing functions effectively and lasts longer.
Installing Your New Wheel Bearing
Begin the installation of your new wheel bearing by guaranteeing proper alignment of the Timkin bearing assembly with the axle. This bearing alignment importance is essential; misalignment can lead to premature failure. Before securing the assembly, clean the surface area thoroughly to eliminate any debris or corrosion. Next, capture the threads on all four bolts carefully during installation. This step is critical for securing bolt threads, guaranteeing a tight fit that prevents loosening over time. Once aligned and threaded, use an impact gun for even tightening. This tool helps achieve the necessary torque consistently, which is significant for the longevity and safety of your new bearing. After everything is in place, conduct a test drive to verify that the new bearing operates smoothly without any noise or interference with the brakes. This final check guarantees you’ve liberated your vehicle from potential issues.
[Products Worth Considering]

[Vehicle Fitment]: Compatible with Toyota RAV4 2006-2012 (with V6 3.5L Engine), RAV4 2013-2018 (with V6 2.5L Engine), RAV4 2013-2014 (Electric), Mirai 2016-2020 (Electric); Compatible with Scion tC 2011-2016 (with Manual Transmission) — Non-ABS

NOTE – Before placing yourorder, please refer to the “ConfirmedFit” ban-ner at the top of the page. Select your vehicle's “Year, Make, Model,” then click “Confirm” to display compatibility-results. Or read the VEHICLE FITMENT description on the page to ensure a complete match

COMPATIBILITY – Fits 2006-2012 Toyota RAV4; 2013-2018 Toyota RAV4; 2016-2020 Toyota Mirai; 2011-2016 Scion tC
Torque Specifications You Should Follow
After securing your new wheel bearing, paying attention to torque specifications becomes vital for ideal performance. Proper torque wrench usage guarantees that each component is tightened to the manufacturer’s standards, helping prevent premature wear or failure.
Follow these essential torque specifications:
- Caliper bolts: Approximately 200 foot-pounds for a 2018 Toyota RAV4.
- Bearing assembly: Adhere strictly to manufacturer-recommended torque for the four bolts securing the bearing to the hub.
- Axle nut: Tighten according to its specific torque specification to prevent loosening over time.
- Pre-tighten all bolts: Confirm they’re snugged before applying final torque for even pressure distribution.
Top Five Mistakes to Avoid When Installing a Wheel Bearing
Installing a wheel bearing can be straightforward, but several common mistakes can compromise the job’s success. First, always clean the surface area before installing the new bearing; failing to do so can lead to improper seating and premature wear. Second, make certain the axle nut is loose before removing the bearing to avoid complicating disassembly and potentially damaging components. Third, adhere to the correct torque specifications, such as tightening caliper bolts to approximately 200 foot-pounds, since neglecting this may result in loose components or brake failure. Fourth, inspect both sides of the vehicle for consistency; overlooking this can lead to uneven wear and safety hazards. Finally, don’t forget to snug bolts temporarily before final tightening—this step is essential for alignment and reducing the risk of bearing failure. Avoid these mistakes to guarantee a successful installation of various wheel bearing types and prevent common symptoms of malfunction.
Performing Final Checks After Reassembly
Once reassembly is complete, it’s crucial to perform final checks to guarantee everything is secure and functioning properly. These final assembly checks can prevent future issues and assure safety.
- Tighten all bolts, including caliper and bearing assembly, to the specified torque—approximately 200 foot-pounds for caliper bolts.
- Conduct a thorough visual inspection to verify no washers or components are missing, highlighting the visual inspection importance.
- Inspect brake line condition to confirm they’re straight and not curled, which can compromise braking performance.
- Verify that the axle bolt notch is properly closed to prevent any bearing looseness.
After these checks, take your RAV4 for a test drive. Listen for unusual noises and confirm that both the wheel bearing and brakes function correctly. These steps are crucial in assuring that your vehicle operates safely and efficiently.
Maintenance Tips for Your New Wheel Bearing
To guarantee the longevity and performance of your new wheel bearing, regularly inspect it for signs of wear or unusual noise; catching potential issues early can save you from costly repairs down the line. Implement routine inspections to identify wear signs and enhance noise detection.
| Maintenance Task | Frequency |
|---|---|
| Visual Inspection | Every 3,000 miles |
| Noise Detection Check | Monthly |
| Brake Pad Inspection | Every 5,000 miles |
| Bearing Torque Check | After installation |
| Surface Cleaning | Before installation |
Make certain you follow proper torque specifications, especially tightening caliper bolts to about 200 foot-pounds. Clean the installation surfaces for better adhesion and to avoid debris accumulation. After installation, confirm proper alignment and secure all components, then take your vehicle for a test drive to ascertain functionality.
Frequently Asked Questions
How Much Does It Cost to Replace a Wheel Bearing on a Toyota RAV4?
Replacing a wheel bearing on your Toyota RAV4 typically costs between $300 and $500. You’ll need specific replacement tools, and repair costs can vary based on labor rates and the type of wheel bearing used.
Can I Replace Wheel Bearings Myself?
Yes, you can replace wheel bearings yourself. Make certain you’ve got the right tools, follow safety precautions, and understand the disassembly process. With DIY repairs, you’ll save money and gain valuable mechanical skills.
What’s the Most Common Problem With a Toyota RAV4?
About 30% of Toyota RAV4 owners report engine issues, while transmission problems and electrical failures also frequently arise. These common concerns can greatly affect your vehicle’s performance and overall driving experience. Don’t ignore them!
Is It Okay to Drive With a Bad Wheel Bearing?
No, you shouldn’t drive with a bad wheel bearing. Bad bearing symptoms like grinding noises can compromise driving safety. Address wheel noise diagnosis immediately to prevent further damage and guarantee a safe driving experience.
Conclusion
Changing the front wheel bearing on your Toyota RAV4 might seem intimidating, but with the right tools and guidance, you can tackle it confidently. Though you might worry about the complexity, following the steps meticulously guarantees a successful installation. Remember, taking your time to double-check everything can save you from future headaches. Regular maintenance will also prolong the life of your new bearing, making it a worthwhile investment for your vehicle’s performance and safety.


Leave a Reply