To change your Toyota RAV4 headlight assembly, park on a level surface and gather tools like a 10 mm socket and Phillips screwdriver. Raise the vehicle for better access. Remove outer screws and bolts to detach the bumper cover, then disconnect the headlight assembly. Install the new assembly by aligning it with the guide pin and securing with clips. Test the lights for proper function and alignment. For further details on common issues, keep going.
Preparing Your Toyota RAV4 for Headlight Replacement
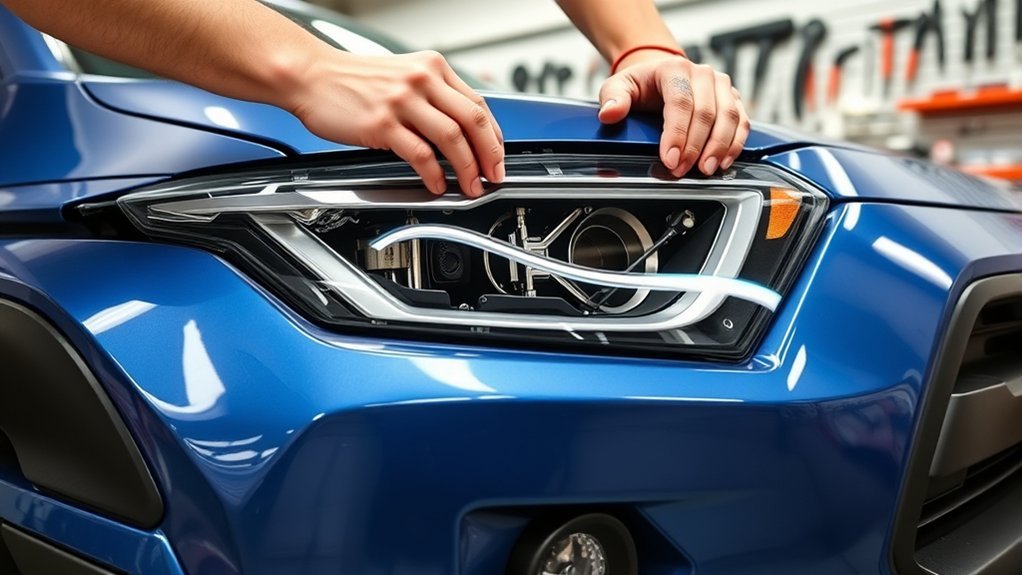
Before you begin the headlight replacement process, it’s crucial to prepare your Toyota RAV4 properly. First, park your vehicle on a level surface and turn off the engine for safety. You don’t want any surprises while you’re working. I’m going to put on gloves to protect my hands, ensuring a clean and safe experience. Next, gather your necessary tools, including a 10 mm socket and a Phillips head screwdriver.
To gain access to the fender wells and undercarriage of the bumper cover, raise the vehicle using a jack. This will make the entire process more manageable. Make sure you have the replacement headlight assembly ready, along with any additional connectors or clips you might need. Finally, check your vehicle’s manual for specific instructions related to your RAV4 model year. This way, you’re fully prepared and know exactly what you’re going to start with.
Essential Tools for Changing Your Headlight Assembly
To change your Toyota RAV4’s headlight assembly efficiently, you’ll need a few essential tools. A 10 mm socket, Phillips head screwdriver, and pliers are vital for removing components and adjusting alignment. Additionally, having a torque wrench and measuring tape guarantees everything is secured to specifications and properly aligned for peak performance.
Necessary Hand Tools
When changing the headlight assembly on your Toyota RAV4, you’ll need several essential hand tools to guarantee the process goes smoothly. A 10 mm socket is vital for removing the outer screws from the fender wells, allowing you to access and secure the headlight assembly. Pair this with a ratchet wrench to speed up the installation and removal of screws and bolts. A Phillips head screwdriver is necessary for adjusting the headlight alignment post-installation. Additionally, keep pliers handy for squeezing clips on the harness when disconnecting and reconnecting the headlight. Finally, a flathead screwdriver can help pry off any stubborn push pins or trim pieces you encounter. Having these tools ready will make the job much easier.
Safety Gear Essentials
Working on your Toyota RAV4’s headlight assembly requires more than just the right tools; safety gear is equally important. First, equip yourself with safety goggles to shield your eyes from debris and sharp edges during the process. Using gloves is vital too; they prevent skin contact with halogen bulbs, which can shorten their lifespan due to the oils on your skin. A 10 mm socket wrench will be essential for efficiently removing screws and bolts, helping you avoid the risk of stripping them. While you may also want a torque wrench to guarantee bolts are tightened to manufacturer specifications, remember that your safety gear is your first line of defense against injury. Prioritize it as you tackle this task.
Recommended Specialty Tools
Changing the headlight assembly on your Toyota RAV4 requires several essential tools to guarantee the process goes smoothly and efficiently. Start with a 10 mm socket to remove the screws and bolts securing the fender wells and bumper cover. A flathead screwdriver will help you detach push pins that hold the bumper in place, while pliers can assist in squeezing clips on the wiring harness for disconnection. Once the new assembly is installed, use a Phillips head screwdriver to adjust the headlights for proper alignment. Don’t forget a measuring tape to mark the correct height against a wall, ensuring peak visibility. With these tools in hand, you’re well-equipped for the task ahead.
Step-by-Step Guide to Removing the Old Toyota RAV4 Headlight Assembly
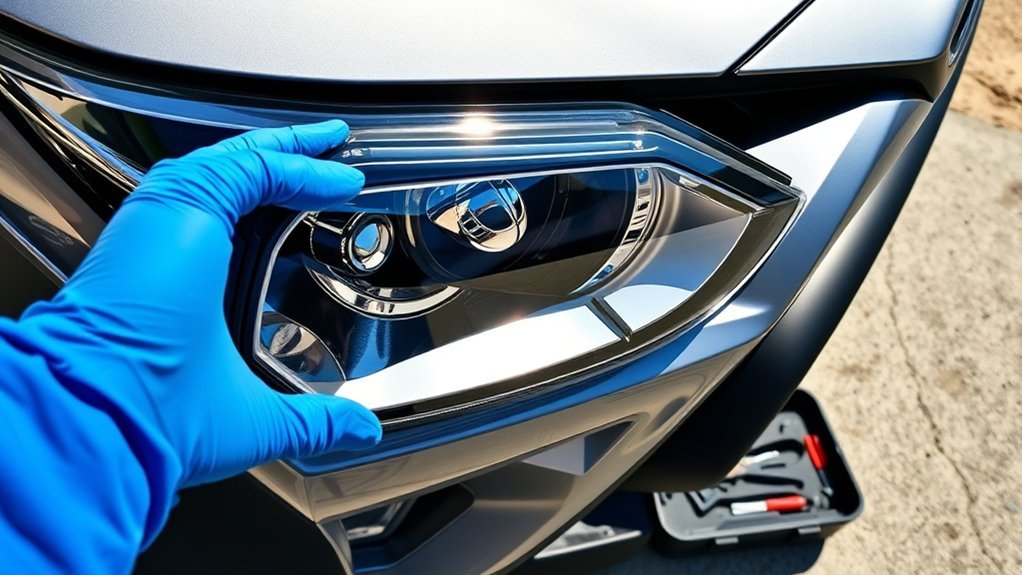
To remove the old headlight assembly from your Toyota RAV4, start by raising the vehicle to gain access to the fender wells. Use a 10 mm socket to remove the two outer screws from both driver and passenger sides. Next, take out the four center bolts securing the bumper cover’s undercarriage.
| Step | Action |
|---|---|
| 1. Remove Outer Screws | Remove two outer screws from each side. |
| 2. Detach Bumper Cover | Unscrew four center bolts and two push pins. |
| 3. Disconnect Trim Piece | Carefully disconnect the bumper cover. |
| 4. Access Headlight | Remove screws on the radiator support bracket. |
After the bumper cover is removed, access the headlight assembly. Disconnect all connections, then remove the headlight bulbs by pushing down the gray tabs. Finally, squeeze the clips on the harness to completely disconnect the headlight from the vehicle.
How to Connect Your New Headlight?
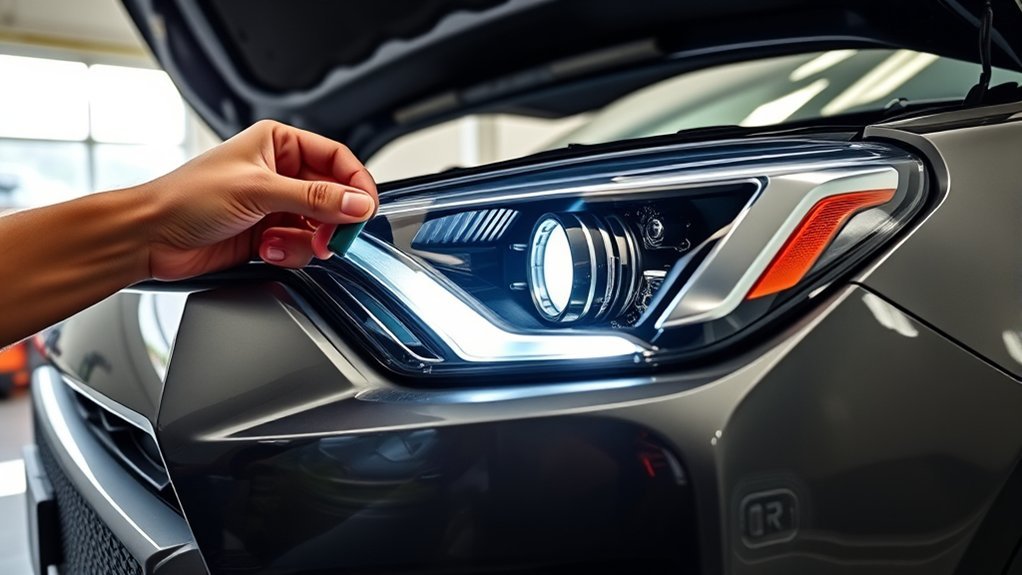
To connect your new headlight, align it with the guide pin for proper fitment, then securely insert the headlight bulbs by pressing down on the gray tabs. Next, squeeze the clips on the harness to attach the new headlight, guaranteeing a firm click confirms the connection. Finally, double-check all harness clips and test the headlight functionality to verify everything works correctly before reassembling.
Proper Wiring Connection Steps
Before you connect your new headlight, make sure the vehicle’s battery is disconnected to avoid any electrical shorts during the installation process. Here’s how to achieve a proper wiring connection:
- Align the new headlight with the guide pin on your vehicle for accurate placement.
- Disconnect the wiring harness by squeezing the clips, then connect it to your new headlight, ensuring it clicks securely into place.
- For the headlight bulbs, push down on the gray tabs to remove them, insert the new bulbs, and push the tabs back to lock them in.
Double-check all connections for a secure fit, making sure everything is properly seated before you proceed with reassembling the bumper. You’re going to take pride in this accomplishment!
Secure All Harness Clips
Secure all harness clips by ensuring they’re properly aligned and locked into place. Start by squeezing the clips on the wiring harness to disconnect it from the old headlight. Then, align your new headlight assembly with the guide pin and push down on the gray tabs of the headlight bulb sockets to connect the new headlight bulbs. Listen for that satisfying click as each connection secures, preventing future electrical issues. Finally, double-check that all harness clips are firmly fastened; this step is crucial for safe driving.
| Step | Action | Emotion |
|---|---|---|
| Disconnect Old Bulbs | Squeeze and pull | Liberation in control |
| Connect New Bulbs | Align and click | Empowerment |
| Secure Harness Clips | Fasten and double-check | Confidence |
Test Headlight Functionality
Testing headlight functionality is essential to guarantee your new assembly operates correctly and safely. Start by turning on your vehicle and check the following:
- Low Beams: Confirm both low beams illuminate evenly and brightly.
- High Beams: Activate the high beams to verify they function without flickering or dimming.
- Alignment: Verify that the headlight beams are properly aligned on the road, preventing glare for oncoming drivers.
If any issues arise during this test, double-check your connections and alignment. Remember, a well-functioning headlight is vital for safe night driving. If everything checks out, you’ve successfully connected your new headlight assembly!
Common Installation Issues and How to Fix Them
While changing the headlight assembly on your Toyota RAV4 can seem straightforward, several common installation issues may arise that can complicate the process. First, confirm you’ve removed all screws and clips before attempting to pull off the bumper cover. Missing any can lead to difficulty and potential damage during removal. If your new headlight doesn’t align correctly, check that the guide pin is seated properly in the assembly to avoid misalignment. When reconnecting headlight bulbs, make sure the gray tabs are fully engaged; this prevents flickering or bulb failure. If your headlight doesn’t function post-installation, double-check all electrical connections, ensuring the harness clips are securely fastened. Finally, if the headlights fail to adjust to the marked heights, inspect the adjustment screws for obstructions or damage that may hinder movement. Address these issues for a smooth installation experience.
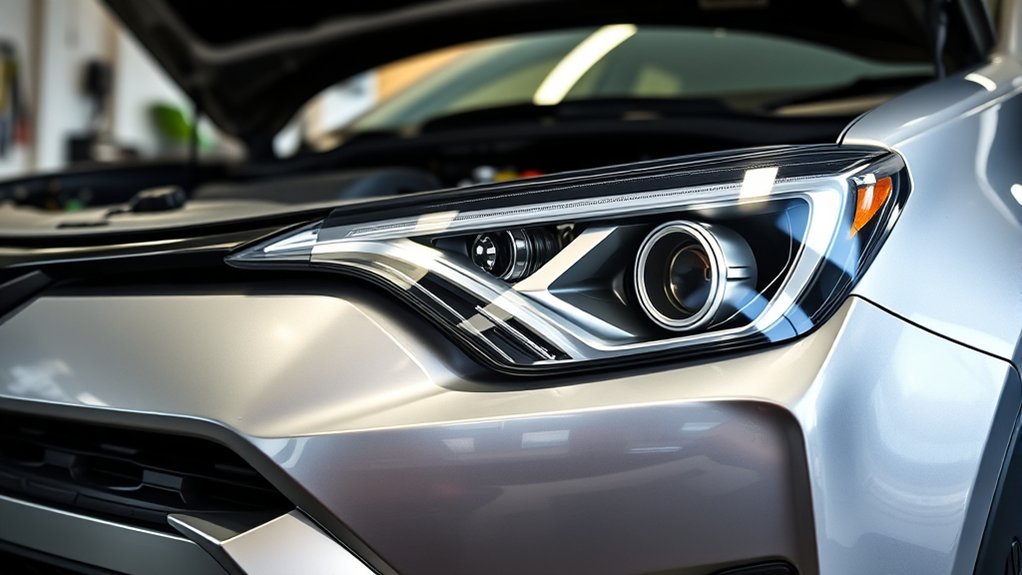
How to Align Your New Toyota RAV4 Headlights?
To guarantee ideal visibility and safety after installing your new Toyota RAV4 headlights, aligning them correctly is essential. Follow these steps to verify proper headlight alignment:
- Prepare Your Vehicle: Inflate your tires and remove any excess weight for accurate measurements.
- Measure the Height: Position your vehicle 25 feet away from a wall. Measure the height of the headlight center dot from the ground and mark the ground.
- Mark the Wall: Use tape to mark corresponding heights on the wall for both driver and passenger sides.
Now, adjust the headlights with a Phillips head screwdriver until the beams align with the tape marks. This guarantees peak illumination and visibility. After making adjustments, double-check that all connections are secure and verify functionality before hitting the road. Proper alignment not only enhances safety but also liberates your driving experience.
Ensuring Headlight Functionality After Installation
After confirming your new Toyota RAV4 headlights are properly aligned, it’s time to verify their functionality. Start by turning on the headlights to check both low and high beams. They should operate smoothly without flickering. Next, inspect all connections, verifying the bulb sockets and wiring harness are securely fastened. Loose connections can lead to power loss and malfunction.
Don’t forget to examine the headlight lens for clarity; foggy or misaligned lenses greatly affect visibility. Use a multimeter to verify that the headlight voltage falls within the manufacturer’s specified range, which is vital for ideal brightness and longevity. Finally, perform another headlight alignment check to confirm the beams illuminate the road correctly and don’t blind oncoming drivers. By confirming these factors, you’ll assure your headlight functionality and safety on the road, allowing you to drive with confidence.
Best Practices for Headlight Maintenance
Maintaining your Toyota RAV4’s headlights is essential for ideal visibility and safety on the road. To guarantee your headlights perform at peak efficiency, follow these best practices:
Regular maintenance of your Toyota RAV4’s headlights is crucial for optimal visibility and road safety.
- Inspect headlight lenses regularly for fogging or yellowing. This indicates UV damage and may require polishing or replacement to maintain brightness.
- Check and replace headlight bulbs at least every two years or when they start to dim. Old bulbs greatly reduce nighttime visibility, compromising safety.
- Test headlight alignment periodically to avoid dangerous driving conditions. Misaligned headlights can lead to reduced visibility and cause glare for oncoming traffic.
Frequently Asked Questions
Can I Replace My Headlight Assembly Myself?
Yes, you can replace your headlight assembly yourself! With basic headlight assembly tools and some DIY maintenance tips, you’ll find it’s a cost-effective solution that saves money while enhancing your vehicle’s visibility and safety.
What Is the Lawsuit Against the Toyota RAV4?
The Toyota RAV4 lawsuit addresses headlight assembly issues, alleging defects that compromise safety and visibility. Class action concerns include premature failure, costly replacements, and violations of federal safety standards, prompting claims for compensation and accountability.
How to Replace a Toyota RAV4 Headlight?
To replace your Toyota RAV4 headlight, gather headlight tools, follow safety precautions, and carefully remove the old assembly. Install the new one, ensuring proper alignment and secure all connections for ideal functionality.
What Is the Biggest Issue With the Toyota RAV4?
The biggest issue with the Toyota RAV4 involves engine reliability issues, particularly excessive oil consumption. You’ll also find interior space concerns and fuel efficiency ratings that might not meet your expectations compared to competitors.
Conclusion
Changing your Toyota RAV4 headlight assembly may seem intimidating, but with the right tools and guidance, it’s like steering a well-tuned engine. By carefully following the steps and addressing installation issues, you’ve guaranteed your headlights shine bright and true. Remember, regular maintenance is key to keeping your visibility clear, just as routine checks keep your car running smoothly. With your new assembly in place, you’re ready to hit the road safely and confidently.